Is it possible to make shelves for icons yourself? What materials are better to choose? Let's try to figure this issue out together. Slavic Orthodox traditions allow the use of icons to decorate living spaces. This tradition testifies to people’s desire for religion and respect for church rituals and traditions.
As a home iconostasis for placing icons, you can consider a corner shelf for icons, as well as various church items. The canons of Orthodoxy suggest the installation of the main icons in the corner or on the eastern wall of the room.
Attention! In addition to Orthodox items, shelves for icons should not be loaded with other items.
Let's try to figure out how to make corner shelves for icons.

For work related to the creation of shelves for icons, you need special tools for woodworking: drill, lathe, milling cutter, jigsaw.
The materials needed to make shelves for icons include boards from any wood, pieces of slabs, wax or varnish, silver and black paints, and wood glue. Component materials and hardware require carved slats, a metal or wooden crucifix. Screws and original plugs are suitable as fastening elements. To secure the product to the wall, you need hinges and dowels.
Some of the carved elements can be made with your own hands. For example, start making carved elements and original shelf parts. The crucifix, which is the center of the icon, is made only in carved form.

Advice! Such parts for placing icons are made by craftsmen, and some industrial enterprises and church shops are also involved in their creation.
In addition to such details, the corner shelf for icons should have a back wall in the form of a carved iconostasis. The carving is made with floral ornaments, outlines of saints, and fabulous birds.
To decorate the upper part of the shelf for icons, you can choose the outline of an Orthodox church.

Advice! A do-it-yourself corner shelf for icons is suitable for those who have skills in working with wood.
You can cut out bas-reliefs yourself and choose interesting reliefs. To carve a crucifix, you must first select a high-quality sketch, and only after that begin to implement your plans.
The types of wood from which a crucifix can be carved include birch, aspen, spruce, pine, and juniper boards.
Attention! The work will require a set of wood cutting tools.

On a board, the thickness of which is fifteen millimeters, the outlines, as well as the main contours of the parts, are transferred from a paper sketch to the main board. Next, use an electric jigsaw to cut out the crucifix. Using cutters you need to make convex parts. The carving must be done in layers, carefully highlighting the internal parts with a thin cutter. Once the procedure for cutting the crucifix is completed, you can begin sanding the product, armed with fine sandpaper.
Advice! If you have to cut out bas-reliefs in segments, it is better to secure them with a sheet of plywood on the back side.

Then the decorative parts are glued together and attached to the sheet of the slab. To remove all excess, you can use a jigsaw or an electric cutter.
Using sandpaper, it is necessary to carry out high-quality sanding of the side of the finished product.
To make beautiful crossbars you will need certain professional skills, as well as certain equipment. After the balusters are made, it is important to carry out high-quality sanding of the product.
For a shelf for icons you will need several parts:
Shelf templates for icons can be made from pieces of wood board.
Attention! Professionals do not recommend using plywood for templates, since after cutting it needs to be significantly modified.
You will need two side panels for the shelf, and you also need to take care of purchasing high-quality fasteners.

First you need to attach the ready-made templates to the board. Next, the part is formed using an electric jigsaw. The edges are processed using a milling cutter; all irregularities and roughness present on the surface are sanded with abrasive paper. Before making holes, you need to mark them with a pencil. Next, the side panels are prepared using the same algorithm. After assembling the product, it is advisable to varnish the shelf.

To attach a corner shelf under icons on the wall, you will need dowels. First you need to attach hanging loops to the finished product. Next, the shelf is applied to the wall, and the places where the dowels will be located are marked. The holes for them are made with an electric drill.
There are certain requirements that must be met in order for the finished shelf for icons to be beautifully mounted on the wall:
Basically, natural wood is used in the manufacture of shelves for icons. If you can’t make carved strips and parts with your own hands, you can limit yourself to creating an imitation of it. To obtain a similar effect, you can first burn out the design, then cover the finished fragments with decorative enamel. To do this, the contour of the ornament is transferred to the top panel or side, and all contours are outlined using burning devices.
Attention! The finished pattern must be uniform over the entire surface of the product, otherwise the shelf will have an unaesthetic appearance.
As soon as the contour application is completed, enamel is applied to the surface with a thin brush, then the product is coated with colorless varnish.

Currently, the tradition of decorating your home with Christian icons is returning; even in city apartments you can find a homemade “red corner”, which is often called a shrine. If you choose the right materials for the shelf, it can be made into a functional decorative element of the apartment’s interior. The priests say that icon shelves should be in the home of every believer.
In the manufacture of such products, you can use wood, plywood, polymer materials, and metal.
Depending on personal preferences, shelves for icons can be single-tiered or multi-tiered structures. Icons for the iconostasis can be mounted on a table or placed on a shelf.

To create a three-tier structure, stock up on a hand-held milling machine, a jigsaw, a ruler, a pencil, nails or screws, abrasive material, a hammer, and wood glue.
In order for the shelf to be beautiful and delight its owner for a long period, it is important to carry out preliminary measurements of the width, height, and depth of the planned structure.
Advice! Professionals consider the optimal size for a corner shelf for icons to be 70 centimeters in height.
You need to transfer the drawing to plywood or wood. If the surface is dark in color, it is better to use a construction knife instead of a pencil. Professionals recommend numbering the parts of the drawing to prevent errors during assembly. As soon as the main details of the planned iconostasis are cut out with a jigsaw, all edges of the product are processed with a hand router.
To ensure that there are no rolling pins or irregularities on the surface of the shelf, the surface is sanded with sandpaper.

Attention! When grinding, the abrasive material must be moved in the direction of the grain.
To connect the parts together, you can use nails or screws. For strength, you can also arm yourself with glue designed for wood. You can varnish or stain wood to protect it from high humidity and temperature changes, and also to give the product an aesthetic appearance.
Basically, shelves for icons are arranged in three rows, but there is one main row - deisis. In order for the created iconostasis to be made correctly and reliably protect the apartment and its inhabitants, it is important to arrange the icons in a clear sequence.
The upper part is the deisis, in its center there should be an icon of Jesus.
To the left of her is the image of the protectress - the Most Holy Theotokos, and to the right side is always the icon of John the Baptist.
Ideally, the number of icons is 12 pieces - according to the number of major Christian holidays. On the bottom shelf of the iconostasis you create yourself, you can place any icons that are revered in a certain region.

Despite the fact that the twenty-first century is a time of innovative computer technologies, people still think about their souls and turn to higher powers for advice. Not everyone has time to attend church services, so improvised iconostases appear in private houses and city apartments. Don’t know where to start with the construction of a shelf for icons? In this case, first carefully study the recommendations of professionals, and also look at photographs of finished work:
After you get the first idea of the procedure for carrying out the work, you can proceed to the implementation of your idea. If you follow all the recommendations of professionals, you will receive a high-quality and original iconostasis for icons. Many people own icons that should be placed on a special shelf, and not placed next to the TV or tape recorder.
Home iconostases represent a kind of small church for a believing Orthodox Christian. They should be given a special place in their home where they can calmly pray in front of the images.
Home iconostases appeared in Ancient Rus'. A whole corner was set aside for them, which was called red (i.e. beautiful). In this place, icons were placed, candles and lamps were lit. In the morning and evening, as well as at times of special spiritual need, household members said their prayers here.
The iconostasis of those times was a multi-tiered shelf on which a god was hung - a small curtain that covered the images of saints and the Savior on the sides. The icons were hidden under the gospel - a special cloth that was pulled back only during prayer. It was no coincidence that such a tradition appeared in Rus'. It is known that the first image of the Savior would have been created by Himself, according to His will of God: after Jesus sprinkled his face with water and wiped it with ubrus (cloth), His face remained on this canvas. He sent this painting to the sick ruler of Asia Minor, Abgar, thanks to which he was healed. After this, the prince gave the order to nail the sacred board over the gates of the city. After 900 years, the sacred image was transferred to Constantinople. Now every year on August 29, Orthodox Christians celebrate the feast of the discovery of the image of the Savior Not Made by Hands and consecrate hand-woven fabrics.

Home iconostasis of those times were also intended for storing holy water and prosphora. The household hid the Gospel and memorial books (special books in which the names of all the deceased and living Orthodox Christians of this family were kept) behind the god. Particularly skilled needlewomen created doves (as a symbol of the Holy Spirit) from scrap materials and hung them from the iconostasis. In the red corner it was obligatory to have lamps and candles, which were lit during home services.
A similar small temple was in every Orthodox home until the 1917 revolution. After the Bolsheviks came to power, people continued to pray, but they did it in secret. Therefore, from the richly decorated home iconostases, only a few images remained, which people carefully hid from prying eyes, fearing persecution. The modern red corner is somewhat different from the one created by our ancestors, since many of the traditions of its creation have simply been forgotten.
What the home iconostasis will be like depends only on the owners of the house. However, remember to follow the following rules:


If you have reproductions of paintings at home that reflect biblical scenes, you should not install them on the iconostasis.
The main difference between a holy image and painting is that in the first case, through icons we communicate with the Lord. And since the iconostasis is a sacred place intended for solitude in prayer, the inclusion of reproductions in it would be simply inappropriate.
Icons cannot be hung on the wall next to posters of celebrities - by doing this we insult holy images, putting them on a par with earthly idols.
It is better to place home iconostases in the eastern part of the house, since this part of the world has special significance in Orthodoxy.
For example, it is known that the Lord created a paradise for people in the eastern part of Eden. And the Gospel says that just as lightning comes from the east to the very west, so the Lord comes from Heaven. The church altar is also located in the eastern part. If the windows face this side, the home iconostasis, a photo of which you will find in this article, is installed in any other suitable place.
Whether you create home iconostases with your own hands from wood or purchase them from a furniture store or church shop is entirely up to you. If you want to buy a shelf, do it in specialized Orthodox stores. There is a wider assortment of iconostases, and the sellers will always advise and help with the choice. Based on the material, they can be divided into wooden and plywood. They can be single-tiered or multi-tiered, straight or angular. There are even solid iconostases that already contain holy images. But such shelves are mostly made only to order. To understand what such a home iconostasis looks like, the photo is presented in this article.
If you decide to create a real red corner, choose multi-tiered shelves. On them it will be much easier to recreate a majestic wall with holy images, like those installed in temples. Whether your home iconostasis will be angular or straight depends on where it will be placed (on the wall or in the corner of the room).

First of all, every home should have images of the Savior, the Mother of God and St. Nicholas the Wonderworker. Of all the icons of Our Lord, the half-length Image of the Almighty is most preferable for home prayer. On this one he holds in his left hand an open book in which is written “A new commandment I give to you: love one another.” With his right hand the Lord baptizes the person praying.
Among the images of the Mother of God, the Russian people especially loved icons such as “Tenderness” and “Hodegetria” (Guide). In the first image, the Virgin Mary holds a baby in her arms, who gently hugs her neck and presses her to her cheek. The most famous icon of this type is the Vladimir Icon of the Mother of God. Its distinctive feature is that the baby’s left heel is completely turned outward. In the image of Hodegetria, the Mother of God is depicted with a baby, who holds a bundle in her right hand, and with her left hand she overshadows all those praying. A striking example of this image is the Kazan Icon, “Quick to Hear,” and “Helper of Sinners.”

In addition to these main icons, on the home iconostasis you need to put images of saints after whom your family members are named. It is also advisable to purchase an icon of the healer Panteleimon - a healer of mental and physical illnesses. The choice of other images depends entirely on the needs of the household. For example, you can purchase an image of Peter and Fevronia, to whom they pray for family well-being. Before they ask for help in learning and good endeavors. Unmarried women can pray before the image of Xenia of St. Petersburg, who, by the will of God, became a helper to people in matters of marriage.
Recently, in many homes, one of the central icons has become the image of the blessed old lady Matrona of Moscow. Even after her earthly death, she helps in everything those who come to her at the Intercession Church or to her grave at the Danilovskoye Cemetery, or simply turn to Matrona in home prayers. Many people have already received healing and help from her. It was not for nothing that she said: “Come to me and tell me everything as if you were alive.” By this, Matrona meant that her earthly death does not mean a spiritual death: after all, she is still with us.
The correct placement of images in the space allocated for them is very important. The Crucifix is placed above the iconostasis. It can be purchased at a church store or made from wood yourself. On the next tier there should be images of the Savior, the Mother of God and St. Nicholas the Wonderworker on the bottom shelf. In this case, the image of the Lord should be in the middle, on the right (right) is the Virgin Mary, and on the left (on the left) is St. Nicholas the Pleasant.
A little lower they place icons of saints revered by the family. On the last tier you can place a bottle of holy water, candles and the Gospel.
You can decorate your home iconostasis with fresh flowers and willow branches after the Twelfth Feast - the Entry of the Lord into Jerusalem. And on the day of the Descent of the Holy Spirit, shelves with images are framed with birch branches, as a symbol of the grace of the power of God.
You can also install reproductions of images on the shelf for icons. They must first be consecrated and then added to the home iconostasis. Embroider an icon case (frame) for them with beads, and then they will look harmonious with other icons.

If you do not have the opportunity to purchase a stand for images, or all the models that you have come across did not appeal to you or are not suitable (for example, a small number of tiers, limited space, etc.), then do-it-yourself homemade iconostasis, photos of which are presented in the article , you can make it yourself. For a standard three-tier iconostasis you will need wooden boards, a drill and screws. In order to assemble it, you need to create drawings of a home iconostasis. Using them, you can easily calculate the dimensions of the wooden panels, which will depend on the number of icons located on the iconostasis.
The most basic stand for holy images can be made from plywood. First you need to attach the icons to it with screws in accordance with the heavenly hierarchy. After this, you should make a chasuble for the icons - this is a special frame that frames the images. It can be created from embroidered fabric or from beads and beads. This will give the icon shelf a festive and solemn look. This is how you can make a homemade iconostasis with your own hands. Photos of similar works in this article will help you in its design.
Thus, the creation of a small church at home is not so much a prerequisite for the life of an Orthodox Christian, but rather his spiritual impulse and desire. After all, those who believe and love the Lord always want to turn to him in prayer both during the liturgy and at home services. It doesn’t matter whether your iconostasis is made of expensive materials and filled with gilded images, or whether you yourself created it manually, collecting holy images. The main value is your faith and desire for spiritual improvement.
The tradition of having an iconostasis in the house has existed for many centuries. An alternative to purchased products is a homemade shelf for icons. The Orthodox religion allows the use of religious objects to decorate premises. With your own hands, you can make an interior element that best matches the size and color of frames, wallpaper and other surfaces. Let's consider what options exist for choosing the configuration, materials and methods of decorating such furniture.
Similar articles:
There are various ways to make stands for images. The main condition is the absence of objects not related to religion. The frames should not overlap each other vertically and horizontally and be placed one on top of the other. It is recommended to provide a place for a candle or lamp. If you plan to purchase new images, then the shelf for icons should have a reserve place for their installation. It is possible to provide the possibility of attaching an additional level.
The following design options exist:


The choice is made based on the layout, interior and size of the room, the number of images and their configuration.
Traditionally, religious items are made from wood and materials produced from it. But there are no strict prohibitions regarding the use of metal or plastic. Craftsmen recommend wood because of its ease of processing and presentable appearance.
To work you will need the following tools:
To protect your hands, vision and breathing organs, it is advisable to purchase fabric gloves, assembly glasses and a gauze bandage.
To make a shelf for icons with your own hands you will need the following materials:
Depending on the choice of finishing method, you may need paint, stain or colored film.


Self-made shelves for icons need finishing and decoration. This will give them a fresh and solemn look that matches the purpose of the products.
There are the following decorative options for stands for images:
It is allowed to combine several finishing methods in one product. The main thing is that it does not look too colorful, overshadowing the image.
Each shelf should have a crucifix. It is performed in volumetric form by. In most cases, such work is entrusted to craftsmen and it is expensive. You can make an Orthodox cross yourself, using a set of well-sharpened cutters. In addition to the crucifix, relief images of domes, images of saints and martyrs, fish, birds, animals and fairy-tale characters are applied to the walls and sides. It is allowed to cut out patterns and bas-reliefs.
Execution of volumetric fragments is carried out in the following sequence:
The crucifix and overlays are glued to the back wall. To do this accurately and without distortions, you should make outlines with a pencil.
Natural wood and good quality metal are not always at hand. Often craftsmen have to improvise to give image shelves an attractive look.
The following methods are used for this:
You can make shelves for images with balusters under the crossbars. To do this, you need to buy or rent a portable lathe. It is advisable to use a pattern so that the side is made of identical symmetrical fragments.
Do-it-yourself home iconostasis is made in the following sequence:
Finally, the finished product is tried on the wall. Screws are screwed into it, and the shelf is hung on them.
Shelves of this type are chosen to accommodate a large number of images or if all the corners in the room are occupied. The shelves are hung on the east wall of the room. Even for such a relatively simple rack to manufacture, drawings are necessary. Preliminary planning will allow you to fit all the details with high accuracy and calculate the required amount of building materials.
For a single-tier structure, it is necessary to take boards with a thickness of at least 15 mm. The height of the back wall should be more than 30 cm so that the images do not protrude above it. The iconostasis should be placed at eye level, provided that there are no other bright or decorative interior items nearby. To install a candle or lamp, a non-flammable stand should be provided. In order not to clutter the product with the side, you can run a low threshold along the bottom crossbar to fix the frames.
In most cases, a corner shelf for icons is made in 2 or 3 tiers. This is due to the need to place several images in a small space. The optimal size is considered to be a height of 70-75 cm and symmetrical shelves 40-50 cm wide. A larger structure will look bulky even in a large room.
They hid it from prying eyes. It was dangerous to show them off. The time was communist-atheistic. That’s why we’ve lost the culture of faith; we don’t know where the icons should be in the apartment. There seems to be no secret to this. Place it wherever you like. But the icons are different, and each has its own approach. Let's figure out what is the correct arrangement of icons in the apartment.
Christianity is over a thousand years old. In the old days, icons were considered of great value. By the way, not every family owned such a relic, and if there were images in the house, they cherished them like the apple of their eye. In ancient times, no one thought about where icons should be located in an apartment. We have seen them since childhood and absorbed the traditions with our mother’s milk. The image was placed in. This does not mean the color scheme of the place, but its essence. “Red” meant “ceremonial”, “solemn” and the like. And the corner, because the layout of the hut was simple. There were not windows on all walls. The lighting was poor, only candles and torches. The red corner was the one that received more sun. As a rule, it was located in the eastern part of the building. And the windows were planned in advance so that light would fall on this festive, ceremonial corner from both sides. The place was decorated as best they could. The girls made towels and napkins on winter evenings, embroidered, and weaved. Flowers were placed nearby in warm weather. And they always lit the lamp. It was not appropriate for holy images to be in the shadows. You, dear reader, are probably wondering why icons were treated this way.

It is necessary to make a small digression. Think about what image means to you personally? Those who are interested in where icons should be placed in an apartment are apparently believers. Images are not just pretty pictures. From them, people who once lived look at the believer, who managed to remain faithful to the Lord, to become part of the proof of his rightness and love for humanity. But they are all fundamentally different from all kinds of gurus who are usually worshiped. Remember: Christ said that he came to people to give light, to show the way to righteousness. He called me to follow the path he pointed out, to feel and understand it with my heart. And those people whose faces we hang on the wall realized this and embodied it as best they could during their lifetime.
Icons are portraits of loved ones, whom a believer wants to be like, from whom he takes example. That is, these are spiritual friends and patrons. Would you hide a respected and dear person in a dusty closet? Of course not. If he comes to visit, put him in the best place, treat him and entertain him with an interesting conversation. The images are not even visitors, but family members, revered and loved by everyone. This attitude used to be passed down as normal rules of conduct. That’s why people didn’t ask themselves where the icons should be in the apartment. They were given the red corner, the most elegant, light and clean.

The church rules requiring that the images be kept in the eastern part of the building have now practically lost their force. Father, seeing that the icons are in a different place, will not make a remark. That is, you can put it where it is convenient. However, there are still a number of requirements for the location. When you are thinking about where icons should be placed in your apartment, do not forget about their religious content. It is inappropriate to keep secular paintings or books of dubious nature nearby. It is also recommended to make the red corner away from TVs and computers. These devices are considered incompatible with spiritual reflection and prayer. Usually icons are used to appeal to the Lord. Therefore, they need to be positioned so that there is enough space nearby for all family members. The prayer is said in solitude; pushing around at this moment is not accepted. Therefore, the owner of the house knows better where the icons should be in the apartment. The photo above illustrates one of the options.

An iconostasis can be built from an ordinary shelf or a small table with high legs. Place images on it and arrange books of religious content, if any. It is permissible and desirable to decorate the iconostasis with napkins and towels of your own making. Nowadays, handicrafts are not in honor; people buy beautiful products in the store. But while working on a special napkin for the iconostasis, you will begin to think about God, which will benefit your soul. In the past, at least, this is exactly what they did. Look at your red corner: is there not enough light there? It would be nice to place special lamps nearby. Don’t forget to wipe the dust regularly, and sometimes light candles or a lamp. It is recommended to keep the Mother of God in the house. The face of a guardian angel is also often placed nearby. It is the saint whose name you bear from birth or baptism (sometimes they are different).

Let's talk about special cases of arrangement of holy faces. Believers have a special relationship with some icons. It is believed that they protect from misfortunes, enemy influence, and evil passions. For example, executives often hang them in their offices. These people are confident that the Mother of God will protect them from intriguers and competitors. At home, it is recommended to hang such an icon above the front door. The clergy say that the face of the Mother of God will take away an uninvited guest with bad intentions from the house. In addition, they say that Semistrelnaya protects owners from negative thoughts, quarrels, mutual accusations and scandals. And opposite the front door it is recommended to hang the “Trinity” icon. It clears visitors of bad intentions.
Often mothers and fathers think about how to protect their child from the evil eye, disease and other manifestations of the devil. Icons are best suited for this. You can hang them in your baby's room. It is advisable to place the image of the Virgin Mary in the eastern corner of the room. Follow the rules above. That is, hang the icon away from broadcasting electronic devices. The holy face in the room will certainly arouse the child’s interest in faith. Teach him to pray, tell him what icons mean to people. Probably, this way we will gradually be able to regain the ancient traditions of spiritual education. What do you think?
Home iconostasis made of natural wood with carved patterns
The tradition of arranging a home iconostasis has existed for more than one century. Although in modern homes icons are often placed on bookcase shelves or hung on the wall, it is best to set up a separate special place for them.

Single-tier straight rack - shelf for icons
A good option would be a hanging shelf, which according to the canon should be placed on the eastern wall of the house. Often such a shelf is made corner, two or three tiers high.

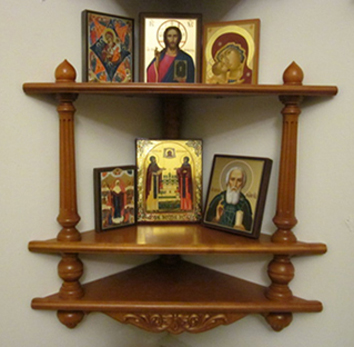
Beautiful wooden shelf for icons in the corner of the room in three tiers

Corner shelf for icons with candlestick

Shelf for icons “Home mini-iconostasis corner”
In workshops you can order a stand for home icons of any size and configuration, but this is quite an expensive job.

Corner shelf made of fiberboard, made in three tiers
An easier option is to use a regular corner shelf from a hardware store, but this may cause sizing issues. In addition, you will have to look for a model that will “fit” better into the interior. All these difficulties can be avoided if you make a shelf for icons yourself - this is quite feasible even with little experience in carpentry.

Wall-mounted corner shelf for wooden icons
A do-it-yourself icon shelf can have any convenient design. Corner shelves are made single-level or in several tiers. To connect several levels, supports carved from wood are usually used. The finished shelf is often decorated with carvings, openwork overlays, and covered with special carpentry varnish and wax.

Small corner shelf for icons, two tiers

DIY home iconostasis
To make a corner shelf, wood of various decorative species is used - for example, oak or cherry. A less expensive material would be pine board. In addition to wood, you can also use plywood or chipboard. The thickness of the board can vary from 1.5cm to 2.5cm. You will also need boards of small width in order to carve the supports.
To work you will need the following tools:

Required Tools
To attach the finished shelf to the wall, you will also need masonry drills, metal corners or hinges, and self-tapping screws with dowels.

Carved corner shelf for handmade icons with drawing
Before starting work, you should make a drawing of the project. The size and number of shelves depend on the type of icons that will be placed on the finished home iconostasis. To make a simple two-tier shelf, you will need two 1.5 cm thick pine boards, as well as four supports.

We cut out three parts using a jigsaw according to the template - sidewall, side and bottom

The workpiece is milled using a stencil using special equipment

To turn decorative parts you will need a lathe or take them ready-made

We assemble the shelf - the bottoms are screwed to the turned elements using self-tapping screws

When connecting the sidewalls to the bottoms, the screws should hit the middle of the ends of the bottoms

The sides are screwed on using cylinders - self-tapping screws are inserted into the holes from the bottom, the cylinders are put on, the hardware is screwed into the side

The final stage is coating the finished product with drying oil and attaching it to brackets in the corner
After completion of the work, the finished shelf is treated with stain and varnish. Both colorless varnishes and those that give the board the color of different types of wood are suitable. When choosing a quick-drying varnish, the product is ready for use in a few hours.

Small shelves for icons of different colors - pine, walnut, mahogany

Depending on the complexity of the elements of decorating shelves for icons, you can make them yourself or purchase them ready-made
The most common way to decorate a home icon case is wood carving. You can do it yourself using a jigsaw. If you do not have the necessary experience, carved elements can be bought at a hardware store or ordered in a workshop. The finished carved plates are attached to the shelf with wood glue.

Soft wood is selected for carving: birch, spruce, pine, aspen or juniper
Another way to decorate is to burn out the ornament using a special device - for this, you first apply a drawing of the pattern to the wood with a pencil. The shelf can also be painted - special wood paints are sold in construction departments. An alternative to strict monochromatic painting is to apply a pattern to the enamel with paint of a different color.

You can burn out the ornament and then open individual fragments of the image on the shelf with enamel
To further strengthen and decorate the shelf, its back walls are covered with a wooden panel. It can also be decorated with carvings, painted with varnish and enamel.

Shelf for icons with a beautiful back wall

To decorate the upper part of the shelf for icons, you can choose the outline of an Orthodox church
When using a plywood board, these methods will not work - but painting with acrylic paint with the addition of gilding will look impressive on such a panel.

A small figured shelf for icons with candlesticks and a lamp


