Previously, beautifully finished seams could only be made in a garment factory or atelier. At home, seamstresses could only hem the edges with a zigzag or hem of the fabric. Now, thanks to the latest technologies, you can purchase an overlocker for your home. If a sewing machine can only make a lockstitch, then an overlocker uses loopers and needles to form various chain stitches. But working with it will require some skill and a lot of spools of thread.
If a person is not engaged in professional sewing, there is no point in buying an overlocker. All you need to do is purchase an overlock foot. It is suitable for many types of cars, both domestic and imported. When buying an overlocker, you will need to pay a tidy sum, even more than for a machine. When purchasing a stitching foot, the costs will be minimal. Learning to use this device is quite simple. What does an overlock foot look like?
If you decide to buy a sewing machine, but buying an overlocker is not part of your plans, then be sure to choose a device with an overlocking foot. It is also called an overlock machine. The set includes at least one overcasting foot. The higher the rank of a sewing machine, the more additional accessories it comes with.
But if you don’t have enough money for a cool car, then don’t worry. Then you can always buy other paws. It's not a problem. In specialized sewing equipment stores or online, you can order any foot you need. If the purchased device already has devices for several overlock stitches, then in the near future you can easily do without an overlocker.
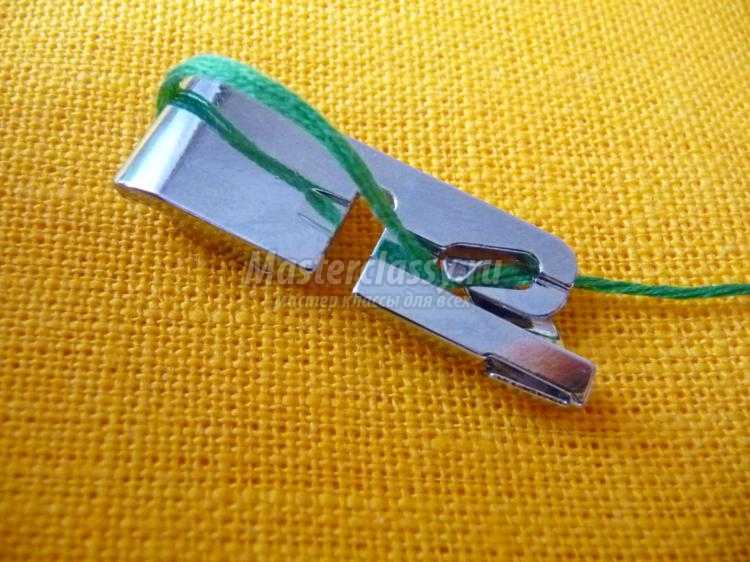
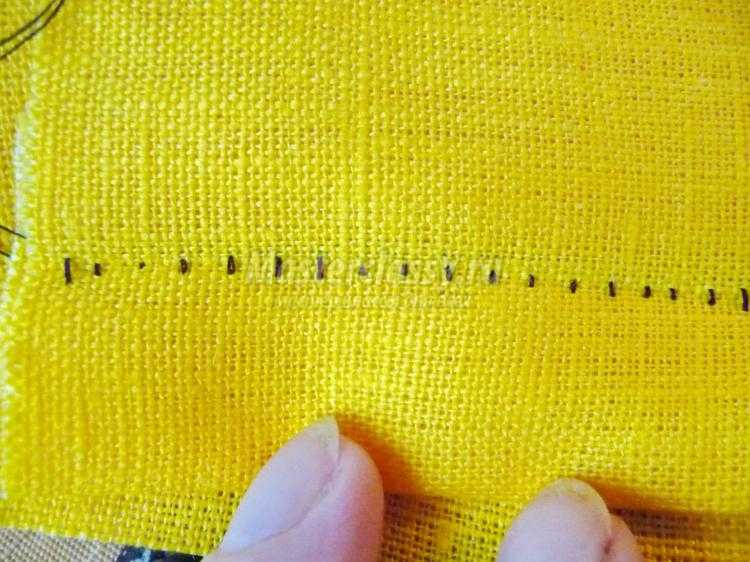
A special foot has a rod and springy presses the edge of the cut fabric to the foot and allows you to stitch it right along the edge. The rod holds the thread, which slips off it with each stitch step, without tightening the fabric.
With the help of the foot, the overlock seam will be beautiful and neat. The stitches will be placed along the edge of the fabric. By increasing or decreasing the tension of the upper thread, you can ensure that the threads intertwine closer to the edge of the cut material. Each seamstress will be able to set the tension in the desired position, especially if you have a foot with a rod, this is not difficult to do. The seam will look like a real overlock stitch. But in order for it to serve for a long time, you must always duplicate it, making just a straight line next to it.
Before starting overcasting operations using an overlock foot, you need to sew together the parts of the future product and carefully trim the remaining seam allowance. Using scissors, you need to trim the desired width and protruding threads. After this, install the presser foot on the machine. In modern units it is no longer necessary to unscrew the screw holding it in place. To do this, simply lower the lever located at the back. We take out the currently unnecessary foot and insert the overlocking foot.

You should hear a click, and after that you need to lift the presser foot lever up. If installed correctly, the sole of the foot will also rise up. After installing the foot, you need to place material under it, while the limiter will control the specified direction of movement of the fabric. Then an overcast stitch is sewn.
1. An overlock stitch, suitable for dense fabrics or areas of the product where seam reinforcement is necessary and most similar to an overlock stitch, requires several stitches. In this case, the stitched fabric must be fed back and forth.
2. When sewing, the fabric should not be pulled forward, it should move automatically, otherwise unwanted folds will appear.
3. If you are working with thin fabric, such as chiffon, then the material may be rolled up. After processing, you will be left with a wavy, sloppy edge. To avoid this, you need to wipe the edges of the material with a starch solution, then iron it through any cotton fabric. After this, calmly sew and overcast the edges, they will keep their shape and not curl. Without any effort, the seam will lie flat.

4. For delicate fabrics, it is recommended to use threads used for decorative embroidery. For colored materials, you can take not only threads of the same color, but also ones that match the tone.
Previously, sewing machines used a zigzag stitch for overcasting, but when the fabric was stretched, it could break in several places. When sewing on an overlocker, the product stretches easily in all directions, and the seams do not come apart. The presence of an overlock foot in modern machines makes the seam look like a two-thread overlock stitch. True, he will not be able to withstand strong tension.

Since overlocking feet come in different shapes, when purchasing it is better to have any kind of foot from your machine. Then it will be possible to compare the fasteners and measure the height of the leg. You can also select these elements based on the name of the machine manufacturer.
A convenient option would be to purchase a universal overlock foot. It fits on most types of sewing units, and also provides decorative finishing to the edges of the product. At the same time, it performs reciprocating movements. The stitching is tight and beautiful.
When purchasing a machine, several paws are included with it. These are the basic devices necessary to perform the simplest operations. For example, a foot for sewing a snake, a universal one, making a zigzag stitch (one of the most popular feet among seamstresses), semi-automatic, for sewing buttonholes. In a set of expensive cars there are an order of magnitude more of them, from 10 to 15 pieces.
In addition to the standard presser feet, which are sold complete with the sewing machine, you can buy separately a whole set of 32 pieces. Most of them are metal, but there are also combined ones, consisting of plastic and metal, as well as Teflon. Descriptions of some products from the set of sewing machine feet are presented below:

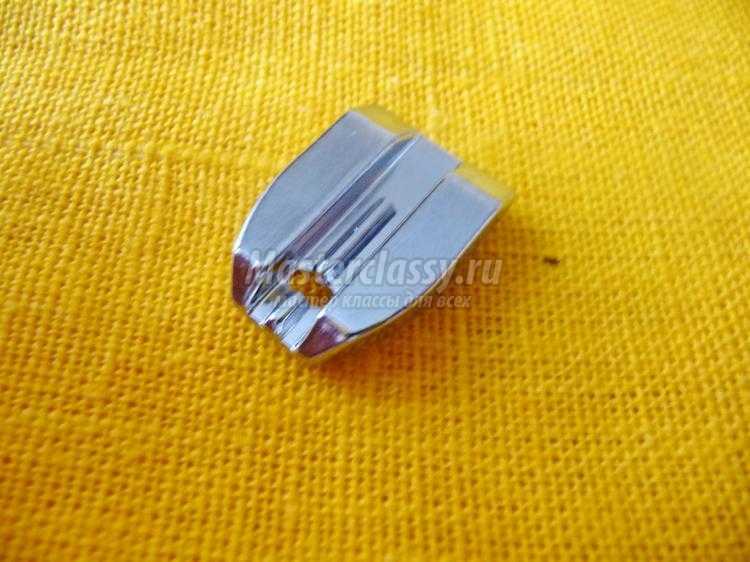
There is one more foot for the machine that must be included in the kit, namely, an overlock foot with a knife. When overcasting the edge of the fabric, the side knife carefully cuts off the excess fabric. The process takes place simultaneously, without the fabric being pulled together. The structure of this element includes a wide sole, a hook and 2 knives. The hook is responsible for the consistency of the needle and the upper knife. The knife at the bottom is rigidly fixed to the sole of the foot.

Before starting work, you need to prepare the material for stitching. To do this, parts of the product must be pinned across the drawn line of the future overlock seam. Using a universal foot, a straight stitch is made. After this, the part is changed to another one, overlocked with a knife. To install it correctly, you need to place the hook on the needle holder. Only then will the foot and needle holder work synchronously. If the presser foot is installed incorrectly, the fabric will not be cut.
Unlike a regular sewing foot, which, when overcasting an edge with a zigzag, leaves snags, compressions and uneven stitches, the overlock foot does not tangle the threads and does not jam the material. This happens due to the presence in the middle of a slot for the needle of a tooth, onto which several stitches in a row are placed when sewing. A seam is formed around it and the edge of the material. Thus, the material does not tighten, and the stitching turns out neat.
By purchasing an overlock foot, any craftswoman can save a lot. A real overlocker is expensive, and figuring out how to connect it and the huge variety of seams is also not easy. Having two devices at once instead of one sewing machine, it will be necessary to allocate a lot of working surface for this technique. When preparing for work, a lot of time is spent threading. When using a foot, you don't need to do all this.
The disadvantage of working with a presser foot is that over time the seam will begin to crumble, unlike an overlock-processed one. Yes, and you need to cut the edge yourself or change the attachment to the foot with a knife. The seam is designed for easy wear, as it is not very strong and can crack when stretched.
So decide for yourself what is more profitable for you to purchase and use in your future work.
When you buy a new sewing machine, you will always find extra sewing feet in the tool and accessories box. Moreover, depending on the class and cost of the machine, their number also depends. The “cooler” the machine model, the more capabilities it has, and therefore the more special sewing feet.
Of course, a Chaika sewing machine or a Podolsk manual sewing machine has a limited set of feet, unlike modern sewing machines from any manufacturer such as Janome, Brother, Astralux, Pfaff, Bernina and others. Usually a large number of paws are included in the kit, which must be used.
However, most often the additional legs are used extremely rarely. Mainly used are a regular universal foot, an overlock foot and a buttonhole foot.
. Other types of paws most often lie in a box for years without use. And the reason for this is simple ignorance of their purpose, unwillingness to understand how to use it and for what operation it is required.
We decided to help you with this and briefly post a photo of each paw during the recommended operation.
There are other articles about sewing feet on our website:
Sewing machine feet,
Presser feet for sewing machine Chaika, Podolsk,
Foot for household overlocker.

Most often, a standard set of sewing feet contains no more than three to five feet. Universal foot, zipper foot, zigzag foot and buttonhole foot (semi-automatic). For expensive models, the set of paws consists of 10-15 paws, and on the body of the machine there is a special compartment for storing them, as in this photo. However, you should know that you can always buy additional feet if you wish. True, provided that they are made by the same manufacturer as the sewing machine and are suitable for this model.

With modern machines, you do not need to unscrew the screw securing the foot with a screwdriver to replace it. By lightly pressing the lever (behind the foot), the sole of the foot is detached. The new sole is fixed by lowering the presser foot rod into the sole socket. You should hear a characteristic click, but just in case, lift the presser foot lever up. If the sole is fastened securely, it will rise up too.

The most “popular” foot is the zigzag foot. With the help of this foot, many seamstresses perform almost all operations and even sew buttonholes automatically. Such skill is commendable, but the use of special paws will not only make your work easier, but will also increase its quality and the speed of the operation.
Below we post photos of presser feet designed for Janome sewing machines. The photo clearly shows the purpose of each foot and the sewing operation for which it is intended.
Photos of the paws and their descriptions were taken from the site Elfort.ru.

Satin stitch foot, designed for working with figured stitches.

With this foot you can sew on beads quickly and accurately.

Bouclé foot. The formation of boucle on the surface of the fabric is ensured by the structure of the foot itself.


Hemming foot 2mm.

The foot is for sewing on flat buttons only, please pay attention to this. Buttons with stems are sewn on by hand.
See How to sew on a button correctly.
Video on how to sew a button on a sewing machine using a special foot.

With this foot you can make gathers on fabric or adjust braid with a gathered effect.


Foot for sewing several cords at the same time.

With this foot you can do embroidery (by moving the fabric with your hands), as well as figure stitching and basting.


Overlock foot wide (C). It is intended for processing cuts and for decorative finishing of product cuts.


The blindstitch foot is used only for loose and thick fabrics. On thin fabrics the stitch mark will be visible.
Watch the video on how to use this foot.


A Teflon foot is indispensable when sewing leather, suede, nubuck, etc.

Machine embroidery foot.
Photos of feet intended for Janome sewing machines were taken from the Elfort.ru website in the article Janome sewing feet.
To work with genuine leather, you need special tools, devices for installing accessories, adhesives and other applied materials.
If the overlocker does not cut the fabric well, then you need to sharpen its knives. How to remove and install overlock knives and whether you can sharpen them yourself.
What is the difference between a round knife for cutting fabric and tailor's scissors? How to use OLFA circular knives, sharpen the blade, etc.
Presser feet for a sewing machine are the main components, without which the sewing process is impossible. Standard feet for sewing machines - universal, straight-stitch, for sewing in a zipper, for sewing a buttonhole. In addition to them, there are many special feet, for example, a foot for sewing in a hidden zipper, for sewing on buttons, for satin stitches, for sewing on a cord, for making a hidden seam, for darning, embroidery and many others.
A description of how to use standard presser feet is in the instructions for your sewing machine. But, as a rule, it is quite meager, and there are no additional accessories at all.

With its help, you can make a gathered stitch on a machine and save time. The density of the gathering is regulated by the tension of the upper thread and the width of the stitch. With a wider stitch, the gathering is tighter. Thin fabric shrinks more, thick and dense fabric shrinks less.
To get the expected result when performing this operation, first try gathering on a piece of fabric from which you are going to sew the product. Cut a piece of a certain length and see how long the assembly turns out to be. This way you can calculate the entire length of the frill.


In some models, the upper transport is already built into the sewing machine.

Designed for sewing products made of genuine leather, artificial leather and coated fabrics. Instead of a Teflon foot, you can use a roller foot, which moves the fabric forward using torque. The fabric you choose will tell you which of these two feet you prefer. The roller foot also copes well with heavy materials, some types of raincoat and jacket fabrics.
Today, there are combined models on sale - a Teflon foot with a roller.

In addition to its main task, it can be used to finish a product with edging. If the edging is narrow, then you need to sew it on like a zipper. If wide, close to the edge.

Eliminates the process of manually basting the binding and significantly speeds up the process. To work with it, just cut a strip of fabric along the bias of the required width, tuck it into the foot and you can sew. It turns out neat and beautiful.
The foot for sewing bias tape is suitable for both ready-made and unfolded tape. The finished binding is inserted higher, through the gap in the “snail”. And the unfolded one goes into the main hole of the foot.
If there are several holes in the “snail” and they are of different sizes, then using this foot you can sew on bindings of various widths. These holes also make it easier to move the bias tape forward.


Suitable for sewing on any bias tape, any width - the screw on the foot allows you to set the required width. The foot is easy to use as it is easily attached to the machine and also easily removed. And the result exceeds all expectations.

Provides an ideal process - the speed of the operation increases, quality improves, labor costs decrease, tucks are even and at the same distance from each other. Before starting work, mark the line of the first stitch. To make the tucks more textured and convex, place a special plastic tongue under the fabric (they come in different sizes). Very narrow tucks, 1 mm wide, are made using a buttonhole thread.


It will help to lay an even finishing stitch along the edge of the product.
Not every needlewoman knows how wide the range of presser feet is and what possibilities they offer. The sewing machine comes with up to 12 types of presser feet. In fact, there are tens of times more of them. Let's get to know them better.
Any sewing machine is equipped with a standard foot; it can be used to make straight and zigzag seams, changing the width and length of the stitch. However, in sewing and needlework there are many other operations that require a different and more delicate approach - sewing on buttons and trim, sewing in a zipper, etc. Each of them has its own foot that facilitates this process. Special feet are also created for fabrics of different textures - thin, stretchy, rough. It is difficult to work with them on a simple foot, but on a special one it is quick and easy.

Sewing foot
lightning

Sewing foot
hidden zipper


Sewing foot
cords

Edging foot
bias tape
Let's start with the paws, which facilitate the most common operations - sewing, sewing in zippers, sewing on buttons, processing seams, finishing the product with tape or cord.
This is a universal foot that is used for sewing most fabrics and finishing seams. With its help, two types of seams are performed - straight stitch and zigzag. The foot is used most often, and some even manage to sew in a zipper with it, not realizing that there is a special foot for this purpose.
Zipper claws can be single-sided, double-sided or narrow; they can be made of plastic, metal, or Teflon. Their task is to help the needle make an even seam at the same distance from the edge of the zipper without turning the product back and forth. You need to choose a foot taking into account the model of your sewing machine.
This foot allows you to sew a hidden zipper into the seam of the product. It has special grooves in which the teeth of the fastener are in a fixed position, which allows you to lay a straight stitch close to the fastener. As a result, the hidden “zipper” is easily, quickly and accurately attached to the product.
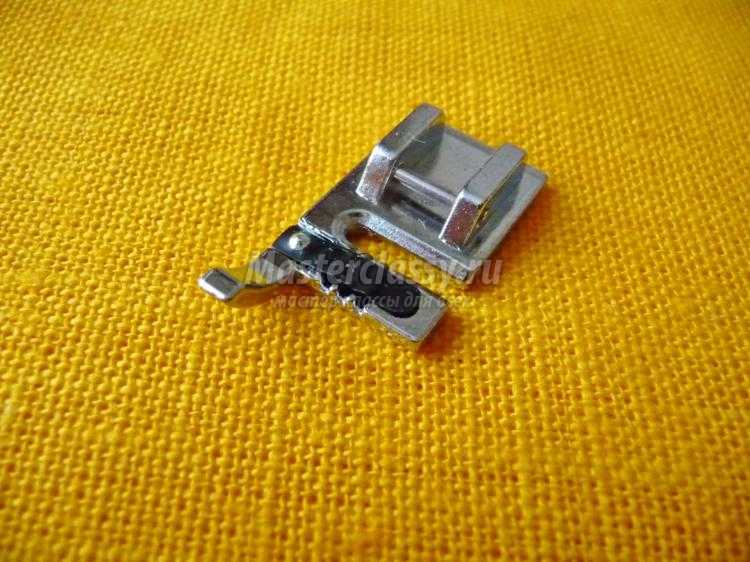
Simple processing of fabric edges is possible with a regular zigzag foot, but a special overlock foot makes this work easier and the stitching smooth and neat. The main feature of the foot is the bar, which increases the length of the overcasting thread. A special “spreader” protects the edge of the fabric from being pulled together, and a limit plate mounted on the foot makes it possible to lay overcasting (overlock) stitches as evenly as possible relative to the cut. There are overlock feet with a knife that simultaneously trim and process the edge.
The foot has guides that lay the cord along the fabric, and the needle stitches evenly along its surface. The foot has special holes for cords, decorative threads - floss, lurex, etc., and is intended for decorating products. When sewing on cords, you can use various decorative stitches.
The foot grabs the bias tape and distributes the top and bottom evenly on both sides of the fabric. At the same time, it ensures an even stitch at the same distance from the edge. Before work, you need to fold the binding in half lengthwise, tighten it into the guide tabs and, together with the product, pull it under the foot.
This foot has a button hole that secures the button to the material. In order for the needle to fall exactly into the holes, you need to set the desired width of the zigzag stitch and turn off the lower conveyor. The work begins to be done slowly by hand, lowering the needle first into the left hole and then into the right. Then the button is sewn on automatically by pressing the pedal. The foot is used not only for buttons, but also for hooks and other similar fasteners.
Some sewing enthusiasts still hem skirt hems or trouser hems by hand. Although there is a special foot that copes with this task perfectly. By pressing the pedal, this blind stitch is performed automatically without much effort. A blind stitch foot should be in every seamstress's arsenal.
Essential for working with thin fabrics with split edges. It is inconvenient and sometimes impossible to bend and iron the edges of such materials. And the foot twists their edges while sewing. It has a special device that grabs the edge and twists it under the overlock stitch. All that remains is to lay the line.
Tucks are often used to decorate clothing and home textiles. The special tuck foot has grooves into which the fabric is pulled during sewing, resulting in a raised fold. Pintucks are formed when sewing with a double needle. There are feet for sewing two, three and five tucks, evenly spaced from each other. Before work, you need to select the stitch length and put a double needle on the machine. A double needle sews the tuck on both sides with parallel stitches.
The configuration of the foot allows you to connect two pieces of fabric at an even distance from each other with a patterned seam. You can insert a cord into the groove of the device, which will additionally decorate the seam between the fabrics.

Sewing foot
knitwear


Under a regular presser foot, thin or too stretchy fabrics will “float” to the side or sag - they require different support from above and below, and a different movement mechanism. Therefore, the paws for such capricious materials have a special configuration and additional devices. But by installing a special foot, you don’t have to worry about the quality of your sewing.
A rubber pad attached to the foot tensions and holds the fabric under the needle, preventing it from sagging and getting caught between the teeth of the lower conveyor. And this is the main problem that arises when sewing thin fabrics and knitwear. The knitted foot does an excellent job with it, forming an even stitch without any extra effort.
Used for hemming the edges of thin fabrics such as silk. The edge of the fabric is tucked into the groove of the foot, which during the sewing process itself bends it by 1-3 mm, ensuring an even stitch along the edge.
Under the pressure of an ordinary foot, the leather immediately moves to the side, which makes it impossible to stitch the product evenly. A roller or roller attached to a special foot relieves pressure on the top layer and easily moves the fabric. This foot is suitable for sewing leather, suede and other complex materials.
.jpg)

.jpg)

You can quilt a thick three-layer blanket with a regular foot, setting it in the upper position. But how much work and accuracy it will require! There is no guarantee that the layers of this “sandwich” will not move relative to each other. Special feet will help you stitch without unnecessary worries, guaranteeing smooth movement of the product and neat stitching.
This foot is designed for free-motion stitching, that is, for stitching that the master performs with his hands, freely moving the material and changing the speed. In this case, the stitch length remains constant. This is monitored by the automatic stitch regulator BSR. To allow the product to move freely, the device turns off the upper and lower fabric feed mechanism.
Acts as an upper gear mechanism, catching and evenly moving the three-layer fabric. The foot takes on the functions that the craftswoman previously performed with her hands, carefully moving the material. This device ensures an even seam when quilting fabrics with interfacing of different thicknesses. A special guide to the presser foot helps to create a perfectly even stitch.
This special foot allows you not only to move the quilt evenly, but also to sew stitches at a given distance between seams with a certain angle of rotation. Depending on these parameters, you need to choose a quilting foot. There are several varieties of such paws. To add variety to your quilting, it is best to purchase several types of quilting feet.
There are whole sets of all kinds of feet for patchwork sewing. The feet differ in the size of the seam allowance when sewing the patches together. They help to perform a variety of finishings on patchwork products.

Sewing foot
round

Transparent open
paw

Sewing foot
beads

Sewing foot
braids and sequins

Foot for
shirring

Decorating fabrics is the most creative part of sewing, which was previously only done by hand. Today, a special foot has been created for any type of fabric finishing, helping to accurately and accurately implement any creative idea of the master.
This tool helps you make circular patterns without rotating the fabric around the needle holder. The foot itself moves the fabric in a circle, performing an even stitch. The presser feet have different stitching diameters, and you can set different diameters of the stitching circle.
The foot sews two lines parallel to each other. The distance between lines depends on the installation of the frame. Special feet are available with a guide that ensures an even distance from the edge.
Made of transparent plastic. Through it you can see the stitching and every stitch made. The foot is convenient for fine decorative work - appliques, patchwork, stitches, embroidery, decorative stitches. Monitoring the stitching while working allows you to eliminate errors.
Fashionable trimmings with pearl or beaded thread are easy to achieve with this foot. The fabric is tucked under the foot, and the decorative thread is threaded into the hole of the foot. Set the stitch pitch and sew the stitch. Before work, it is important to secure the beginning and end of the decorative thread to the fabric.
This foot also has a groove in the upper part. First, press the fabric with a foot, then insert sequins onto the thread into the groove. Set the stitch parameters and attach.
This foot is used to make ruffles and flounces. The foot is a small double plate with a slot over the entire surface. The material for gathering is placed under the foot, and the fabric to which the gathering will be attached is placed in the slot. The foot can perform three functions at once: gather, process the edge and sew the flounce to another fabric.
When sewing with a zigzag stitch, the foot itself forms a boucle of thread over the fabric. Depending on the parameters of the stitch (usually the length is from 0.5 to 1 mm, and the width is from 3 to 6 mm), different types of “bouclé” are obtained. By sewing the design along the contour, you get beautiful embroidery with fringe.
Listed here is a small selection of the most common sewing feet. In fact, there are many more of them. If you can’t cope with your idea with the accessories that come with your sewing machine, then it’s time to create your own collection of the necessary sewing feet.
Good afternoon, dear needlewomen. Today we will look at the use of presser feet for sewing machines. If you love to sew, then this master class is for you. I bought sewing machine feet from a Chinese online store.
The paws are very good, but how do you know how to use them? I started looking for information and realized that this topic was poorly covered. But if you use such devices, you can easily and simply perform various operations. So I decided to figure it out myself and help people who are also looking for this information. So, let me begin.
Narrow edge lining foot. The paws can be different by 2 mm, 4 mm, 6 mm. The foot makes it possible to process the edge very smoothly and efficiently without markings. This foot is also called a snail. I’ll say right away that the paw is worthy. Cut the edge of the hem at an angle and tuck it into the snail. The fabric wraps itself very nicely.
The seam turns out very neat. The width of the seam depends on the foot. Wrapping fabric 2 mm by hand is not at all an easy task, but here any fabric, even if it frays a lot, folds up nicely. True, you need a warp, but you will be patient, and it will be your faithful assistant.


Using this foot, you can sew on various narrow cords by tucking them into the snail from below. Instead of top thread, it is better to use mono thread.

Assembly foot. A very necessary paw. Using this foot it is easy and simple to make frills and ruffles. Pay attention to how you place the fabric. The fabric that is being gathered lies as the bottom layer, and the top layer is tucked into the groove of the foot and will be sewn evenly along the top of the gather. The assembly is uniform.


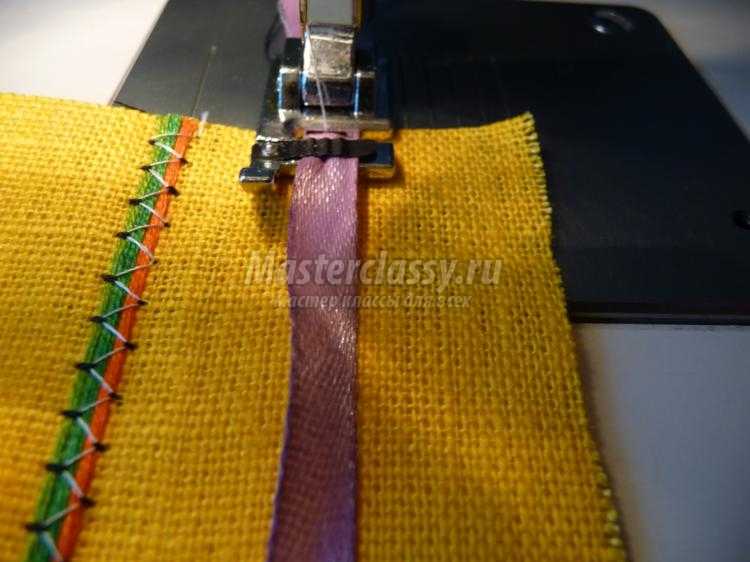
Edge stitching foot. I liked this foot because the plate allows you to guide the edge of the fabric along the edge of the needle. The overlock stitch is made strictly along the edge, the thread runs along the plate and lies freely, which makes it possible to stitch knitted items, the seam will not burst when stretched. We use an overlock stitch, imitation overlock.


Foot for sewing elastic, ribbons, braid. I can say that the paw is simply decent. Using this foot it is easy to sew on an elastic band. I inserted it under the plate and it lays flat and does not jump to the sides. And if you tuck thick threads of different colors under the plate and stitch, you will get a beautiful decorative braid. We use mono thread instead of upper thread. We use a zigzag stitch, or stitch zigzag.


Foot for sewing on appliques. The foot is transparent and the design is clearly visible through it, so it is used when it is important to sew accurately along the line. Used when sewing a zigzag stitch. The step distance is small, the stitching should be tight. For volume and beauty of the stitch, loosen the top thread, and then the stitch will emphasize the beauty of your work.


Blindstitch foot. Everything is easy and simple to use, but I didn’t really like the quality of the lining, dots are visible on the front side. There is a screw on the foot, with its help we adjust the hem to the lining, but I still have visible marks and I think I won’t hem it like that.


Darning foot. This foot is designed for darning. Lower the teeth for free movement of the fabric. Comfortable.

Foot for sewing on buttons. Set up a zigzag stitch. Select the stitch height equal to the distance between the button holes. Simple and fast.


Foot for sewing on zippers. The foot has two holders, left and right - this makes it possible to sew the zipper on both the left and the right, you don’t need to control anything, the foot rests on the zipper and the stitching lies very evenly, when sewing zippers in this way, the fabric will never get caught in the zipper, the zipper opens without difficulty . I've been using this foot for a long time and I love it.


Foot for sewing a hidden zipper. It’s a wonderful foot, it’s like an iron; at the bottom there is a recess just the width of the zipper itself. I also use this foot for sewing on cords; it lies in the recess and is easy to sew on.


Foot for lining fabric. How I regret that I did not use this foot. The foot makes it possible to run the stitch evenly, the plate rests on the fabric and the stitch lies evenly, and there is a screw on the foot, and this makes it possible to shift the stitch, believe me, I sew like a pro and I won’t sew as perfectly as with this foot. If you sew a line and then move the screw, you can lay a second line right next to it. So great.


Solyanikova Tatyana Viktorovna
Today everyone knows what a sewing machine is. But not many people know about sewing machine feet and how many types of them exist now. Nevertheless, the paws not only expand the capabilities of the machine, but also make it easier to carry out many processes, and most importantly, make them of high quality. By paying due attention to this article, you will learn a lot of new things, and by using the presser feet in practice, you will get great pleasure when sewing a variety of products.
If you bought a sewing machine, you will immediately see the adapter (mechanism for attaching the presser feet) “AU-100” and the “ziz-zag” foot - “AU-107”. In addition, as a rule, there is an additional foot for zippers “AU-101” and for loops “AU-116”.

(Allows you to quickly change paws, which is very convenient and speeds up processes)

(Standard foot for operations on
zig-zag basis)

(Needed for lightning.
Can be located on both sides of the needle)

(Excellent help when making loops. Convenient when making robots on slats and collars)
Many machines also come with the AU-108 blind hem foot, the AU-115 quilt foot, and the AU-105 button foot.

(Use for operations that require more careful execution. For example: blind stitches, etc.)

(Use for straight parallel stitches that run at the same distance).

(Use for buttons, fasteners, hooks)
The instructions for the machine always contain descriptions of the work for all of the above paws.
Today's home sewing equipment market can offer 40 or more types of feet for different functions. Paws are divided into semantic groups:
Complete most workflows
Making decorative stitches
Performing work with highly complex fabrics.
Sets of presser feet
Main workflows:
There are many paws on the market that can sew in hidden zippers, available in both metal and plastic.

(Inserting a hidden zipper)
Due to the fact that there is a special groove at the base of the foot, sewing in a “secret” zipper is done almost in the blink of an eye. To make good straight stitches on delicate fabrics, you need to use a straight stitch foot.

When processing edges, you need to take a 2mm hemming foot “AU-111”.

For thicker fabrics, you can take a set of hemming feet with different widths (6 mm, 16 mm, 22 mm) “AU-121.”
If you don’t have a screwdriver, you definitely need an “overlock” foot “AU-109”.
This foot has a stopper that does not pull the edge of the fabric when used. If the fabric needs additional processing of part of the cut, then you can use the foot with a knife on the side to process the edge “AU-125”,

Decorative works:
Edging products is a complex operation, but with a special foot it is greatly simplified.
You'll be sewing bias tape in just a few minutes using one stitch using the edging foot "AU-117" or a foot with a ruler "AU-114".


Very interesting is the device that lays folds “AU-122”. With it you have the opportunity to sew a decorative part to the product in one operation.

If you want to give your product a more individual look, then use different types of decorative finishes. For this purpose, you can use, for example, the beading foot “AU-130”,

foot for decorative cords AU-106 or braid AU-131,

Among those performing decorative operations, one should definitely mention the foot for embossed tucks (when used together with a double needle) AU-127, the foot for sewing appliques AU-110 and the foot for shirring AU-128


.jpg)

