The idea of making a bouquet of paper flowers is very good. To make paper crafts, we will need to purchase colored paper, cardboard, markers, a stationery knife, tape, scissors and PVA glue.
First you need to make three blanks for each flower, two of which should be the same color, they should have six petals.

Place one blank in front of you and glue a circle on top of it.

On the mug, first make holes for the eyes and mouth in the form of a smiley face.

After gluing the mug with the flower, you need to color the eyes with a black felt-tip pen, and then bend the petals inward.

The next step is to cut out the stem, which we then attach to the flower, and on the other side of the flower we need to attach the same blank.
You can also make leaves for the bouquet, which can be made from green paper.

First you need to draw an oval and cut it out, and then use scissors to make notches.

In order for individual pieces of paper crafts to become a single whole, tie the flowers with ribbon or some other fabric to decorate the bouquet.

This bouquet will never fade and will be an excellent decoration for your home.

The simplest crafts for children include bottle crafts.

For example, from a bottle you can make a piggy bank, which requires only a marker, a stationery knife, dice (4 pieces), a small bottle, glue and colored paper.

The first step is to cut a straight line, the width of which can be 5 centimeters, and the length of this line should be enough to encircle the bottle.


We draw eyes with a marker, and draw nostrils on the bottle cap. Using a utility knife, cut a hole for coins.

As legs for the pig, you need to attach the dice using glue.


This craft develops a child’s imagination and is also useful in everyday life.
The craft can be used as a lampshade for a lamp or simply hung as a decoration.

A ball of thread is made very simply; to make it you will need colored threads, a ball, and transparent glue.

First, we need to inflate the balloon and tie its tip so that the air does not escape.

Then you need to wrap the inflated ball with threads, then apply glue to the surface of the ball and wait until it dries.


Now you need to separate the ball from the threads, to do this, just pierce it with a needle and the craft is ready.

As a simple DIY craft, you can make a gnome. For the craft you will need a pine cone, light-colored plasticine, pieces of fabric, glue and a brush.
First of all, the child should roll a ball out of a piece of plasticine, after which, using a brush, they need to make indentations for the nose, eyes and mouth on the ball.


At the next stage of our craft, we need to attach the resulting head to the top of the cone.

Then the child must cut out a triangle from the fabric and glue it on the sides, resulting in a cone. The cone will act as a hat for our character.


Finally, you need to make mittens from fabric, and then attach them to the pine cone using plasticine and our gnome from the pine cone is ready.
A paper bookmark is perfect as a simple craft for kindergarten. For children to be able to make this simple craft, they will need a pencil, ruler, colored paper, scissors and glue.

To begin, children must draw a square measuring 20 by 20 centimeters.

Then divide the resulting square into 4 equal parts using a pencil and ruler, resulting in 4 squares measuring 5 by 5 centimeters.

The second step is to divide the upper right and lower left squares in such a way as to obtain triangles, that is, you need to draw a line diagonally from the upper corner to the lower corner.

We don't need the triangles with the outside and can cross them out.

Then you need to cut out a figure from paper without taking into account the crossed out triangles.

The top triangle needs to be trimmed. If everything is done correctly, the paper will be in the shape of a diamond, to which two triangles are glued.

The next step is to fold all the triangles in half, and then one by one place them on the tip of the rhombus. You should end up with a pocket that fits over the tip of the book page.

To make a bookmark original, you can advise children to cut out some kind of applique from colored paper.


You can create a beautiful and cozy interior in your home with the help of handmade crafts. Making such original things is not so difficult - you don’t need professional skills for this. The things we make with our own hands are unique, they give the interior of the home individuality and add variety to the environment.
Handmade crafts exude the special warmth of a home. Thanks to unusual creative gizmos, you will have the opportunity to change the interior at will or in accordance with the seasons (for example, create New Year's decor). DIY home decor is varied and purposeful. Homemade beautiful things and useful crafts for the home can be used as original furnishings, decorative elements, or as devices intended for storing various household items.
In order to make things with your own hands, you don’t have to buy expensive materials; you can also use improvised means.
Creating unusual decor is possible without large material costs. Most of you have various unnecessary little things in your house, for example, fabrics, colorful paper, buttons - all this can be used as material for crafts.
There is similar “junk” in almost every house, if you dismantle the pantry or rummage around in the attic, you will find something. Natural materials, glue and threads are also useful for making beautiful new items and homemade little things. But handmade decor ideas at home are also needed - of course.
Many people believe that only people with experience can make crafts and create presentable interior items on their own - this is a misconception. Show your imagination, combine different textured materials, don’t be afraid to experiment, and you will create not only beautiful, but also original home decor.

Even if you have to tinker with the first thing, each subsequent decorative craft will come out better and better, and you will spend less time.
So, what can you do yourself for your home? Let's look at a few ideas for inspiration. Among the proposed options, you will definitely find something interesting for yourself and try to make the thing you like with your own hands.
One of the useful things for the home that also serves a decorative function, which you can make with your own hands, is a key holder.

The peculiarity of this key holder is that its design imitates brickwork. The basis for the key holder is thick cardboard (you can use part of a box). You will also need thick toilet paper or thick napkins. Dense material is needed so that it does not spread when lubricated with glue. Stock up on acrylic paints, varnish and glue (ordinary PVA will do).
Make the back wall of the key holder from rectangular cardboard or a sheet of plywood. Hooks will be attached to the base. Cut out small rectangular bricks from cardboard, the size should be the same, and glue them to the base, leaving a small distance between the parts. Not the entire surface of the cardboard is covered with bricks.
In the central part you need to stick a sign decorated with an inscription, and in the upper part you need to place a beautiful picture.
After this, coat the bricks well with glue, and put a napkin (previously crumpled) on top and a little more glue for impregnation. Using a stick, press tissue paper or paper into the gaps between the miniature bricks to create corners. Give the craft time to dry.

Paint the dry panel with paint (to imitate natural brick, you need to choose a red-brown shade). Use bronze paint to paint the seams.
After the paint has dried, paint the bricks in the same tone using a dry brush (dip the brush into bronze-colored paint, then wipe it on paper until it is almost dry, and only then brush the brickwork).
On a note! When painting bricks, you need to move the brush without changing direction.
To give the key holder a smooth finish, coat it with a clear matte varnish.
The work is completed by attaching the loops, after which it can be hung on the wall or given as a gift to someone. The photo below shows the finished key holder:

All representatives of the fair sex love jewelry; Almost every woman has jewelry that needs to be stored somewhere. An original storage for jewelry will be a hanger made like a painting.
In order to make a hanger for storing jewelry, you will need:
Cut the plywood according to the dimensions of the frame and coat it with stain, then dry it and apply it to the frame. Mark the places where the hooks will be attached and screw them. All that remains is to hang the decorations on the hanger.
Now you have a place to store women's treasures - jewelry.

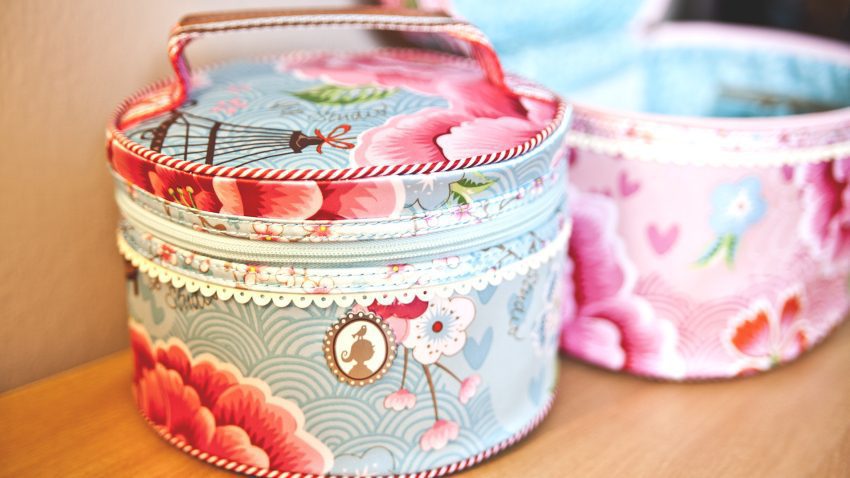
A simple but presentable box designed for storing various small items can be made from plastic canvas.
Canvas is a material for embroidery. You will need a canvas made of plastic; you can buy it in stores that sell everything for needlework.
On a note! Plastic canvas is usually made in the form of sheets, A4 size. The perforations in the plastic canvas differ in size. Canvases are produced with different numbers of perforations; the more there are, the smaller they are.
In addition to the canvas, you need to stock up on the following materials:
Embroidery on plastic canvas is almost no different from regular embroidery. Embroidery techniques can be different, the most popular are cross stitch and satin stitch.
The plastic canvas is flexible, but at the same time it is very durable.
Decide what the dimensions of your box will be. Divide the material into parts intended for the sides and the bottom. There should be five parts in total. Make elements for the lid. Make a workpiece whose size is 0.5 cm larger in width and length from the bottom. The sides of the lid should be slightly narrower. You will need five more parts. Then sew the parts with thick threads (you can use braid and even ribbons).

You can embroider any pattern on the blanks. Drape the parts that are not embroidered with fabric or embroider with beads.
Having completed all 10 blanks, begin assembly. The first step is to sew the side parts to the bottom. Then sew all the side elements of the box from the outside and trim the top around the edges. The last step is to assemble the cover in the same way.
We assemble the lid of the box in the same way.
A beautiful box made of plastic canvas is ready.
One of the options to add coziness to the interior is tapestry rugs. To weave such things, you do not need special tools. A rug using the tapestry technique can be made from scrap materials: thick threads that are used for knitting (they can be replaced with ropes made from old clothes) and cords.
A tapestry is a lint-free carpet made by hand. The base of tapestry rugs is decorated with ornaments created by interweaving threads. We will create a plot composition in the form of a circle with drawn lines; a thread will run along them, serving as the basis.
All work is done using weft threads. The complex name hides ordinary ropes and braid, from which weaving and decorative patterns are created.

Stage one. We draw out cardboard measuring 500 x 500 mm. We stitch the cardboard with the thread chosen for the base. To do this, cut the markings drawn on the cardboard and thread a rope through the lines so that it runs through the central part.
Stage two. Let's start weaving the tapestry. You need to carefully fix the starting thread. Weaving using the tapestry technique involves pulling the underlying cord by alternating one thread at the top and the second at the bottom.
Stage three. After weaving the last turn of the thread around the cardboard circle, you need to turn the resulting rug over to the reverse side and cut off the base cords. When pruning, leave about 5cm at the ends. Pull the ends of the laces out of the notches made on the cardboard (there is no need to remove the picture while pulling it out) and tie them into pairs. Attach pompoms to the resulting knots.
Complete the composition by sewing a thick rope from the wrong side in a circle - this will hide the knots and ends of the threads.
Advice. By using different textures and shades of threads, you can make different rugs and then combine them into one. You will get a large rug that can be hung on the wall or laid on the floor.
A tapestry rug placed on the floor will make it warmer and also looks beautiful. Weaving a tapestry rug with your own hands is not difficult: try it and see for yourself.
You can make an unusual curtain from ribbons. Tape curtains are suitable for both windows and doors. Making curtains from ribbons will take a little time; you don’t even need a sewing machine. A fluttering ribbon curtain repels insects well; Previously, such curtains were made from newspapers cut into strips.
To make a curtain from ribbons, you need the following materials:
The ribbons need to be thrown over the cornice and secured with clamps. Large beads can be strung onto fabric strips for decoration.
The ribbon curtain performs not only a practical, but also a decorative function. The advantage of curtains made from ribbons is their lightness. This is an excellent option for a summer house; a ribbon curtain can also be hung in an apartment.

Many people have paper bags at home; instead of throwing them away, make them into flower pots.
Materials for making flower pots:
Take paper bags and mark them: eight strips measuring 70x300 mm, then cut the paper along the dotted lines.
Place a wooden skewer in the corner of one of the strips and wrap the paper base around it diagonally. You must make a paper tube from each strip. Tape the corners of the paper tubes to prevent them from unraveling. The easiest way to do this is with a glue gun.

Take a plastic container, apply glue to it and wrap it with paper (from the same bags) so that the plastic is not visible. Glue paper tubes to the bottom of the container. Cut paper strips measuring 70x450 mm (you will need large bags) and make tubes.
Wrap the tubes so that they are pressed tightly against the walls of the container. Attach a long tube of paper with glue to the bottom of the container and wrap it around it, you need to braid the main tubes. Wrap all the main tubes, and then change the direction of weaving to braid the missing tubes - this way you need to wrap the entire container.

Make two holes in the sides of the pot (top).
Stretch a string through the holes made; tie a knot at each end of the twine to secure it well. Another woven tube will help hide the ends of the twine. Wrap the tubes protruding above the pot inside the container and secure with glue.
The unusual flower pot is ready.

Handmade items for the home can be used as decorative elements in your home or given to friends.
Most things made by hand are not only beautiful and original, but also useful and necessary in the household. Feel free to start working on homemade things and decorate your home with them.
Video For five more ideas for handmade crafts with your own hands to decorate the interior of rooms, see the video below:
Many people prefer not to work "for someone else." Such citizens need to earn money somehow. For example, by organizing your own business. This is the most correct solution for those who want to receive money without being hired. But in this case, every businessman faces the question of defining activities. Quite often people prefer handmade things. They are highly valued in the modern world. Today we have to find out what we can make with our own hands and sell. What tips and tricks will help you make good profits from your business? Where and how best to distribute handmade things? If you thoroughly study the answers to these questions, you can become a famous businessman with a good income.
With the advent of man on Earth, handicrafts arose. In the past, people made things out of necessity. With the development of society, handmade things began to be valued not only because of their importance, but also because of their beauty.
The so-called handmade is usually genuine, original and unforgettable. It carries the love and positive energy of a person. Many say that the philosophy of art of conserving the planet's resources is promoted through the creation of handmade things. After all, craftsmen usually use only natural materials in their work.
Owning and wearing handmade items means always being on top of fashion. People also think about what they can do with their own hands and sell because such things are distinguished by their originality and uniqueness. They emphasize a person's individuality. Besides, not everyone can do something with their own hands. Some people don’t know how to do anything, some are good at embroidery or sewing, others have a talent for drawing or forging. In any case, in the modern world, handmade items are in great demand.
Is it possible to sell something you made yourself? Yes. A similar prospect opened up in ancient times. As already mentioned, people used to make things for themselves. Then they started exchanging objects. With the development of the economy on Earth, handmade goods began to be sold. This is normal.
But every businessman who wants to create handmade things faces a number of problems. The first of them is the question of what you can make with your own hands and sell. Next, the most common, relevant and useful ideas will be presented for those who plan to try themselves in the field of handmade. 
The first thing we can recommend is to make jewelry and accessories. They are usually worn by women. Such handmade things are always in price. They never go out of style. Such items are unique and eye-catching.
What can you make with your own hands and sell? Any jewelry and accessories. They can be either male or female.
You can make beads, bracelets, pendants, brooches, keychains and so on. In this case, the use of absolutely any materials is allowed - beads, clay, wood, wire. This is not an exhaustive list.
What can you make with your own hands and sell? Bracelets made of beads and beads made of polymer clay are now popular. Even a schoolchild can make such decorations.
Many people say that kanzashi style jewelry is very popular - these are unique hair decorations. When making such handmade items, they use the technique of folding fabrics in a variety of ways.
Please note that many jewelry made from semi-precious stones without a clear cut cannot be found in stores. Such items can only be purchased secondhand. They look original, which attracts buyers.
What can you make with your own hands and sell at a profit? The next idea is suitable exclusively for diligent and neat people. We are talking about paper filigree. It is called quilling.
What it is? The art of creating various crafts (decorations) from paper. Typically, craftsmen use paper tapes for their handmade items. They create different decorations that can be used to decorate cards, letters, frames and gift wrapping.
In addition, using quilling you can make a variety of decorations. What exactly should I do? It's difficult to predict. Any figures made from paper ribbons will be bought up by modern fashionistas. 
Some ideas for paper filigree:
Paintings are especially popular today. Making them with a certain skill is not difficult. And such hand-made items are sold at a high price.
What can you make with your own hands and sell? At home, modern people can create a variety of objects. The range of available materials is practically unlimited. Therefore, there are plenty of ideas for business.
The next interesting direction to work is quilting. This is the process of creating objects from scraps of fabric. Usually such things turn out to be bright, original and original.
The art of quilting has come to the modern world from past centuries. Ancestors quite often sewed from scraps of fabric. Modern craftswomen use expensive fabric of different colors in their work.
What can be done this way? Here are some ideas:
This is not a complete list of what can be done with quilting. But these ideas will help you test the activity and evaluate its profitability.
Not everyone can do tinkering. Some people have certain talents for art. What can you do with your own hands and sell in this case?
When decoupage, the use of any materials is allowed - from napkins to fabric. Such a business will not require any special expenses. The main thing is to have talent in the field of decoration.
You can paint anything - plates, saucers, cups, vases, stands and even furniture. It all depends on what exactly a person wants to do. At first, it is recommended to work with available items - dishes and vases.
DIY crafts can not only help you pass your free time and get pleasure from creating useful or beautiful things. Those who have achieved a certain skill in their hobby will be able to make good money from it. Handmade items are valued all over the world, and being able to offer them for sale online will help you find many customers and get a fair price for your work.
To make a handmade item you will need various natural and artificial materials, special tools, a variety of decor, as well as a lot of time and patience. Almost any hobby requires glue and scissors. Any needlewoman will find a place to use scraps of fabric, colored paper, and paints.
At home, you can make unique decorations, toys, panels and exclusive, but at the same time useful everyday little things (vases, shelves, stands, lamps, rugs, covers, etc.). Not all things made with your own hands are worthy of admiration, but those that are successful can be presented to loved ones or sold at a profit to those who are interested in works of art that are available in a single copy.
Jewelry making is a very popular hobby. Beautiful and stylish jewelry can be created from ordinary beads. Simply fantastic jewelry is made from polymer clay. You can also use natural precious and semi-precious stones, beads, buttons, laces, threads and other materials for this. In order to create a unique piece of jewelry, you just need to show at least a little imagination: scraps of leather and scraps of fabric can turn into beautiful flowers in a hairpin or necklace, and an unusual combination of beads can turn into a spectacular accessory.
If you decide to make jewelry making your hobby, then you will need to master several techniques for working with various materials and purchase accessories from specialized stores, which you cannot do without when creating bracelets, earrings, necklaces and rings. You can study the techniques used to create jewelry and find ideas that will lead to the creation of unique products on the Internet on a variety of handmade websites.
Quilling is the art of creating compositions from multi-colored strips of paper twisted into spirals. Using this technique, you can create postcards, paintings, jewelry, photo frames and even voluminous interior decorations.

It is noteworthy that this hobby does not require spending a lot of money on purchasing supplies (except for strips of colored paper, you will need glue, scissors, tweezers and a special device for twisting ribbons). Mastering the quilling technique is not difficult, but creating truly unique pieces will require a lot of time, patience and especially perseverance.
All products made using paper rolling consist of basic elements (modules), such as a tight and loose spiral, curl, triangle, square, heart, eye, leaf and others. To quickly understand how to make them, you should carefully look at the photos of the modules or several videos with master classes on quilling.
Decoupage is the name of a decoration technique that involves attaching a design to an object and coating the resulting product with varnish. At the same time, the product looks as if the picture was originally drawn on it. You can decorate in this way not only surfaces made of glass, plastic, ceramics or wood, but also leather or fabric.
For decoupage, you will need an object to transfer the design to (this could be a vase, cutting board, chair or even a whole cabinet), glue, scissors, varnish and the picture itself (depicted on a napkin or cut out from a magazine). The surface of the object to be decorated must be thoroughly cleaned of dirt and degreased. The picture is cut out using scissors, glue is applied to its reverse side, then it is placed on the surface of the product. After the glue has dried, the item is coated with clear varnish.
Cardmaking is the name given to making postcards. In order to engage in cardmaking, you do not need to spend a lot of money on special paper or decor. You can make beautiful greeting cards from cardboard, foil, colored paper, beads, buttons, lace, ribbons and feathers. For this you will definitely need glue, scissors, double-sided tape and imagination.

Each handmade postcard is a real work of art. This hobby will allow you to always have a beautiful birthday gift on hand for your relatives and friends. If you are seriously interested in this type of applied art, then making original postcards can be a good source of income.
Scrapbooking is the name given to the design of photo albums. This includes family photographs, drawings, newspaper clippings and notes. Each page of such a photo album contains a collage that expresses a certain thought or covers certain events in the life of the whole family: wedding day, birthday, family vacation, etc.

Since digital photographs, which can be stored almost forever on special media, have become firmly established in our lives, paper photo albums have begun to become a thing of the past. But scrapbooking has simply evolved into a new quality: various computer applications have appeared that allow you to process photos, insert them into various frames, make collages from them, place various signatures, audio and video files in them.
Felting is the name given to felting wool. Using this technique you can make very original jewelry and beautiful toys, slippers, bags, scarves. To master this method, you will need unspun wool of various colors and special needles designed for felting.

Anyone can master felting. To make a three-dimensional product, wool is placed on foam rubber, which is then tangled with needles. First, large needles are used, then, as the product becomes denser, they are replaced with thinner ones. Creating things from unspun wool is a very exciting activity that brings real pleasure.
Patchwork is a technique in which a fabric with a unique pattern is created from scraps. This technique is used to make blankets, bags, rugs, toys and panels. To create a work of art using the patchwork technique, you will need scraps of fabric, scissors, a ruler and thread.

Cutting in patchwork is done using templates, which are simple geometric shapes. The product is assembled from small parts to larger ones. There are many successful schemes, using which novice needlewomen can create unique works. Once the basics of patchwork have been mastered, you can begin to develop your own patterns.
Fusing is a technology that allows you to make real stained glass windows from colored glass and exclusive decorations at home. For this purpose, special furnaces are used in which glass is sintered at a temperature of about a thousand degrees.

To create an original product you will need multi-colored glasses, safety glasses, glass granules, a glass cutter, special gloves, and heat-resistant paper. First, a sketch of the future product is invented and drawn, then the glass is cut. A mosaic of cut multi-colored glass is laid out on thermal paper, and the gaps between the glasses are filled with granules. The resulting pattern is placed in an oven and baked at a very high temperature.
Important: After baking, you need to wait several hours until the product has completely cooled down.
A real handmade product must be based on an original idea. Having mastered several techniques for making crafts, everyone will be able to invent and implement their own ideas, combining various techniques and embodying their vision of the world.
This will allow you to express yourself, decorate the interior of your home, present original gifts to friends, earn money by selling your works, and even (if a particularly successful set of circumstances) receive recognition and become a respected person who creates real works of art.
Many famous artists and sculptors started small, first creating their creations at home for themselves or to order for clients. So why don’t you start reproducing works of art, embodying your own ideas, and presenting them to the public?
You can exhibit and sell your products through pages on social networks or through popular thematic platforms on the Internet (you can even create your own online store). You can also make beautiful crafts with your own hands and put them up for sale in specialized offline souvenir stores.
Save the article in 2 clicks:
Each of the considered methods has its own advantages and disadvantages. Therefore, when selling your handmade products, it is worth trying each of them to choose the most suitable one for yourself. If you are not ready to exhibit your work to a wide audience, then your relatives and friends are unlikely to be against having a beautiful trinket or aesthetically useful thing you made at home.
In contact with
In this article we will tell you how to create crafts for your home with your own hands. Decor made from scrap materials gives your home a unique look and helps old things find a new life.
A craft starts with an idea. It shows individuality. You can make a craft for your home yourself. It is not necessary to have a designer's education. In creativity, it is important to be careful. This is the only way the crafts turn out to be of high quality and beautiful.
DIY home decor from scrap materials enriches the interior. The kitchen is the place that brings the whole family together. In this room you can paint the walls, hang photos, decorate furniture, kitchen aprons, etc. If you don’t have a design education, you can use stencils. An empty wall is decorated with a panel or painting on a kitchen theme.
It is better to decorate the living room with the whole family. Ideas bring people together. We offer as an option to cut out the first letter of the family surname from thick cardboard and decorate it with paper flowers, pom-poms, and beads. The letter is framed like a photo and hung on the wall. Various words are assembled from such letters: love, family, home.
Decorating in the form of vases helps to transform the interior. Old bottles are used for decoration. The elements are wrapped with twine and decorated with flowers. To create room decor, use sofa cushions, covers for which you can make yourself. Such things give comfort.
The bedroom is a place of relaxation. There is no need to overload it with decorations. A few elements will be enough. The wall of the room is decorated with family photos, and a homemade patchwork blanket is placed on the bed. The design of bedside rugs should be made in the same style. An original solution is to use fabric birds, which are hung above the bed by satin ribbons.
The bathroom is a place of cleanliness and self-care. You can decorate it with shells and pebbles. A lot of things and accessories are stored in this room, so you can make homemade panel organizers. Wicker baskets screwed to the wall at the bottom can be used as storage shelves. Original towel hooks can be made from various materials: wood knots, wrenches. The main thing is not to stand out from the overall design of the room.
The design of the nursery is determined by its size. To create the interior of a children's room, bright things should be used. It is decorated with homemade toys, photos, bedspreads, wall paintings, and unusual lamps.
On the Internet you can find various ideas for your own interior using scrap materials. For inspiration, you just need to look around. DIY interior crafts from scrap materials can be created from:
Tip: you can also use larger things for crafts, for example, cabinets, wall mirrors, chests of drawers, tables.
If you don’t like various trinkets, then you can make practical interior items with your own hands from scrap materials.
Sometimes there isn't enough shelving at home. So why not make it yourself? This will be a truly practical craft. The rack is made from an unnecessary ladder. In addition to the ladder, you will need boards, paint, a jigsaw, a brush, sandpaper and glue.
Stages of work:
On such a rack you can place books, original baskets, flowerpots with flowers, A4 size paintings and other beautiful do-it-yourself things for the home and interior using improvised materials.
We invite you to create another practical craft for your home - a table from unnecessary wooden boxes. Vegetables and fruits are often stored in such boxes. For this craft you will need 4 of these boxes, nails and a hammer.
Place the drawers on the side surface with the open side facing out and connect them together into a square. Fasten the elements with nails. It is possible to decorate the open space of the drawers with additional shelves. At the end of the work you need to paint the table.
We invite you to create a unique spice rack from an old pallet. To do this, clean the tray with sandpaper. Use a jigsaw to saw off unnecessary elements. You can make additional shelves. The result is a panel with a pocket that is suitable for any interior. Containers with oil, wine bottles, and spices are placed in this pocket. The shelf is painted in the color of the interior.
Crafts for interior decor
A house is a reflection of its owner. It’s nice to come visit a creative person and look at the embodied ideas and unique style. We offer you some tips for interior decor and creating crafts.
An interior decor item made from scrap materials can be a wall mirror decorated with an unusual frame. It is easy to make from a regular newspaper or magazine. Colored sheets are cut into equal squares measuring 10x10 cm and rolled into tubes of equal thickness. These tubes are glued along the perimeter of the frame parallel to each other. The result is a beautiful mirror design. The tubes need to be secured not only with glue, but with varnish.
To make a plastic lampshade, you will need several sets of plastic spoons, an empty 5-liter plastic container, and glue. The neck of the container is cut off. The handles of the spoons are cut off to form petals. Using glue, the original petals are fixed to the surface of the container in the form of scales. The plastic lampshade is ready.
The interior of a home made from scrap materials will become more lively if you use the remains of bright fabric. You can make various crafts from them, for example, fabric flowers. Using a stencil, circles d = 20 cm are cut out. A spiral is drawn on the circles, which is cut along the entire length. The spiral is twisted from the bottom, gluing it so that the bud does not fall apart. After drying, the petals are straightened. Unusual do-it-yourself decor from improvised materials for your apartment is ready. Several fabric colors are combined into a composition, panels, paintings are made, shelves, walls, etc. are decorated with them.
If you have old beads, do not rush to throw them away. They are disassembled into beads to make a hand-made candlestick. You need to attach an unnecessary CD to the base of the candlestick. Glue beads in rows along the edge of its circumference to form a cup. If you put a shaped candle in this glass, it will turn into a beautiful candlestick. This decorative element has a big plus. Thanks to the beads, it shimmers beautifully when the candle is lit.
On New Year or any other holiday, the windows of the house are decorated with garlands. It is not necessary to hang bright lights; we recommend that you make an unusual curtain from scrap materials. To create a garland you will need thick colored cardboard, thick thread, a needle, and scissors. Using a stencil, cut circles d = 10 cm. The circles are strung on threads of the required length. The threads are connected together into a curtain and secured to the window frame.
There can never be too many DIY crafts. A woman's dressing table can be decorated with a homemade jewelry hanger made from scrap materials. It's easy to do. To realize the idea, you will need a picture frame, a small piece of plywood, paint, small hooks, and a jigsaw. Saw off the plywood to the size of the baguette, paint it with paint. Mark the places where the hooks are attached and secure them. With this decorative element you can store your jewelry in an original way.
We suggest you make a box from plastic canvas. Canvas is a material for embroidery and crafts. It has the dimensions of an A4 sheet. The canvas has a varying number of perforations. To work, you will need the workpiece itself, threads, a needle, a piece of fabric and scissors. You can embroider with cross stitch or satin stitch on canvas. Make the details of the future box from canvas and decorate them with your favorite embroidery method. Connect the parts with thread and a needle. The canvas box is ready, it needs to be stored on the shelf. Without a doubt, it will become the main decoration of the interior of your home.
The tapestry technique allows you to create a rug at home with your own hands from any available materials. For example, they cut old clothes into ribbons. This option is called a “grandmother’s” rug. For crafts, you should choose a durable material and draw the thread by hand.
Prepare cardboard 500x500 mm. Sew it with thread. Having secured the first thread, begin weaving the tapestry. Once you've finished the last circle, turn the rug inside out and sew some rope around the perimeter to cover the ends of the threads.
From scrap materials that are sometimes accumulated at home, they make a pot for an indoor flower. For DIY crafts you will need paper bags, wooden skewers, scissors, rope, glue gun, containers (for example, you can use a mayonnaise jar).
From paper bags, make blanks in the form of ribbons measuring 70x300 mm. Using skewers, make tubes from the blanks. Secure the corners with glue. Wrap the sides of the container in a paper bag. Turn it upside down. Attach 8 tubes to the base. Return the future flowerpot to its normal position. Fold the tubes up, pressing them tightly against the walls of the pots. It remains to braid the main tubes with the remaining ones in a checkerboard pattern. The pot is pierced at the top, a rope is threaded through the holes and the pot is hung on the wall of the room.
Hangers are always needed in the household. We suggest you make several of them. For crafts you will need:
Draw the outline of the hanger on a piece of fabric. Leaving a small gap, cut out 2 blanks. Sew the pieces together to make a cover. Wrap the hanger hook with satin ribbon, securing it with glue. Place the fabric cover on the hanger. Fill the internal space with padding polyester. Sew up the hole. Make a bow from a contrasting satin ribbon and secure it at the base of the hook. The fabric hanger is ready. You can hang delicate items on it.
There is always a mirror in the house. Most often it is located in the hallway, bathroom or bedroom. The decorating ideas are endless. The mirror can be beautifully decorated with newspaper tubes, broken shards of porcelain or tiles, colored glass, shells, buttons, beads, hemp, etc. To fix the elements, you must use transparent silicone glue.
Do-it-yourself room design from scrap materials can be made using decoupage technique. We suggest you decorate a small mirror in a wooden frame:
For crafts, it is better to use a round mirror. Cut off the handles from the plastic spoons, leaving the scoops. Glue them in several rows around the entire perimeter of the mirror. Spray paint the decor. Instead of spoons, you can take buttons, beads, shells, clothespins.
DIY decor using improvised materials can be inexpensive. Cut rings of the same width from plastic pipes. Finish their edges. Take a nylon cover. This will be the base of the structure. Attach the first row of rings to the lid. Attach the second and subsequent rows to the already glued rings. At the end of the work, we recommend that you decorate the decor with sequins. Secure the mirror in the center.
To implement the idea you will need hemp rope. Cut out the base from cardboard. It must be larger than the mirror itself. Place a mirror in the center of the base. Apply clear silicone adhesive to the base. Fix the hemp turn by turn. The result is a mirror that can be used to create a marine-style room interior.
Do-it-yourself home decor from scrap materials includes painting. To work you will need stained glass paints, glass contour, glitter, alcohol, cotton swabs, toothpicks and silicone glue. Before starting work, decide on the design. Transfer it to the mirror using carbon paper. Trace the design along the glass. Remove irregularities with alcohol. After the outline has dried, paint the pattern with stained glass paints, distributing them with a toothpick. The paints should dry for about 3 days. After this, the decor is complemented with glass beads or glitter.
Beads are used to decorate the mirror. Mark the future frame using masking tape. Apply silicone glue to the resulting border. Pour the beads onto the paper and spread it over the glue strip. Carefully remove the tape and let the work dry thoroughly.
The atmosphere of the interior can be changed by paying special attention to wall decoration. To do this, you only need rollers, paints and color. It is not necessary to paint the surface of all walls. Sometimes it is enough to highlight part of it. They decorate the walls in different ways: with paintings, with the help of panels, photos, natural materials, baguettes, paper butterflies, interesting hooks and other improvised materials.
This method of wall decor is considered the simplest. Stencils are made by hand from thick paper, whatman paper or plastic. Patterns can be found on the Internet. The stencil is pressed tightly against the wall and spray paint is applied.
Tip: apply paint in a thin layer so as not to smear the pattern and avoid smudges!


