The finish of the bathroom is subjected to severe tests of high humidity, temperature changes, insufficient air circulation, and therefore wears out faster than in other rooms.
In order not to carry out repairs every 5-7 years, wear-resistant and water-repellent finishing materials are used in the bathroom, in particular plastic ceiling panels. They allow you to quickly, inexpensively and beautifully sheathe the ceiling without leveling the surface and dismantling the old coating. In this article we will tell you how to make a plastic ceiling in the bathroom correctly and efficiently.
The ceiling in the bathroom of plastic panels is a suspended structure that includes a frame made of wood or metal and sheathing. Surface finishing in this way is carried out without preliminary dismantling of the old coating, leveling or other preparatory work, which can significantly reduce the repair time.

For filing, plastic canvases are used that have a hollow structure with internal stiffeners, the width of which is 25 cm and the length is 2.70 m. Finishing the ceiling in the bathroom with this material has the following advantages:
Note! Finishing the ceiling with plastic panels is considered a budget option that allows you to complete repairs in a matter of hours. However, with the help of this material, complex, figured multi-level structures are not made. Experienced craftsmen note that the seams between the canvases with this method of finishing will be visible even with professional installation.
To mount a plastic ceiling in the bathroom with your own hands, you will need guides from which the frame, plinth, profiles for connection and fastening, as well as the panels themselves are made. When buying, you need to choose high-quality panels that have sufficient thickness, since products in the lower price segment are often too thin, and therefore transmit light from the lamps. The device of a false ceiling made of plastic is carried out using the following components:

Important! Before you make a ceiling from panels in a sanitary room, you need to purchase all the necessary components. In addition to the starting profile, n-profile and corners, you will need metal guides to make the frame, the panels themselves, as well as self-tapping screws to install them correctly. Due to the high humidity in the bathroom, experienced craftsmen advise using galvanized fasteners that are resistant to corrosion.
Installation of plastic panels on the ceiling begins after the walls of the bathroom with ceramic tiles are completed. There are various methods for manufacturing suspended ceilings: some craftsmen install the frame directly on top of the tile, while others prefer to finish the last row of tiles 10-15 cm below the ceiling, and fix the guides above it. The second method of mounting panels is considered less convenient, however, it will reduce the risk of damage to the tile. Further, the finishing of ceilings with suspended panels is carried out in the following order:

Note! Before attaching plastic panels to the ceiling, you need to resolve the issue with wiring and lighting. Professional craftsmen advise combining installation with the installation of fixtures, since this technology will allow you to perform all work under lighting. In addition, paneling will help hide the wires, get a perfectly smooth, glossy surface.
No matter how the walls in the bathroom are decorated, they should be in harmony with the ceiling. Indeed, in the case when the ceiling is painted with ordinary paint, various types of pollution can form on it, which are sometimes difficult to wash off. Also, the bathroom only in modern apartments has a large volume, and in old houses - in this place you can only be alone. The correct design of the walls and ceiling will visually increase the area and give a small room convenience.
PVC panels are so easy to install and operate that most people prefer this way of decorating their bathroom ceiling. This material is not afraid of high temperatures and strong steam, does not corrode, does not become infected with a fungus.
Material on the options and technologies for decorating the ceiling in the bathroom will also be useful:
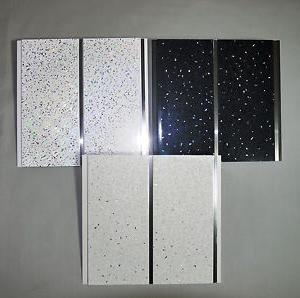
So many advantages in one type of material that I would like to immediately install it in my bathroom. At the same time, plastic panels are made in different colors, which allows you to choose the color of the ceiling in accordance with the overall range in the bath. In addition to standard plain panels, the plastic industry offers a range of models with various stains and inclusions.

When all the profiles are installed, the ceiling decoration begins with plastic, which I insert into the plinth guide and fasten with self-tapping screws to the profile guides. But before sheathing the ceiling, it is worth cutting all the panels to the required length.
In those panels in which the fixtures will be installed, make round holes using a special socket or cut them out with an ordinary knife.
After installing the panel with holes, it is necessary to tighten the lighting wires to these slots.

The last panel may be too wide for the remaining space, so it must be carefully cut along the entire length, the last fourth skirting board is attached to the cut and inserted into place. The plinth is glued to the wall using a universal tool such as liquid nails.
Fasteners for lamps are inserted into the holes for lighting, to which all wires are connected. Next, you just need to insert the necessary light bulbs and the ceiling is ready for use.
PVC ceiling panels on the ceiling look equally good with ceramic tiles, the same wall panels, self-adhesive film and other bathroom decoration materials. Before mounting the ceiling, it is necessary to put the walls and floor in order, since in the case of false ceilings, repairs do not start, as usual from above, but from the walls, moving first to the ceiling, and then to the floor in the bathroom.


In the bathroom, it is quite possible to make a stretch ceiling with your own hands. Laying out PVC panels and sheathing them is not difficult if you follow our recommendations. You can collect any ceilings, for example, mirrored, patterned or aquapanel. The choice is yours.


Finishing work with a ceiling surface using PVC panels has both advantages and disadvantages. Having knowledge of the strengths and weaknesses of the product will help you be prepared for unforeseen situations.
Let's start with the positives.


Despite the large number of positive aspects, PVC panels have some disadvantages.


Before proceeding with the sheathing of the ceiling with PVC panels, it is recommended to purchase all the necessary elements: frame rails, a profile and a specialized PVC cornice for the ceiling.
Choosing the right material, presented on the shelves of building stores in a wide range, can be a real test.
There is a classification of PVC panels, which takes into account the technological features of each type.


PVC panels are produced in different color shades. It all depends on your personal preferences and desires. You can easily choose the color you want for your bathroom to match your interior. There are plain and textured materials.


The PVC panel is made in different sizes. In most cases, the length of the plastic profile is 2.6 m, 2.7 m, 3 m. The width of the PVC panel is often standardized: 240 mm, 250 mm, 300 mm 320 mm, 375 mm. Regardless of the chosen length and width, the thickness of the panel always varies from 8 to 10 mm.
To calculate the required number of PVC panels, you first need to calculate the area of \u200b\u200bthe ceiling surface. To do this, measure all sides of the bathroom (length and width) and multiply the resulting parameters. Next, divide the area of the ceiling surface by the area of \u200b\u200bone unit of the product. You will find the parameters of the plastic panel on the label.


Before proceeding with the installation work, it is necessary to familiarize yourself with the required construction tools for working with PVC panels.
First of all, the assembly of the ceiling surface is carried out using:


Installing a ceiling surface made of PVC panels is a fairly easy process, while the possession of special building skills and knowledge is not required.


Let's go through the installation process step by step.
First you need to carry out preparatory activities before installing plastic panels in the bathroom. If there is any structure on the ceiling surface, it must be dismantled.
Achieving a flat ceiling surface is not required, since the ceiling will be hidden behind a plastic panel structure. However, if there are falling off sections of plaster on the ceiling, it is recommended to get rid of them. The cleaned ceiling surface needs to be treated with a deeper penetrating primer solution that will protect the ceiling from fungal deposits and mold. The primer is applied with a roller in several layers.


After the layer of soil has dried up, you can start marking. To do this, mark the location of the new PVC panel ceiling with a line. The setback from the surface of the old ceiling will depend on how you plan to use the space under the ceiling.


If this space is not used, the indentation will be 4-5 centimeters. And if the space involves the installation of lighting fixtures or the laying of communication systems, then an indent is made between the plastic panels and the ceiling in the bathroom with the amount you need. Using the building level, transfer the line of the new ceiling to all sides of the walls.


After successfully marking along the marked lines of the walls, UD is fixed - profiles of the format 2.5 cm by 2.5 cm. Dowels are used for fastening. Then, taking the ceiling profiles, insert them into the guides and fix them with self-tapping screws with press washers.
On a note! There is no need to pre-drill a hole in the ceiling profiles. Using a screwdriver to tighten self-tapping screws, the screws will perfectly fit into metal products, and the fasteners will be very durable.


If you plan to install recessed lighting fixtures in a PVC panel, you need to prepare the following items: wiring, terminal block, insulating tape and a switch.
When choosing a lighting device, it is recommended to give preference to those models whose power does not exceed 40 watts. Ignoring this, there is a possibility of overheating of the plastic panel, subsequent deformation and the occurrence of toxic fumes.
The wiring must be fixed in the areas of the future installation of the lighting fixture. At the intended point, we make a loop with a wire 10-14 centimeters long. For a more convenient and reliable fixing of the wiring on the frame structure, use the latches. It is not recommended to tighten tightly, as there is a risk of deforming the braid.


In order to make a hole, use a crown for wooden materials. A clear match of the diameter with the dimensional parameters of the luminaire is required, but not less than 4 mm of the front rings. Standard diameters include parameters from 58 mm to 74 mm. Due to the fact that the correction of the holes made is difficult, plan the installation site very carefully.


So, the final step will be the collection of PVC panels on the ceiling surface.
To successfully cope with this process, you must follow a simple algorithm.


The plastic ceiling in the bathroom is a practical solution for decorating this room. It allows not only to create an atmosphere of cleanliness and comfort, but also to make the bathroom truly modern and respectable. All these benefits can be obtained for relatively little money.
Plastic is a fairly durable and moisture resistant material. These two parameters determine all its main advantages. Bathroom - a room in which the level of humidity is periodically increased. Therefore, the main requirement for the finishing material is resistance to moisture. Plastic meets him fully.
In the bathroom, strong blows to the ceiling are unlikely, so there is no need to install high-strength cladding elements. Plastic will successfully cope with the mechanical impact of a household level, expressed in accidental blows with a hand or some object.
Another advantage of such a ceiling is the simplicity and ease of maintenance. The glossy surface of the plastic is fogged and moistened under the influence of steam, so small particles of perfume or cosmetics, cleaning products, dust and dirt rising up can settle on it. In order to get rid of stains, it is enough to wipe the plastic ceiling with a dry or damp cloth.
These designs are also good because they can be quickly and easily mounted. The light weight of the plastic ensures the convenience of work, pliability for processing does not require powerful and expensive tools.
There are several options for installing a plastic ceiling in the bathroom. For this purpose, you can use the following materials:
In order to choose the most suitable material in a particular case, it is recommended to familiarize yourself with the features, pros and cons of each.
| Material Features | PVC panels | Plastic lining | Plastic slats |
|---|---|---|---|
| Color palette | All shades of primary colors, a wide range of patterns | Predominantly natural wood imitation and solid colors | plain |
| Surface type | Flat, matte, glossy | Flat and embossed, matte and glossy | flat, glossy |
| Type of panel connection | tenon groove | tenon groove | Gapless and gapless connection |
All these materials require a frame device, but in each case there are some nuances of its installation and assembly. Step-by-step instructions for their installation will help to understand the features of the device of plastic ceilings.
plastic lining for the bathroom
Materials:
Instruments:
The use of a metal profile for a frame device is irrational for the reason that it is unstable to moisture. Therefore, in places of scratches and dents, corrosion may appear. Wooden blocks are able to absorb moisture, but are "breathable" material, so excess water evaporates. In order to ensure the protection of wood, it must be coated with a special impregnation that increases the degree of moisture resistance of this material.
If the installation of recessed luminaires is planned, the distance from the base surface should exceed the height of the luminaire body by 2-3 cm.
Step 1. Marking the level of a suspended plastic ceiling.
At this stage of work, it is necessary to draw even horizontal lines along the perimeter of the walls, retreating the distance required for installing fixtures from the base ceiling.
An important point: if the walls of the bathroom are tiled, you do not need to mark the level of the false ceiling. It is necessary to focus on the line of the upper edge of the tile. Otherwise, visual defects such as a skewed ceiling or plaster gaps between it and the tile are possible.
Step 2. Preparing wooden blocks for installation on walls.
Step 3. Forming holes in the walls of the bathroom.
Wooden bars are applied to the walls and holes are drilled for dowels. The most convenient way to do this is with a puncher and a drill with a diameter of 6 mm.
If the ceiling level line runs along the tile, holes are drilled in the tile joints. They do it like this:
Step 4 Installing the dowels.
With the help of light hammer blows, dowels are driven through wooden blocks.
Step 5. Installation of wooden bars.
Self-tapping screws are screwed into the dowels, thereby fixing the bars to the walls of the bathroom.
Step 6. Installation of longitudinal beams.
For the device of the frame, it is necessary to install crossbars located along the long walls of the room. Depending on the width of the bathroom, you will need from 2 bars. The crossbars are installed at a distance of 40-50 cm from each other. Their ends are laid directly on the wall bars.
Step 7. Installation of transverse auxiliary bars.
On the walls opposite the longitudinal beams, segments of bars 20-25 cm long are attached. They should be located at a distance of 50-60 cm from each other. These bars with one of their ends should rest on wall guides.
Step 8. Mounting the cross beams.
Bars of the same section are attached to the auxiliary bars from below. They form the cross beams of the frame. If the area of \u200b\u200bthe room is large, the intersections of the frame beams are reinforced with metal corners.
Wooden crate - photo
Step 9. Installation of the starting profile.
With the help of a stapler and steel brackets, the starting profile is attached to the wall guides so that a long profile shelf adjoins directly to the bars. Thus, three walls are sheathed. The fourth should remain without a profile. And this should be one of the walls towards which PVC panels will be installed. This precaution is due to the fact that the last (fourth) starting profile will be fixed together with the last panel. This will ensure a neat appearance of the plastic ceiling.
Step 10 Trimming the first panel.
Before installing the first panel, its narrow front lock strip is cut off from it. This process can be done in two ways:
Step 11. Cutting plastic panels.
Procedure:
Step 12. Installing the first panel.
The panel is brought into the starting profile so that its part completely enters the recess of the bar. If the panel is long, it must be supported to prevent sagging. If this is necessary, it is recommended to invite an assistant.
Step 13 Attaching the First Panel.
The first PVC panel is attached to the frame at its intersection with wooden blocks. This task is performed using a battery-powered screwdriver and wood screws 2-2.5 cm long.
It is not recommended to use a stapler and staples to fix the panels. The reason is that the panel is a relatively hollow material with rather soft stiffeners. Therefore, when fastened with a stapler, dents and cracks may appear on it.
Step 13. Drilling holes for the fixtures.
Procedure:
If it is not possible to use a crown, holes can be cut with a screwdriver and a thin drill. In this case, put the lamp on the panel and draw it. Turn on the tool, insert the drill into the inner part of the circle, lead the drill along the pencil line. In this way, a cut with relatively uneven edges is obtained. But do not worry: they will be covered by the decorative lower part of the lamp.
Step 14. Connecting recessed fixtures to electrical wiring(performed at the final stage of the panel set).
Step 15 Mounting the last panel.
Plastic ceiling in the form of a blue sky with clouds
Installation of a ceiling made of plastic lining is in many ways similar to assembling a ceiling made of PVC panels. But since the lining is considered a heavier material, they mount not a wooden frame, but a metal frame.
In this regard, the relevant requirements for a set of tools: it must contain metal shears for cutting a metal profile. As a wall profile, guides PN 28/27 are used, for the base of the frame - a ceiling profile PP 60/27. The slats of the frame are attached to the base ceiling with the help of suspensions - thin metal plates with perforations along the edges.
Correct cutting of metal profile:
After cutting the strips, do the following:
Proceed to the installation of suspensions:
Suspended ceiling in the bathroom
Installing a slatted ceiling is a quick and effective way to design a bathroom. Most manufacturers of this finishing material offer ready-made kits for rooms of standard sizes. For example, 1.7x1.7 m and 1.35x0.9 m. If the bathroom has other dimensions, they will need to be reported to the seller of the outlet, who will select the optimal configuration for the rack ceiling.
But the first thing to do is to decide on the appearance of the finish. The fact is that manufacturers offer two types of rack ceilings: closed (slotless) and open (slotted) type. Thanks to the "speaking" names of these options for the ceiling device, it is easy to understand that in the first case the canvas will be continuous, in the second - with gaps between the panels.
Another nuance: you need to choose the design of the panels. The most popular are French and German. They differ in the profile of the panels. In French it is rounded, in German it is strictly rectangular. Therefore, when choosing a French design and a closed installation method, small indentations will be noticeable on the ceiling. Due to the play of light and shadow, they will give it a special appeal. If you need a strict and concise design, you need to choose German.
The rack ceiling frame is mounted not from wooden bars and metal profiles, but with the help of components:
The installation of a rack ceiling is carried out by going through all the steps in turn, listed in the instructions for installing a plastic ceiling made of PVC panels. The assembly of the rails is carried out not in the same way as in the case of PVC panels and clapboard (by the “thorn-groove” fixing method), but by snapping into special recesses in the frame slats (stringers). Docking panels along the length is carried out using an H-shaped profile.
Rack ceiling - photo
The ceiling in the bathroom of plastic panels is considered the fastest way to finish. It is outwardly attractive, allows you to hide defects and disguise ceiling communications. Next, we will analyze the advantages of the material. The article will also describe how to make plastic panels with your own hands.
The material used for the production of panels is environmentally friendly. It does not emit or absorb unpleasant odors. The ceiling in the plastic bathroom has a glossy smooth surface. It is convenient to take care of it - just wipe it with a damp cloth and ordinary detergents. In addition, various lamps can be built into the surface. Additionally, the ceiling in the bathroom of plastic panels can be decorated with a plinth.
It should be noted that for finishing there are two types of coating:
The second option is more suitable for decorating a country-style room. But in a high-tech interior, a seamless coating looks better. When installing, the joints will be practically invisible.
Before you make a plastic ceiling in the bathroom with your own hands, you need to determine the right amount of consumables. The panels are available in various lengths and widths. However, there is also a popular size. The most common panels are 25 cm wide and 4 meters long. To calculate the amount of material, the surface area must be calculated. To do this, measure the width and length of the room. The resulting values are multiplied. Add 10% to the result. This margin is needed to compensate for the material to fit the size.

The ceiling in the bathroom made of plastic panels is installed on a pre-fixed frame. It can be made from or a metal profile. If the first option is used, then softwood is used. The elements of the crate must be well dried and treated with moisture-resistant compounds and antiseptics. If the timber is wet, then over time it will deform. Experienced experts do not recommend using wood for crates. The ceiling in the bathroom made of plastic panels is best mounted on a metal profile. Such a crate is not subject to deformation and will create a more rigid and durable foundation. The fixation of the elements is carried out similarly to the installation of a drywall frame. Pre-marking is done using a hydraulic level.

On the starting harness, the beam is fastened along the perimeter. In this regard, the first value is the actual perimeter of the room plus 3%. The load-bearing elements are located along a long wall 30 cm from the walls and in increments of 60 cm. All elements of the crate are fixed with self-tapping screws and dowels. The fastening of wooden bars is carried out in increments of 30-40 cm. If the length of the rail is divided by this distance, then the number of self-tapping screws can be calculated. Another 3% should be added to the resulting number (for marriage). The fastening of the panels themselves to the crate is carried out with galvanized self-tapping screws (25 mm long) with a press washer. The recommended number of fixing elements is about 200 (based on 16 m 2).
Fastening of plastic panels is made in a special PVC profile with a guide groove. You will also need a ceiling (starting) plinth. Its quantity is equal to the perimeter of the room plus 5%. These elements are of two types. The first option is a combined and starting profile. The second is a rail with a groove for installing a separate skirting board.
Installation of the coating is carried out in a strictly horizontal plane. In this regard, it is necessary to pre-markup. To do this, use a water or laser level. After the markup is ready, the fastening of the elements of the crate along the perimeter begins. Dowels are used to fix the beam. They are fixed in pre-drilled holes with a perforator. The beam is fixed in increments of 30-40 cm. 30 centimeters should be retreated from the wall element, and the supporting element is fixed parallel to it on the ceiling. The next beam is fixed after 60 cm. 30 centimeters must also be retreated from the opposite wall.
Before you make the ceiling in the bathroom of plastic panels, you should mark and make holes for lighting fixtures. In addition, the wiring should be laid along the crate. Next is installed for the lamp. Before you make the ceiling in the bathroom of plastic panels, you need to check the performance of all electrics. All wires must be properly insulated.

A PVC profile is fixed on the beam fixed around the perimeter. For this, the fastening pitch is used - 30 cm. For a smooth joining of the profile, it must be cut correctly. For this, a joiner's miter box is used. With this tool, the element can be cut strictly at an angle of 45 degrees. When sheathing the ceiling in the bathroom from plastic panels, the elements are adjusted to the required size. To cut the desired length, use a knife and a building corner. Mark a line with a pencil, draw along the front side with a blade and break the panel. The first plate is installed with a spike towards the wall. The element is fixed with self-tapping screws with press washers to the lathing bars. It is preliminary recommended to cut the spike with a knife. The next fitted panel is inserted into the groove of the first and gently tapped until it is fully seated in place. Subsequent elements are installed in the same way. The only thing to remember is that a hole is pre-drilled in the panels for the lamps. When installing the last element, trimming will have to be done not only in length, but also in width.

When using mortise fixtures, the wiring for them is bred immediately after. When choosing lighting lamps, it should be noted that PVC is a fusible material, so heating it over 60 degrees is highly undesirable. When installing a ceiling made of plastic panels in the bathroom with your own hands, you should choose halogen lamps up to 35 W or incandescent lamps up to 60 W. When laying the coating, the elements in which the fixtures will be installed are first tried on to the surface. They mark the location of the lamp. Then a hole is cut out and a lamp is inserted. Next, the panel is installed in place. 1mm copper wire can be used for wiring. A terminal block is used to connect the joints. It will be indispensable in the case when different wires are used. Over time, they can oxidize. To prevent this, a terminal block is used. All wiring is displayed in a box installed in the wall.

The second and subsequent tiers of the ceiling are assembled in the same way as the first. Panels are also cut along the profile line that limits the second level. The vertical section separating the tiers is closed by a strip cut from the panel. From below, at the height transition, the corner of the ceiling is masked by a decorative element, and from above by a baguette.
If it is supposed to use a wide foam plinth as a edging, you can not fix the profile around the perimeter. If a metal crate is used, then the strength of its fastening only on suspensions will be enough to withstand the relatively small weight of the panels. In general, a person who does not have much experience in finishing can install a plastic ceiling with his own hands.


.jpg)


