In order for vegetation to grow and develop normally, it needs moisture. However, the weather conditions are often not pleasant with their surprises - scorching sunny days are replaced by torrential rains. Doing drip irrigation with your own hands is one of the best options for organizing an irrigation system in a suburban area.
This is a solution with numerous advantages. Do-it-yourself drip irrigation for a summer residence does not require the regular presence of a person, which is very important for those who travel out of town exclusively on weekends. Therefore, many owners of suburban areas are interested in the question of how to do it?
A person who does not have special knowledge and experience can create drip irrigation with their own hands for a summer residence. This system is very economical and has earned many positive reviews due to its undeniable advantages:
After the drip irrigation system was invented, it gained great popularity. At first, the main branch of its application was greenhouse farming, and then open soil where vegetables and fruits are grown. This system is also used in viticulture.
A modern drip irrigation device is a flexible hose into which droppers are mounted. Droppers help to even out the moisture supply around the entire perimeter. This hose is installed on the surface of the earth. In some cases, it is buried in the soil along the entire required irrigation perimeter. Today, drip systems are presented on the market in a wide range.
It will also not be a problem to create drip irrigation for your dacha with your own hands. However, the drip irrigation device, despite the differences in different models, has no fundamental differences. It consists of the following mandatory elements:

A drip irrigation scheme is an extensive water supply network that supplies moisture to the root systems of plants. The drip irrigation scheme is very simple - first, it is supplied from a well, lake, water pipe or other source of water to the water intake unit, and then, through main pipes and drip tubes, it moves directly to the roots of the plants. Drip irrigation, compared to conventional irrigation, does not disturb the natural structure of the soil. Plants will not get burned even with excessive sun activity, which is caused by moisture getting on the leaves.

You can create a similar scheme both in a greenhouse and in open ground. You should do drip irrigation in a greenhouse with your own hands in order to provide plants that are not provided with precipitation with the necessary amount of moisture. Lack of water will lead to their death. Do-it-yourself drip irrigation in a greenhouse is a significant help for a person who does not have the opportunity to constantly care for cultivated plants.
After you create drip irrigation in a greenhouse with your own hands, you will notice a significant increase in plant productivity, the incidence of plant diseases will decrease, and their appearance will improve. This will provide you with economical water consumption. In this case, excessive moistening of the surface layer of soil will not occur, with normal moistening of the deeper layers. Each plant will receive water in the required quantity.
The design of a modern drip system can be automatic - this allows you to determine the exact dosage for each plant and will facilitate the organization of fractional watering. The circuit can be equipped with connected rain sensors - if it rains in sufficient quantities, water will not be supplied.
Automatic elements allow you to determine convenient conditions for turning on irrigation, for example, at night, when a sufficient amount of water is collected in the water supply system or well. The fairly high price of automatic elements is justified by the numerous advantages of such a scheme - it absolutely does not require human participation, so you can leave the dacha for a fairly long period of time.

Even a novice summer resident can create drip irrigation himself. Some components should be purchased in specialized shopping centers. When choosing distribution pipes, you must first determine their exact suitable length and diameter. This should be decided based on the planned water flow and a suitable irrigation scheme.
However, when doing drip irrigation yourself, it is better to choose the simplest possible scheme, with a minimum number of branches and components. Since each element that is part of this system represents a kind of blocking zone, which leads to the accumulation of dirt.
Creating drip irrigation yourself is a fairly simple task. It is enough to create a simple plumbing system, since its excessive complexity will lead to difficult movement of water and will require frequent repairs.
In various shopping centers and stores you can purchase all the necessary elements to create such a structure. They have a wide price range. The cost of a specific component is determined by its quality, materials used to create it, operational and technical characteristics.

How to make drip irrigation with your own hands from scrap materials? It is possible to use various plastic pipes or flexible hoses, however, certain conditions must be met:
To create a reliable, convenient and effective drip irrigation system, flexible soft medical hoses are suitable. The diameter of the main hose should be 1-2 centimeters. It is also possible to use used medical systems with thick needles (for containers with solution) as hoses. Half-meter-sized tubes that fit over the needles are also useful. The needles are inserted diagonally into the main hose - and the irrigation system is ready.

Clogging of such droppers occurs quite rarely, and they are very convenient to clean. This system has the only drawback - it quickly becomes overgrown with algae, subject to direct sunlight. However, this drawback can be easily corrected - the structure can be covered with black material that does not allow sunlight to pass through.
Before starting installation, you should mark out the planting plan, determining the duration of each bed and the gap between them. If all the plants on the site are evenly distributed, you can create a structure based on the finished plantings and the space between them. The tubes are cut into pieces of suitable length and connected into a single system. It is better to place the tubes with a slight slope, adding strength to the structure using pegs.
The length of the line should not be too long, and should be approximately 6-8 meters. Holes are punched in suitable places where tubes and needles are inserted. After installation is complete, the system should be tested under high pressure conditions. You also need to check how quickly the water flows out. The speed is adjusted by changing the inclination of the hoses.
To prevent frequent clogging, a filter should be placed on the hose. In its role, you can use foam rubber, which is easily removed and washed. To prevent direct sunlight from causing algae to grow, a lid covers the water tank and foil covers the tubes.

The DIY drip irrigation system comes in two main varieties. The most popular is the do-it-yourself drip irrigation system, which is based on drip tubes or drip tapes. The drip tube is made of polyethylene, its diameter can reach 20 millimeters, and the wall can be two millimeters thick. The droppers are connected to the tubes externally or internally.
The material used for making drip tapes is also polyethylene. They roll up into a tube and connect under the influence of temperature. The role of droppers is played by miniature holes that remain after the connection, or are made on the outside. Such tapes have a thickness of up to 300 microns. A suitable do-it-yourself drip irrigation system is selected based on individual preferences, capabilities and requirements, the size of the irrigated area and the types of crops.
The drip tube system is designed for high pressure and long-term use. Similar systems are used to irrigate orchards and vineyards, as well as in landscape design. They allow you to supply water over long distances, and are capable of supplying up to 2 liters of water within an hour. For the winter, such a structure can be disassembled and reassembled in the spring.
Drip tape systems are designed for use in low pressure conditions and are used to water vegetable crops in garden beds. Such a system consumes water according to certain standards. Some models have adjustable water supply intensity.

Drip irrigation from a barrel supplies water using gravity; the water intake tank supplies it by gravity. Instead of a barrel, you can use any type of container filled with a network plumbing system or a natural water source. Drip irrigation from a barrel can also be provided by rainwater.
Drip irrigation from a barrel can become clogged with algae, plankton or suspended particles, as well as the result of corrosive processes. Therefore, the material used to manufacture the barrel must be a material that is not susceptible to corrosive or destructive processes. It can be a material of synthetic origin, plastic, galvanized iron. The barrel must be covered to prevent leaves, debris or dust from falling into it.

The volume of the barrel should be selected based on individual requirements and the general need of the vegetation of the site for water. So that the system is able to irrigate the garden, and there is no need to constantly replenish moisture reserves. The process of water supply must be continuous.

It is better to place the barrel at a height of 1 to 2 meters above the ground to ensure suitable pressure. The water should be as clean as possible. The drain hole should be located approximately 10 cm from the bottom to prevent accumulated sediment from entering the hose. Any type of filtration element is suitable for this design. The filter must be washed regularly. Droppers designed for use in low pressure environments should be used. Drip irrigation for a greenhouse from a barrel is the best option.
When creating drip irrigation for a greenhouse from a barrel, you should start by installing a submersible pump with a power capable of supplying water along the entire perimeter of the site. To remove the tube, you can drill a special hole in the lid or in the bottom of the barrel. The sealant and sealant are placed here. The main pipe around the perimeter of the greenhouse is routed with a fitting. Each pipe or hose is equipped with a plug. The design can be supplemented with various automatic, electronic or mechanical elements, such as a timer.

Do-it-yourself drip irrigation from plastic bottles is a solution that is very popular due to its many advantages. One of its main advantages is its simple device - a bottle made of plastic is dug around each plant. Small holes are made in it. The bottle is filled with water, it gradually seeps through the holes made. Thus, the root system of plants is evenly supplied with moisture.
Creating drip irrigation from plastic bottles with your own hands requires minimal financial costs, since empty plastic bottles can be bought for a completely symbolic price, or found at home at home or in your neighbors. Also, its arrangement is simple. This does not require special knowledge or skills. Anyone can create drip irrigation from bottles with their own hands. Its creation will greatly simplify caring for plants in a greenhouse. You can safely leave the area for quite a long time.

Another advantage of the decision to make drip irrigation from bottles with your own hands is the autonomous operation of the system. Unlike other systems, it does not require a water tank - just fill the bottles with water. Thus, the question of how to make drip irrigation in a greenhouse is solved very quickly and simply.
In addition, the plants are irrigated with water corresponding to the air temperature in the greenhouse. This helps to improve the condition and increase the yield of various crops. If any element of the system fails, it is very easy to replace it with a new one - to do this, you just need to dig out the bottle and replace it with a new one.
Compared to using conventional metal pipes, DIY drip irrigation using polypropylene pipes has numerous advantages. They are light in weight. Such drip irrigation can be done with minimal financial costs.
The internal walls of such pipes are almost completely free of various deposits. Pipes made of polypropylene can last more than half a century. They are suitable for constant intensive use and are resistant to condensation. Installation of such a system is simple.

When looking for an answer to the question of how to make drip irrigation in a greenhouse, people often make mistakes at the design stage, as well as during operation:

The following tips will help you understand how to make drip irrigation in a greenhouse as efficient as possible:

In order for plants to thrive in the garden or greenhouse, they need to be provided with good lighting and proper, even watering. Therefore, every gardener tries to create the most comfortable conditions for all representatives of the flora that grow on the site. And if everything is more or less clear, then what about watering? You've probably heard more than once that simply pouring water from a hose is harmful to plants. That is why many people are thinking about a more gentle type of moisture supply to crops. A do-it-yourself drip irrigation system is quite simple to make, but there are a huge number of advantages from using it.
What is drip irrigation, how to turn it into a “system” and what advantages can it have? Before we answer these questions, let’s figure out why heavy watering with a hose is so harmful to plants. Most people are even willing to water the plantings manually from jars rather than use a hose.

And all because:

These are the main reasons why many gardeners are increasingly thinking about installing a drip irrigation system in their summer cottage. Drip irrigation is truly a win-win option for both greenhouses and open ground. It is a system of water hoses, which are connected at one end to a reservoir of water, and with many other ends of the branches dug into the ground right next to the root system of each plant individually. That is, many thin hoses are necessarily diverted from the main, main one, and each goes to a separate plant.

On a note! Such a system can be equipped for absolutely any crop. But most often, summer residents provide drip irrigation for peppers and other, more capricious plants.

As a rule, such a system cannot be universal for every garden. Typically, a separate drip irrigation plan is drawn up for each site. It will indicate all the plantings that need a gentle supply of water, and all hoses will be laid in accordance with this plan. This is probably the main drawback of the drip irrigation system - you can’t just go to the store and buy the first kit you come across for installing this device. By the way, that’s why many people do everything with their own hands.


On a note! It was with the help of the drip irrigation system that it was once possible to turn dried-up Israel into a blooming oasis, in which gardening is now widely developed. So drip irrigation is time-tested.
Most likely, after reading the beginning of the article, you are inspired and are already thinking about going to the store for a drip irrigation system. But don’t rush: first, first you need to draw up an irrigation plan and use it to calculate how many meters of hoses you will need. And secondly, drip irrigation is faster and easier to do with your own hands.

drip irrigation system
Knowing the basic principle of operation of a drip irrigation system, it will not be difficult for an imaginative gardener to come up with what this device can be made of. The system typically consists of a large water tank mounted on an elevated surface. A long main hose is connected to it in the lower part using taps, to which, in accordance with the irrigation scheme, hoses with a smaller cross-section are connected through fittings. And the ends of small water conduits are dug directly under the root of each plant or fixed so that the moisture from them drips directly along the stem onto the ground.

On a note! It’s good if you take care of the presence of a filter in the irrigation system. The fact is that various debris can get into the water (if the tank is open), which will quickly render the hoses unusable by clogging them. Everything will have to be redone to make the system work again.

This is what a drip irrigation system looks like. It can be complicated and equipped with a controller, or, conversely, simplified.
Table. Ideas for a DIY Drip Irrigation System.
| Material | Description |
|---|---|
| The most familiar and understandable way. You will need a thick watering hose and thin water conduits with a diameter approximately the same as the air supply hose of a conventional pump for wheels and balls. The entire system is connected, as in the case of industrial installation, using fittings. |
| There can be two scenarios here - the bottles can be hung near the plants or dug into the ground. In the first case, they are equipped with droppers, in the second, a lot of holes are made in them, and the upper part is cut off. The system is inconvenient because you have to add water to the bottles. |
| It is very easy to make drip irrigation from this material. Droppers are an affordable material; they can be purchased at a pharmacy or asked from a medical professional you know. |
The device looks like this: a plastic bottle with small diameter holes is dug in near each individual plant in the greenhouse. The bottle is filled with water, which seeps through small holes and nourishes the roots of the plants.
There are also many modifications of the listed ideas that can be improved or, conversely, simplified. Let's consider creating a drip irrigation system from ordinary medical droppers.

Where does the installation of an irrigation system begin? And it begins with developing an irrigation scheme and acquiring the necessary materials. The plan should reflect the complete layout of your site, and not just show the location of the house and greenhouse, but also show all the garden plantings. But this is the case if you decide to equip your entire garden with a drip irrigation system. To equip an irrigation system for a small plot - for example, three strawberry beds - it will be enough to draw up a detailed diagram of these same beds. The diagram also indicates the location where the water tank will be installed.

On a note! Try to transfer the most accurate dimensions to the drawing - this will simplify the calculation of the amount of materials needed. Measure everything with a tape measure.

Materials needed to make a drip irrigation system:
On a note! The water tank must be located at a certain height, so you should immediately take care of the presence of a stand for it. The optimal height for raising the tank is 2-2.5 meters.

So, the materials have been purchased, plans have been drawn up - it’s time to start making a drip irrigation system from drippers.
Step 1. It is necessary to make a hole for water outlet in the tank. To do this, cut a hole for the ball valve a few centimeters from the bottom of the tank and install the latter using seals and a coupling so that water does not leak out.

On a note! If you plan to install a filter in your system, it is best to install it at the water outlet from the tank so that all debris that gets into the water does not clog the tap and hoses. Instead of a filter, you can use a piece of foam rubber, but it will need to be changed regularly.
Step 2. In the hoses that will be located between the bushes, we make holes of such a diameter that the ends of the droppers will be held inside. The number of holes will be equal to the number of plants being watered.

Step 3. We connect the main main hose to the tap, to which, according to the diagram, we also connect those that will be located between the rows of bushes. The connection is made using splitter fittings.

Step 4. We stretch the hose system and lay it between the rows.

Step 5. We close the ends of the main hoses with plugs to prevent water from spilling out.

Step 6. We remove the needles from medical droppers, leaving the rubber tips in place.
Step 9 Open the tap and allow water to enter the system.
Step 10 Using a regulator with a wheel on the droppers, we control the flow of water, adjusting the intensity.


On a note! Be sure to cover the water tank with something from the sun's rays to prevent the water from blooming. Otherwise, microalgae will grow in the tank, which will quickly contaminate the filter.
You are convinced that making a drip irrigation system yourself is not difficult. How much cheaper it is than buying a ready-made one remains an open question. This will be easy for those who have medical workers in the family or people who can buy IVs at a discounted or wholesale price. Otherwise, the system may turn out to be quite expensive.

And finally, I would like to give some tips on using drip irrigation that will extend its service life and make it easier for you to use.

Now you fully understand what drip irrigation is, why it is needed, and how to assemble it from ordinary droppers. The system is not complicated, but very functional. That is why do not waste your time now, so as not to run around with buckets later.
By installing drip irrigation with your own hands, you can significantly speed up ripening and get a wonderful harvest of vegetables, berries, fruits, and significantly save money. Every gardener knows the benefits of moisturizing the roots of a plant. A self-created drip irrigation system will ensure uniform distribution of water and fertilizer to all plantings on the site.
There are several types of self-assembly of this kind of structures. It is enough to familiarize yourself with them and make a choice of the appropriate option for a particular area.
For those who want to install drip irrigation on their own and want to save money, it will be enough to purchase only the necessary components or select analogues from improvised means, without spending a penny on parts, depending on the structure being installed, since there are several types of irrigation systems.
Before you begin to independently install a structure for drip humidification of something, you need to take into account the volume of water reserves in the bucket; it should be enough to fully charge the siphon.
The siphon is a vertical arc-shaped pipe installed in such a way that one end is open to transmit water and is immersed in a tank of water, and the other end is connected to the pipeline of this irrigation system. The height of the siphon depends on the volume of the tank and the water intended for watering the plants.
Through the siphon, water is driven by the last portion of liquid raised from the bucket to the upper level of the siphon.

The photo shows how the liquid from the tank flows through the irrigation water supply until the levels in the tank and at the end of the siphon are equal. You can regulate the speed of water supply to the tank using a tap.
From the tank, the liquid enters the distribution system, which consists of hoses, a watering pipeline with a certain size of holes for spraying water.
During the installation of drip irrigation, you can form different shapes, for example, ring shapes for irrigating shrubs or trees. Simple rectangular systems for watering beds are made from ordinary pipes.

To regulate watering, a special subsystem design is used, which consists of a rain valve, a lever, a pusher, a tank cover and a spring.
In order for the valve to work, it is necessary to carefully make a special recess on the tank lid, where rainwater will collect, which will act as a load at a certain moment.
To fit onto the pins of the tank cover, holes are drilled along its edges.
The recess on the lid should be of such a size that, on the one hand, the weight of the collected rainwater is sufficient to close the valve, and on the other hand, so that after the rain, when the water evaporates, which is about a day later, the lid can be lifted by a spring, and the valve was able to reopen.

In the process of installing a drip irrigation system, it is necessary to correctly attach the pusher, the upper end of which should be attached to the tank lid, and the lower end to the lever.
An emergency subsystem cup is installed on the pusher. The principle of creation and operation of a rain valve is similar to the function of a float valve in a sanitary cistern.
It is known that the rate of moisture extraction from the soil depends on the depth of the root system relative to the ground surface.
The deeper the roots are, the lower the rate of water being extracted. Experience shows that roots extract at least 40% of precious moisture from the upper layers of the soil.

Plants with the most developed surface roots may die during drought. The main number of roots are located in the soil layers at a depth of 20-25 cm.
When installing your own drip irrigation system design, it is necessary to take into account the peculiarities of planting and growth of the root systems of grown plants.

The emergency subsystem mechanism includes a cup and an emergency drain valve. After filling the tank with water, the glass is filled, which should close the valve, which in turn will block the flow of water into the tank.
The valve should open from water pressure after its level rises above the top edge of the glass.
When making calculations with your own hands, it is necessary to take into account the value of the given pressure, and with the help of a spring and a fitting, create a certain force in the rod. If the set pressure limit is exceeded, the rod moves to the right.
The operating principle is as follows:
At the moment when the ball retainer moves to the side up to the annular groove, the balls fall into this groove under the influence of the spring, thereby fixing the rod and opening the way for fluid to enter the distribution network through the valve.
In the video you can see the stages of installing drip irrigation for your dacha with your own hands.
You can create an automated drip irrigation system thanks to a simple scheme, with the help of which at a given time every day, without human intervention, the irrigation system will start and turn off.
In this drip irrigation design, a hose with through holes is connected to the pump. These holes in the hose can be made with a hot awl. Through such holes, water will be distributed freely and it will not be afraid of congestion. The distance between the holes should be within 30-35 cm of each other. A hose with holes made according to the design is laid across the area. To avoid clogging, it is necessary to place pieces of boards in several places.
To set the system startup time, the pump power must be taken into account. The data is recorded using a circuit to automatically start the pump. This type of drip irrigation system will allow the owner to visit the dacha only once a week, since the irrigation of the beds will be carried out independently by this design.
This drip irrigation option is beneficial for lawn grass. After all, its root system is located at a depth of about 15 cm and in the heat, constant watering of lawns is necessary, otherwise there is a possibility of the top layer of soil drying out quickly, which leads to the death of plants. And the costs of a new lawn are quite high. Using the example of lawn grass, which is most susceptible to the harmful effects of wind and sun, it is clear where the soil dries out most quickly, and the benefits of regular and systematic watering are visible.
It is known from practice that with an economical supply, it may happen that all the water flows out in the first sections of the system, but may not reach the outer sections.
And in the case of strong pressure of water pumped from a well, there may be an overconsumption of it, and as a result, waterlogging of the soil. This problem can be solved by purchasing a special dispenser in the store or making a similar dispenser with your own hands from an ordinary plastic bottle, using the principle of the toilet flush system and connecting it at the junction of the distribution pipes with the liquid supply point. Using this device, you can regulate the rate of water supply both to the beds and to individual plants.
An important role in the irrigation system is played by drippers that are installed on water supply pipes, since through them water is supplied to the root system of plants.

To save money when creating a drip irrigation system with your own hands, you can use plastic elements from medical blood transfusion systems as droppers for irrigation.
COMPLETE GUIDE
on design
automatic watering systems.
This manual describes in detail the design methodology for modern automatic lawn watering systems and modern landscapes. Using this technique, you can design and assemble an automatic watering system using equipment from any of the world's famous brands: Hunter, Rain Bird, Irritrol, K-Rain.
Stages of work on the project
INTRODUCTION TO AUTO WATERING

The automatic watering system is designed to provide accurate and timely watering of the lawn without human intervention. Executive watering devices are sprinklers, which are located underground in a folded state. During irrigation, the working parts of the sprinklers move to the surface under the influence of water pressure. The irrigation mode is monitored by a controller, according to the program of which the valves of individual watering zones open. The water pressure is created by a pump, in front of which a storage tank is installed. The container is filled from the water supply and the level is maintained automatically. The automatic watering system also includes drip irrigation, which is used for watering shrubs, flower beds, as well as in beds and greenhouses. The automatic watering system includes a network of hydrants (water outlets) for connecting hoses.

Sprinklers

The main equipment in automatic irrigation systems are sprinklers. There are two main types of sprinklers: rotors And static sprinklers.
Rotors
The rotors are watered with one powerful jet and their main advantage is range. However, a single powerful jet from a rotor can damage flowers and other delicate plants, so rotors are used for watering open lawn areas.
Each rotor includes 8-10 so that you can select the required irrigation radius.
Static sprinklers.
Static sprinklers are the most popular type of equipment in automatic irrigation systems. With their help, both the lawn and all other types of plantings are watered. Static sprinklers have threads at the end of the extension rod through which removable nozzles are screwed in.
Injectors are divided into two main types:
- fan(slotted)
- rotators(multi-jet with rotation)
The nozzle lines allow you to select the desired nozzle according to the irrigation radius from 1.5 to 11 m and across the sector from 0 to 360 o. Static sprinkler nozzles are used to water any type of plant and lawn.
All manufacturers produce sprinklers and nozzles with the same threads, so a nozzle from one manufacturer can be used with sprinklers (housings) from another manufacturer.


All sprinklers for automatic irrigation systems have an internal moving part - a rod. Under water pressure (1.5 - 4 atm), the inside of the sprinkler extends and water comes out through the nozzle.
Site plan
|
Before you begin the calculations, you need to create a drawing of the site, where all buildings and landscaping areas must be displayed with sufficient accuracy. You can create such a drawing yourself and all you need is a sheet of paper, a pencil, a ruler and a tape measure. Instead of paper, you can use something more convenient for work."graph paper" is a special paper for drawings, lined every millimeter. You can buy it in stationery stores or print out a lined sheet. You need to select a scale for transferring dimensions - this is the ratio of the real size to the size in the drawing. For example, 1 centimeter on paper will be equal to 1 real meter on the site. |
Measurements are taken from baselines, which allows you to minimize errors in the drawing. The base lines should be the two perpendicular longest sides of the site. All dimensions are taken from the base lines.In extreme cases, when access to baselines is difficult, measurements are taken from opposite sides of the site or from nearby objects.

In the sketch, depict all buildings, trees and groups of plants and also indicate their sizes. Determine areas with sprinkler and drip irrigation and proceed to selecting sprinklers.
Each subsequent sprinkler is placed at a radius distance from the previous one. This is done in order to eliminate uneven precipitation, because... The precipitation pattern of a single sprinkler is uneven - the further away from the sprinkler, the more precipitation. .

You should also take into account the fact that plants are an obstacle to the flow of water and create some “shadows”. In this case, it is necessary to compensate for the created "shadows" installation of counter sprinklers.
Selection of sprinklers.
The principle of nozzle selection is the same for both single-jet rotors and static sprinklers. In this guide we will use static sprinklers and nozzles as an example. . as the most commonly used in landscape irrigation.
MP rotator injectors, which appeared in the early 2000s, revolutionized the field of automatic irrigation due to many useful properties. G Their main advantages are efficiency and high range.
RotAtors consume 5 times less water than fan nozzles, which for a long time were the only type of nozzle for static sprinklers. Using rotators, it became possible to place a larger number of sprinklers in one irrigation zone and, accordingly, cover a larger area. This made it possible to reduce the number of valves, use smaller diameter pipes, smaller pumps, etc.
In addition, MP rotators are more wind-resistant and have a longer range. For example, the MP3500 nozzle has a throw radius of 10.5 m, which is comparable to the radius of the average rotors of the PGJ type and
The assortment of RainBird and other well-known manufacturers also includes rotator-type nozzles.
MP rotator nozzle range


The first parameter by which a nozzle is selected is the irrigation radius . Radii are selected in accordance with the defining dimensions on the plan. From the catalog (table below) of MP Rotator nozzles you can see that there are nozzles of 5 radii, and there are also so-called special nozzles - strip and angular. Each of the nozzle models: 800, 1000, 2000, 3000, 3500 has its own irrigation radius. For projects, take the nozzles highlighted in the characteristics table in bold - these are the characteristics at a normal pressure of 2.8 Bar.
Determining dimensions for choosing nozzle watering radii

The radius and sector of irrigation should be chosen so that water does not fall on buildings. It is allowed if part of the sector falls on fences or paths. Select the nozzle coverage sector according to the location. Do not forget about the principle of overlapping sprinklers and avoid the “shading” mentioned above.
In this way, place the nozzles evenly throughout the drawing.
An example of choosing a nozzle from the catalog

First, select the watering sector that matches the location
In the next column, select the water pressure, at which the nozzle will operate. Normal operating pressure for MP Rotator injectors is 2.8 Bar. In the catalog, the corresponding lines with this pressure are highlighted in bold
Find the irrigation radius, which corresponds to the desired - this will be the injector you are looking for.
The irrigation radius can be reduced by 15-20% using the adjusting screw on the top of the nozzle
Flow value(flow) will be needed when we calculate costs and group sprinklers by zones.

The table has another column with the parameter Norm- it talks about how much precipitation the nozzles create when they are located together relative to each other. The arrangement of nozzles in a "triangle" gives more precipitation than in a "square". The “norm” parameter will be needed when selecting the watering duration in the controller. It will not be needed at this stage of design..
We place sprinklers on the plan
Starting from any place on the sketch, begin to draw sectors for watering the nozzles and gradually fill the entire area, trying, as much as possible, to adhere to the principle of “overlapping” the sprinklers.


Watering paths
Experience shows that keeping the paths dry (that is, placing sprinklers so that they do not fall on the paths when watering) does not make much sense, because Watering is usually done at night or early in the morning when the paths are not in use.
It makes sense to only bypass paths more than 1.2-1.5 m wide, because... On wide paths, the ineffective use of water during irrigation is already becoming noticeable.Irrigation water will not cause any damage to materials or the integrity of paths; the negative impact of natural precipitation is much more significant.
For a lawn, the watering rate is 5-10 l/m2 per day.
For example, for Moscow it is 5 l/m2 per day, and for Astrakhan or Krasnodar it is 10 l/m2 per day.
Knowing the irrigation rate and the area of the lawn, you can calculate the required daily volume of water for irrigation.
Daily watering rate
V=n*S
V - daily volume of water for irrigation
n- watering rate
S - lawn area
Let's calculate the irrigation rate for our site
The overall dimensions of the plot that we are considering in this article are 24x38 m. The lawn area is only 4.6 acres (463 m2)
For a given area of 463 m2, located in the Moscow region, where the irrigation rate is 5 l/m2 per day, you will need
463x5=2315 l/day
Now let's see how much water all the sprinklers that we have placed on the plan pour out at the same time.
Using the table of nozzle characteristics, we determine that the consumption of all 42 sprinklers, or more precisely, nozzlesok =5,800 l/h.
But tak, Since we need only 2315 liters per day, it is not difficult to calculate how long our 42 nozzles per day should work in totalTki to ensure a precipitation rate of 5 l/m2 per day.
2315/5800=0.4 hours , that is, 24 minutes a day
Division into watering zones
Now we have come to determining the size of one watering zone (branch)...
The irrigation system we are considering here is relatively small in size, but even if all the nozzles are turned on at the same time, this is as much as 5800 l/h! To ensure such a water flow at a pressure of 3 Atm, a powerful pump and large diameter pipes (50 mm) will be required.
To reduce the size of the pump and the diameters of the pipes, the irrigation system is divided into equal small watering zones, combining several sprinklers. Only one watering zone is operating at a time. The zones are opened one by one according to the controller program.
There are several main pipe sizes that are used in irrigation systems. These are almost always HDPE pipes. Each pipe diameter corresponds to an electromagnetic valve, which corresponds to the flow characteristics.
The range of pipe diameters and corresponding valves is presented in the table.
In general, selecting the number and size of watering zones is a process that involves a lot of data. We will not go into detail here about the design features for large areas (over 50 acres), because The larger the area for irrigation, the more nuances there are in the design. Here we will limit ourselves to statistical data, which says that for private areas of up to 50 acres, irrigation projects include zones with 1" valves and, accordingly, with a 32 mm pipe as a main line.
Accordingly, all that is needed for our project is to divide the productivity of all sprinklers by the productivity of one 32 mm pipe (3200 l/h). We see that in our case, two such zones on the 32nd pipe and 1" valves will be sufficient. You can also use a smaller valve and pipe diameter - 3/4"
| HDPE pipe | Valve | Consumption, l/h |
| 25 | 3/4" | 1800 |
| 32 | 1" | 3200 |
| 40 | 1 1/4" | 5000 |
| 50 | 1 1/2" | 7700 |
| 63 | 2" | 12000 |
The total flow rate of all nozzles in our system is 5800 l/h
There are two options for dividing into zones and both of them will be correct.
Option 1
Select a 25mm pipe and a 3/4" valve and divide the system into 4 zones of 1450 l/h (5800/4= 1450)
Option 2
Select a 32mm pipe and a 1" valve and divide the system into 2 zones of 2900 l/h (5800/2= 2900)
By the way, option 1 has parameters close to those of the water supply system in cottage villages. Sometimes it makes sense not to use an additional pump, but to power the automatic watering system directly from the water supply.

Strive to install (sprinklers) evenly and in balance from the main pipe. A figurative example is the uniform distribution of tree branches relative to the trunk.
This equilibrium scheme reduces the pressure difference throughout the entire irrigation zone and reduces resistance losses. Avoid sequential placement of sprinklers.
Calculate the water flow in pipe sections. The consumption will be different in different places. Select the pipe diameter according to the local water flow.

An example of calculating the diameters of pipes in one zone
with sprinklers with a flow rate of 0.2 m3/h each


Valves act as taps that separate irrigation zones from the pump line and open according to the irrigation controller program.
Valves are placed at a depth 25-30 cm one at a time or in groups of up to 5 valves (box sizes , )
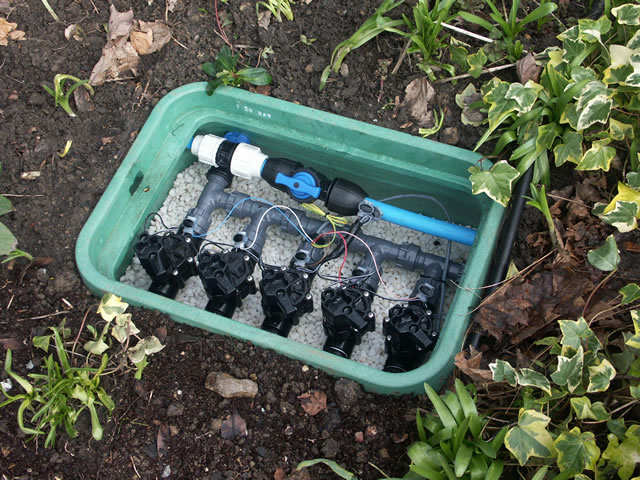
In our example project, it makes sense to mount the valves in one bundle and not far from the pump, because the area is small.
In general, valves should be located close to the pressure line, but away from the walkways to hide the valve manifold covers from view.
The main pipe from the water source (pump or water supply) is usually laid along the perimeter of the site. At any point in the main water supply you can connect both a valve and a water outlet or hydrant. The main water supply is always under pressure. The pressure in the line is maintained by the automatic pump, which turns on the pump when water flow in the pipe is detected (a valve or hydrant has opened somewhere)
The diameter of the main water supply pipe must match the diameter of the pressure pipe of the pump, but if the length of the main pipe exceeds 100 m, then the diameter closer to the pump must be increased. If, for example, the main pipeline of 32 diameter has a length of 150 m, then the first 100 meters from the pump must be made with a diameter of 40 mm. This rule is related to resistance losses in pipes along their length. Every 100 m in plastic pipes there is a pressure drop of 1 bar.
More details about this in
Drip irrigation
Drip irrigation in automatic watering systems is connected by a separate zone (or zones) and operates at reduced pressure (up to 2.8 Bar). The lower operating pressure is explained by the peculiarity of the drip equipment - it operates at low pressure. For drip zones, a special combination of valve + filter + pressure reducer is used, called
The most common equipment for drip irrigation is a drip tube. It is used both for watering beds and for watering flower beds, shrubs and trees.
Read more about drip irrigation in the article
Water outlets and hydrants
To connect a garden hose in automatic watering systems, devices such as hydrants and water outlets are provided.
have a ball valve for connecting the hose, and hydrant- quick release connection. The hydrant's response "key" is forcefully inserted into the hydrant itself, the lock fixes the key in the working position and opens the passage for water.


The hydrant line must always be under pressure, so it must be connected to a pressure line.
Water outlets should be placed at a distance of 10-15 meters from each other, installing them at the edge of the paths for ease of approach to them.

Valve control wires are laid in HDPE or PVC corrugated pipes in the same trenches as the pipes. The required wire cross-section is 0.75 mm². For wire lengths over 100 m, use a cross section of 1.5 mm²
Operating voltage - 24 Volts AC
Control current - 0.1 A per valve
It is more convenient to connect valve bundles with a cable with the number of cores “+ one to the number of valves”. That is, one wire is used as a common wire, and the rest as control wires.

1- Main pipe
2- Master valve (closes access to other valves. Advantage - small leaks can be ignored. Disadvantage - hydrants cannot be connected to the valve line - a separate hydrant line to the master valve is required)
3- Watering zone valves
4- Exit to sprinklers
5- Black - general. Colored - cable control cores
Controller Settings
Basic settings :
- number of starts
- duration of operation of each irrigation zone.
To calculate the duration and number of watering starts, we will use the following data:
Irrigation norm in Moscow - 5 l/day per m2
- favorable period for watering from 23-00 to 7-00 (8 hours)
- there is a container with water reserve 2000 l.
- pump with production 3000 l/h,
IN injectors there is a column -NORMAL mm/h
This parameter tells you how much precipitation falls per hour when sprinklers are placed in a square or triangle. The triangle pours out more water, because This placement moves the sprinklers closer to each other.

Let's take the average precipitation - 10 mm/h when placed "square"
If sprinklers arranged in a “square” pattern pour out 10 mm of precipitation per hour, then the area we are considering here will require 0.5 hours of operation of one irrigation zone, because Our precipitation norm is 5 mm.
Our project has two sprinkler irrigation zones, respectively: each of them must work 0.5 hours/day, that is, a total of 1 hour.
(drip irrigation is considered separately)
With a pump capacity of 3000 l/h, 3000 l will be consumed in 1 hour.
Since our container has a reserve of 2000 liters, we should distribute all watering totwo starts: morning and evening
- start No. 1 at 22-00 (it will work for half an hour)
- start No. 2 at 06-00 (it will also work for half an hour)
The controllers allow you to configure 3-4 starts during the day and each zone can be set for up to 3-10 hours of watering, so the flexibility of the settings is sufficient for irrigation systems with a large number of valves.
The type and model of the pump is selected based on:
- type of watering devices
- productivity of one zone
- length of the pressure line
- water supply parameters, etc.
Read more about calculating pump parameters in the following articles:
And
The choice of container volume is influenced by
- pump performance
- number of watering zones
- speed of filling the container (water supply capacity)
- length of watering day (how many hours are allocated for watering)
Let’s say the container is filled at a speed of 1000 l/h
Then, in our case, we can use a capacity reserve of 2000 l in an hour + adding 1000 l/h from the water supply. In this case, one start of watering would be enough for us, because... The daily requirement of our system is exactly 3000 liters.
For irrigation systems with high daily flow rates, you should look for a “golden mean” between increasing the capacity, increasing the number of watering starts and increasing the speed of filling the container.
What do automatic watering projects look like?
The key to an annual good harvest and soil fertility at your summer cottage is timely replenishment and fertilization of the land and, of course, constant watering. Proper and competent arrangement of the irrigation system will not only ensure timely and regular soil moisture even in your absence, but also save considerable money. In this article we will give some useful advice on organizing irrigation systems at the dacha, Let's look at their main types and highlight the advantages and disadvantages of each system.
The simplest system irrigation, the organization of which does not require any specific knowledge or costs associated with the purchase of material. The process of arranging such a system boils down to the fact that a narrow trench, 10-15 cm deep, is dug on both sides of each bed. Then you can either make a connection to each trench or lay it. You can connect the hose to a regular barrel of water, which is installed at a height of 1.5-2 meters above the ground. This will ensure that water flows out of the hose under its own pressure. You can also use a centralized water supply. In this case, a lot of pressure is not required - the main thing is that there is enough pressure for the water to come out of the hose. This is true when the beds are located at a decent distance from the water tap.
In addition to the furrow method, a surface irrigation system can be carried out in an estuary way. In this case, trenches are not required, because the entire surface of the beds is completely filled with water so that it stands on the surface for some time. If you actually use this method, it is worth assessing the condition of the landscape. On sloping or hilly areas, ensuring uniform watering will be problematic. What advantages This irrigation system has:

That's where the positives end. Regarding disadvantages:
Experienced gardeners have long stopped using such irrigation methods and are striving to organize more sophisticated systems. These include the following types. However, if you are completely satisfied with surface watering and, most importantly, it suits the crops growing on your site in terms of frequency of watering and the amount of liquid supplied, you should not refuse it. The irrigation system should meet your personal needs, and not the emergence of more modern technologies, which sometimes make no sense to pursue.
This method is the most gentle and economical. It is advisable to use it for root watering of plants that are especially sensitive to drought. Setting up a drip irrigation system is quite simple. It includes several main elements:

Such watering can be carried out both from a storage tank and using the main pipeline. It is necessary to arrange a central pipe, which will have a number of connectors equal to the number of beds. Length drip hose should correspond to the length of the bed and have a small margin. It should be located as close to the seedlings as possible. Watering can be continuous: the main thing is that the capacity of the water tank is appropriate.
If you use water from a pipeline, you can equip the system with a timer, which will open and close the water supply according to the set mode. When organizing a drip irrigation system, be sure to install a filter before the water enters directly into the drip hose. Process water contains many impurities and small debris, which quickly clogs the holes. Drip irrigation has a lot of advantages:
TO shortcomings This can only be attributed to frequent clogging of small holes on the bottom of the drip hose. In addition to the fact that plaque will settle in the holes, the lower rows will become clogged with particles of wet soil. In this regard, many experienced gardeners recommend laying the hose at a low height above the soil level. Then this problem can be avoided.
One more no less effective method moistening the area - using so-called sprinklers. They can have different irrigation angles and be rotary or static. This makes it possible to water the entire area without leaving dry islands. It makes no sense to use a similar method on . The radius of action of water spray reaches about 2 meters. This method of irrigation will not be effective even if the pressure in the system is insufficient. In this regard, the system is additionally equipped with a pump. It works in automatic mode and turns on only when necessary, when the pressure is insufficient. In this way, it is possible to compensate for deficiencies and maintain constant pressure at the required level.
Static sprinklers can have an irrigation angle of 90°, 180° or 270°. Respectively rotary cover an angle of 360°. By combining systems of different angles, you can easily ensure uniform watering even in the most remote places or, conversely, limit the territory. A similar system is suitable for moistening flower beds with ornamental shrubs and trees.
If you plan to irrigate a plot of vegetable crops in this way, you should provide a timer that will turn on the water supply early in the morning or in the evening so that the sun does not burn the young shoots. Areas with lawn grass will need to be mowed periodically. To ensure that the irrigation system does not interfere with this process, give preference to types of sprinklers that, when not needed, hide in a special depression in the ground and become almost invisible. To the obvious benefits This system includes:

Flaws are manifested in the following:
The subsurface irrigation system is a system that is installed throughout the entire area underground. The minimum installation depth is 30 cm. At a certain distance, small holes are made in the pipes to provide water access to the plant rhizomes. Typically, such a system is used in areas that cannot be dug up. The optimal material for organizing a subsurface irrigation system is . They have a number benefits before other types of plastic pipes, namely:

When laying pipes, then small crushed stone is poured onto the bottom of the trench, then the pipe is laid and the trench is backfilled. Sand-crushed stone pillow Provides removal of excess moisture. It will not be difficult to route the pipes around the area and connect them to each other. It is only important to correctly calculate the required amount of material. This process is quite labor-intensive, but has many advantages:
TO shortcomings include:
The answer to this question is quite simple to find, after analyzing the features your landscape plot and the types of plants that grow on it. It often happens that trees grow in one area along the perimeter, one part is reserved for recreation and is sown with lawn grass, and the second is a small vegetable garden. Many people grow grapes in their dachas. It is clear that it is impractical to water plants that differ in both height and water consumption rates in the same way. Some will drown in excess water, while others will not receive even half the necessary moisture. In this regard, the irrigation system often consists of several lines. For example, sprinklers can be used to water grass and trees, while a drip system is ideal for moistening vines and vegetable crops. You can organize subsoil irrigation over the entire area of a small garden. To understand how organize correctly watering system yourself, you must:

Control of the irrigation system at the dacha can be either manual or more advanced. Let's consider three main types:

We mentioned that polyethylene pipes are used to organize an irrigation system at the dacha. The diameter of the main line should be larger. For example, a pipe with an internal diameter of 40 mm is most often used, while 20 mm is sufficient for branch pipes. Connections are made using compression fittings, eliminating the need to purchase or use special tools. It is only necessary


