Even a child can make a kite out of paper. There are many different options, but today you will learn about the simplest method. You will spend only 5 minutes making it. We invite you to learn about all the intricacies of its creation. In this article we will look at step-by-step instructions that will help you create a wonderful kite with your own hands from paper.
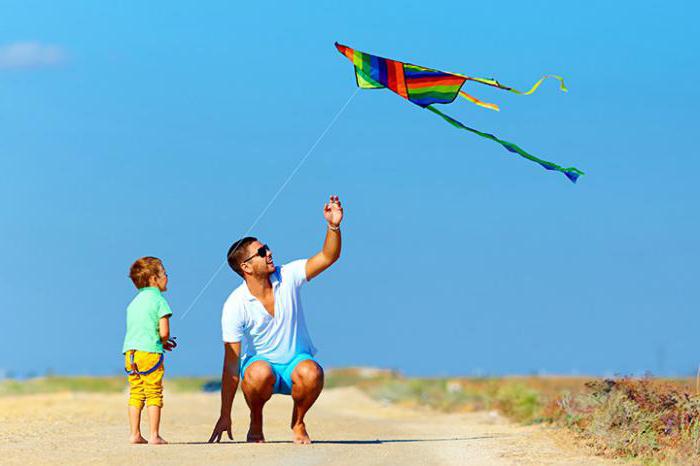
Child with a kite
It is very easy to make a paper kite, and even a beginner or small children under parental supervision will be able to cope with this task. In addition, if you make a paper kite with a child, the baby will develop hand motor skills, attention and perseverance.
To make a paper kite you will need:

Craft materials
Also, for its construction you will additionally need a body, a thread with a spool and a bridle.
Take a sheet of paper and fold it into a triangle.
Making a kite. Step 1
Making a kite. Step 2
Making a kite. Step 3
Making a kite. Step 4
Making a kite. Step 5
Making a kite. Step 6
Useful information: In order for the kite to serve you longer, it must be made of durable and rigid materials. It is also necessary to take into account that the pressure on the load-bearing part of the kite at an average wind speed of 7-8 m/s reaches up to 2 kgf/m². In addition, the kite should not fold under the influence of wind in flight.
Making a kite. Step 7
Making a kite. Step 8
Making a kite. Step 9
Making a kite. Step 10
Making a kite. Step 11
Let's start making the coil. We will make it from simple cardboard. With such a reel, launching a kite is much easier, since the thread will not get tangled, and you can adjust the flight length yourself.
Making a kite. Step 12
Making a kite. Step 13
Making a kite. Step 14
Making a kite. Step 15
Useful information: The kite must be portable. It should fold and unfold easily. Once assembled, it shouldn’t take up much space in your apartment, so don’t make it too big.
Making a kite. Step 16
After the work has been done, you can launch our kite. Check if you did everything correctly. The main thing is that the bridle is attached exactly in the center, otherwise your kite will be uncontrollable - instead of a smooth flight, it will dangle randomly in flight. If you did everything correctly, but the kite still flies unevenly, the problem may be in the tail. It may be either too light or not long enough. Extend it using auxiliary materials.
It may also be that the tail, on the contrary, is too heavy. With this problem, the kite will have trouble taking off or gaining altitude. Then you will need to remove additional scenery.
If you did everything correctly, the kite will fly high into the sky and fly smoothly. If, of course, weather conditions permit. If there is strong wind, you will not be able to launch your fake properly.
If you fly a kite with a baby, watch the length of the thread. It should not be unwound more than 3 meters. If the weather is calm, the baby can simply run around with a reel in his hands, and then the kite will certainly take off. Remember that the length of the thread must be constantly adjusted.
This is interesting: For the first time, the kite became known in the 2nd century BC, in China. Then it was called the serpent-dragon. For a long time, kites could not find practical use. But already in the second half of the 18th century, scientists began to widely use them when conducting scientific research of the atmosphere. In 1749, A. Wilson used a kite to measure air temperature at altitude. In 1752, B. Franklin conducted an experiment with the help of which he was able to identify the electrical nature of lightning. Soon, thanks to the results of this experiment, M. Lomonosov invented the first lightning rod. Such a useful toy!
As you have already seen, making a paper kite with your own hands is not at all difficult! Try it and you will remember your childhood. And our instructions will help you create a wonderful aircraft.
Before we begin the story of how to make a flying kite with your own hands, let us explain what it is and how people used it.
An aircraft or is an aircraft that rises into the skies by the force of air currents and is held in place by a rail. Already in the 2nd century BC, the first mention of a flying dragon snake appeared, which was launched by the ancient inhabitants of China. Since then, people have constantly thought about how to make a flying kite with their own hands and where such an invention could be used.
Many great discoveries have been made by scientists using a kite. This is an antenna for a better signal during the invention of radio by A. Popov, and measurement of air temperature at high altitude by meteorologists. Even during the war, such devices served as reconnaissance soldiers to adjust artillery fire on the enemy.
Appreciating such benefits for humanity, since 1985, people around the world have been celebrating World Kite Day, held on the second Sunday of October. Now such devices are used only for sports and entertainment. The article describes how to make a flying kite with your own hands.
In ancient China, snakes were made from light bamboo sticks and a piece of silk fabric. Nowadays, a variety of methods are used to make such items. Consider the types of kites:
1. The simplest option is a kite in one plane. Such an aircraft is not intended for serious long-term flights. A strong wind will immediately break it, but this is the option that is introduced to children who want to know how to make a flying kite with their own hands.
2. The second type is a structure made of several layers: a shelf, in the shape of a box or parallelepiped, having many cells and parts. They are stable and can withstand quite strong winds.
3. The next type is a group connection of several devices into one. It turns out to be a long structure. Such kites are used at festivals as they look very picturesque against the blue sky.
Let's consider the simplest option, how to make a flying kite with your own hands, what it consists of.
1. Rigid frame base. The shape of the future structure depends on the location of the slats. It can be in the shape of a triangle, diamond or multi-tiered.
2. Light material or oilcloth surface of the kite, which is pulled onto the frame. It is this that performs the aerodynamic function and holds it in air currents.

3. Fastening slats and material. This could be tape, simple threads or thin rope, or there could be stronger bindings that can be disassembled. If the kite has movement regulation, then a rope is attached to it to adjust the direction of the tail.
4. Tail of the apparatus. When flying it curls and looks very impressive. In addition, it also serves as a stabilizer in flight.
5. Retaining thread or handrail. It should be very strong, but at the same time light. It is better if it is wound on a reel. This will protect the owner of the kite from painful unraveling.
Before you make a flying kite with your own hands, you need to prepare all the necessary materials. For the simplest diamond-shaped kite you need to take:

1. You need to draw a drawing according to this sample.

2. Transfer the dimensions to polyethylene and saw off the strip to the required length.
3. The sticks are folded into a cross and tightly wrapped with tape.
4. We make small cuts at the ends of the slats and insert fishing line into all the holes, stretching it along the contour of the rhombus or “diamond”.
6. You need to wind a piece of fishing line onto the top and two side slats, connecting them in the central part into one long thread called a lifeline, with which you need to hold the snake in your hand so that it does not fly away.

You can do the job easier - from plastic sticks and double-sided tape (as in the photo), but such a kite will be fragile and, in principle, disposable.
You already know how to make a kite with your own hands. Now you need to go outdoors and try to run it. You also need to be able to do this, otherwise the kite may fall and break without ever taking off. How to launch correctly?
First you need to choose an empty place, without trees, bushes or water obstacles. For a kite to fly, you need wind. Without at least a slight whiff, nothing will happen. Having waited for the breeze, you need to determine its direction and stand with your back, holding the kite in your hand.
Then you need to take the device in one hand and the spool of fishing line in the other. Turn the kite with its nose up and forcefully push it away from you in the direction of the wind. When the kite flies up, you need to regulate the flight using a handrail.
If the tension has subsided, then you can run forward, keeping the kite level relative to the ground. If the wind has died down and you see that the device is falling to the surface of the earth, you need to loosen the thread so that the tension decreases. Then the fall will not be so strong and critical. The kite will not break and can be launched again.
The article showed how to make a simple kite, but you also need to understand the danger this device can pose during launch. Therefore, it would be a good idea to familiarize yourself with the safety rules.
Before starting, make sure that there are no power lines on top, as this may result in an electric shock.
Flights cannot be carried out in large crowds of people, near railways, highways or air terminals. This may interfere with and harm other people.
When starting, use a reel and it is better to wear gloves. When there are gusts of wind, the kite can twitch violently and the sudden movement of the fishing line can cut your hand.
Before starting to move the kite, you need to check all the connecting elements so that an accident does not occur and the flight is not interrupted at the very beginning.
If all safety rules are followed, then you can safely begin this exciting activity.

 A DIY kite will bring you much more pleasure than a purchased one. Because the process itself is not only very exciting and creative, but also simple! And such a snake will definitely be exclusive.
The first to invent kites were, as usual, the Chinese somewhere in the 6th century BC. Their use was purely practical - with the help of a kite, ropes were thrown across rivers and deep ravines, along which bridges were then built.
And the cunning Chinese commanders were even glorified with their help! One of them launched a kite that could make sounds over the enemy camp in the night. Some believed that they were attacked by demons, others that their guardian spirits were warning them of danger. By morning the army fled.
 Another general flew a kite during the day, over the palace of an evil ruler. Using the length of the rope, he calculated the distance to the palace and ordered a tunnel of the required length to be dug. One night, with a small detachment, he passed through this tunnel and easily defeated the enemy.
Later, kites helped people achieve amazing success in the conquest of the air and the study of natural phenomena.
Nowadays, it serves as a fun place for groups of all ages. And the process itself at home will help you understand aerodynamics, mechanics and design.
Depending on the design there are: simple kite, box and compound trains. By the way, in English-speaking countries, a kite is called a “kite,” and flying such a kite is kiting, which has long become a sport.
 A simple kite differs from a box kite in that it lies in the same plane. This is the easiest kite to make. A kite train consists of several kites of a simple or box-shaped design, flexibly connected to each other - such a design will remain in the air even if a couple of links are lost.
There are quite a few models of each design (top, box, smile, box-shaped diamond, etc.), but since we want to make a kite at home, only the simplest designs will be considered here.
Snakes come in completely different shapes and materials. To make any design we will need:

For frame slats you need to take light, durable and slightly elastic materials. Frames for professional kites are made from carbon tubes and rods, but at home you can also make them from wooden twigs.
Paper kites are the most short-lived, but this material is much easier to obtain than lightweight nylon, which does not allow water to pass through and does not fade in the sun.
Its thickness is no more than 1 mm, so nylon mesh is added for greater strength.
If you are lucky enough to find nylon fabric somewhere, then when cutting, place the patterns diagonally - then it will be easier to pull it onto the frame and it will have better aerodynamic properties. The bridle and straps to protect the joints of the elements are best made of leather.
Before choosing a kite and its size, review these tips:
The design of this paper kite is extremely simple; you can make it in 15 minutes. Ideal if you need to keep a group of children or adults occupied for a short time.
M  Materials and tools: thread, A4 sheet of thick paper, scissors, PVA glue.
While the snake is drying, prepare its tail. This is important, the kite will not fly without a balancer.
This snake is most often depicted in books and shown in films. It looks like a rhombus with one shortened axis. Done in a couple of hours.
The materials you need for a quality, durable kite will depend on the region in which you live. If there are strong winds in your region, the structure, naturally, should be more durable. If the winds are weak, then a powerful kite may not take off.
The “sail” consists of two slats connected by a cross and a canvas stretched over them. In light winds, you can use a plastic bag or a garbage bag as a fabric. You will also need tape, scissors, a meter, fishing line or strong thin cord and superglue.
Simple manufacturing steps:

No, not Harry, but this box kite flies just as well if it's done right.
Materials:
Assembly steps:

Cover and openers:

The box kite is ready! It can also be decorated with a tail and designs on strips of fabric.
Do not let small children fly kites themselves if the structure is large or the wind is strong.
There are many cases where the kite had so much resistance that children were lifted into the air. This usually results in injury, but there have been deaths.
The fishing line or twine must match the size of the structure, otherwise it will be very disappointing when the kite flies away.
Do not fly kites near power lines. In addition, to fly particularly large kites in some countries you must contact the police for permission.
3 23 458
The desire to soar and reach unknown heights is inherent in each of us. And although, unlike birds, we cannot soar in the skies on our own, we are able to give the joy of watching free flight to ourselves and our children. Do you think we're talking about a plane ticket? But no. We just want to tell you a few ways to make a kite. This simple aircraft, made from improvised materials with your own hands, will give you a lot of positive impressions and emotions.
Did you know that the first kites plied the skies of Ancient China back in the second century BC? e.? Today the art of building and running them is back in fashion. And every year, on every second Sunday in October, World Kite Day is celebrated.
By the way, the hero of our article today is sometimes called “kite” in a foreign manner. So, when you come across this term, don’t be surprised.
And now it's time to start building snakes.

To work, you will need the simplest materials at hand:

Instead of wooden twigs, thin window beads will do, and tracing paper can be replaced with plain paper (but remember that the lighter the kite, the better it will fly).

Place the resulting blank on tracing paper and cut out a quadrangle (well, it’s hard to call it a rhombus from a mathematical point of view), for which the crossed sticks will be diagonals. Glue the twigs with tape to the paper base, paying special attention to the corners.
Cut a tape about 2 m long and 2 cm wide from tracing paper. Glue it around the perimeter of the quadrangle with tape.

Cover the intersection of the rods on both sides of the tracing paper with tape. Using a nail heated over a fire, carefully burn a through hole to secure the thread to the kite.

Thread the thread through the hole, make a loop and tie it around the cross. Remember that the loop should be on the inside of the kite. Tie a thread, cord or fishing line wound on a spool to the loop (see how to make a spool at the end of the article).

The most important stage has arrived - decorating. Entrust this task to your child: he will independently decorate the craft at his own discretion. If you are assembling a test copy to study its flight characteristics, you can skip the design stage.

The simplest kite is ready. You can go outside to catch the wind and cheer yourself up.
A little time, accuracy, strict adherence to step-by-step photo instructions - and your kite will be ready to take off on its first flight. You will see that conquering the skies is a most exciting activity. Moreover, this version of the kite is more improved compared to the first. He equipped with a bridle, making it easier to control.


To work you will need:


Place the workpiece on the paper, outline it with a marker, leaving a couple of centimeters around the perimeter for allowances. Make notches on the seam allowances so that the edges do not wrinkle when folded.


To strengthen the frame, tie additional pieces of wire on the back side of the structure.


All that remains is to secure the cherished thread of control. For a kite to fly, it must be done correctly. Regardless of its size and shape, fasten the rope in 3 places on the frame on the back side of the product. Next, tie its ends, departing 30 cm from the center of the structure, and tie the thread.


Make it with your children and you will get triple benefits:

* based on materials from handmadecharlotte.com
Grease a 48 cm long stick with PVA and glue it to the center line of the workpiece.


* based on materials from eventor.ru

Cut several strips 2.5 cm wide.

Mark the inner circle, use a compass or a suitable template.

Roll the cut strips along the contour of the cutouts and glue them with hot glue.

Glue the inner ring in the same way.

Glue the second circle on top of it.

Glue the end of a long thread to the inner surface of the spool and wind the thread.

To prevent it from getting tangled, tie a match to its end and secure it with glue. Thread the thread into the slot on the outer ring.

With such a convenient device, your flying kite will conquer not only the sky, but also the hearts of your children.
A kite is rightfully considered one of the best flying machines, as it brings a lot of positive emotions to both adults and children. Moreover, in the homeland of such an invention, in China, the first kite was launched into the air several thousand years ago.
The ability to cut through airspace with the help of a bright and light device came to us much later. Apparently it is for this reason that today kites are not so often seen in the sky, but it takes no more than 30 minutes to create one.

How to make a kite at home? Read and learn!


There are several subtypes of these aircraft. For example, flat ones are used for fun games. Serpentines are more often launched during festive events. And multi-plane ones are used in some types of extreme sports.

But if the desire to create a kite with your own hands has arisen for the first time, then it is better to choose the simplest models. First of all, they are the easiest to make. Secondly, they are the easiest to manage. And thirdly, if such a device breaks down, it can easily be replaced with a new one.

For information: a single-plane kite can have a rectangular, diamond or triangular shape.

The simplest kite is a structure consisting of a frame, canvas and connecting elements. In addition, such a device must include a reel and thread with which the kite is controlled.

It is noteworthy that the sizes of kites vary greatly depending on their purpose. Thus, the largest aircraft to date has a width of 55 m and a length of more than 120 m (this includes the tail).


Of course, it will be extremely difficult for an untrained person to create such a structure at home, so we will focus on the standard version with dimensions of 35x60 cm.

In order for the kite to be easily caught by gusts of wind and soar above the ground, only lightweight materials must be selected for its manufacture.

Therefore, prepare:


For information: instead of cellophane, you can take multi-colored sheets of paper. But in this case the device will weigh a little more.

Many are sure that creating an aircraft with your own hands begins with drawing kite drawings. This opinion is partly true, but only if we are talking about complex models.

After all, the beauty of a simple design is that even school-age children can handle it.


That's it, the main work on creating a kite is now complete.

In fact, the simplest kite can fly calmly without a tail. But if you want to decorate the structure, then prepare:

Cut out several bows from paper and secure them to a string with tape. Attach the beginning of the “tail” to the bottom of the long snake stick either with tape or glue.


By the way, if the basis of this aircraft is a plastic bag, then it should be painted using markers and felt-tip pens. And here sketches of a snake for a hand tattoo, which can be found on the Internet, will come to the rescue.

After the answer to the question: “How to make a kite with your own hands?” found and the aircraft created, it needs to be tested in action. And to do this, you should take the structure outside and find the most open space possible.

FYI: Do not fly your kite near houses, trees or power lines. A sharp gust of wind can blow the device in the wrong direction and damage the structure.

Place the kite on the ground with the frame facing up and stand with your back to the wind. Slowly back away, slowly unwinding the coil.

Make sure that the rope is always under tension. And as soon as the aircraft catches the first wind, pull it by the thread.

Making a kite at home is a fascinating activity that will definitely bring all family members together. Create original designs, organize competitions and truly enjoy such a fun and carefree pastime.


