Dill is a perennial herb that is familiar to absolutely everyone. It is loved for its delicious spicy aroma. Find out how to grow dill in your summer cottage (secrets, tips and main nuances), and then you will always have a bunch of fragrant and fresh herbs at hand. It can be dried and frozen, and also used for salads and soups. Inflorescences and seeds are also used, mainly in the preparation of marinades for canning vegetables.
Experienced gardeners and gardeners recommend soaking the seeds before planting dill. Growing dill from seedlings is also practiced; this is mandatory for bush varieties. To soak the seeds, just wrap them in a cloth and keep it moist for a couple of days until they swell. Then they need to be dried for 20 minutes in the air and sown in the prepared soil. Uniform shoots appear, as a rule, after two weeks. All this time it is necessary to maintain constant humidity. They are not demanding on temperature and begin to actively germinate already at +3 °C.

Dill can be grown in two ways: sowing in spring or late autumn. This plant is quite cold-resistant and can tolerate frosts down to -6 ° C, so the seeds can be planted in the ground in late autumn (October-November), the timing depends on the region. The second option involves spring planting. They also start quite early, as soon as the snow melts and the soil dries out a little. Estimated dates are from mid-April to the end of May. Dill reproduces very well by self-sowing. If you don’t remove the umbrellas with seeds in the fall, then next spring, most likely, the entire garden will be strewn with fragrant greens.
The bed for spring sowing needs to be prepared in the fall. You need to dig the ground to a depth of about 25 cm and add a bucket of humus (per square meter). In the spring, it is enough to level the bed with a rake and make grooves at a distance of 20 cm from each other, 2-3 cm deep. Seeds should be sown in them, sprinkled with a small layer of humus on top. There is no need to water until seedlings appear.

Throughout the summer, dill can be sown more than once, but at intervals of 20-25 days to obtain fresh herbs. This is exactly the period of its maturation. At this point, the plant reaches a height of about twenty centimeters. To obtain seeds you will have to wait a little longer until the umbrellas ripen. These are the basic rules for growing dill in open ground. Everything is quite simple and will not cause difficulties even for a novice gardener.
This variety has recently appeared on the seed market. Its appearance and cultivation technology are somewhat different from those of ordinary dill. If you do not follow agricultural techniques, then, of course, it will grow, but it will lose its elite qualities. The main feature of this variety is its size and strong foliage. Bush dill can grow up to one and a half meters in height, so the distance between plants should be large (25 cm). It is more demanding on soil fertility and climate, which is why it is planted in greenhouses. Growing dill in open ground is also possible, but only by seedlings (sowing in mid-April - early May). It is planted in the garden when the air temperature is between 20-25 °C.

The capriciousness of bush dill is compensated by its high yield. So, 20 plants will provide you with greenery not only for the whole summer, but also for the winter.
If you practice growing dill in open ground, then it is best to remove the flower stalks, especially in central Russia, since the seeds still do not have time to ripen even in greenhouses. The plant will only waste its energy. This variety is best grown exclusively for greens.
One of the main enemies of fragrant greens is powdery mildew. It can appear at any time as a white coating on seeds, stems and leaves. most often occurs in late summer when the nights become cool. As a result, the plant loses its taste and is no longer suitable for human consumption. Downy mildew may appear, which is characterized by the appearance of chlorotic spots that gradually turn yellow.
Dill can also be subject to fomosis. This fungal disease appears as blackening on seeds, stems, and sometimes leaves.
These diseases, in principle, can appear at any time, regardless of whether you are growing dill in open ground or in a greenhouse. It is impossible to treat plants with chemicals, therefore it is only possible to use preventive measures, namely, alternating crops, timely destruction of weeds and infected specimens, as well as disinfection of dill seeds. To do this, before planting, they need to be heated in hot water (50 ° C) for 30 minutes.

Often, vegetable growers and summer residents do not attach importance to greens - they are greens. And this is a completely erroneous opinion. In the modern seed market, the choice of dill varieties is very large. As a rule, they all differ in terms of ripening, and sometimes in agricultural cultivation techniques. Therefore, carefully read the labels on bags of aromatic seeds. It is worth noting the following varieties of dill.
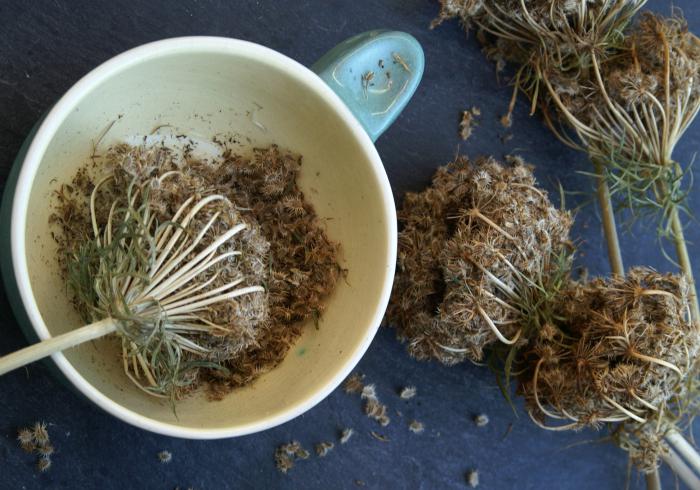
Greens are collected for drying or freezing 25-30 days after shoots appear. At this point, the plant has grown to 15-20 cm in height. Before freezing, greens should be washed and drained. Then the dill must be chopped and packaged in bags or containers. You can also dry it. This should be done not in the sun, but in the shade, in a well-ventilated area. store in jars with tight-fitting lids or in paper bags, the same goes for seeds.
Be sure to plant a fragrant one in the open ground on your site; it will not require much time and effort. But as a result, you will get not only tasty, but also very healthy spicy greens, and the seeds are perfect for use in pickling and pickling vegetables, in addition, they have medicinal properties.
Fragrant, vitamin-rich fluffy bushes, unpretentious in cultivation and growing in any conditions - dill, familiar to everyone. To obtain early fresh greens, which are especially valuable in a meager spring diet, you should know the nuances of planting in open ground and caring for them. Knowing when and how to plant dill, at what stage of development and what to fertilize with, will help you reap a rich harvest.
Types of crops differ in many characteristics, of which the most significant is the ripening period. To continuously obtain a fresh product, the conveyor method of growing it from seeds by repeated sowing every 10-14 days is practiced.
At the end of May, early varieties are sown in order to obtain the “umbrellas” necessary for preservation by mid-summer, and late-ripening varieties are sown in July.
Knowledge of varieties is necessary, because you can grow good dill using only those that are zoned for cultivation in a given region:

In fact, there is not much difference when to plant dill: in order to obtain both greenery and seeds, it is sown in the fall before winter and in the spring, as soon as the snow melts. The vegetable is not afraid of frost; it can withstand temperatures dropping to -4°C, and will germinate only when the thermometer consistently shows at least +3°C. Winter crops are sown in open ground at the end of October - the first ten days of November. Growing dill in this way allows you to get greens to the table at an early date.
In summer cottages and garden plots, dill is most often propagated by self-sowing. When growing new varieties of aromatic and healthy greens, the seeds are sown in separate beds.
Many gardeners soak dill before planting to get quick and friendly shoots. Gardeners are people who love experiments, so they have many original ways to prepare dill seeds for sowing in open ground. They are simple, but they allow you to awaken the planting material and increase the growing season of early green products.
The seeds of many cultivated plants are covered with hard shells. And on the surface of the dill seed there are a lot of essential oils that protect the embryo. To speed up germination and awaken the embryo, this substance must be washed off the surface. Before planting, dill can be soaked in various solutions other than water.
There are a lot of compounds that are used to prepare slow-germinating seeds for sowing in the spring:
It is best to use melt water for soaking. If there is none, take tap water. The planting material is placed in a fabric bag and immersed in water no warmer than 20 degrees Celsius. Dill seeds are soaked for two or three days before planting. The water is changed twice a day.

Growth stimulants not only accelerate plant growth, but also promote the awakening of embryos. The range of such preparations is large, but gardeners most often use the following:
Use growth stimulants for soaking (for example, in Kornevin) dill and other refractory seeds strictly according to the instructions.
To ensure that dill sprouts quickly, before sowing it is soaked in infusions of various herbs. Most often it is chamomile or aloe.
Soaking in chamomile. Experienced gardeners soak dill in chamomile infusion before planting. Pour 1 tablespoon of dry chamomile into the teapot and pour boiling water over it. When the infusion has cooled to 50 degrees, the planting material of the spicy crop is dipped into it in a gauze bag for half an hour. Chamomile infusion washes away essential oil.
Aloe. Aloe or agave juice is an excellent growth stimulant. In addition, it improves plant immunity. To soak dill seeds in the juice of this homemade doctor, aloe needs to be prepared. The leaves of an adult plant are cut and kept in the refrigerator in dark paper for two weeks so that they “ripe.” The juice is then squeezed out by hand. Metal shredders are not recommended.

To treat seeds, the juice is diluted with water in a 1:1 ratio. A piece of cloth is soaked in the solution, the seeds are wrapped and kept for 24 hours. If necessary, the tissue is additionally irrigated with juice.
Ash has long been considered a substance rich in natural minerals that plants need.
The germination rate of dill increases several times if you soak the planting material in a solution of wood ash.
Pour 2 tablespoons of wood burning waste into a liter jar and add warm water. After two days, the infusion is ready. Dill seeds are poured into a gauze bag and filled with infusion. Soaking lasts 4-5 hours.

Honey is a natural antiseptic and a substance that strengthens the immunity of not only humans, but also plant seeds. Dissolve a teaspoon of sweetness in a glass of warm clean water and immerse the seeds for 5 hours. Then they are dried until they flow.
It is not recommended to use tap water, as it contains chlorine that is harmful to plants.
The germination of dill seeds can be accelerated by soaking them for five hours in a complex solution. It’s easy to prepare it yourself:
In addition to the options listed above, the seed material of the spicy plant can be processed in other compositions to accelerate germination:
Potassium permangantsovka. First, the seed is kept in ordinary water for a day, changing the liquid every 4 hours. After this, you can soak in a 2% solution of potassium permanganate for 20 minutes, no more. Then the seeds are thoroughly washed with clean water, dried and sown.

Potato juice. Raw potatoes are frozen in the freezer, then thawed and grated or put through a juicer. The seeds are soaked in the resulting liquid for 7 hours.
Mushroom decoction. Chopped dried mushrooms are poured with boiling water and left until completely cooled. Seeds in gauze are poured with the resulting mixture and kept for about 5-6 hours. Then they are dried until they flow and are sown.
In vodka. For quick germination of dill seeds, some gardeners soak them in vodka, dipping them in an alcohol-containing liquid in a gauze bag for no more than 15 minutes! During this time, the essential oils will have time to dissolve.
Then the seed is washed with plain water, dried and sown. Gardeners who have tested this method of germinating dill claim that seedlings appear in 3-4 days, and not in 18-20, as they say on the bags.
The seed material is first poured into water for calibration. The bad seeds will be on top. They are drained along with the liquid. Those that have fallen to the bottom are left for an hour, after which the water is poured out, the seed is soaked in a 3% solution of hydrogen peroxide for 5-7 minutes. Seeds should not be filled with large amounts of water. Just wet the cloth well. The water should be warm, about 25-30°C. 3-4 times a day, the seed is washed directly in gauze in clean water to wash off the essential oils.
To speed up the germination process, the fabric is placed in a plastic bag and kept warm, but not more than 3 days.
We have already found out exactly how to germinate dill before sowing - fortunately, there are plenty of known methods. But the specific decision is, of course, up to the gardener. Although you can try each of the methods to understand which one works best in your garden.
» Spices
Dill is a very unpretentious crop that can be quickly grown everywhere in open ground. The scope of its application is very wide. The plant can be used both in cooking and in medicine. But even for such unpretentious greens, there are certain planting rules that allow you to enjoy the aromatic seasoning for a long time. Later in the article we will talk about how to properly plant, water and germinate dill.
Dill can withstand light frosts, so it can be planted as early as April. But how long should we wait for the first shoots in this case? The first shoots begin to appear when the air temperature reaches +3°C. Low temperatures inhibit the plant and contribute to slower growth. It is best to wait until the air warms up.
 A bunch of dill on the table close-up
 To obtain an early harvest, seeds are sown at the very beginning of April, when the snow has just melted. To be able to consume greens for as long as possible, do not sow the entire garden bed at once. Seeds are planted at intervals of a couple of weeks.
According to the lunar calendar, the best days for planting in 2018 will be:
Greens grow well in fertile soils rich in organic fertilizers. Before planting the plant, it is recommended to add a small amount of humus or fertilize the soil with a solution of mullein or bird droppings. The following are good chemical fertilizers:
The plant does not tolerate acidic soil, so it will not be possible to get a harvest. If there is no other choice, then all measures must be taken to reduce acidity.

Where is the best place to grow greens? She loves sunny beds with lots of sunlight. However, direct exposure to rays is undesirable, since appetizing greens can spoil their appearance with burns. It is also advisable to avoid drafts. But the plant is not demanding regarding its neighbors: it can get along well next to any crops.
Summer residents claim that many of them grow dill right in the beds with potatoes, onions and carrots. True, in this case it is necessary to ensure that the plantings do not create wilderness for each other.
Preparation of the bed should begin in the fall. This will make it possible to start sowing seeds in early spring, and, accordingly, get an early harvest. The soil must be dug up to a depth of 20 cm. In this case, both humus and mineral fertilizers should be added. After these procedures, all that remains is to thoroughly level the soil, make grooves in it and sow the seeds.
Seeds need preliminary preparation only if they are planned to be sown outside of winter. Preparatory activities should begin a week before the intended sowing. First of all, the seeds must be placed in gauze and moistened well. The gauze should not dry out, it must be constantly moistened. The seeds are kept in this way for about a week.
 Dill blossom close-up
When soaking seeds, they should be stored in a warm room with a temperature of at least 20 degrees.
Immediately before sowing, you need to dry the seeds for half an hour. After this, you can sow them in the garden. After a couple of weeks, shoots should appear.
If sowing is done before winter, then there is no need to soak the seeds. In the spring, they will already have enough moisture in the soil and they will sprout perfectly.
Before sowing seeds, you need to prepare furrows a couple of centimeters deep. The distance between them is left at 20 centimeters. It is recommended to make the gaps between seeds equal to 5 centimeters.
You can use greens as a compacting crop and plant it among other vegetables in the beds. In this case, it is necessary to provide sufficient distance for the development of both the dill itself and the neighboring crops.

Some summer residents use a zigzag method of sowing this plant in the beds and claim that caring for it this way is much more convenient. It is worth noting that this is a purely personal matter, everyone draws conclusions based only on personal experience and preferences.
Maintenance is not a big hassle. However, even this unpretentious crop has its pests. The main one is aphids. To combat it, it is good to use alcohol, the solution of which is sprayed on the garden bed. For 10 liters you will need 2 tablespoons of crude ethyl alcohol. In addition, the pest does not tolerate thyme growing near bushes. You can plant it nearby and not worry about the vitamin-rich greens being attacked by aphids.
After sprouting, you need to carefully monitor the color of the dill foliage. At the first changes, you should take a closer look and take measures to eliminate the defect.
After all, this fact indicates, first of all, a lack of any microelement in the soil. Yellowness can be eliminated by applying nitrate at the root, and red leaves can be eliminated by applying phosphorus fertilizers.
Dill is the most common and unpretentious spice grown everywhere. The harvest can be harvested almost all year round (as it grows). However, the leaves have the greatest aroma precisely at the time when the inflorescences begin to form.

Now there are many varieties of dill on the market, which differ from each other not only in appearance and taste, but also in the features of agricultural technology: some varieties are easier to grow, some need to be soaked before planting, some will take a very long time to sprout. These crops have different ripening times, which makes it possible to plan harvest dates in advance and adjust them to your needs.
It is not necessary to have a separate bed for dill: it is possible to grow it together with other crops (for example, potatoes, tomatoes, carrots). This is very important for owners of small summer cottages who want to use their territory to maximum benefit.
The tasty and aromatic seasoning dill has not lost its popularity for thousands of years, continuing to remain one of the most famous and accessible spices of the middle latitudes.
After a long winter, when the body is weakened and you want “fresh” vitamins from the garden, the question becomes relevant: when to plant dill in open ground in the spring?
Did you know? Dill was known to the ancient Egyptians as a medicine. The ancient Greeks ate dill, Sappho praised the aroma of dill, Theophrastus mentioned dill in incense, Hippocrates and Dioscorides left advice on how to use dill medicines. In ancient Rome, lovers gave bouquets and wreaths of dill to each other. In the 10th century, Ibn Sina described in detail the effects of dill on the human body. In the Middle Ages, they believed in the ability of dill to protect against witchcraft.
 Dill (Anéthum) is an annual umbelliferous plant. Dill has a dark green straight stem (40 to 150 cm high), covered with thin grooves. The stem branches in the upper part. The leaves are four times pinnately dissected (the last lobes are in the form of threads). Flowering occurs from June to July: dill flowers are collected in inflorescences and form a large umbrella (up to 15 cm) of 25-50 rays. The color of the petals is yellow. The seeds (up to 5 mm long and 3 mm wide) fully ripen in September.
Did you know? Dill enhances hematopoiesis in the body, has a disinfectant effect on the gastrointestinal tract and genitourinary system, improves digestion, normalizes metabolism, and reduces high blood pressure. Anetin contained in dill dilates blood vessels and improves blood supply to the brain. The combination of beneficial substances and properties, their easy digestibility make dill equally useful for both children and adults.
 Dill is not capricious. This plant is cold-resistant (it can withstand light frosts, and the seeds begin to come to life in the ground at a temperature of +3 ° C). If you want to achieve a good harvest of green spice, you must take into account what dill loves, and proper cultivation of dill involves creating conditions favorable for it.
Important! Adding frozen dill to salads will spoil the dish - an unpleasant herbal aftertaste and wateriness will appear. Dried (salted) dill will add a pleasant smell and taste to salads. Frozen dill is used in the preparation of soups and sauces.
How to sow dill correctly? There is nothing complicated about this.
Firstly, you need to ensure proper lighting. Bright sunlight is what dill likes. Open areas are suitable for it. With enough light, dill has a rich emerald color and develops normally. Ideal conditions are sunlight 12 hours a day at a temperature range of 18 to 25 °C.
Secondly, you will need to ensure the availability of the necessary soil.
 When choosing a site for planting dill, you should take into account that the plant prefers neutral soils with good ventilation and hygroscopicity. Dill does not require special soil fertility (areas where cabbage, cucumbers or other vegetables were previously grown are suitable for planting it - last year's fertilizing will be sufficient for the unpretentious plant).
It is best to prepare the beds for dill in advance (preferably in the fall). You need to dig up and apply fertilizer (you can fertilize with manure, urea, superphosphate or potassium salt - at the rate of 20-30 g per square meter). This fertilizing of dill will help you reap a large harvest.
Sometimes dill begins to change color to yellow-green, and its growth slows down. These are signs of nitrogen “starvation” of the plant. The remedy against this is the application of nitrogen fertilizer (20 g per square meter).
As practice shows, even beginners can grow dill early. Before preparing the seeds for planting, you need to choose a dill variety. Dill varieties differ in terms of ripening:
 When choosing seeds, you should take into account that we sow dill in open ground. Early ripening varieties are more cold-resistant and can easily tolerate frost down to –4 °C. Late varieties are more thermophilic.
 Essential oils in seeds inhibit the process of hatching and germination. Reducing their concentration before sowing dill in open ground will significantly reduce germination time. To do this you need:
Did you know? Using an aquarium compressor and aerating soaked dill seeds will help reduce the time it takes to prepare them for planting by three times.
Dill is sown in any season (receiving a harvest). It all depends on weather conditions and temperature.
To sow dill correctly, you need:
 There is no definite answer when it is possible to plant dill in open ground. The first spring planting is often carried out after the snow disappears, and in the fall - in early November and later.
 Did you know? The healing properties of dill are actively used in cosmetology. Dill is included in various cosmetics. You can get rid of bags under the eyes using dill infusion lotions (herbs and seeds). Frozen dill water whitens and refreshes facial skin.
 The time for sowing dill in the spring depends entirely on weather conditions - if the spring is warm and early, the timing will be earlier. Experienced gardeners recommend sowing after April 20.
After germination of the seedlings, they need to be thinned out so that there is no thickening (the distance between the sprouts should remain from 5 to 10 cm).
Important! Dill reproduces well by self-sowing - you must not miss the moment, otherwise the entire garden will be sown with dill next year. Experienced gardeners advise: to avoid spontaneous sowing of dill, tie the ripening baskets with gauze.
Summer planting has certain features. This is an opportunity to get fresh greens every day (it is enough to sow a new portion of seeds every 10-15 days). Another feature is that in summer the garden beds are all distributed and occupied by other plants. Questions arise: is it possible to plant dill and parsley, dill and other vegetables together? Dill does not get along with some plants, for example, fennel and beans. It is friendly with others (cabbage, cucumbers, tomatoes, onions, celery), protects them from pests (aphids, caterpillars) with its oils, improves their taste, and increases the fruiting period. In return, dill takes advantage of the fertile soil of its neighbors.
Planting dill in the fall is quite popular. The goal of fall planting is to produce as early a harvest of greens as possible in the spring. Autumn planting should take into account that:

Important! If the soil in the dill beds is not moist enough, this can speed up the “transition” of the dill into stems and flowers.
Winter is also the time to sow dill. To do this, you need to prepare a place in the garden (for example, remove snow). Dill seeds are scattered on the cleared area (preliminary preparation of the seeds is not necessary). Humus mixed with soil is placed on top of the seeds and covered with snow (as the snow melts, the seeds will gradually begin to germinate). In case of severe frosts, the area can be covered with film.
Planting dill before winter and in winter allows you to gain one or two weeks in obtaining the first harvest of greens.
Dill planted in open ground requires more attention than growing in a greenhouse. You need to remember the preferences of dill (sunlight, light neutral soil and moisture) and adhere to several rules:
 For daily use, it is better to pick dill at a young age, when the height of the stems is 17-25 cm. This occurs approximately 30-40 days after planting. With the beginning of flowering, the taste of greens deteriorates.
Dill is collected using different methods:


