On any home computer there is a “C” drive, and sometimes also a “D” and an “E” and a few more. Why do we need so many?
Let’s take and format one, for example, “C”. Just for the sake of experience, to see what happens. Let's begin by praying... But first we need to know what formatting is. Still, it’s stupid to do something you don’t know.
A computer hard drive is simply a magnetic storage device. In order for a computer to accurately find old files and write new ones, the disk must have some structure. Formatting creates exactly this - the entire disk is divided into certain areas - sectors and clusters, of a strictly defined size, into which all information is recorded. In addition, service information is created and also written to disk. This also includes a table of files. Simply put, it stores information about which file is in which sector - by reading this table, the computer quickly finds the necessary files. Formatting just creates a new partition on the disk. The so-called “quick format” only clears the table, but the files are still lost, since their addresses are erased. Although it is possible to restore them using some programs. So, right-click on the “C” drive shortcut and select “format”. Here we are waiting for a somewhat unexpected reaction from the computer if we have the operating system Windows XP, Vista or Windows 7 installed. Usually they are located just on the “C” drive, and the system is not a kamikaze to destroy itself, even with our divine permission. That's why we won't succeed
However, we are more cunning, so we take out some kind of disk from which we can boot bypassing Windows. We insert it into the drive, select boot from it in the BIOS, and wait. On the disk we will certainly find many programs to satisfy our destructive needs. The most common program that is now on almost any boot disk is Acronis Disk Director. It is quite suitable for us, especially since everything is clear and in Russian. Let’s select the unfortunate “C” drive and try to format it. Surprisingly, this time everything will go smoothly, without any warnings. If we wish, we can even completely delete the entire “C” drive, but this is completely perverted... We have achieved our goal, we remove the drive and restart the computer...
Yeah, all the LEDs blinked, as during a normal boot, the monitor turned on and behold... We are sitting in front of a black screen, looking at him blankly. Why did we expect him to dance, or what? Here we are sitting in front of a pristine computer that no longer has an operating system, and without it it is just a pile of hardware. She now grazes on the heavenly hard drives, taking with her “My Documents”, viruses and antiviruses, the desktop and much more... Now the operating system needs to be installed again, so take the installation disk and go! Or we call someone who knows how to do it...
However, if our system was not on the “C” drive, but, say, on the “D” drive, nothing bad will happen. We will simply lose all the files in “C”, but this is safe for the system - it was in a different place at that moment...
It is worth noting that in general the operating system is installed on the “C” drive, and not just because it is first on the list. It’s just that usually all disks are not separate hard drives, but one, but of large capacity. It’s just divided into several so-called “logical” disks. The computer perceives them as different, but there are differences. In this case, disk “C” is not just the first in the list, but also the first from the axis of the real magnetic disk - they say that it is “at the beginning of the disk.” This means that it is easier for the hard drive’s reading head to search for information in this place; it has to move less due to the smaller radius of this area. Fewer unnecessary movements – higher speed of reading/writing files. And the overall speed of the system depends on this, which is why the operating system is placed on the “C” drive. Although it is possible for any other, of course, but this is no longer professional. Usually, not very understanding “home hackers” can find the system folder in the most unexpected places.
But we already understand everything, so we will install our system on the “C” drive, and we will format it only before installing it, and even then we will first copy all the necessary files from it to other drives. And such experiments... Well, keep them away, it won’t take long to lose a six-month job. It’s a pity for the daytime...
From time to time, users need to work with flash drives or other devices. But when it comes to a hard drive, many questions immediately arise. That is why today we will touch on this sensitive topic, how to format the C drive of Windows 7 through the BIOS, as well as how to do this using the Windows 7 installation disk. Many users who have begun to study the computer on their own face this problem, so I will tell you in as much detail as possible.
Attention! Windows 7 is taken as an example! If a different system is installed on your computer or laptop, then there is nothing to worry about, since the program does not care which version is installed on a particular device.
The main reason when you need to format drive C is to reinstall Windows. Personally, when reinstalling Windows, I always format drive C. Of course, before formatting, you must transfer all the necessary data to another drive, for example D:\ or to another medium where there is free place for this data.
The second reason may lie in malware that cannot be cured. For example, many files on your C drive have become infected with viruses, what should you do then? After all, after treating these files, they may open, but most likely when you open them, you will see one or more errors on the screen that are associated with file corruption.
Naturally, such viruses are dangerous, but novice users forget about simple measures precautions: antivirus, opening links from friends (fake), etc. Therefore, it is better to use the Internet with an active antivirus to prevent this from happening to you. But if this does happen, then formatting the local disk and then installing Windows will help.
Note: if you find a lot of viruses on your computer and after treatment your Windows freezes, then it is possible that this was due to the viruses that you removed. In this case, it is better to reinstall Windows to get rid of annoying system glitches:
The cases described above were a kind of introduction from which you can understand why you may need this procedure.
There are many programs through which you can do this procedure, but in fact, you only need to know 2-3 methods, since situations are different, and only you can find a solution.
I’ll say right away that you won’t be able to format it directly from the system (meaning right-clicking on the disk and selecting “Format”). To format a disk, you need to boot from the installation disk, and then use it to format the C:/ drive or any other drive.
Now I will describe how to format the C drive in Windows 7, or to be more precise, we will do the formatting using the distribution kit. This principle is the same for all versions of systems! When you have started the installation and got to the step where you need to select the hard drive where you would like to install Windows, select drive C to format. Click once on the C:/ drive with the left mouse button, thereby selecting it. Then click on the item: “Disk Settings” - “Format”. All information will be deleted, including viruses, if there were any, of course.
Now we will figure out how to format a disk using third-party software. There are many special programs designed for this, but I prefer Acronis Disk Director because it is intuitive and convenient in every sense. It is with this utility that I will give an example of how you can format a hard drive or its partition.
For everything to work, you need to download AcronisDiskDirector BootISO- this is how you enter it in search engines to download this program. Then you need to burn this image to a CD or DVD.
There may be other Acronis products on your drive, but there is nothing wrong with that, as you may need them in the near future. After you set priorities in the BIOS, when booting from disk, select AcronisDiskDirector and wait for the program menu to appear on your screen.

The screenshot was taken in old version Acronis Disk Director, and the screenshots below were taken in the new 12th version of the program.
Before I start writing instructions on how to format drive C via BIOS, I want to say right away that this program has very detailed help on using this software, which opens: “Help”, then select “Help Topics”.

Now all that remains is to right-click on the disk we need and select “Format”. You can also select the disk with the left mouse button and select “Format” in the menu that appears on the left.

In the window that appears, before formatting, you can leave everything as it is, with the exception of the “File system” item. Make sure that the NTFS option is set there, since this is what is needed to work on Windows.

We confirm the actions at the top of the program, where the menu is located, click on the checkbox - we’ll start performing our actions.

In the next pop-up window, click “Continue” and wait for this procedure to complete.

After this, the system will reboot and, if you selected the drive where Windows is installed, then after the procedure is completed, the computer will not be able to boot the system, since it simply is not on your hard drive. If you selected another drive, for example, D:/, then Windows will be able to boot successfully.
This program can not only format disks, it has other features that may be useful to you. Therefore, I recommend using it.
If you do not have an installation disk or some software products at hand, then you can perform the formatting operation without software. You can remove the drive from your computer and connect it to another computer that has a different Windows system.
You should boot not under your system (the disk that was just installed into the computer), but from the disk that was installed before. When Windows boots up, it will detect your hard drive with all the partitions, then you can do everything necessary actions which I mentioned above. Right-click on it and select “Format”.

I also want to note that there are situations when it is not possible to format the C:/ drive for a number of reasons. But this is a topic for a separate article.
According to available statistics, several hundred people every day are interested in the answer to the question of how to format a hard drive via BIOS. I note that the question is not entirely correct - in fact, formatting using BIOS alone (at least on regular PCs and laptops) is not provided, but, nevertheless, I think you will find the answer here.
In fact, when asking a similar question, the user is usually interested in the ability to format a disk (for example, drive C) without loading Windows or another operating system - since “from within the OS” the disk is not formatted with a message that this volume cannot be formatted. Therefore, we will talk about formatting without loading the OS - this is quite possible; By the way, you will also have to go into the BIOS along the way.
In order to format a disk without using an installed operating system (including the hard drive on which this OS is installed), we will need to boot from some bootable drive. And for this you will need it yourself - a bootable flash drive or disk, in particular, you can use:

Once you have one of the specified drives, simply boot from it and save the settings. Example: how to enable booting from a flash drive in the BIOS (will open in a new tab, the steps are similar for a CD).
Note: If you want to format the driveC before installationWindows, then the following text is not quite what you need. It will be much easier to do this in the process. To do this, at the stage of selecting the installation type, select “Full”, and in the window where you need to specify the partition for installation, click “Configure” and format the desired disk. More details: .
In this example, I will use the distribution (bootable disk) of Windows 7. The steps when using a disk and flash drive with Windows 8 and 8.1, as well as recovery disks created within the system, will be almost the same.
After downloading Windows Setup, on the language selection screen, press Shift + F10, this will open the Command Prompt. If using a Windows 8 recovery disc, select Language - Diagnostics - additional features- command line. When using a Windows 7 recovery disk, select “Command Prompt”.
Taking into account that when booting from the specified drives, the drive letters may not correspond to those that you are used to in the system, use the command
Wmic logicaldisk get deviceid, volumename, size, description
In order to determine the disk that needs to be formatted. After that, to format, use the command (x - drive letter)
Format /FS:NTFS X: /q - quick formatting in the NTFS file system; format /FS:FAT32 X: /q - quick formatting to FAT32.

After entering the command, you may be prompted to enter a disk label, as well as confirm that the disk is formatted.
That's all, after these simple steps, the disk is formatted. When using LiveCD it's even easier - set the boot from the desired drive in the BIOS, boot into a graphical environment (usually Windows XP), select the drive in Explorer, right-click on it and select context menu"Format".
When installing the operating system, as well as when changing files or redistributing space between partitions, it is necessary to format the hard drive. This is a fairly common operation performed by PC users. If you haven’t done anything like this before, then let’s look at the theoretical part of the question.
Marking areas for storing information, in which some of it is deleted, is called formatting. It creates a system for accessing stored information.
Typically done for:
Currently there is a large number of various file systems. They are used on a variety of equipment, including not only computers, but also mobile devices. To work in latest versions Windows uses the NTFS file system.
Formatting is performed to delete files from the hard drive, as well as to change one file system to another.
In most cases they resort to it:
Despite the large number of various programs for working with a hard drive, the Windows operating system has its own set of utilities.
Let's look at the process of formatting disks using Windows:

Windows also includes a more comprehensive service for working with hard drives.
To open this menu, do the following:
Execute this operation You can also use the command line:


If you need to format a hard drive partition from the BIOS, you will have to tinker a little. Unfortunately, the BIOS does not have tools for formatting a hard drive, so you should use third-party programs to perform these operations.
One of the most common is Acronis Disk Director. To work with it, you need to create bootable media in the operating system with the files of this program. But before you start creating bootable media, you should consider another option - formatting using Windows Installer. This solution is a simpler option compared to Acronis Disk Director.

For this method, you only need a disk or flash drive with a recorded operating system installation package.
To format, you must perform the following steps:

Attention! The drive partition letters may not match. To more accurately determine the required disk, use the wmic logicaldisk get deviceid, volumename, size, description command.
To create a bootable flash drive you will need:

Algorithm of actions:
To load a flash drive you need:

The most convenient formatting method is to perform all actions using standard operating system utilities. This solution does not involve installing additional programs or creating additional boot disks.
If you do not have an operating system installed, then in this case you should use special programs, such as Acronis.
Steps describing how to format a hard drive as ntfs:

In addition to the standard Windows programs There are various utilities used for the same purpose.
The most common options include the following:

What is the best program to format drives in ntfs?
Each program has its own characteristics, but the main direction for all utilities remains the same - working with disks, including creating partitions, forming into other file systems, etc. Therefore, choosing a program is a purely personal question for each user, which depends on his preferences .

How to quickly format a disk without losing data?
Unfortunately this is not possible. All stored information will be deleted. Only part of the data can be recovered.
Which drive is better: external or external?
Formatting external drives is performed in the same way as for a regular hard drive. During this process, all information will be deleted, including windows, after execution the disk will be like new without windows.

Unable to format hard drive
If you did everything according to the instructions, but did not achieve results, do not sound the alarm. This doesn't always mean something bad.
If you have removed the factors described above, but still cannot format your hard drive, you will have to resort to special programs. The most popular tool is HDDscan, which is easy to install and also free.

Algorithm of actions:
You can also use Acronis Disk Director. If it is impossible to format a portable hard drive using this program, most likely the hard drive is partially damaged. And the entire procedure can sometimes be performed only from bootable media, that is, not in the operating system.
How to force format a flash drive?
To format flash drives you can use the program HP USB Disk Storage Format Tool.

How to format a write-protected drive?
The operating system includes utilities that:
Quite often, users have problems with formatting. Especially if you need to do it with the system hard drive ( usually, but not always, this is C). In this case usual ways won't work.
If the hard drive ( or its section) without system files, then use the formatting method in the system itself.
In my instructions, I will show you how to format a hard drive with a system (there, where is windows installed) and without. I'll start with the simplest thing.
These methods are practically no different from. It can only be done on those hard drives that do not have system files ( usually D or E).
No need to worry about formatting the system drive. There is no way to do it this way. You will see a warning that the action is not possible.
Open my computer ( conductor). In it, select the disk, open the context menu and select formatting.
In the window that appears, leave everything as it is ( can be removed quick way, but then you will have to wait a very long time).

The process will take a long time ( depends on volume). You may think that nothing is happening and the computer is just frozen. But in most cases this is not the case.
The same can be done in the disk management window. Use this method if for some reason the first one did not work.
Go to Start >> All Programs >> Administrative Tools >> Computer Management.

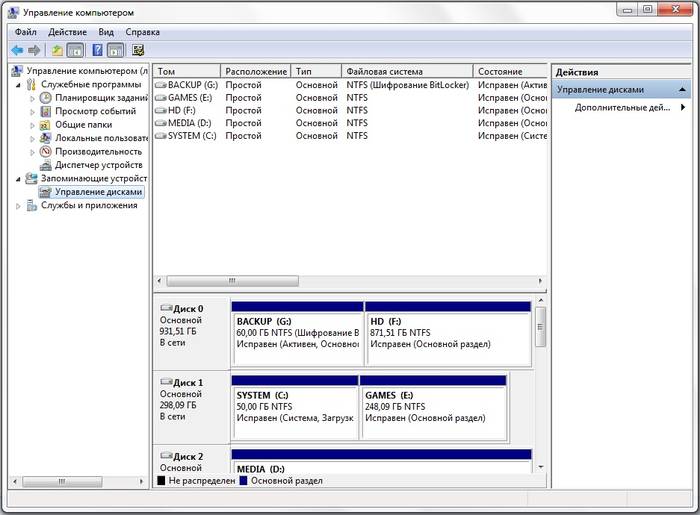
In the window that appears, select the hard drive and “Format” in the context menu as in the image below.

There is 1 more method on the command line. Administrator rights are required.
Go to Start menu >> Run ( or Win+R) to open the progress bar. Then go to the command line.

Enter the command there:
Explanation: E is the hard drive letter. NTFS- file system. Q- quick formatting.

When you try to format your system hard drive using the above methods, you will see the error shown below.

Why does this happen? It's simple. Windows cannot format itself. This will cause the system to malfunction and the error provides protection against this.
In addition, even if Windows was installed on another hard drive, the system files necessary to run the OS can be stored on the local one. In this case, the BIOS check will begin with it ( C).
It turns out that this is only necessary for future installations new system. Otherwise, you will simply make the computer unusable. Before this you need to prepare a little.
You will need another media with the operating system you plan to install. This method works on any version. I'll demonstrate it on Windows 8.
Set it in advance. First you need to find out its letter. It may be different from "C:" so check this in advance. Now I’ll show you how to do this right during installation.
Press the key combination Shift+F10. On other versions operating systems This keyboard shortcut works the same way.

A command prompt window should appear. In it, enter the command notepad, which will open a notepad. From there you can further view the necessary information.

The Notepad program will open. In it, go to File >> Open or press CTRL+O.

Explorer will open. Go to the “This PC” tab and look at the drive letter you want to format. In my case D. It is designated as local.

Now go back to the command line and enter the command:
Where /FS:NTFS- file system. D:— drive letter. /q- quick formatting.

You can also use the utility directly during the installation process and not use the command line.
Select the language, click on the install button and in the window where you need to select the partition to install, you need to select formatting. See how it looks in the image.

It can also be done using any ( almost) LiveCD. This is the media from which the system boots instead of booting from the hard drive. You can format it directly in Explorer, similar to methods with non-system hard drives. This is possible due to the fact that most of the data is in RAM and this does not prevent the computer from starting.
There are also many programs, but they are paid and their use will be unnecessary for such tasks. This information should be sufficient.
If something was not clear to you, then watch this video. It clearly depicts all the actions with detailed comments and you will have no questions left.
Were you able to format your hard drive?


