Grooving walls for wiring is not difficult to do with your own hands, especially if you have a special tool and the wall itself is concrete. The nuance is that sometimes there are no suitable power tools at hand, or the partition is made of wood, aerated concrete or plasterboard. Here things are a little more complicated and you need to know how to properly make a groove without polluting everything around (in particular, without dust) and, moreover, so that the groove for the wire is even. Next, we will look at the main ways to create grooves and useful tips regarding this issue!
First of all, let's talk about how you can make a groove in the wall, having considered the most suitable tools and the effectiveness of their use. An overview will be provided from the most labor-intensive method of gating to a more convenient and faster option.
The old-fashioned way to make a groove for electrical wiring yourself is to knock it out with a chisel and hammer. The advantage of this option is the complete absence of costs, because in fact, you can pierce a wall without power tools, using improvised tools that are found in every home. Disadvantages - a large loss of time and effort, which is not entirely reasonable in the 21st century.
In addition, you will not be able to make a recess for the cable in a brick using a chisel. We advise you to refuse this option, because... Below we will list simpler and effective ways gating walls for wiring in houses and apartments.
How to do without a wall chaser and other power tools
A more effective, but still inconvenient way to create grooves under is drilling holes every 1-1.5 cm across the width of the future recess. When the “point” route is ready, as shown in the photo below, you can use a chisel to knock out the jumpers between the holes, resulting in a not entirely smooth, but still groove. The disadvantage of this option is, again, time-consuming and low productivity of concrete cutting. 
Coming closer to handy power tools that will allow you to quickly cut a straight groove, the worst of best options is angular Grinder(angle grinder) or as it is commonly called in common people - grinder. If you put a diamond disc on it, the process of cutting walls for wiring will become several times faster, and the contours of the groove will be perfectly smooth. 
This option really has a lot of disadvantages: a lot of dust in the room, the same groove can be made in two approaches (one boundary is cut first, then the other), the inability to cut a route in the corner, increased noise during operation, and besides, it is very difficult to make a depth the grooves are the same along the entire length. The bottom line is that you should only use a grinder to drill a concrete wall as a last resort.
Correct work with an angle grinder
To make a strobe yourself with a hammer drill, you just need to select a suitable attachment - a spatula or a special strobe and walk along the marked lines in impact mode. The disadvantage of using only a hammer drill is that the grooves will be crooked, but still, in home conditions, this type of power tool is most often used for punching walls with your own hands.
By the way, with a hammer drill you can not only just go through the walls with a spatula, but also work like an impact drill - first drill holes along the markings, and then knock out the partitions with a spatula. Grooving concrete is quick, convenient, and at the same time the grooves themselves are more or less even.
Video tutorial on using a wall chaser with a hammer drill
Well, the last one, the most effective option– using a special tool that allows you to make grooves on concrete evenly and without dust. The wall chaser is really very convenient to use, it does not work so noisily and, thanks to its connection to a construction vacuum cleaner, it instantly absorbs all construction dust. Today, wall gating with this tool is the most effective, fastest and safest.  The only but significant drawback of this option is the very high price power tools, so there is no point in buying one for a one-time repair in an apartment. There are two ways to get out of this situation: rent a wall chaser (it will be inexpensive) or. We recommend stopping at production homemade instrument, especially if you have an angle grinder, the process will not take more than half an hour.
Using a wall chaser
So, among all the listed tools for tapping walls for wiring with your own hands, we recommend choosing one of two methods:
On latest version Let's stop a bit. The fact is that if you cut through the boundaries of the groove grinder, after which you can knock out the core from the inside with a hammer drill, you will get a quick and effective creation groove in concrete and brick walls. At home, this option is used very often, so if you don’t have the opportunity to make a wall chaser, choose this option!
I would like to move away from the topic a little and talk about how to say it correctly: shtraba or shtroba. The fact is that the term in construction is actually correctly called shtraba, but for unknown reasons, a slightly modified pronunciation has been fixed in conversation for a long time. Technically, both versions of the word mean the same thing, so don't be surprised if we use both pronunciations later in the article!
Video: comparison of the three best power tools by cutting time
Before proceeding to gating walls, it is necessary to take into account the following standards and requirements in accordance with SP 76.13330.2016 “Electrical Devices”, updated edition of SNiP 3.05.06-85 and recommendations of experienced electricians:

Taking into account all these standards and requirements, you can correctly make a groove for electrical wiring so that the latter is safe, durable and easy to maintain. Next, we will talk about how to carry out wall gating using the most popular tool - a wall chaser, providing step by step instructions in pictures!
So, to make the instructions clear even for electricians, we provide step-by-step technology, which will allow you to quickly and correctly wire the walls for wiring in a house or apartment:


This is where do-it-yourself wall slitting for wiring ends. All that remains for you is to clean the hole and secure the cable in it with a dowel clamp, gypsum plaster or alabaster. We talked about this in detail in the article:. We draw your attention to the fact that you need to trench the walls before plastering, and not after, so that you can then plaster the entire route in one fell swoop, preparing the surface for wallpapering or tiling.

If the instructions provided seemed complicated to you, you can always call a specialist so that he not only drills the entire network of grooves, but also disconnects the wiring himself. However, keep in mind that such a pleasure will not be very cheap. Today, the price of gating 1 meter of route can range from 100 to 500 rubles, depending on the material of the walls. In addition, a fine for each socket, switch and distribution box will cost you 300 rubles per point. As you can see, the prices are not very cheap and if you add up the amount for the entire house, the price will be quite high, so it is better to try to do the gating yourself.
The instructions provided above are suitable if you want to make a groove in a monolithic or brick house with corresponding walls. However, today aerated concrete, wooden and plasterboard partitions can be erected inside housing. We’ll talk further about how to groove one of the non-standard wall options yourself.
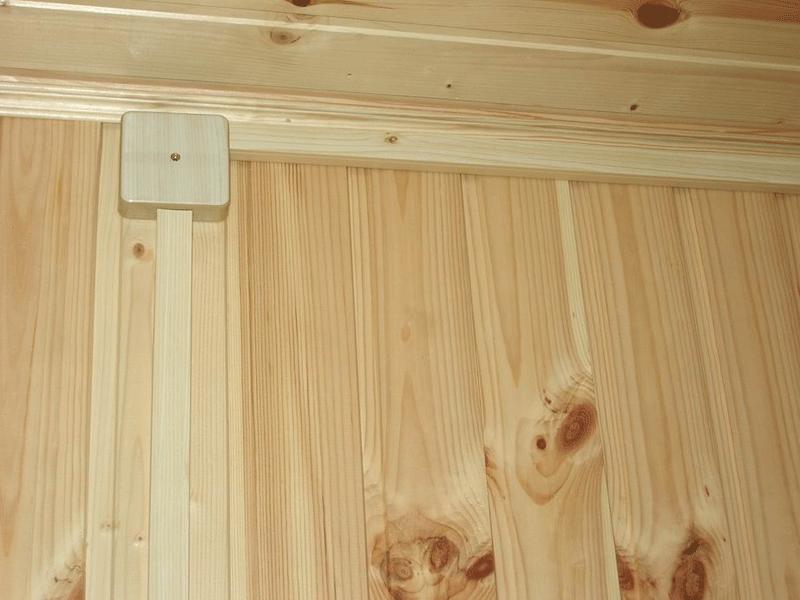
When installing electrical wiring in a bathhouse or wooden house You will encounter walls made of logs or profiled timber. Making grooves in wood is prohibited due to safety regulations, and this is not advisable, because... You will not have to chisel the log, but rather cut special recesses in it. Such an activity will be very difficult and will take a lot of time, so in the case of wooden walls they use.
If you need to lay a cable in a wooden floor, gating here, again, is impossible, so you need to consider the option of laying it under the boards behind the chipboard, insulation and other layers of the pie. In this case, the cable is laid in pipes with localization capability, that is, metal tubes. In general, electrical wiring in a wooden house is not difficult, but there are a number of nuances. Hidden wiring in combustible walls and ceilings is also possible in metal pipes, but not in the corrugation. If you are still going to lay wiring in corrugated floors or walls made of wood and other flammable materials, you must provide protection with a 10 mm thick layer of non-combustible material. This can be plaster, alabaster, etc. (PUE 2.1.40,). We discussed this issue in more detail in the article.
Open wiring in wooden garage(using wood-look cable channels)
It will also not be possible to cut horizontal and vertical lines in plasterboard walls, because... The gypsum board sheet is very thin and fragile. The cable is simply laid behind plasterboard partition in corrugation, between profiles. The only thing you can do in drywall is to drill holes for sockets and light switches with a crown, as shown in the photo: 
If you need to make a groove in tiled floor(for example, in the bathroom or kitchen), there should be no difficulties here; it will be most convenient to use an angle grinder or wall chaser. You should not punch the tiles with a hammer drill, because... You will only damage the material - the tiles will crack, after which you will have to completely replace the floor covering. Do not forget that when working with stone and tiles, you need to install a diamond blade that is designed to work with such material. 
Well, the last of the popular materials is aerated concrete. You can make a groove in aerated concrete yourself using a special manual wall chaser, the cost of which does not exceed 1000 rubles (and even then this is a model from the manufacturer). Using this tool is quite simple, as you can see by watching the video tutorial below.
Wall gating is required when the wiring in the room needs to be laid hidden. They begin work after marking the routes. An integral part the gating process results in increased dust formation. Therefore, do not forget to use respiratory and eye protection. For gating, you cannot do without special devices and tools. For small volumes, you can even get by with a simple chisel and hammer; if you completely replace the wiring in an entire apartment or house, you will need more serious things.

If you are renovating only one of the rooms and still live in the others, then use a hammer drill and a chisel. The wall chaser produces dispersed dust that will penetrate everywhere and can ruin things. 
To groove with a hammer drill, first drill holes d-8mm along the marked route. The distance between the holes is 1 cm. Then put the slotting attachment on the hammer drill and switching to impact mode, break the slot between the holes.  Of course, purchasing a wall chaser may not be economically feasible. However, chipping walls with a simple grinder is quite dangerous work. Even for work in one apartment, I advise you to still purchase the most inexpensive wall chaser. It is very important that high-quality discs are used for both angle grinders and wall chasers. In this case, the work will take much less time, and the work process itself will be safer
 Only people who are constantly involved in repairs can afford to buy industrial vacuum cleaners.
For everyone else, we can advise you to buy bags for vacuum cleaners and screw them onto the branch pipe of the wall chaser. The amount of dust generated during gating will be sharply reduced. 
If purchasing a wall chaser + vacuum cleaner set is prohibitively expensive, try purchasing these tools from professional builders for rent. Some craftsmen adapt homemade water supply to the disks to reduce dust formation:

Disadvantages of a wide groove:
When gating, do not forget about safety precautions. Be sure to use:
At the end of the work, clean the grooves from dust with a vacuum cleaner or broom.
You can view the current prices for wall chasers and attachments for wall chasers or angle grinders.
Most often, people start thinking about concrete chipping when they start making repairs in a new home, or want to redo something in an old one. refers to durable materials, especially if it still has, but if you want to install additional sockets, electric wires or other pipes, then you can’t do without it.
Let's consider the norms and standards, where you can do it and where it is strictly prohibited, what tools you will need and much more.
If you have planned work, be sure to draw up a diagram and do not forget to photograph everything, as this will be useful to you in the future.
As we have already said, gating is done in order to lay, make new sockets or switches. It is necessary to make special grooves. Before starting work, study the regulatory documents. If you break load-bearing walls, then you can not only pay a fine, but also harm your neighbors’ homes.
Can't do horizontal channels in houses made of panels, since in this case the reinforcing materials are damaged. It is not allowed to make grooves in seams or joints bordering the stairs if this will affect the floors. The only option in these cases is plastering work.
Wall chipping is done only in horizontal and vertical directions. The width and depth of the groove should not be more than 25 mm. According to SNiP 3.05.06-85 it is necessary to deviate from:

The work process also depends on the material where the groove needs to be made. For example, in, this can be easily done using a chisel and a hammer. But if you need to work with concrete, then you need special tools.
Do not forget to carry out preparations before work. Find the places where the old wiring was installed, this will protect you from getting electrocuted. If you don't know, there is no wiring diagram, then you can use an indicator. Remove old coverings from the walls (wallpaper, paint, plaster). So that the whole house or apartment does not become dusty. Be sure to hang a wet rag or a special one on the door. Construction film.
Ideally, you need to invite specialists who will do everything necessary work, however, you can do everything yourself.
You will need special tools. If possible, use a strobe; when choosing, pay attention to its power. You can also cut through the wall with diamond wheels, but some parts will still have to be knocked out by hand. You can drill a large number of holes, but it is quite tedious work. As you understand, there are many options regarding which tools you can use.
IMPORTANT: you don’t have to buy expensive tools, you can just rent them.
When carrying out work, first find out what the wall is made of. This will allow you to find out whether there is reinforcement and approximately how and where it is located, its location, and the choice of tool also depends on the surface material.
The easiest way would be to groove or. It's bubbly, so it's easier to destroy than monolithic structure. After your groove is ready, do not forget to cover it with a small layer, and also fill in any excess potholes. This will provide an additional protective surface.
The most difficult part will be gating. The work is complicated by the fact that there is reinforcement in the wall. Here it is necessary to use only specially designed equipment.
When purchasing tools, pay attention to the fact that it is best to immediately purchase attachments that will be useful on different surfaces.
Make two cuts across the entire width of the groove; they should be parallel to one another. Use a hammer drill to deepen the groove, as we wrote above. This way you will get smooth edges and good depth channel.
Disadvantages: a lot of dust, but with an industrial vacuum cleaner this can be corrected. To immediately work with an angle grinder and a vacuum cleaner, you need an assistant. The closer the vacuum cleaner is to the groove, the less dust there will be. After work, ventilate the room well.
It is considered a professional tool for creating grooves. There are 2 discs attached to the tool, the distance between the discs can be adjusted. Thus, 2 cuts are made at once. You can also adjust the depth. The wall chaser has a casing that fits tightly to the wall, and a vacuum cleaner is also attached, the process can be considered dust-free work. When working, it is important that no old wallpaper remains on the walls, as it clogs under the casing and clogs the vacuum cleaner.
The remaining concrete is removed using a hammer drill. This method is the most expensive. Most often, only professionals have such tools. A wall chaser can make holes for pipes up to 5 cm in diameter.
Sometimes it is necessary to make a track directly under the wallpaper. To do this, you need to remove a small strip of wallpaper. We retreat more than 5 cm from the future track, and make an incision with a stationery or mounting knife. If you need a horizontal groove, then make the cut higher.
Soak, bend and attach using tape. The resulting area where the work will take place should be more than 10 cm. We use only a hammer drill or wall chaser to avoid a lot of dust. After the work is completed, we lay the wires, putty and wait for everything to dry, then glue the wallpaper in its original place. Do this very carefully so as not to damage the wallpaper. The same work is carried out if it is necessary to groove walls for sockets.
To make a hole for a socket or switch, follow these steps:
If the socket is not high from the floor, then the wires can be hidden under the floor.
When all the holes are ready, clean everything well from dust. We lay the cable, fill the groove with putty (gypsum, plaster, alabaster powder), and carefully level everything. We glue wallpaper on top.
Having conceived the redevelopment of rooms with a design update, the owner of residential premises is often faced with technical issues that require a hidden, safe location of the wiring of electrical, computer, security and other low-current circuits.
Now all owners strive to hide this equipment as much as possible, which is often justified, but requires taking into account many factors. Our tips will help the home handyman, when renovating an apartment, to safely tap walls with his own hands for wiring, choose the optimal tool for the job, and complete it quickly and efficiently.
It will not be possible to silently drill walls for cables. Such work will immediately become audible to all residents of a multi-story building from the first to last floor. The blows of a hammer or perforator travel well across load-bearing structures made of brick and reinforced concrete. They will interfere with people's rest, cause irritation, and sometimes misunderstanding.
We advise you to talk to your neighbors in advance and discuss the gating schedule with them, taking into account that noisy repairs are legally permitted from 9 a.m. to 7 p.m. on weekdays. All other times, including weekends and holidays, such activity is considered illegal.
From 23 to 7 am, noise in the apartment is allowed no more than 40 decibels. This is the level of operation of the computer system unit, quiet colloquial speech or the sound when lighting a match.

The hammer drill, as the main tool, performs scoring with a noise of 120 decibels.
Wall chipping is accompanied by the grinding of the wall material into dust and the scattering of small stones in the most unexpected directions. When working, use protective equipment and tools: glasses, headphones, respirator, durable clothing, shoes.
Chasing walls for wiring is hard physical work. You can do it different ways, created in relation to building materials, from which the building is constructed. We will proceed from the fact that House master has in its set a standard tool: a hammer, chisel, drill or hammer drill.
The most accessible, but labor-intensive method. This type of gating is suitable for working in a thick layer of plaster of about two centimeters. In other cases it is very difficult to use.

Although I had to emergency situation cut a groove one and a half meters into the concrete wall. Damaged wiring required replacement. To do the work, I had to use a 400 gram hammer and a special chisel made from a 30 cm long track pin from a tracked vehicle. A hammer drill was a rarity at that time, and hammering took a couple of hours. I do not recommend repeating this kind of gating under the cable.
This tool is quite capable of punching holes in brick, foam block and even concrete walls.

In any case, before you start gating the walls, everything should be carefully thought out, calculated and saved in the computer memory or on paper. This information will be useful in the future.
Let's look at methods for creating recesses for sockets, switches, outlet blocks and distribution boxes. They are easier to get started with. And the technique for cutting longitudinal grooves for cables is disclosed above in the review of tools and devices.
The hammer drill has a device - a nozzle of increased diameter, which works on the principle of a bolt.

It allows you to quickly create round recesses in concrete for single sockets and switches. To prevent the cutout from going to the side, a drill is located in the center of the crown. The beginning of the marking of the socket box is shown in the photo.

After the nozzle has cut to the required depth, it is removed, and the remaining protrusions are cut off by a hammer drill with a chisel.
This method works if there is no nozzle, and there is no time to put aside a recess for the socket box. Holes are drilled along the diameter of the marked circle with a hammer drill, and the partitions are cut down with a chisel.
The method is quite accessible, but the edges are not as smooth as with a nozzle.
When installing blocks of sockets and switches, you have to cut larger recesses. For these purposes, it is convenient to use a grinder with a diamond wheel. They cut grooves around the perimeter of the block, and then use a hammer drill and a chisel.

After processing is completed, the socket boxes are placed in the wall and prepared for installation of cables and wires.

Human memory has the ability to forget information, and knowledge of the locations of the grooves on the walls may be required at any unexpected moment.
We recommend that you sign the final location of the grooves directly on the wall with a clearly visible marker and make detailed photos all places where cables and wiring run, save them on several electronic media. They will help you out in difficult times.

Wiring enclosed in the wall operates under conditions of less heat dissipation and heats up more. This imposes increased requirements on its choice.
Cables and wires with aluminum conductors are prohibited from being installed in modern residential premises by the rules, and previously installed wiring in old buildings is simply completing its service life.
Do not interfere with the grooves. They can cause malfunctions or fire.
The most suitable cable for these purposes is KVVG ng, or better yet, KVVG ng-LS. The abbreviation “ng” denotes the marking of their protective shell as non-flammable, and “LS” denotes reduced flammability with low gas emission. They can be laid side by side in cable ducts.
There are only two accommodation options:
Suitable only for cable brands KVVG, which have increased reliability. You can simply lay it in the groove, soak it with a primer for better adhesion to the putty, and plaster it.


Special flexible plastic protection allows you to quickly replace a damaged cable during operation. It is simply turned off on one side and pulled out on the other. It is important to remember to attach new wiring to the end that is being pulled out. Otherwise, difficulties will arise with its installation.
The PPV cable with copper conductors must be placed in the groove only in this way. It should not be permanently bricked up.
To consolidate the material of the article in your memory, we recommend watching the video of the owner Tikhy Dima “Chambering walls with a wall chaser.”
A major renovation involves replacing not only the flooring and wallpaper, but also the electrics, and you need to know how to tap walls for wiring if you are going to do this work yourself. In the article, we’ll talk about four available tools and a professional apparatus, compare the effectiveness of each of them, and also find out on which surfaces gating is prohibited.
Before making a groove in the wall, make sure that there is no old cable in the path of the new wiring, and if there is one, check whether it is de-energized. A special indicator will help determine this. Next, we carefully prepare the walls. Removing remnants of old wallpaper and other finishing materials, which can clog the casing of the working device and lead to a short circuit. The next stage is preparing a sketch with notes on the location of future wiring, a layout plan for switches and sockets.
Before tapping the cleaned walls, using a tape measure and a pencil, we outline the route for laying the wiring and additional elements. To save time, use laser level. If you personally carry out the work process from start to finish, check out normative document SNiP 3.05.06-85, which describes in detail how to properly tap walls. The laying of wires is carried out parallel to the base of the structure - strictly vertically or horizontally. Tilting the groove at an angle is allowed when laying electronic wires in inclined walls (in attics).
WITH According to the standards, horizontal grooves are carried out at a distance of 150 mm from the floor slabs, vertical - at a distance of at least 100 mm from the door and window openings, and from gas pipes retreat at least 400 mm. The depth and width of the groove is at least 25 mm, depending on the thickness of the cable. For a cable 1 cm thick for 3 cores, the depth should be 3–4 cm. Average length grooves - 3 m. We advise you to design the wiring plan in such a way as to minimize the number of turns of the grooves to the switch and sockets. Ideally, you should have one turn from the junction box to the outlet or switch. It is prohibited to make horizontal grooves in load-bearing structures; this rule applies to all walls panel house.
The main points have been taken into account, we get to work, and to comply with safety precautions, we put on a respirator, safety glasses, and open the windows for ventilation. To save time on subsequent redevelopment, before finishing, use a marker and tape measure to mark the distance from the corners of the walls and ceiling to the grooves, and take a photo of the resulting sketch. This way you will know where the wiring goes, and you won’t be mistaken when choosing a place for a dowel or nail. .
It's time to prepare your tools. Use a professional machine (wall chaser) or look for an alternative. The simplest option is a hammer and chisel. We start work with markings. Using a chisel, we mark the recesses where the groove will go through for the electrical wiring. Next, place the tip across the furrow and knock out upper layer walls with a hammer, continue to work along the intended line, and then make 25 mm indentations along the entire length. Dignity this method– availability of tools. But there are more shortcomings. A lot of effort and time are spent, the contours turn out uneven. Making such a groove in brick or concrete is problematic, but for plaster it is a good budget option.
A drill will speed up the process. Along the marked line, we drill holes every 1–1.5 cm to the required depth. After this procedure, you will receive a groove outline. To complete the work and create a single strip, take a chisel and knock out the jumpers between drilled holes. This option can be used for chipping concrete. However, just like when working with a hammer, it will not be possible to achieve smooth lines and uniform depth.
A hammer drill helps you drill holes into the wall for electrical wiring yourself. Professional and amateur tools differ in quality, set of attachments and additional characteristics, but the main advantage of this technique over a drill is in any version - the impact function. Yes, this function is also available in the drill, but when permanent job In shock mode, equipment wears out quickly.

A hammer drill is a powerful tool; if you wish, you can turn off the rotation and get a full-fledged jackhammer. Therefore, ditch concrete wall It's easy and fast with him. For work we use two attachments with a short and a long drill, and a metal spatula. The principle of operation is not much different from the option in the previous chapter. We make holes along the intended line at a distance of 1–1.5 cm to a depth of 25 mm. We clear the recess from any remaining concrete with a spatula. The finished groove turns out slightly uneven.
And if you want to achieve straight lines, combine an angle grinder (angle grinder) with a hammer drill. To make the process go quickly, the grinder is equipped with a diamond blade. So working with brick or concrete covering will not cause you any trouble. We make two parallel cuts at a distance equal to the width of the groove. Next, take a hammer drill and make a groove to the required depth, repeating the familiar steps described above. The combination of these two tools results in straight lines and a fairly uniform groove depth.

The main disadvantage of the method is the large amount of dust that is released when working with an angle grinder. To minimize it, use an industrial vacuum cleaner. For ease of use, hire an assistant to hold the vacuum cleaner as close to the cut as possible. Don't forget to ventilate the room well after gating.
Wall chaser – professional tool, is used for . This is an improved model of an angle grinder, which is used by electricians. The device contains two diamond blade, thanks to which an accurate cut line is obtained with the ability to adjust the distance and width of the groove. The cutting discs are covered with a special casing. They cover the point of contact with the wall.

The wall chaser has an outlet into which a hose from the wall is inserted. Thanks to the suction, dust-free gating is ensured. After cuts are made along the entire length of the groove, excess concrete and brick are removed using a hammer drill. There is only one drawback to this technique – the high price. If for a domestic instrument Interskol you will pay 4500–5000 rubles, then for foreign-made brands ( Bosch, Makita, Metabo) you will have to shell out an average of 30,000–55,000 rubles, depending on what the case is made of.
If it becomes necessary to make holes for a socket or switch, follow following instructions. First, make a hole in the center with a diameter of 8 mm, and then make a small notch with a crown to mark the outline of the future socket (switch). Make 8–10 thin holes around the perimeter of the marked contour, after which you can easily make one through hole with a crown. When drilling a hole for the switch box and socket, do not touch the fittings. Violation of the integrity of the reinforcement can lead to the appearance of cracks in the walls and their destruction.
When installing the socket at a short distance from the floor, you don’t have to carry out gating in the wall. Lay the wires on the floor.

After the grooves and all the necessary holes have been prepared, we clean the walls from dust using a vacuum cleaner and a broom. After laying the cable, we seal the grooves using putty, gypsum, plaster or. Please note that the walls must be tiled before the plaster finish in order to achieve the maximum flat surface before wallpapering.
The main question that arises for an inexperienced builder is “Is it possible to ditch a load-bearing wall?” If we are talking about external walls and partitions, gating is allowed, since they are thick and strong, which allows them to withstand the loads of perforating equipment without consequences. The same cannot be said about internal load-bearing walls of frame-panel type. To carry out such work, it is necessary to obtain permission from the municipal construction committee.
It is also prohibited to make a groove in the floor of a panel house. If it is necessary to lay wires, make concrete screed and provide space for the cable. You can only ditch the ceiling along the shortest path to the lamp. Are grooves made in reinforced concrete partitions? No. This leads to the appearance of cracks in the structure and adverse consequences. As a last resort, if it is necessary to make a groove, a shallow groove is made so as not to damage the reinforcing frame.
When mounting or in a wooden house, avoid gating. The walls of such buildings are made of wood or timber; the material will have to be sawed rather than tapped. This is a complex process that takes a lot of time and effort. Therefore, installation is used open wiring. The same rule applies to wooden floor coverings. The wires are laid behind boards, chipboard panels, baseboards, and insulation.
Plasterboard walls are a thin and fragile material, so it will not be possible to install horizontal or vertical grooves in them for laying cables. As with wood, the wires are laid in corrugations or between profiles. But making a hole in the drywall for an outlet or switch is allowed. To do this, use a crown. The last materials that I would like to pay attention to are aerated concrete and foam concrete. In them, the groove is made using a manual wall chaser, which costs about 1000 rubles. In any case, the rules for gating walls may differ in each region, so we recommend that you familiarize yourself with them first.


