In Khrushchev and Stalinist houses, the builders usually did not make sure that the walls were even. Because of this, when repairing, it is necessary to pre-align the walls.
When repairing, you can not stick wallpaper on walls that have defects.
And if you want to glue the tiles, then the walls need to be leveled so that they are very even, otherwise there will be voids under the tiles.
Before performing work, you should select and prepare a mixture for plastering walls. In dry plaster mixtures there are two binders - gypsum and cement. Calculate the amount of material, taking into account the area to be leveled and the number of layers applied.
If you work in residential areas (living rooms, halls, bedrooms), a more environmentally friendly and supportive favorable microclimate in the room a mixture based on gypsum. For kitchens, bathrooms, closets and more utility rooms cement mixtures are quite suitable.
 Get the tools:
In addition, you should buy work clothes, a headband, gloves.
Apply a building level to the wall horizontally and vertically to see all the irregularities.
Then they look for defects, for this they put the rule against the wall. So, where there are defects, put a mark.
Then they retreat from the corners of the room by 0.3 m, and then draw straight lines vertically in the direction from ceiling to floor. Then they retreat 1.6 m from each drawn line and make another line vertically. They are determined with the length of the beacons, for this at the corners they retreat from the ceiling down by 150 mm, and from the floor up by 150 mm and drill holes, insert dowels with self-tapping screws.
Then the cords are pulled horizontally from one corner to another, one at a little below the ceiling, the other cord 15 cm below the floor. In places where the cord will intersect with the lines drawn vertically, holes are drilled and dowels are inserted without self-tapping screws. As a result, 2 rows of dowels are formed, with an indent of 150 mm from the ceiling and floor.
 If the wall is brickwork or it is made of cellular concrete, then it is primed with deeply penetrating compounds, if the wall is smooth, then you can choose "Betonkontakt".
 The unevenness of the wall up to 3 cm is eliminated with just one layer of plaster, but sometimes plasters are used that can apply a layer up to 5 cm.
To knead the mixture, you will need a bucket or other suitable container, a mixer or a drill with an appropriate nozzle. The mixture is placed in a container, diluted with water and stirred vigorously. After that, make a short pause and re-mix until completely homogeneous. The proportions of mixing the mixture with water are usually indicated on the packaging. To avoid misunderstandings, they should be followed. Otherwise, the mixture will either be too thin and will not be able to stay on the wall, or it will be too thick and will not adhere well to the wall.
After appropriate preparation of the wall, installation of beacons, the mixture is thrown onto the wall with a large spatula, leveled by the rule. It is convenient to apply plaster on a large trowel with a small narrow trowel.
If broaches, pits and depressions remain on the surface, then you should not get carried away with beauty on this stage, because all this is corrected by grouting and puttying. If you do not want the formation of broaches, then more often remove the solution from the rule with a spatula and clean it with a brush, which will not be superfluous to moisten in water. When working in the corners, certain difficulties will necessarily arise, therefore the best option their resolution will be sequential plastering first of one, and then, after it dries, the second wall.

It is clear that all beacons must be on time, even before the plaster hardens, they are removed, and the potholes are carefully covered with mortar. But the lighthouse rails do not need to be removed from the plaster!
 If the maximum unevenness of the wall is more than 3 cm, then two or even three layers of gypsum plaster will be required.
The second layer, as a rule, must be applied in a day, after pre-priming the first layer with water. At the same time, the rule is led from the bottom up along the lighthouses. The solution remaining on the rule is cleaned off and placed in those places with which the rule did not come into contact. By repeating such movements, the final filling of the space between adjacent beacons is carried out. In the event of the formation of bumps, it is recommended to draw the rule from top to bottom, and they will disappear.
When applying two or more layers, do not forget to moisten the previous layers with water after they dry. The first two layers, if three-layer plastering is supposed, are usually not leveled, leaving them rough. And the third layer is brought to perfection.
Yes, if the walls are uneven. A gypsum wall is best leveled with gypsum-based plaster.
If the irregularities are more than 3 cm, then you can cut the bumps with an angle grinder. And the depressions are advised to cover with putty.
Plaster with gypsum can be applied in a fairly thick layer, but it will still be strong. Because of this, using a similar composition, it is possible to make walls that have large defects smooth.
 If, after applying the plaster, it is supposed to be tiled, then it remains as it is. In the case of gluing wallpaper, it must be rubbed with a special grater; for painting, puttying is carried out with preliminary rubbing of all defects. Sometimes putty is also performed before wallpapering, in order to achieve ideal quality - this is at the customer's choice.
The grout removes all minor defects (shells, bumps, traces of tools) that remain on the plaster. It begins only after the complete drying of the top layer of plaster. If the plaster is dry before grouting, it is slightly moistened with water. It is necessary to overwrite, alternating circular motions and in a run, with a special grater. Sometimes this smoothing is done again, also slightly wetting the applied plaster with water, achieving a glossy, optimally aligned wall. After that, putty is applied in accordance with the recommendations placed on the package or documents attached to the mixture.
Plastering will level even walls that have strong defects, bumps and depressions. Therefore, after the operation, it will be easy to stick tiles, wallpaper and other materials on the walls.
One of the methods of leveling walls is plastering. It is used most often. How to choose plaster for each room, which brands are better, how to make cement mixtures with your own hands - read on.
Any plaster consists of a mixture binder, sand of different fractions and additives, giving the composition specific properties. First of all, they are distinguished by the type of binder. It could be:
The most commonly used gypsum cement plasters. They are the most practical, with their help it is easier to get a flat surface. Since the cement sand mix(DSP) turns out to be very tough and it is not very convenient to work with it; lime is added to the solution. Such plasters are called cement-lime. To choose plaster, you need to know exactly where the walls will be leveled - outside or inside the room and what conditions are in this room (more on this below).
Cement-based plaster sweeps can be done independently. This saves money but takes more time. You can buy ready-made - dry mix, packed in bags. Gypsum plaster is rarely made by hand, more often they buy it ready-made.
Plaster and putty are often confused. The processes are somewhat similar - both are used to level the walls. But the walls and ceiling are plastered with a large curvature - from 5 mm or more. After plastering, the surface is even, but grainy (less grainy when using gypsum compositions) and needs to be smoothed down. And smoothing is done with putties. They contain more finely ground components, which is what gets a smooth surface. The maximum layer of putty is 5 mm, plasters - 50-80 mm in one layer, and several of them can be applied.
It is necessary to decide which plaster is better to buy - gypsum or cement - based on their qualities. What is a plus in one room is a minus in another. Therefore, we first consider the properties of cement and gypsum plaster.
| Property | cement plaster | Gypsum plaster |
|---|---|---|
| Vapor permeability | 0.09 mg/MhPa | 0.11-0.14 mg/MhPa |
| Average consumption per square meter with a layer of 1 cm | 12-20 kg/sq.m | 7-10 kg/sq. m |
| setting time | about 2 hours | less than 1 hour - about 40 minutes |
| Hygroscopicity | is not afraid of moisture, does not change properties when wet | wetting is undesirable, maximum humidity - 60% |
| The need for putty | needed for all types of finishes except for laying tiles | only needed for painting |
Let's start with economic feasibility. If we compare only the price per kilogram of dry composition, then cement-based compositions are cheaper by about 1/3. But since their consumption is about the same amount, the total amount spent on plaster will be approximately the same. So there are no priorities here and choosing plaster for the price will not work.

If we compare cement and gypsum plaster in terms of ease of use, then the gypsum composition is easier to lay down. It is more elastic, better "sticks" to the base. But there is one “but” - it seizes faster. On the one hand, this is good - it dries faster to a state where you can apply the next layer and the work moves faster. On the other hand, this is bad - you need to close in one go small portions: to have time to put everything in 30-40 minutes. It is better not to use the seized mixtures, since the addition of water changes its state only externally. This material will no longer gain normal strength.

Cement compositions remain elastic for 2 hours, so that large volumes can be closed at a time. But such plaster also dries longer, so the process takes longer - you have to wait for the composition to dry.
When choosing between gypsum and cement plaster, everything usually depends on the area of \u200b\u200bapplication - gypsum is not used outside because of its fear of moisture. In this case, choosing a plaster is simple: for outdoor work we use cement.
The same property determines its scope in interior spaces: for the bathroom and kitchen it is better to use cement plaster, which is not afraid of moisture. In all other, "dry" areas, they prefer to level the walls with gypsum compounds. They “lay down” better and, with some experience, you don’t need to putty the walls under the wallpaper - you just need to level the grout layer well.

Plaster is the basis of a finishing cake, so it must hold very well.
There are, of course, plaster moisture resistant plasters. Their moisture resistance is increased through the use of hydrophobic additives, but this is reflected in the price - it is much higher than for conventional formulations. It is also worth mentioning that in the bathroom the walls are leveled with gypsum non-moisture resistant compounds. Tiles will then be laid on it, and if the seams are carefully rubbed with moisture-resistant grout, then moisture will not reach the plaster. But this, after all, is not the best way out, since gypsum and cement are very different in characteristics, and tile adhesive is always made on the basis of cement. If tiles are laid on gypsum plaster, in most cases it lags behind the base, as they say, “bumps”, and maybe falls off.
If you choose the better to plaster the ceiling, in dry rooms the choice is clear - gypsum plaster. It is lighter, has better adhesion, and is easier to level. And even in wet rooms it is better to use a moisture-resistant gypsum composition - it is very difficult to work with cement on the ceiling. This is the case when it is better to overpay a little. So it’s easy to choose plaster for the ceiling: it’s a gypsum composition.
With a limited budget for construction or repair, you have to think about saving. It’s easy to choose plaster here: you can save on finishing if you make cement-based compositions yourself. It is really cheaper, although it requires additional time and effort. But remember that additives have been added to the finished compositions that improve the properties of the plaster. For example, in formulations for wet rooms add antifungal additives that prevent the development of mold. In compositions for plastering external walls, an additive is added to antibacterial ones that increases frost resistance. There are also plasticizing additives that make application easier. In principle, these additives can also be added to homemade plaster. You can find them in construction markets or in specialized stores, the norms are written on the packaging. And even with the cost of additives, savings in self-manufacturing will be solid - about 30%.

It is not difficult to make cement-sand or lime-cement plaster with your own hands. The components are mixed in certain proportions in a dry form, then liquid components are added (if any, and water), brought to a certain consistency. You can knead manually with a shovel in a large basin, trough. You can mechanize the process if you have a drill - using a special nozzle. The easiest way is with a concrete mixer. With it, things go faster, but large volumes are difficult to produce, especially if there is little experience.
The cement-sand mixture is made up of 1 part of M400 or M500 cement and 3-5 parts of sand. Cement must be fresh, sand - dry, sifted through a fine sieve with a grain size of not more than 1.5 mm. Waters take 0.7-0.8 parts. As you can see, the proportions are approximate. Sand can be of different moisture content, the solution can be used for plastering walls in different rooms, cement can be different brands. When choosing the amount of water, the main guideline is the convenience of work. It is necessary to choose the composition so that it is not so thick that it falls off the wall, but not so liquid that it slides off. This is determined experimentally.

There is also a difference in composition depending on the application. For plastering walls outside, 3-4 parts of sand are taken for 1 part of cement. To level the walls inside the sand, add more - 5 parts or even more.
Although the DSP is much cheaper than ready-made mixtures, it is more difficult to work with it - it does not adhere very well to the wall, it dries for a long time, and almost always cracks when it dries. But she is not afraid of moisture and for this reason it is recommended for plastering walls in wet rooms, which will later be either, MDF or any others). For other types finishing- painting, and wallpaper - it is better to use a cement-lime mortar or gypsum.
Cement-lime plaster is made with the addition of lime paste. Parts of lime are measured in the form of a dough, then diluted with water to a liquid state and added in this form to thoroughly mixed dry cement and sand.
The proportions of cement-lime plaster are as follows: for 1 part of cement, take from 1 to 2 parts of lime paste, 6-9 parts of sand. Water is added to bring the solution to the desired consistency. The sand is the same as for the CPS - with a grain of no more than 1.5 mm, the water is clean, without pollution. Lime dough is better purchased. With home extinguishing, there are still particles that have not reacted. Later, when the wall gets wet, they react, increase in volume, which causes pieces of plaster to fall out. Therefore, it is better not to save on this.

The exact selection of proportions is determined experimentally: the mass should hold well on the wall. You can plaster with cement-lime composition walls in any room. The composition is softer, it is more convenient to work with it, it does not crack when it dries. But the strength of such plaster is much lower than the DSP, and this must also be borne in mind.
Choosing the type of plaster - gypsum or cement - is just the beginning. Next, you will have to choose the manufacturer and the composition itself - there may be several products that have slight differences.

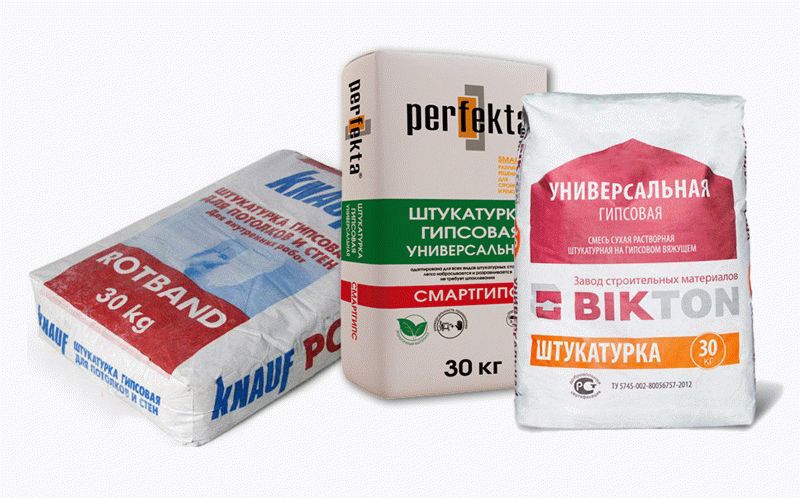
The most popular gypsum plaster Rotband (Rotband) company Knauf (Knauf). This is a really high-quality product that is easy to use even for beginners. The same company has other products - Goldband (Goldband) and HP Start (HP Start). They are cheaper, the quality is quite decent.

The most popular type of plaster - Rotband
HP Start is a gypsum-lime composition, Goldband is gypsum. The difference between Rotband and Golduand is in the thickness of the minimum layer. In Rotband it is 5 mm, in the second - 8 mm. Otherwise, the technical characteristics are very close - both the consumption (8.5 kg / m 3 with a layer thickness of 1 cm), and the maximum layer (50 mm), and compressive and bending strength. The density in the hardened state differs slightly: ~980 kg / m 3 for Goldband and 950 kg / m 3 for Rotbabd. Scope - any residential and non-residential heated premises, including kitchens with bathrooms.
| Name | Purpose | Colour | Layer thickness | binder type |
|---|---|---|---|---|
| Plaster mixture Knauf Rotband | For plastering smooth surfaces of walls and ceilings | White gray | 5-50mm | Gypsum with polymer additives |
| Plaster-Adhesive Mix Knauf Sevener | For restoration of old plaster surfaces, including facades | Grey | Portland cement with polymer additives and reinforcing fibers | |
| Plaster Bergauf Bau Interior | For plastering in rooms with normal humidity | Grey/White | 5-40mm | Cement with polymer additives and perlite filler |
| Plaster Volma-Holst | For interior spaces with normal humidity | 5-50mm | Based on gypsum with chemical and mineral additives |
Not bad also speak about the gypsum plaster Volma Sloy, Found Gipswell, Eunice Teplon, Prospectors. They cost less, give a good result, but it's still easier to work with Rotband and the "company". Based on the results of working with these brands, there are both positive and negative reviews, but in general, the quality is not bad.
Cement plasters are hand and machine applied. We will talk about compositions for manual application. For interior work, Forward, Weber Vetonit, Startvell, Weber Stuk Cement are good. They adhere well to a clean, pre-moistened surface. For a better grip better walls pre-primed, after drying, start by yourself

If you choose cement-based plaster for outdoor work (including for plastering an open loggia or balcony), you need facade compositions. They differ from ordinary ones in an increased number of freezing / thawing cycles. Facade cement plasters - Yunis Silin facade, Founded by Profi Startvell, Knauf Unterputz (Knauf Unterputz), Bergauf Bau Putz Zement. Ceresit CT 24 Light plaster is suitable for both facade and interior work.
Aerated concrete walls require a special plaster. It has increased vapor permeability to prevent moisture from being trapped inside the wall. This is Ceresit CT 24, Knauf Grundband (it contains the smallest particles of expanded polystyrene, which increases its thermal insulation properties, reduces consumption).
Despite the fact that each of us has repeatedly started repairs, we are not always guided by what plaster is. Under this name lies a material that has different constituent elements, with the help of which masters perfectly align walls, floors and even ceilings.
In order for the result of the repair to please the owners of the apartment, before buying, you need to navigate the types of plaster and its intended purpose.
The material is made on the basis of gypsum, cement or lime, as well as various additional elements, which provide waterproofing, soundproofing and other properties necessary for residents of modern high-rise buildings.
There is also plaster, which is made from a mixture of lime and cement. This is the most environmentally friendly option and is used for plastering wooden surfaces.
Different types of plaster are suitable for different types finishing works. Plastering walls with lime mixtures is justified when internal repair- the material is washed off the surface when interacting with water. It's been a long time known way to give evenness to the walls, in addition, lime has excellent environmental performance.
The price of lime mixtures for leveling surfaces also attracts buyers, but this method also has its drawbacks - poor coating strength and its fragility. Experts recommend strictly observing the proportions of the preparation of the solution in order to avoid an unpleasant result at the end of the repair work.
Cement plaster has an extended scope - it is used both for interior decoration walls, as well as for outdoor work. The material is relatively cheap, practical, durable. The mixture most often contains cement itself, sand, chemical components for easy application and plasticizers.
On the basis of cement plasters, decorative structural materials are produced - a fur coat, bark beetle. But most often this type is used during rough work to level the walls and prepare them for the subsequent decorative coating (, tiles, etc.).
If you want to purchase a mixture of gypsum for plastering walls inside the apartment, then you are making the right choice. After all, this material is known for its high practicality, ease of use during repairs (plastic with low slumping). At the same time, it dries very quickly, and literally after 1-2 hours you can continue to work - wallpapering, laying tiles or other types decorative coating. Does not require puttying and is resistant to dry cracking. Also, experts note the fact that gypsum is the most best material providing sound and heat insulation.
Attention! Gypsum plaster suffers from moisture and steam, it is very easy to damage it. Therefore, it is only used for internal works in the apartment with subsequent decorative coating.
Advice. get by drywall sheets or knead cement mortar- you decide. However, any of the options you choose requires certain professional skills from the master. If you are not confident in your abilities, it is better to trust repair work specialists.
In construction stores, you can buy these types of plasters according to the readiness of the material:
Mixtures for plastering walls can be prepared independently. This method will significantly save finances, but it will take more effort.

Bringing beauty
With the help of plastering, you can not only level the walls in the apartment, but also give them a unique texture, relief, color and design of the coating. Decorative plasters can help us with this.
They are:
The final result of covering the walls with decorative plaster depends not only on the type of material chosen, but also on the method used during application. There are different techniques - rollers, spatulas, trowels and brushes are used.
In building materials stores, there are often experienced sellers who can advise you on the types of plaster available for sale. Before buying, decide on the main aspects:
So, to even out large irregularities on the walls, it is better to purchase plaster based on lime or cement. For decorative application It is better to buy silicone, but it is expensive. The choice is always yours!
Almost everyone who decides to make repairs in a house or apartment faces the curvature of the walls. A surface that has deviations within a few millimeters per meter is very rare. Much more often, the existing shortcomings make you think about how to level the wall with plaster. Of course, this is not the only solution, but the most commonly used, since even a person without much experience can perform it.
When it comes directly to working with surfaces, a difficult situation immediately arises, because on construction market There are many varieties of material for these purposes. And the question of which plaster to choose for leveling the walls becomes a real problem for many.
It is worth focusing on two main options.
This mixture is considered universal. It must be borne in mind that there are two varieties that differ in their fraction. To create the main (rough) coating, a material with coarse-grained sand inclusions is used. Fine finishing is carried out with products with the addition of very fine sand. In any case, a finishing cladding with putty will be required, especially if paint will act as a decorative layer.
 Cement-based plaster
The cement mixture has the following advantages:
Advice! To make the mixture more plastic, acquire better fixation and antibacterial properties, a little lime is added to it. It should be borne in mind that this component previously acted as an independent type of plaster, but at present it no longer meets the requirements.
 Cement plaster is characterized by low cost and high durability, which makes it a very popular material for leveling walls.
 There are also significant disadvantages:
All this affects the fact that the work is more tedious. But in some cases, cement mortar may be the only solution.
This option is very popular for, because it has many positive characteristics:
A significant disadvantage is considered a quick setting. Therefore, the work must be carried out quickly, which implies the presence of certain skills. It is impossible to prepare more mixture than necessary for a certain area, because the excess completely loses its properties. Many refer to disadvantages and more high cost than the cement product. But keep in mind that the consumption of this material is less, this eliminates the difference.

So which plaster is better? This question does not have an unambiguous answer, it is necessary to proceed from a specific situation, based on the parameters and characteristics of the room.
There are two main ways to level walls using plaster. But no matter which one is used, it all starts with preparation:

It is necessary to take care in advance about the choice of all the required tools.
Alignment of walls with plaster on lighthouses is good decision if there are significant shortcomings and the area of work is quite large. Difficulties can arise only in the process of installing guides.
Beacons are fastened by different methods, but the most commonly used is installation on plaster or cement.

The technology is:
After the guides are fixed well enough, the main alignment stage begins:

On a note! To get even corners and eliminate long work with them, you must follow simple rule: allow a little time for the first wall to dry. This will prevent distortion.
Leveling is not considered complete until the surface is completely finished. Therefore, the final procedures are required:
If everything is done correctly, then the result will be a smooth plastered surface.

If the walls do not have significant deviations, then a simpler option can be used for alignment. It should be borne in mind that it is almost impossible to obtain perfect evenness using this method. Therefore, it is more suitable for subsequent wallpapering or using decorative elements.

On a note! There is a dry type of plaster - GCR boards. With their help, it is possible to achieve much faster desired result. But the disadvantage of this option is a decrease in the area of \u200b\u200bthe room.
Plastering using the beaconless method is a rather laborious work, while it is not possible to cover large areas and completely eliminate defects. This method is most suitable for small surfaces where it simply does not make sense to install beacons.
The following video will help to study in detail the process of leveling walls with plaster without the use of beacons.
In the houses of the old Soviet construction, the walls, unfortunately, do not always differ in special evenness. In most cases, their surface is covered with bumps and pits, has cracks or chips. At the same time, their plane itself often often deviates significantly from the vertical or horizontal. Of course, rooms with such walls do not look very attractive. Before wallpapering, painting, or, for example, before finishing with decorative plaster, the surfaces of the enclosing structures in such apartments have to be adjusted. How to level the walls? The answer to this question, of course, many homeowners would like to know. Surfaces with defects can be corrected using different materials.
In our time, there are two main ways to align the walls in a room:
In the first case, the alignment of the walls under the wallpaper or decorative plaster most often done with drywall. Also, dry correction technology may involve the use of plywood, lining or PVC boards. With a raw leveling technique, usually different types of plaster are used.
Such wall leveling materials are usually supplied to the market in dry bags. Before use, they must be diluted with water, in the amount determined by the instructions for use. Plaster can be used to level the walls:
The initial mass of materials of this type is a very fine powdery dry mixture. The answer to the question of how to level the walls in the apartment, gypsum plaster is very good. Its composition, among other things, includes various kinds of plasticizers. And so it lays down on the walls very evenly.
With the use of such plaster, alignment can be carried out concrete walls or brick. Do not use such mixtures mainly only in very damp rooms - saunas, bathrooms, swimming pools, etc. It is also not allowed to use gypsum to level the facades of buildings.
The main advantages of plasters of this type are:
Also, the masters also refer to the advantages of gypsum plaster and its fine texture. Aligning walls for wallpaper using such mixtures has the advantage that at the final stage in this case it is not necessary to apply finishing putty. Another undoubted advantage of such plasters is rapid maturation. If necessary, it is possible to start pasting the walls, leveled with a gypsum mixture, in a week.

The disadvantages of the compositions of this variety include primarily their high cost. Leveling walls with gypsum plaster is usually quite expensive. The funds of this variety cost about one and a half to two times more expensive than cement ones. Also, the disadvantages of mixtures of this type include a very short period of viability. It is necessary to use the prepared gypsum mixture within an average of 45 minutes. Of course, such a short “life” makes working with plaster of this variety not particularly convenient.
Of course, when choosing a plaster of this variety, like any other, you should first of all pay attention to the brand of the manufacturer. The most popular gypsum mixtures in our country are:
It is this material that most often serves as the answer to the question of how to align the walls inside or outside the room. There are two main types of such plasters on the market today. For leveling surfaces, both a cement-lime mixture and a cement-sand mixture can be used.
On the walls, both of these types of plaster lie no worse than gypsum. At the same time, the cement leveling mixture is much cheaper. Such plaster is the best answer to the question of how to level the walls in the bathroom. It is perfect for wet areas.
The only thing in which cement plaster loses to gypsum plaster is not a very smooth texture. After using such a mixture, it is usually necessary to additionally apply a finishing material. Another disadvantage of cement plaster compared to gypsum plaster is the long maturation period. Proceed to final finishing walls, aligned with its use, is possible only after about a month.

Compositions of this type, like gypsum, are supplied to the domestic market by many companies. But the most popular plasters in our country are:
The Starwell mixture can be used to level the walls not only indoors, but also outside. Such plaster costs about $ 5.9 per bag weighing 25 kg. Polimin SHV 1 mixtures may only be used indoors. Permissible maximum thickness leveling layer when using both of these types of plaster is 20 mm. The price of a mixture of Polimin ShV 1 is approximately $ 3.6.
Compositions "Vetonit TT" can be used for leveling indoor walls and facades. They can be applied to the surface with a layer of up to 3 cm. Such a plaster costs about $ 9 per 25 kg.
Building facades are thus most often leveled with cement plaster. However, sometimes acrylic mixtures are also used for this purpose. Such materials are more expensive, but at the same time they give a much stronger leveling layer. Such a finishing composition is made on the basis of an aqueous solution of acrylic. The main advantages of plasters of this type are:
The disadvantages of plasters of this variety, as well as gypsum, include a short pot life. Also, such a mixture did not deserve too much good feedback consumers and for a not particularly high degree of vapor permeability. Walls covered with plaster of this type, unfortunately, simply stop "breathing". They refer to the disadvantages of mixtures of this variety and the fact that after drying they can accumulate static electricity and attract all sorts of garbage to themselves.
The most popular manufacturers of such plasters in Russia, as well as gypsum plasters, are Osnovit, Vetonit and Knauf. Also, Ceresit brand plasters are often used to level the facades. Such mixtures are usually supplied to the market in ready-made form. It is not necessary to dilute them with water. It is convenient to work with them, but plasters of this type are more expensive than gypsum and cement ones. Therefore, they are usually used only to correct walls that have only minor defects.

Alignment of walls for painting or any other kind decorative finishes using such material can be made both outside and inside the room. But most often, silicate plaster, like acrylic, is still used for finishing facades. Such materials are made on the basis of silicone resin. They also include liquid potassium glass, a water-repellent agent and mineral fillers. Like acrylic, silicate plaster is expensive. And they use it, respectively, only for leveling walls that have minor defects or as a finish after a cement-sand mixture.
The advantages of silicate plasters include primarily:
The main disadvantage of such mixtures is considered to be a short pot life.
Acrylic and silicate plasters, therefore, are in most cases applied to walls in a thin layer using the usual technology - with a spatula or by means of a spray gun. Cement and gypsum mixes superimposed on surfaces usually in a thick layer. Therefore, when working with them, among other things, special guides are used - beacons. The use of such add-ons allows you to get the most flat surfaces. Work is carried out in this case in several stages:
After the composition dries, beacons are removed from the wall. To level the walls (seal the grooves remaining after the profile), a little more gypsum or cement plaster is diluted. At the final stage, the surface is treated with a paint grater and covered with a thin layer of a fine-textured mixture.

Compositions of this type can be:
For wet rooms and facades, depending on the budget, cement plasters, acrylic or silicate plasters can be selected. Gypsum is usually used to decorate rooms from the inside. Also, in some cases, for this purpose, of course, cement can also be used. Putties of this variety are applied over plaster, often using a special reinforcing paint mesh.
Plasters are, of course, just a great answer to the question of how to level the walls. However, such tools can, unfortunately, be used mainly only to remove holes and bumps from the surface. More serious defects in the form of deviation from the plane by means of a crude technique are rather difficult to correct, and sometimes even impossible. After all, it is allowed to apply plaster compositions on the surface only with a not too thick layer.
Some disadvantage of raw technology is that it can be used to level only concrete or brick walls. For wood, such materials are usually not used.
Therefore, the raw technique is not suitable for eliminating serious wall defects, as well as for leveling cobbled or chopped surfaces. In this case, another method of correction is usually used - dry. The walls with this technology are simply sheathed on the frame with some sheet material. Types of finishes in this case can be used different. But most often drywall is used for this purpose.
Actually, the GKL sheets themselves for wall correction can be used in two main varieties:
The second type of GKL differs from the first primarily in color. Moisture resistant sheets have a greenish tint. They, for example, are an excellent answer to the question of how to align the walls in the bathroom. It is produced by the industry in our time and refractory GKL. Sheets of this variety can withstand not only very high temperatures, but even an open fire (for an hour). Such drywall is very expensive, and therefore it is used mainly only for leveling the surfaces of stoves and fireplaces.

The leading manufacturers of GKL in Russia are:
The quality of all these brands of drywall are quite good. But the Knauf sheets are still the most popular in our country. This company supplies the domestic market with three main types of GKL:
If desired, today you can purchase both ordinary sheets of this manufacturer 2500 x 1200 mm, and non-standard ones. The width of the latter can be 600-1500 mm, length - 1500-4000 mm, and thickness - 6.5-24 mm.
Any special preparation of the walls when using GKL is not required. Surfaces in this case are usually simply cleaned of dirt and dust. Next, a special aluminum or steel profile is mounted on the wall using a level. Actually, the drywall itself is attached to it with the help of dowels of a special design with plastic wide heads. GKL sheets are fixed during installation so that no cruciform seams form between them.
At the final stage, the plasterboard surface can either be wallpapered or treated with a thin layer of plaster. Of course, it is often used for finishing GKL and finishing putty.
Such materials are also usually used for large deviations of surfaces from the horizontal or vertical. In addition, such a finish can also be used when the walls need not only to be leveled, but also insulated.

In the latter case, timber is usually used to assemble the frame for the material. It can be wall-mounted both vertically and horizontally. Actually, for insulation between the bars of the frame, plates are subsequently installed mineral wool or polystyrene foam. Then a vapor barrier film is sewn on top, and the leveling material itself is installed on top of it.


