Is it possible to grow pine nuts yourself at home or in the country? Any novice gardener can grow cedar from a nut at home.
First you need to purchase planting material, germinate seedlings, choose a place for planting, plant the plant and follow all the rules for caring for and maintaining it.
You can buy ready-made Siberian cedar seedlings, but growing a plant from pine nuts yourself will be a more economical and useful way.
After all, from the very first appearance of a sprout, you will always be close to your tree. And when, after many years, it brings you its first fruits, the feeling of joy will be unforgettable.
You can grow a pine nut seedling in an apartment or at home.
To do this you need:
Dried or roasted seeds should not be used. The best place To purchase seeds there will be areas where this species grows.
Those that have sunk will be used for planting.
You can use a refrigerator. The soil will need to be watered once every two weeks. In this state they are stored for 4 to 7 months.
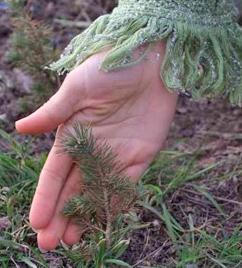
Planted in a small pot to a depth of 1 - 2 cm. The pots are kept in light, warm room at a temperature of 19 - 22 degrees. Do not allow the soil to dry out or become overly wet.
Seeds are sown in maximum quantities, since their germination rate is only 10%. The first shoots appear after a couple of months and grow at a slow pace to 5 - 7 cm per year in the first five years.
At the age of five, when the seedling reaches about one meter in length, it can be planted in open ground.
Interesting! Adherents of superstitions advise holding them in your mouth for some time before planting seeds. This will nourish the seeds with human energy and have a positive effect on the germination and growth of the plant.
In mid-spring, the seedling can be planted in open ground summer cottage. To do this, choose a sunny place with humid and fertile soil. It will not be possible to plant trees in the neighborhood great height, since pine nuts require increased lighting when growing.

The seedling should be planted directly on the day it is dug up. The root system must not be damaged or dried out. If you can’t plant the tree right away, you need to cover the roots with soil and moisten them with water.
It is best to plant cedar trees in small groups of 6 - 7 plants of different sexes, so that pollination of the trees occurs and cedar fruits begin to grow. It is advisable to plant lupine nearby, which will enrich the soil with nitrogen.
Trees are planted at a distance of 6 - 8 meters from each other and more than 4 meters from the house and other buildings, since the cedar root system can destroy buildings when growing.
To properly plant a seedling, you need:
Young plants require high humidity and spraying the needles with water, while mature trees do not need frequent watering and tolerate dry climates.

When caring for young trees, they need to be constantly weeded to remove weeds, as they will die in grass thickets.
It is necessary to carry out mulching, it helps to preserve the root system during frosts. Every year the amount of mulch needs to be increased, this promotes the development of adventitious roots.
In spring and autumn time the soil near the trunk is mulched with organic matter. In summer, fertilizers are applied twice a month in the form of organic and mineral fertilizers.
Important! It is prohibited to take cedar seedlings from burnt areas and arboretums. This is an illegal action and will be considered by the court as poaching.
In order to plant a cedar tree in his dacha, the gardener must think and understand whether there will be enough space for a huge pine beauty? For those who have dacha area not large, breeders have bred a dwarf type of plant.

Cedar wood has many beneficial properties:
Siberian cedar is the shortened name for Siberian cedar pine. In nature, this powerful plant reaches a height of 35–40 meters, having a spreading tiered crown and a trunk diameter of up to 2 meters. The tree can rightfully be proud of its frost resistance; it can withstand cold temperatures down to -55 degrees. In comfortable favorable conditions When grown, the plant lives up to 600–800 years and grows well in the area central strip Russia and Siberia.
To land on suburban areas Most often, seeds and seedlings of low-growing varieties are used - they are no less decorative, and the aroma of their needles is as useful as essential oils tall ancestors. The most popular of them: Recordist - with a dense crown in the shape of a ball, and Icarus, which has a pyramidal crown.
Siberian cedar has inflorescences of both sexes on one tree: shoots of male cones are located at the base of the growth in the central part, and female shoots are located at the top of the crown. Flowering time: May-June. From the moment the buds form until the seeds fully ripen, a year and a half passes.
The ripening of cedar nuts consists of several stages:

Ripening dates may shift by a couple of weeks depending on the region, climatic conditions and the condition of the tree.
The seed method of propagating cedar is a very labor-intensive and very long process. To germinate nuts and successfully grow new ones from them, capable of independent life under open air seedlings will take several years.
Collect pine cones for further planting Seeds can be collected in the fall or spring, when the waterfalls that have fallen from the tree on their own are collected. After this, shake the nuts out of the cones, place them in a container and pour hot water(not boiling water).
After an hour and a half, the seeds will need to be gently rubbed in your hands to wash off the resin and substances that prevent germination. The liquid after such a procedure will become very dark and must be drained. These steps: pouring and washing the nuts are repeated until the water stops taking on a dirty tint - about a day.

The next day, the seeds will be sufficiently saturated with moisture, and the most mature of them will sink to the bottom of the container. They will serve as good planting material in the future. If planned spring planting, then the nuts, without drying, should be placed in a glass jar with damp moss or river sand, filling it no more than 2/3. Holes must be made in the lid for oxygen access. In this form, the seeds are ready for stratification - cold treatment, by placing them in a cellar or refrigerator for 2-3 months.
After this period, the pine nuts should hatch - their shells crack and a small white root appears, then they can be sprouted. Some experienced experts advise soaking the seeds for 30 minutes in a weak solution of potassium permanganate before sowing in order to protect them from fungal infection and stimulate the appearance of sprouts.
In order to grow cedar at home, it is important to follow step-by-step instructions describing the stages of development of young plants of this species. B prepared flower pot or the container is filled with a pre-steamed substrate: either peat and clean river sand in a 1:1 ratio, or soil for coniferous species. The seeds are buried so deep that the top of the shell is at ground level. Plantings are well watered and covered with glass or plastic film to create greenhouse conditions.
Nuts can be planted either in separate small pots or cups, or in a common spacious pot - cedar grows for quite a long time, and the plants will need to be transplanted into individual containers only after 3-4 years, when they reach a height of 15-18 centimeters.
On average, if preparation seed material was carried out in accordance with the recommendations, the seeds germinate after a few days. It is very interesting to watch the seedlings of cedars: the sprout gradually straightens and throws off the shell that it no longer needs, turning into a miniature “palm tree”. It is important to understand that cedar seeds never germinate all at the same time; the percentage of germination can be judged after a month. Usually about 25–30% of the planting material germinates.

The cover in the form of film or glass is removed from the pot after about 7–10 days, watering is done as the surface of the substrate dries.
Another equally popular and well-proven method of planting cedar seeds is to germinate nuts in wooden box or a box with sawdust and pine needles. The height of the container should be about 25 centimeters; there must be holes at the bottom for excess moisture.
Cedar pine seeds go deep into the substrate by 5–10 millimeters at intervals of 10–15 centimeters from each other. A thin layer of peat is placed on top to maintain moisture. For the winter, the box is placed on the balcony or outside.
Cedar sprouts do not require much attention; they only need to moisten the substrate and maintain temperature regime: room temperature air in summer time and cool in winter. It is useful to feed one-year-old seedlings with natural immunostimulating agents - nettle infusion, for example.
We traditionally call Siberian cedar pine (Pinus sibirica) cedar, and not real cedar - a coniferous tree from the genus Cedrus. Many people dream of growing cedar in their garden, thousands of kilometers from its natural habitat. And then in the store you come across pine nuts.
You can try to grow cedar from them, although germination will be low, and sometimes none.
The buds are often heated for shelling, which may kill the embryo in the seed. And then, who knows where and how long these nuts were lying? If you want to get results on the first try, look for whole pine cones. They are often sold at weekend fairs.
You can husk 2-3 dozen nuts from a cone. This is quite enough to get a good result.
You can simply sow nuts before winter, burying them shallowly (1-2 cm) in a garden bed or in a separate pot dug into the ground. But there are plenty of people in the garden who want to feast on them: birds, mice. Therefore, if there are enough nuts, it is better to divide them into two parts: sow one in the garden before winter, and experiment with the second at home.
The nuts need help to germinate. They are so cleverly designed: they just won’t sprout in warm, moist soil, like, say, marigolds. They need stratification so that everything is as in nature: a nut fell to the ground, lay swollen under the snow during the winter, and when it became warm, it sprang up.
Scarification (breaking the hard shell of the seed mechanically) also greatly increases germination. To do this, before sowing, rub one side of the nut. sandpaper so that the shell becomes a little thinner.
It is better to start sowing at home no earlier than March: while the daylight hours are short, it does not make sense. No matter how you dance around the seedlings, they will develop slowly, and it is very easy for them to die in an apartment.
To ensure that the seeds are well preserved, after scarification, soak them in a fungicide (Maxim) for an hour or two.
This is the most important procedure, since the main enemy of home coniferous crops is blackleg.
Then, without drying, mix the nuts with a moistened neutral substrate (moss, sawdust, vermiculite, perlite, clean sand), place in a hermetically sealed plastic box and place it in the refrigerator at a slightly above-zero temperature - .
Now they need to be checked regularly to see if they have hatched. If they don’t sprout for a long time, you can try moving them to a warmer place. If the shell is cracked and at least one of the nuts has a white root, it’s time to sow.
The soil, consisting of high-moor peat and coarse washed sand (1:1), must be steamed in advance.
Place the pot with soil on the windowsill. We sow the seeds, burying the roots in the soil, leaving top part shells at soil level. Water, cover with glass, wait. After a few days, a sprout appears, straightens and throws off its shell, slowly turning into a tiny “palm”. Hurray, the baby is born! We remove the glass after a week or two, water only as the top layer of soil dries - without flooding, but also without allowing it to dry out.
If you forget about the nuts, they can germinate and even shed their shells right in the substrate in the refrigerator. The sprouts will be very pale, but viable. Such seedlings can be planted in a pot, covered with glass or film for the first 3-5 days - they will take root and develop normally.
You can plant nuts immediately in individual pots or in one large common pot, so that they can be replanted in a year or two.
Further care consists of watering and preventing blackleg. We prevent the latter by treating (watering) the soil once every two weeks with a “Maxim” solution.
(according to instructions). As soon as the threat of frost has passed, we take the seedlings out into the garden and dig in the pots in partial shade.
It is better to mulch the soil in pots with fine gravel or pine needles to avoid drying out.
There is much less hassle with outdoor crops. It is also advisable to scarify the seeds. Sown in the garden, they simply sprout (or don't sprout) in May. Next, you need to remember to weed and water them. In size and strength, both street and domestic ones will be the same by the end of the season.
Despite the fact that after the first year of life, pine trees are just stalks 2-3 cm high with a palm-shaped bunch of short needles on the top, they overwinter well. Any shelter will only provoke damping off. My cedar crops overwinter in pots that are placed in boxes and not buried.
It is convenient to monitor and care for cedar seedlings in pots for the next 3-4 years, transferring them into larger containers as they grow. In the second year they will grow to 5-7 centimeters, by the age of four - to 20-30.
This is where you can think about landing for freedom. Cedar seedlings do not transplant well if they have reached the size more than a meter. The landing site must be immediately selected so that the level groundwater was no higher than 3 m and to prevent the plants from getting wet.
Cedar trees begin to bear fruit late- at the age of about 20 years, and sometimes even more mature. And at first there will be very few cones, and the first ones may fall off or be empty. But how nice it will be one day to be one of the few patient gardeners who collects their harvests of sweet nuts!
On the Sunset Soviet power fate brought me to Krasnoyarsk region, where the Podkamennaya Tunguska river flows into the Yenisei. I went to those places to earn money. I worked for a couple of seasons and returned home. But after the Siberian business trip, for many years I was drawn to visit familiar places again, see friends, admire the greatness Siberian nature. And so, in the fall of 2007, I decided to go on a long-distance voyage.
People usually bring souvenirs and various curiosities from distant places. What could you bring from Siberia in your hand luggage - cranberries, lingonberries, caviar, sable and pine cones? Of course, customs would not allow caviar, sable and fish, but cranberries and lingonberries can be found here too. So I decided that pine cones were the most suitable souvenir.
Not without some wrangling with Russian customs officers, of course, but I still brought a few cedar cones. I gave some to my friends, and with the rest I decided to conduct an experiment on growing cedar Siberian pine in the conditions of Ukraine. I prepared a thick notebook for recording my observations, highlighted small area land and sowed pine nuts in the spring. Now I understand that there were many mistakes in my idea. The first shoots appeared only at the beginning of August, and although almost all of them sprouted by September, their life was short-lived. By the summer of next year, only one seedling remained.
I think my main mistake is incorrect choice soil. Ukrainian black soil still does not suit them. Along with the dead seedlings, my idea about the cedar grove faded into the background. Although the desire to continue the experiment did not disappear, and the only surviving seedling added to optimism.

Five years later, or rather in 2011, I came across an article about the cedar alley in Yaroslavl region. And at the end of the same year I had another chance - I again ended up in Krasnoyarsk. The most valuable souvenir from the long trip was, of course, five pine cones. This time, remembering previous mistakes, I approached the matter differently. I made three-liter containers from black plastic film and filled them with soil taken from the top layer of soil in a coniferous forest. Just before winter, I soaked the nuts in a weak solution of potassium permanganate, sowed them one at a time in containers and covered them from freezing with leaves and grass. Fortunately, the weather allowed, the real winter that year began only on January 17th.
This time my cedars sprouted in early May. In the first year, the seedlings resembled one and a half centimeter hedgehogs and did not produce any growth. To protect them from overheating and drying out, I covered them with a sunscreen and regularly watered and weeded them. In the second year, the seedlings grew a little, only 3-4 cm. I was ready for this, because I knew that in nature they grow very slowly for the first five years, but then they become powerful, famous for their beauty and longevity.
In the third year, having made sure that the plants were alive and well and had adapted to our climate, I transplanted them into 15-liter buckets, having previously made several holes in the bottom of each container. The soil was taken from the same pine forest. After planting the seedlings, I covered the ground with fallen pine needles to protect it from drying out and the dominance of weeds. In the summer I still shade the babies with a sun protection net and water them regularly.
Now my “taiga” made of cedar pine is already five years old. All plants are alive and healthy. In the last two years they have given very good growth, some specimens have grown up to 80 cm. It is interesting that the northern tree, accustomed to severe and long frosts (sometimes until mid-May), awakens much earlier in Ukraine. The first growth appears already at the end of April - beginning of May. But the miracles don’t end there; a second wave of growth begins in July. Although the increase that is formed at this time is less than in April.
Then you can try to grow a wonderful tree from seeds. With a little effort you can get a wonderful seedling. Our article will tell you in detail about how to plant cedar from a nut. Follow all the recommendations, and the result will definitely come.
First option
There are a few different ways how to grow cedar from a nut. In any case, seed stratification is required - this means that they need to be kept at low temperatures for several months. If you are going to grow cedar from a nut at home, then you need to imitate natural conditions in which this tree grows. If you received the seeds at the end of summer or early autumn, then you should simply plant them in loose soil - then you will receive seedlings next spring. Of course, only if the planting material is of high quality.
How to grow cedar from a nut? Second option
This method is reminiscent of forcing bulbous tulips).

First you need to prepare the land (or buy ready-made one). Ideally, it should be a mixture of sawdust and sand. Place the seeds in the prepared soil, moisten it a little with a spray bottle and place it in the refrigerator (on the bottom shelf), where the seeds should remain for at least three months. As the soil dries, you need to moisten it a little, but not much. After three months, the seeds are removed from the refrigerator (it is better if this happens in the spring) and treated with a non-concentrated solution of potassium permanganate. They must spend two days in the solution. follows in a prepared mixture of sand and sawdust.
How to grow cedar from a nut? Accelerated method
If you can't spend three months, you can apply the accelerated stratification method.
But in this case it is necessary to strictly observe step by step instructions, only then can you count on results. The quality of the seeds is also very important - they must be clean and ripe pine nuts, with a pleasant smell and without traces of mold or any other suspicious stains. Chew a few from the batch you plan to sow - you should smell the pine aroma and see clean, firm flesh in each nut. Hull the seeds and rinse warm water(you can rub a little with a soft toothbrush - this will clear them of resin, and it will be easier for moisture from the substrate to get inside the seed). After preparation - the stage of stratification itself. Seeds are placed in cold water. Its temperature should not be higher than zero degrees. They are kept in this state for three or four days. It is necessary to monitor the temperature of the water - it should not get hot, otherwise everything will go down the drain. This can be achieved by periodically adding, for example, ice cubes. Carefully monitor the container in which your nuts are placed for stratification. You will see that some of them will sink to the bottom. This is very important stage. The fact that the nuts sink to the bottom of the container means that they are suitable for planting. The low-quality ones stay at the top. There will be about half of them. Take out those that have sunk and plant them in a prepared soil mixture(its temperature should be fifteen degrees Celsius). Now you know three ways to grow cedar from a nut.
Cedar is a long-lived tree that grows to gigantic sizes. Science has learned to use the natural qualities of wood and has made its own adjustments: low-growing varieties cedar for growing on personal plots. Fans of such innovations try to implement the best in themselves. Many people are interested in how to grow cedar from nuts. To do this, you need to choose the right seeds and care for the tree.

To grow cedars from seeds, you need to choose good-quality nuts. They must be ripe and fresh (for better viability). With cedar seeds from last year's harvest, germination is partial. Nuts can be dried, but not artificially, but in air, to avoid mold and preserve reproductive qualities. The quality of cedar seeds is determined by the following indicators:
The shell of cedar seeds is hard. In the forest, a cone with nuts that falls on the ground is treated with cold, and when the snow melts, it absorbs moisture, so the germination of cedar grains occurs easily. Imitating nature, cedar is grown from seeds on private farms and in nurseries in a similar way.
In the first ten days of October, a small-height bed is prepared by adding peat and sand to the soil. The nuts are treated with a light solution of potassium manganese for a couple of hours. Sow the seeds by pressing the seeds into the ground to a depth of 2 cm. Cover the ridge with coniferous branches to prevent mice from chewing on the crops. Seeds sown in autumn period, give germination rates exceeding 90% (according to statistical studies of biologists).
If the seeds were purchased at a time when the sowing time was missed, there are different methods of stratification:

Many people are interested in the question of how to germinate pine nuts at home. To do this you need:
There are other options for home stratification:

If necessary (a short period before sowing in the ground, when the time comes to plant cedar seeds) apply quick way stratification: soak pine nuts in hot water(not boiling) for a week. Drain the water 3 times (during this time), adding new water. Remove the seeds and combine with peat crumbs. Place the resulting mixture in river sand and place it in a box. Withstand in warm room 1 month. Send the hatched seeds to the glacier. Store at zero temperature.
In the spring, after the snow melts, 7 days later, stratified cedar seeds (again kept in a saturated solution of potassium permanganate for 24 hours) are sown in a greenhouse ridge. The finished bed is placed under film. Cedar sprouts heated in this way sprout. Reproduction of seedlings under polyethylene occurs better because they are protected from birds.
Care methods include picking seedlings. It improves root growth. While the seedling has a bent appearance (cedars begin to grow this way), they carefully dig it out, trim the root and slightly deepen it into the same hole, maintaining a distance of 20 cm along the width of the ridge and 15 cm along the length. Water well, smoothing out plant stress. In the future, the picked plants will quickly take root and develop an excellent root system.
Adding soil from under an adult cedar to the seedlings provides nutrition from mycorrhiza. The same effect and assistance in the propagation of cedar in homestead conditions is achieved by watering the seedlings with an infusion of mushrooms growing under coniferous trees. The soil around the seedling is mulched with pine needles, hay, and nut shells.

Young seedlings that have just parted with the cone cannot be planted immediately in open ground. These are stems three centimeters tall. In the second year of life they will become seven centimeters, and only by the age of 4 will the growth be 18-23 cm.
Cedar sprouts can overwinter on a home balcony (when grown in pots). At low temperatures, they are lightly covered, but there should be plenty of light and moisture. In glazed greenhouses, seedlings do not require shelter.
Seedlings are transplanted regularly in summer or spring, each time increasing the distance between them on the ridge, or transferring them to a larger pot.

On permanent place It is possible to plant cedars that have grown up to 90 cm. Planting is carried out in large holes (diameter and depth of at least 1 m) with humus and forest needles. Place cedar trees in a shady area of the site, with a distance of 9 m between them for better productivity.


.jpg)


