The market for finishing materials today is truly huge, but for the interior of a bathhouse, where humidity is always high and temperatures are high, there are restrictions on the use of cladding. It is quite natural that you cannot use materials here that, when exposed to high temperatures, will release substances harmful to health: plastics, chipboards and others. This is probably why the popular wood is widely and universally used for interior decoration of bathhouses. different breeds– a natural, affordable and easy-to-work finishing material.
Although, if the bathhouse is built from timber or logs that look great interior spaces appropriate and natural, the bathhouse does not need to be lined with anything from the inside at all. After all, if all construction technologies are properly followed, the owner will not have to rack his brains about additional insulation. Although in this case, it is quite possible to line the inside of the bathhouse with clapboard - this is the most common and beloved cladding. Lining is the name given to carefully dried and planed boards made from wood of different species.
Let's take a closer look at the features of different types of wood so that you can choose and buy the most suitable lining option for finishing your bathhouse.
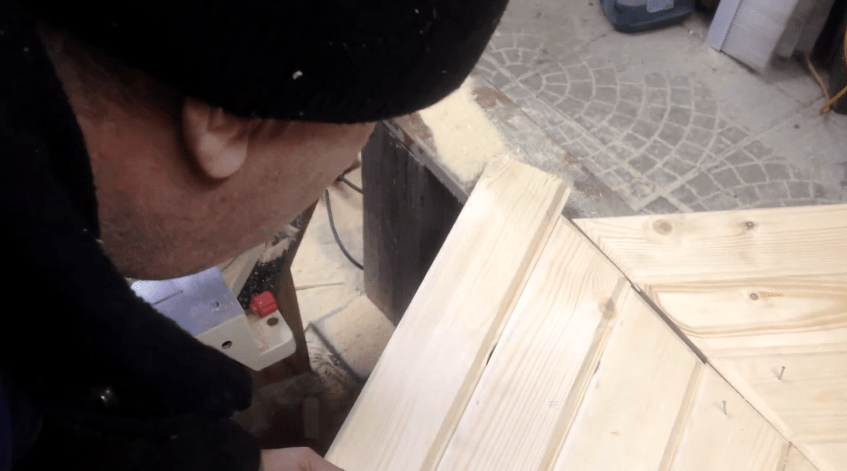
In this video, a professional team is covering a sauna with clapboard:
When choosing what to cover the inside of a bathhouse with, consider the conditions under which the lining will be used: for finishing a steam room, some species will be the best, for a relaxation room - others, and for a washing room - still others.
The clear leader is linden, especially when used for steam rooms. Charging human body positive energy, when heated, it releases various essential oils with anti-inflammatory and bactericidal effects, helping to improve health and enhancing the diaphoretic effect. And it smells just wonderful. In addition, linden does not burn the skin and does not heat up much due to its low thermal conductivity.
Aspen, also, is very pleasant to the touch, and is useful for health, drawing out negative emotions and various ailments from the body. It does not rot, even in constant contact with water, and is quite soft, so it is easy to cut without breaking. The price of aspen lining is much lower than linden.

Larch is a conifer that produces many phytoncides and has a positive effect on a person’s well-being and the body’s resistance to various infectious diseases. This material would be great for decorating shower walls. And floors made of larch, a reliable and durable material, only become stronger over time. In addition, no wood beetles or rodents are afraid of this wood.
Hard, very hot wood species - oak and ash - are resistant to rotting, moisture and temperature. Due to the fact that this wood does not deform, barrels, fonts and doors are made from it. Oak wood darkens over time, which only decorates products made from it. Ash is lighter than oak, but still rots under conditions of high temperatures and humidity, so it is subjected to special treatment and used in finishing interior interiors baths, in the manufacture of doors, furniture, stairs, railings or parquet.
The most durable of the hardwoods discussed here is black locust. It surpasses even oak in strength and is resistant to rotting, so products made from it are not deformed and almost do not break. These products are distinguished by their special durability and wear resistance, which allows the use of acacia in bathhouses with the most high humidity– for doors and steam room floors. Acacia boards darken under the influence of temperature and time, acquiring deep, beautiful shades.
This beautiful, reliable and natural material Baths and saunas, loggias and balconies, walls and facades of houses are now covered with wood. In appearance, a block house is similar to a log, surpassing it in strength many times over. After undergoing special drying, this material reaches a humidity of no more than 12%, so when installing this board, you don’t have to worry that it will dry out or become deformed.

The internal lining of the walls of the bathhouse is made with a block house of hardwood or coniferous species. Since denser conifers have greater heat transfer, it is not recommended to decorate the steam room with spruce or pine materials, because leaning against a pine wall in high temperatures can cause a burn. But lovers of a specific pine aroma in a steam room often choose a block house made of cedar for its cladding - over time, its resin ceases to stand out from this material.
Under the MAGELAN brand, the building materials market has been rapidly conquering the innovative, highly functional and reliable glass-magnesium sheet - SML - also called “magnelite” since 2007.
LSU is made on the basis of magnesium chloride and oxide, finely dispersed wood shavings and other binding components, reinforced on both sides with a fiberglass mesh with a cell diameter depending on the purpose and class of the material.

This material has many advantages:
The best way to decorate the inside of a bathhouse is for everyone to decide for themselves. But the accessories, shelves and loungers in the steam room are, of course, made of traditional wood.
We told you about the most preferred materials for finishing a bath, from traditional wood to modern MAGELAN material, and we hope that we were able to greatly facilitate the process of choosing a material for the interior finishing of a bath.
How good is the Russian cozy bathhouse. Many owners of summer cottages dream about it. It is possible to bring this idea to life. To do this you need to invest effort and money. If on suburban area There is a construction site, start building a soap house, as it is also called. But keep in mind that the main advantage of a bathhouse is in the interior decoration, and not in appearance structures.
With even a little skill, you can build a room equipped for washing a person with the simultaneous action of water and hot air with your own hands. If you are not confident in your abilities, hire a team of professionals for interior cladding. But any builders need supervision, so you need to be aware of how the interior in the bath space should look.

Photo 2. Log house of a Russian bathhouse made of pine
Not recommended for use when interior lining premises metal parts even for fastening wooden beam. These tips are given to ensure safety in the bathhouse, because if you accidentally touch them, you can easily get burned. If you use fasteners, then only hidden ones, for example a clamp.
The small size of the steam room does not imply decoration of the room. Here nothing should interfere with the free circulation of hot air. Then mold will not grow in the bathhouse, and condensation will not collect on the walls.
For finishing a steam room, it is not recommended to use lining made from coniferous trees, since spruce, larch or pine release sticky resins when heated. The best option is cedar lining and cedar shelves. Cedar cladding retains its original beauty for a long time and does not overheat, and also smells wonderful. You can also combine wood with brick. These materials are also not afraid of high temperatures and humidity.

Photo 3. Finishing the steam room
linden
Chipboards or linoleum should not be used in the steam room. When heated, these materials become toxic and flammable. In damp room they quickly deform and lose their aesthetic appearance.
The shelves in the steam room are made stationary. Best option- place it against a blank wall. The lounger can be rearranged. Their surface must be perfectly processed. There should be no unevenness that could cause a sharp piece of wood to pierce the skin.
The shelves, like the lining in the steam room, must be treated with special heat-resistant wax Hartwachs GNature. Thanks to this procedure, you will not only double the life of the finish, but you will also be able to easily wash off green splashes from the broom. The steam room will always be clean and new.

Photo 4. Steam room in a Russian bath
To make it comfortable to sit on the top shelf, the distance between it and the ceiling must be at least 1.2 m, but the width is made up to 1.5 m, then you can lie comfortably on it. The steps are made different sizes. The lower they are, the smaller the width.
The dressing room is assigned the functions of a hallway, and accordingly, the interior decoration in this room should be comfortable and conducive to relaxation. Of course, the size of the room depends on the free space on the site, but still summer residents are trying to make it larger.
The material for interior decoration is selected taking into account the specifics of the dressing room. There is high humidity here, so it must retain heat. Tile would be out of place here, as it creates a feeling of coolness. This means that it is necessary to choose cladding wood. It quickly absorbs heat and slowly releases it. In addition, wooden lining emits a pleasant smell that has a beneficial effect on the body.
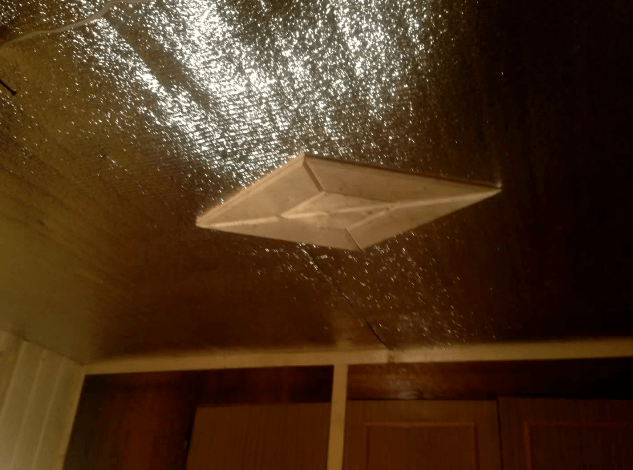
The walls are being finished wood panels, and place it at will in different directions. Ceiling covering executed from wooden board, in this case, a vapor barrier must be installed.
It is necessary to install a high-quality ventilation system in the sink for good air exchange. If the surface is finished wooden clapboard, it must be laid with the spike facing up. This will prevent water from getting under the sheathing. To make cleaning easier, the walls are finished tiles. This material is practical and durable.
The floors in the washing bath room are decorated with tiles, but wooden slatted ladders are required, which can be knocked together with my own hands, or rubber roll coverings for security. If you are using wavy tiles, it is not necessary to use bridges.
For basic bath rooms The main thing is practicality, and for the rest room - aesthetics. As the name implies, it serves for relaxation, that is, for relaxation. The rest room is decorated with wooden paneling, but coniferous wood can be used here, for example, spruce or pine, as well as larch and cedar.
Good material for internal lining baths - cedar, distinguished by a very pleasant aroma and the ability to withstand, without changing its geometry, the most high loads. This type of wood contains tannins that protect the lining from rotting.

Photo 6. Barbecue area
When decorating the interior of bath rooms, you don’t need to skimp on details, then the perfect original house for taking water procedures and recuperating.
When decorating a bathhouse, the use of chipboard and fiberboard boards, linoleum, and plastic panels is unacceptable. It is unacceptable to have surfaces coated with paint, and even in the dressing room, use natural oils or waxes.
The LesoBirzha company thanks you for your attention. Our team hopes that our experience will help you realize your dreams. Our line of bath materials is for you. Choose!
The steam room is just that building in country house, where the presence of the most natural materials is required. This requirement is justified not only by decorative reasons, but also by environmental ones. The release of steam and high temperatures can greatly affect the materials with which the wall, floor and ceiling are lined. And if the materials are not of sufficient quality, they will emit harmful substances. What kind of wood is best to cover a steam room?
Figure 1. Scheme of covering the steam room with clapboard.
Main and the best material Wood is used to decorate the steam room.
It is convenient to install and easy to care for. The tree will have an extremely positive effect on the health of visitors. But there are quite a lot of tree species, so you need to decide what kind of wood to use for finishing. Let's look at the most common and practical types of wood intended for this purpose.
Today, two main materials used for finishing baths are block house and lining. But even they come from different wood species that have different properties. The best species for a bath are linden, larch, aspen, ash, oak, white acacia, spruce, pine and cedar.

Figure 2. Block house installation diagram.
Many wood experts constantly argue with each other which species are better to choose: deciduous or coniferous. On the one hand, conifers are good because they do not change their color over time, so they always remain in the same form as they were originally during installation. On the other hand, hardwoods are considered more resistant to temperature fluctuations and high levels of humidity. But both of them have their own characteristics.
The best deciduous tree Linden is considered to be used for finishing. This wood at the same time retains heat perfectly, but also does not heat up too much, due to which the skin does not burn if you have to touch even very hot walls. Linden tends to secrete twice as much essential oils than other trees. Therefore, it is ideal for the body. And due to the fact that its vapors increase sweating and are hypoallergenic, the effect is enhanced.
Common aspen can be considered an excellent alternative for linden. According to their own healing properties she's the same. Moreover, this tree also has the ability to change the mood to positive and calm. Aspen is not subject to rotting, and is very easy to work with due to the fact that its fibers are quite soft and docile.

Ash and oak have approximately identical properties. It's pretty strong trees, which are little susceptible to rotting and deformation when exposed to high temperature, especially oak. They release less antiseptic into the air, but are quite good in practical terms. Over time, the oak slightly changes its shade to a darker one, but this does not spoil its appearance at all.
If you want the most practical and useful steam room, then it is better to trim some elements that are most susceptible to heating from oak or ash. After all, ash and oak, despite the fact that they are resistant, tend to get very hot. Remember that ash needs to be processed by special means more carefully, since the risk of fungus is slightly higher.
Another excellent type of wood for finishing a steam room is white acacia. If it is properly pretreated, acacia can surpass oak in its strength and resistance to deformation. Due to the fact that acacia boards are less common, it is advisable to use them to decorate the bathhouse floor, since it is more susceptible to impacts.

Of the coniferous tree species, it is advisable to focus separately on larch. It is the most durable and stable conifer tree for a bath. It releases a lot into the air healthy oils, capable of significantly increasing human immunity. And if you make not only walls, but also floors from larch, you can be sure that every year they will only become stronger. Keep in mind that such a tree does not attract bark beetles, which is another positive point.
Cedar has approximately the same properties. It costs a little more, so if you do not have the opportunity to completely decorate the steam room with it, you can use its wood for installation only in some separate parts. It is especially good to place cedar boards where the accumulation of greatest number pair. This increases its usefulness and antiseptic effect on the body.
Spruce and pine are also common tree species for decorating a steam room in a house. They release less into the air useful material, are more susceptible to deformation. But at the same time, they are several times cheaper, and if you properly process them before installation, they will last quite a long time.

Now let’s figure out what is better to sheathe a steam room: a regular board, a block house or clapboard. So that you can decide which is better and cheaper to choose, let’s look at some of the features of these three finishing materials.
Covering the steam room with clapboard (Fig. 1). This good material, because working with him is easy and pleasant. Due to the fact that the lining sheets already have places for connections, they will fit well together without causing inconvenience. Small gaps ensure minimal circulation clean air, which is necessary for greater durability material and prevent its deformation in the future.
There is no need to choose lining for finishing a steam room made of pine or spruce, as it will constantly release a lot of resin, which will clog between the gaps and prevent air from circulating freely. Optimal view wood - linden or aspen. Even if there may not be enough air in the gaps, the lining will not deform; these rocks are resistant to all influences.
Second ready-made material for finishing the steam room there is a block house (Fig. 2). This is the most modern material, which in its characteristics is capable of several times exceeding a very thick log. Due to the fact that the material elements are not flat, but slightly rounded, the tree will not be deformed, even if it is made from inexpensive types of wood.
Another feature is the reduction over time of resin emissions from block houses that are made of pine or spruce. At the same time, the wood does not lose its beneficial properties at all. The technology only provides for improving the quality of the species of these trees over time.
But with strong heating, even such finishing material becomes quite hot if it is made of pine (spruce). Therefore, it is not recommended to get carried away and decorate the steam room in this way. In general, a block house is good from any wood - both deciduous and coniferous.
Probably the most economical option there will be a steam room lining regular boards made of wood. It’s cheap, since you can find this type of board and cut it yourself, spending virtually no money. Particular care must be taken when treating with antiseptics.
But finishing the steam room with this method has one significant disadvantage: it is quite difficult to do it yourself, since you will have to use self-tapping screws, a frame, and monitor the joints. Therefore, there is no guarantee that such a coating will be ideal and will last for a very long time. This finish is good for a temporary steam room, where large expenses are not envisaged.
So, when choosing a sheathing material and a method for sheathing a steam room, you must take all this into account so that the result of the work does not disappoint. This is especially true for the capital finishing of steam rooms, where considerable funds have been invested.
The original Russian bathhouse was always made of timber. Today, the following can be used for these purposes: brick, cinder block, aerated concrete, foam block and others, sometimes cheaper, lighter and more durable. Construction Materials. And to maintain environmental cleanliness and unity with nature, you can always carry out the appropriate finishing.
In this article we will look at how to line a bathhouse inside and outside to achieve the best effect.
To the question, what is the best way to line the inside of a bathhouse, there is only one answer - wood. And if other materials can still be used for the relaxation room, then the steam room should be equipped only with wood paneling. Let's look at the most suitable tree species for such purposes.

This material has been used for the manufacture of bath structures since ancient times. Our ancestors, through trial and error, noticed its amazing water-repellent qualities, like for wood. Excessive amounts of humidity and hot steam have absolutely no effect on the color and shape of linden products.
Perfect for making shelves, dishes, decoration. Especially recommended for production door frame. Such a door will never swell and will not lead to the side.


What is the best way to sheathe the inside of a bathhouse on a limited budget?
Aspen wood is excellent, which, in fact, is a cheaper substitute for linden and has the following advantages:
There is also a disadvantage to this type of material:

The best option for covering the walls in a bathhouse is cedar. Unfortunately, it has a rather high cost, but if you can still allocate a sufficient part of the budget, you will never regret it.
Advantages of cedar wood:
Tip: When purchasing cedar products, consider checking the authenticity.
Because because of high cost such a product, cases of counterfeiting have become significantly more frequent.

At high temperatures, pine releases abundant resinous secretions into the air, which prevents its use in the steam room. But this material is cheap enough to cover it with and enjoy a wood interior.
Tip: when buying boards of any type of tree, pay attention to the presence of knots in their structure. Because they are the most common causes of burns due to uneven heating.
After you have chosen what you can use to line the inside of the bathhouse, it is recommended to study the process of installing the lining on the walls and ceiling. You can always, of course, hire specialists for this work, but if you want, you can save money and do everything yourself.
Instructions:


Whatever material you choose to build a bathhouse, the interior decoration must be made of wood. Only then will the traditional atmosphere of the Russian steam room, which provides such a pleasant health-improving holiday, be respected.
You can choose different types of wood depending on your budget and preferences. Carrying out the cladding yourself will not be difficult if you follow the auxiliary instructions.
The answer to the question of what is the best way to cover the outside of a sauna is more extensive, since the outer part of the sauna does not come into contact with a person. Here you can be guided by purely aesthetic considerations.

The video in this article invites you to watch Additional information on this topic.
Choose the right interior finishing material and fully enjoy your visits to your bathhouse!
Building a bathhouse is only half the battle. It is important to properly equip it from the inside: finish it, install a stove, arrange furniture, etc. Quality finish premises will allow you to make bath procedures truly sincere and as pleasant as possible.
Traditionally, a bathhouse has several rooms with different humidity and temperature levels; accordingly, there are a number of restrictions on the use of certain finishing materials.
| Room. Conditions | Recommended materials | Materials that are undesirable to use for finishing |
|---|---|---|
Steam room. | 1. Tree. Finishing with paired wood lining is considered a classic. This material is best suited for finishing walls, floors and ceilings. Requires treatment with special impregnations (wood in a steam room cannot be coated with varnish or paint that is not natural). 2. Stone. It is often used for cladding the wall behind the stove, while simultaneously serving as a fireproof cut. The solution is practical, durable, and quite original. 3. Salt panels. Ideal material for medical procedures. Illuminated salt blocks will pleasantly transform your steam room. But it is better to use this material in saunas with electric stoves, because direct contact with water and excessive humidity have a detrimental effect on the material. 4. Facing brick. Can be used to cover the wall behind the stove. Goes well with wooden wall paneling. 5. Porcelain tiles and ceramic tiles with a non-slip surface for finishing the floor and/or wall behind the stove. Recommended as finishing coat for screeds with insulation. On wooden base It is better not to put tiles in a steam room. 6. Mosaic. Traditional material for finishing hammams. In Russians and Finnish baths not used often. | 1. Parquet and laminate. 2. Linoleum. 3. PVC panels for covering walls and ceilings. 4. Ceramic tiles are glossy (slippery). 5. Ceiling tiles all types. 6. Plaster. |
| 1. Porcelain tiles and tiles with an anti-slip surface, mosaic. Recommended in combination with elastic anti-fungal moisture-resistant grout. 2. Natural or artificial stone. 3. Wood impregnated with antiseptics and water-repellent compounds. The service life of the shower is quite short. The best type of wood for finishing a shower room is larch. 4. Moisture-resistant drywall. It is used for the construction of partitions, as a base for laying tiles. Plasterboard can be used to protect laminated timber walls from moisture. It is permissible to paint GVL with moisture-resistant paint, but this option is short-lived. 5. PVC panels. A good option for finishing walls and ceilings, provided that waterproofing is properly organized. Finishing wooden walls plastic panels permissible only after complete shrinkage. 6. Moisture resistant plaster. The finishing can hardly be called budget; additional waxing is required. It is possible to bring unique patterns to life by choosing the right structure and shade of the composition. | 1. Parquet and laminate. 2. Linoleum. |
|
| Any available materials are suitable for finishing. | It is not recommended to decorate the wall bordering the steam room with wood or plastic. Better to use facing brick, stone, decorative plaster. |
Let's look at several ways to decorate the inside of a bathhouse.

An example of finishing the ceiling of a recreation room with clapboard
Lining is used very often for wall decoration. These can be expensive panels made of cedar, larch or more budget-friendly ones made of aspen and linden. Often, bathhouse owners combine different types of wood; the finish is unusual and very beautiful. It is better to use pine lining for covering the dressing room; in a steam room it is not the best choice.


A combination of lining from different types of wood for finishing walls and ceilings

They fasten the lining vertically or horizontally, and also lay out patterns from the slats, fixing it to the sheathing beams. A foil vapor barrier must be used. But it’s difficult to surprise anyone with such a finish.

If you have a sufficient amount of free time and material, some diligence and accuracy, pay attention to method of installing lining in a herringbone pattern.
Step 1. Calculation of lining. Calculate the area of each wall in the steam room separately (you need to multiply the length of the wall by its height), sum up the results. You don’t have to subtract the area of the doorway, since it is necessary to provide a supply of material, taking into account the scraps.

When purchasing lining, pay attention to the label - manufacturers indicate the number of panels in the package, as well as the area of the finishing material. Divide total area your steam room for the area of one package and get the number of packages that will be needed for finishing.
If there is no information on the label, you will have to measure the length and width of each panel without taking into account the width of the tenon, and then calculate the number of panels for finishing. It is better to purchase material with a reserve.
Important! Do not use lining with knots to finish the steam room. The density of the knots is higher than the density of solid wood; when heated, the knots will fall out.
Step 2. Preparing the lining for installation. Unpack the purchased lining and store it in a heated room. You can begin finishing in two days.

During this period, prepare workplace and tools:
Step 3. It is better to fasten the lining with the tenon facing up. Based on this, we mark out the panels.

The herringbone can be angled up or down.

The photo shows the herringbone laying method with the corner pointing down.
Cutting must be done at an angle of 45 degrees. The ends of the panels should be on the sheathing bars. For convenience, you can make a template and mark according to it.
Step 4. We start attaching the paneling from the top. We fix the first panel with finishing nails all the way through. If the bathhouse is wooden and has not yet shrunk, it is better to leave a gap of 3-5 cm between the ceiling and the casing, which will be covered with a plinth.
We insert the second panel with a tenon into the groove of the top panel, precisely aligning the ends of both panels. We fasten with a clamp. We insert the clamp into the groove, hammer three finishing nails into the holes of the clamp through a hammer. One panel will require at least two clamps, depending on the length of the lining.

We continue fastening from top to bottom until we reach the floor. Here it is also worth leaving a gap of up to two centimeters. Lastly, we attach triangles cut from the lining at the top and bottom, fixing them through with nails.
We install the next row in the same way, but we change the direction of the lining.
After installation, close the panel joints with thin wooden baseboard, fixing it with finishing nails strictly vertically.

There is another way to lay the “Christmas tree”. The technology is similar to laying parquet. The lining is sawn into planks rectangular shape. Laying is carried out with a shift equal to the width of the panel without taking into account the tenon. Fixation is done with clamps or construction staples.

Herringbone wall covering method
It is better to use boards rather than timber as sheathing. This will simplify the installation process. The method is applicable for both wall and ceiling finishing.
Step 1. It is necessary to draw a rhombus with angles of 30 and 60 degrees. We draw a straight line between the 30 degree angles, dividing the rhombus into 2 triangles. We cut the paper blank, transfer the drawing to the lining so that a spike is located on two faces of the diamond. We cut out the workpiece. Connect two triangles to form a rhombus. We fix the diamond with finishing nails right through to the sheathing (two nails for each triangle, we do not drive the nails all the way in).
Step 2. We take a whole panel of lining. We apply it to the diamond, connecting its tenon to the groove of the board. We make markings on the board for cutting.

We draw a straight line to the spike. On the tongue of the paneling we draw a line perpendicular to the board itself, continuing the pencil markings to the other side of the tenon of the panel.
We saw the board according to the markings. To do this, turn the paneling over with the pencil markings facing down, and place the edge of the circular saw on the line marked on the tenon. Turn on the saw and make a cut.


We take the second clapboard board. We apply it with a groove to the rhombus (on the edge where there is no spike). We mark for cutting, maintaining the accuracy of the angles. We check with a protractor and a long ruler. We saw according to the markings.
Advice! It is more convenient to connect the initial elements on a table or on the floor by nailing wooden elements finishing nails to a piece of FSF plywood.
Step 3. We continue to work. Rush is unacceptable. It is important to accurately mark and cut and join the corners. We mark or number each element to make it easier to install on the wall or ceiling in the future.
Step 4. When decorative element will reach the right size, you need to remove the nails and disassemble all the panels that were assembled on the table.

Let's assume that insulation and vapor barrier have already been completed, the sheathing has been filled. Using a level and a tape measure, you need to find the place where the center of the diamond will be. Accordingly, the center can only be located on the plane of one of the beams or sheathing boards. We nail the central diamond to the sheathing, driving the finishing nails into the tenon. For convenience, it is better to use a hammer to avoid breaking the lining with a hammer.
We attach the following lining boards to the central element, adjust them with light blows of the mallet and fix them in the same way.


Assembling a rhombus on the ceiling. When the decorative element is fixed, further cladding can be carried out parallel to the fixed panels or perpendicular
The joints of the rhombus can be covered with a thin wooden plinth, nailed through with finishing galvanized nails.
On a note! By placing lining panels in different directions, combining lining from different varieties wood, you can create an interesting pattern that will turn a simple steam room into a work of art. “Elite class” wood is considered to be cedar, fir, ebony and mahogany, rosewood, Canadian hemlock, African oak, pear and elm, and eucalyptus.


When the cladding is completed, impregnate the wood with a protective compound.
If the walls of the bathhouse are wooden, you cannot, of course, put tiles or mosaics on them. Moisture-resistant plasterboard will serve as the basis for the mosaic. This material is quite hard, does not deform in conditions of high humidity, does not emit harmful substances into the atmosphere, that is, it is completely safe.

A frame for plasterboard is similar in structure to a frame for lining. To equip it, we will prepare 50x25 mm and 75x25 mm antiseptic timber, galvanized screws, perforated corners. We will mark using a tape measure, a plumb line and a level.

The timber must be antisepticized yourself or purchased material that has already been treated. Store timber indoors
Step 1. We fasten the beam under the ceiling with self-tapping screws (if made interior partition, then the upper beam must be attached to the ceiling). Using a plumb line, we make markings on the floor for attaching the bottom beam. They must be in the same plane.
Step 2. We fasten the bottom beam to the wall with wood screws.
If the walls are made of blocks or bricks, fastening is done with dowels through pre-drilled holes in the wall.
Step 3. We measure the distance between the upper and lower bars, this will be the length vertical racks. We cut the timber with a jigsaw or saw. We install the first rack in the corner of the room. We attach the stand to the upper and lower beams with perforated corners and self-tapping screws.
Step 4. At equal intervals we install the following racks in the same way. We check that the racks are in the same plane.
Step 5. We cut the timber to a length equal to the distance between the posts. Using corners and self-tapping screws, we secure intermediate jumpers between the posts.

moisture resistant drywall


Step 1. By using laser level check the verticality of the wall. We set the level on the floor and use a tape measure to measure the distance from the wall to the beam in different places.


Step 2. If the differences are significant, we knock down the protrusions with a hammer drill. We remove debris and dust. We repeat the plane check operation again.

Step 3. Using a rule and a pencil, draw a line on the floor (we move away from the wall by about one and a half centimeters). The profile will be located along this line. We fasten the PN 50x40 profile to the floor with dowel nails.

Draw a line along which the profile will be located

Step 4. We insert vertical guides (PN 50x50) into the lower fixed profile and fasten them to the walls (in the corners of the room) with 6x60 mm dowel nails.


Step 5. We attach the PN profile to the ceiling. The upper and lower profiles must be located in the same plane. If the length of the room exceeds the length of the profiles, we make a joining, that is, we insert one section of the profile into another with an overlap of up to 40 cm.

We insert the profile into the vertical guides. Be sure to check the horizontality of the top guide; to do this, insert a vertical profile in the center and apply a level.

If necessary, we move the upper profile a little and only then fix it with self-tapping screws to the ceiling. We install fasteners at intervals of 50 cm.
Important! The installation of electrical wiring, pipes and other communications must be completed before finishing work begins.
Step 6. Installing intermediate profiles. We fix the ends at the top and bottom with self-tapping screws and a press washer. We take the distance between the profiles taking into account the dimensions of the plasterboard sheet. For example, from the outermost post we fix the next two at a distance of 40 cm, and install the fourth post so that its center is at a distance of 120 cm from the first (corner) profile.


Step 7 We check the position of the vertical posts with a level and begin fixing the profiles with hangers.


We insert the suspension between the vertical profile and the wall. Using a marker, mark the points for drilling holes. We drill holes with a hammer drill, insert dowels into the holes, attach hangers and fix them with self-tapping screws.
We bend the shelves of the hangers, screw in the “bug” screws to attach the hanger to the profile.


First we attach the hangers in the center of the profiles, then the rest. The vertical step between the hangers is approximately 50-60 cm.
On a note! To prevent the vertical profiles from shifting or rotating along their axis during the installation of the suspensions, we fasten them with a horizontal profile, screwing it with self-tapping screws and a press washer.

Step 8 We install jumpers. We mark the profiles for cutting. According to the markings, we cut the profile with a grinder.

We stretch the cord horizontally and use these markings to fix the jumpers with self-tapping screws and a press washer.


Installed jumpers. They are necessary if the size of the plasterboard sheet is smaller than the height of the walls
On a note! Use magnetic screwdriver bits. This will simplify and speed up installation.

Let's look at an example of installation on a metal profile frame. Installing sheets on wooden frame It is performed in the same way, the joints of the sheets should be located in the center of the profiles. Direct contact of drywall with the floor should not be allowed; plastic pads will be placed under the sheets. Also, you should not fasten the sheets tightly end-to-end; it is better to leave a gap of 1 mm between the edges for ease of puttying.


We use sheets for cladding moisture-resistant plasterboard 12 mm thick. We fix the sheet with self-tapping screws 25 mm long. The pitch between the screws is approximately 15-17 cm. We screw the screws in a checkerboard pattern.
First, we fasten the sheets along the perimeter, then along the line of vertical profiles. We draw a vertical line according to the level and make fastenings along this line. We recess the screw caps into the sheet by 1 mm.


Puttying seams
The joints of the sheets must be puttied using a mesh and moisture-resistant putty. If the drywall edges have a hand-cut edge, chamfer it at a 45-degree angle with a sharp knife. A primer is applied to the joints. The mesh is embedded in the putty mixture. After the putty has dried, the seams are sanded with sandpaper.


To fix the mosaic on the walls of the bathhouse, it is better to use moisture-resistant glue, for example, Ceresit CM 115.

Step 1. Prepare the glue.
The room temperature should be from +5 to +30°C. Recommended water temperature for glue mixture from +15 to +20°С.
Gradually add the dry mixture to the water. For 1.5 liters of water, 5 kg of mixture is required. Mixing is done with a construction mixer or drill with an appropriate attachment. The speed of the drill or mixer should not exceed 400-800 rpm. After the first mixing, pause for 5 minutes and repeat mixing.

Advice! You should not prepare a lot of glue at once; the time of its use is limited to 20-30 minutes. Do not dilute the finished glue with water. If it thickens slightly, you need to stir the mixture well.
Step 2. Apply glue to the wall. We start gluing the mosaic from the upper left corner. Scoop up a little glue with a regular spatula and apply the mixture to the edge of a notched trowel. Distribute the glue evenly over the drywall.
Step 3. Unpack the mosaic, take one fragment and press the mesh to the glue. Carefully straighten so that there is an equal distance between the elements. Roll the entire fragment with a roller or wide rubber spatula.

It is important to lay them level so that the rows are even. The area of applied glue should not greatly exceed the size of one fragment.
You can only cut the mesh; it is not recommended to deform the pieces of ceramics or glass themselves.
Step 4. 24 hours later (or more, depending on the speed of drying of the glue) after laying the mosaic, we grout it. To fill the seams we use a moisture-repellent composition with antifungal properties, for example, Ceresit CE 40 Aquastatic.
For 2 kilograms of dry mixture you will need 640 ml of cool water. Mixing is carried out with a construction mixer at a speed of up to 800 rpm. Gradually pour the dry mixture into the water. After mixing, take a five-minute break and repeat mixing the grout. Ready solution must be used in two hours. It is unacceptable to exceed the specified amount of water, so as not to deteriorate the properties of the grout.

Apply the grout to the mosaic with a rubber spatula, spreading it diagonally. After 15-20 minutes, remove the excess with a damp (but not wet) sponge or rag. We remove the remaining grout from the surface of the mosaic with a dry rag.

You can decorate a shower room or dressing room entirely with mosaics, or combine this finishing material with ceramic tiles, porcelain stoneware.


Soapstone chlorite is highly valued by bathhouse attendants for beneficial features. The stone accumulates heat well, cools down for a long time, and the vapors emanating from soapstone have a healing effect on the body.

Soapstone is used to decorate stoves and walls in steam rooms, but nothing will prevent you from decorating, for example, a relaxation room in a bathhouse or a shower room with tiles made from this stone.


Soapstone is available in various variations - tiles with a smooth or textured surface, mosaics and even bricks. Manufacturers offer baseboards, borders and corners made of soapstone as additional elements. If you are finishing the wall in a steam room, you will need heat-resistant stone adhesive (used for lining stoves and fireplaces), and when lining a shower room it is better to use moisture-resistant mixtures.

The surface on which the tiles will be laid must be flat and pre-primed. The tiles are laid from the bottom up, keeping the rows horizontal. The adhesive is applied with a notched trowel and the tiles are carefully pressed against the wall. Laying is possible both end-to-end, that is, without gaps between adjacent elements, and under jointing. The second method is suitable for tiles correct form and with a smooth surface. Cutting tiles is done with a grinder diamond blade. The joints are grouted with a heat-resistant stone mixture.

The combination of soapstone tiles with different textures looks quite extraordinary.

A combination of smooth soapstone tiles and tiles with a torn stone texture
soapstone
Remember - finishing the inside of a bath should not only be exclusive, but also practical. It is important that Decoration Materials did not contribute to the development of mold and mildew, were easy to clean, safe for health and extremely durable.


