It is not always convenient to leave messages on a smartphone. For example, the mother left for work before the child woke up to go to school. And he should give something to him. A text message can wake up your baby, even if the smartphone is on vibration. And later the mother runs the risk of forgetting to convey the message to her child. In this article we will look at the options handmade slate reminder boards, with which you can easily leave short messages to each other.
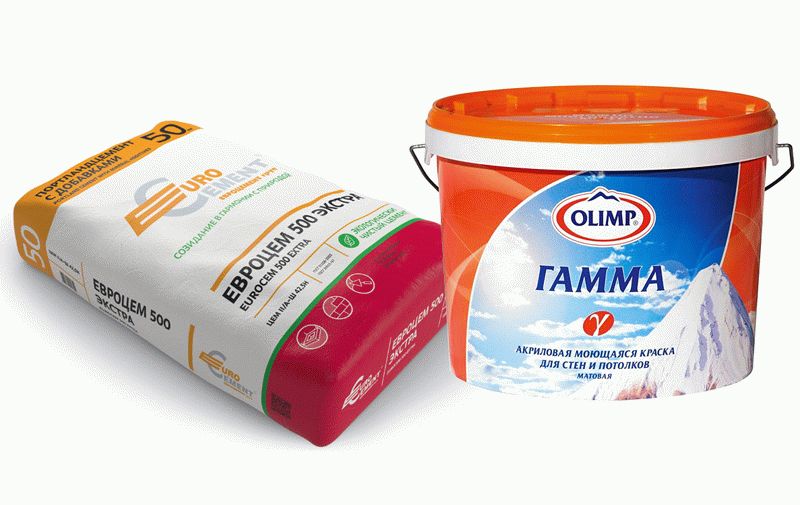
Many people prefer to use ordinary black paints, flavored with powder for grouting tile joints, to create slate boards. But few people know that special slate compositions are sold in stores. They are intended for painting surfaces on which they will later write with chalk. Their cost, as a rule, is quite high, but the fuss with preparing homemade slate paint less.
The same should be said about paints with magnetic properties. If you want to make a magnetic slate board on which you can hang a funny magnet, if desired, then these will come in handy.
The plane itself can be of any shape. To create small boards, you can use dense multi-layer plywood; for more bulky ones, a thick sheet or OSB board. If you have a jigsaw on your farm, you can cut any blanks for boards from a piece of plywood. For example, a slate on a refrigerator can be shaped like a cloud, a multi-faceted star, or a simple oval. Subsequently, the product can be framed, like a real painting, or it can be equipped with a stand and made into a tabletop.
The surface painted with glossy paint will be perfectly smooth. It is useless to write with chalk on such a board, since the chalk fractions will simply have nothing to cling to. The block will slide along the board without leaving a mark. That is why the paint should be roughened, and in in this case manufacturing process slate board begins with the preparation of special paint. So, let's start making:

Here everything happens in the same order and in the same way as in the previous version, except that no grouting powder is needed. Matte acrylic paint itself has all the properties of slate paint. The chalk clings to it perfectly, and therefore you can immediately start painting.

After hardening, you will get the same wonderful board as in the first case. We make a couple of holes with a drill, thread a string, tie it in a knot and hang it on a hook on the wall. The slate board is ready to use.
The fastest and easiest way to make a slate chalk board using special slate paint. The composition initially has all the necessary properties, and if you purchase it in a special can, you don’t even need a brush or roller for application.

Simply apply a layer of chalkboard paint to the sanded surface of the workpiece and let it dry. If you are not satisfied with the layer of paint, and the wood has absorbed it too eagerly, after it has dried, you can apply another layer again. After final drying, the board will be ready for use.

There are many paints intended for making slate boards, but you can’t buy them everywhere. If desired, you can order online or purchase in specialized stores.

In this case, the following materials will be required:
The procedure in this case is as follows:
After complete drying, you can not only write with chalk on such a board, but also place various funny magnets.

The process of creating magnetic slate boards based on galvanized steel sheets is more labor-intensive. And a much more impressive set of tools and consumables will be required here. In particular for upcoming work should be prepared:
Manufacturing begins with the selection of sizes and other figurative features of the future board. When we have decided on the size and shape, we proceed directly to the process.

The procedure is as follows:
After this, all that remains is to equip the product with brackets of your choice. There are countless of them in specialized stores. There are simply suspended ones, there are ones with a changing angle of inclination, there are ones that rotate from side to side. Agree, such a magnetic slate board on the wall, the photo of which is presented in this material, will look great in any interior.

To give the slate more elegance and aesthetics, you can frame it around the perimeter LED strip, hidden in a groove in a wooden corner of an intricate frame. Also, the original frame can be made from the same decorative plastic corner, purchased 5 mm wider than the size wooden base. It must be secured to the edge of a wooden base with an overlap, and an LED strip must be placed in the resulting groove between the front side of the corner and the edge of the board surface.
Such a slate board will definitely become a source of special pride for you. First of all, you made it with my own hands, and secondly, they also achieved that it looks no worse than a store-bought one, plus it is equipped with backlight functionality, which expensive factory models do not have. Not only will it faithfully serve you in accordance with its intended purpose, but it will also become an excellent unique lamp that can perfectly decorate any interior.

Anyone who is satisfied with our master class on how to make a slate board with their own hands at home can take note of the suggested tips.
And for those who don’t have enough, they can watch one more video for complete satisfaction. The video shows how real masters of “handicraft architecture”, burdened with the dominance of useful branded equipment, approach the production of slate boards.

We hope that the boards you make will be no worse than those shown in this video.
The desire to decorate their home leads to many people looking for the most unexpected ways to implement it. For example, some associate the slate with distant childhood, when we were called to the board and forced to solve problems and prove theorems. Today this attribute is actively used in interior design. Why and how?
According to modern designers, with the help of the mentioned attribute you can solve not only an aesthetic, but also a practical problem. For example, a slate board in the kitchen is an opportunity to write on a quick fix recipe that you just heard on TV, or leave a message to your husband that there are cutlets and pea soup in the refrigerator. And sometimes on the board you can just wish good morning to your family. The easiest option to decorate your kitchen with this accessory is to buy it in a store that sells a variety of decorative items. You can attach your purchase to the wall, if possible. free place, and on the refrigerator door. The effect of a slate board is also created by a sticker, which will become a more economical option.
If you have definitely decided that you want to designate a wall for a slate board, you should carefully prepare for this process. First, we buy special paint in the form of an aerosol, which is suitable for treating walls. Secondly, you should prepare the surface. To do this, we first sand it, then plaster it and apply several layers of paint. Let it dry. DIY slate board created with minimal costs and effort. By the way, it can be done not only in the kitchen, but also in any other room, even a nursery, where kids can practice drawing and learning to write, for example.

It is noteworthy that the use of slate boards began in restaurants, cafes, and bars. It is in these establishments that they write the weekly menu on them, talk about possible promotions, discounts, new dishes, or leave certain messages to passers-by. Thus, the touching children's tradition gradually moved into the sphere of entertainment and service. However, for registration home interior a slate board fits perfectly.
The simplest option is to make it from chipboard, wood or thick cardboard. Selecting the material the right size and prepare the surface for painting, that is, clean it from dirt and dust. Apply several layers of primer and allow time to dry. To create a slate surface, you can buy special film and glue it, or you can paint over the canvas. By the way, you can make your own paint: take a glass of black paint and add a couple of tablespoons of grouting powder to it. tiles and mix this composition well. As you can see, the raw materials for slate boards are simple, and you can find them in any hardware store.

To make a writing board, we will need to stock up on the following equipment:
This product will be used as a slate board on the refrigerator. Take a sheet of plywood and paint it with white paint. At this time, we dilute cement in black paint and then cover it with the resulting composition. front surface plywood. We drill holes in the canvas to attach it to the frame later.
Let's move on to the frame. We need to paint it somehow beautiful paint. Then we take decoupage paper and cut out drawings from it, which we glue onto the frame. After the glue has dried, the frame should be varnished. In a container we prepare a solution of cement and paint - 2 tablespoons of cement per glass of paint. Mix the solution thoroughly and then apply it to the plywood. After the first layer has dried, apply a second one so that the strokes are powerful and wide. Our chalkboard is ready!

The peculiarity of slate boards is that they can be used to create accents in almost any room. For example, unique look You can attach it to a chest of drawers, a door or some wall. Moreover, it should be remembered that it is better to place the board on a contrasting background so that a natural frame is created for it. Designers say that black, while traditional, is quite capricious. This means that you have to work hard so that the space occupied by the slate board is no more than 10% of the wall.
Certainly, modern tendencies designs are such that monochrome is used quite often. And therefore, a slate board placed on the refrigerator no longer surprises many people. The main thing is that it fits into kitchen space pretty organic. In addition, it is not at all necessary that the cover of the writing board be exactly black - gray or dark blue colors will do just fine.

This accessory can be great decorative element, say, when decorating the premises where wedding celebration. For example, you can write a menu on a slate board, indicate the names of guests who should sit at specific tables, or you can simply use it as an element for a romantic photo shoot. You can make this simple attribute with your own hands. To do this we take:
Instead, you can use special paint for slate boards (we will also tell you how to create it). Let's start creating the decor. Take the frame and remove the back and glass from it. We cut out a rectangle of the required size from the film, leaving 2 cm on the sides so that the film can be wrapped around the glass. We glue the film to the glass, while smoothing it with a construction spatula or a piece of plastic. We return the glass back to the photo frame, close it and make inscriptions. An elegant and original decorative attribute for a wedding ceremony is ready!

We'll show you how to create paint that will fit perfectly on any surface, be it a closet door or a bedhead. We stock up on the necessary materials:
Mix the primer in a container in a ratio of 8 to 1. Mix the solution thoroughly so that there are no lumps, preferably with a mixer. We look for a suitable surface and paint it with our paint, preferably in two layers. To bring our board to perfection, we take chalk and polish the surface with it. Then we wash it with a dry cloth. The board is ready, and you can use it to decorate the interior of both an adult and a child’s room.
Chalk boards are becoming increasingly popular in modern interiors. Firstly, it is very convenient - by hanging such a board in the kitchen, you can write short reminders to yourself about what you will buy and what you should not forget to do.
For a family with children, this is also an irreplaceable entertainment and your wallpaper will remain intact. Chalk boards are used to decorate parties and birthdays, and adults also love to draw on it and leave wishes.
You can buy such a board ready-made and it costs from 10 to 100 dollars, but why? If it’s very simple, you can make a chalk board at home from any base and acrylic paint.
There are special paints - they are called “for chalkboards”, but you need to spend money on them.

You can choose absolutely any base, it could be:

The fastest and easiest way to make a board is to use any cardboard as a base; it does not need to be processed before painting. In addition, after practicing on it, you can move on to larger surfaces.

If the mixture is too thick, add a little more water, since acrylic paints from different manufacturers have different densities.

For durability, apply 3 coats of paint to the chalkboard. Let the paint dry completely between coats. After the third layer has dried, It is recommended to rub chalk over the entire surface in order to harden it, and then wipe the chalk with a dry towel.


TIP: The cardboard may sag slightly after applying the paint, but it will straighten out once it dries.
Insert the cardboard into any photo or painting frame and your board is ready!

This master class can also be used to paint all or part of a wall. Such black wall drawing boards are becoming a whole trend in the kitchen or in work area. But before painting, the wall must be treated, read in detail at this link.


Apartment decor with help chalk boards has long been popular.
It is very convenient to keep a chalkboard in the kitchen where you can write down purchases that need to be made, plans for the day, recipes of the day. In a children's room, such a board is well suited for school schedules, tutors, and section schedules.
However, just a board is boring. Can with paint turn any flat surface V chalk board. It is enough to buy special paint for this. You can paint the entire refrigerator with this paint and write whatever you want on it.
It is known how young children love draw on the walls, you can turn an entire wall into a drawing board like this, and you won’t have to shed tears because the children ruined the newly wallpapered wallpaper. The child’s creativity drawn on the board can be easily erased with a damp sponge and you can draw again the same minute.

Decoration with the help of such surfaces it is becoming more and more popular. They can be arranged in any room. In the kitchen along the cutting table: convenient for writing down recipes.

Near the phone: convenient to record everything necessary information received during a telephone conversation. We probably remember the film “Pokrovsky Gate”, where the main character’s aunt wrote down the phone numbers of her nephew’s friends on the wall. She kept finding the string from the pencil, but not the pencil itself, so she could write down the next phone number.
With a chalk board will always be in place, because they can only draw on this board. In the children's room, there is a whole surface for drawing with chalk - this is a paradise for small child, he will be able to show his creativity and creative abilities with ease and without damage to the repair, and he will be able to do this every day on a clean surface.
For an older child, a whole wall on which to write notes will serve good place for fixing the multiplication table, spelling rules, native and foreign alphabet.
Such a surface can be made in in the most unexpected places: in the pantry where you store food; above the bed, where you can write a message to your loved one every morning; label on the chest of drawers: underwear, socks, scarves; make the surface of the table suitable for writing with chalk and you can make inscriptions of any kind: who will sit in what place at the table, and besides this is another comfortable spot for a child's creativity.

However dye, which is sold in stores to create such surfaces, usually black, dark gray, sometimes dark green. In most cases, this color scheme does not fit into the interior of the rooms. In this article we will talk about how to make paint for creating surfaces for drawing with chalk of any color.
Mix paint with grout. For small surfaces (for example, a door panel) we will need 1 cup (300 ml) of paint and 2 teaspoons of grout. Pour the paint into a mixing container, add grout and mix everything thoroughly with a mixer. The solution should become homogeneous, i.e. no lumps.
Apply the solution using a roller or foam brush to the painted or primed surface. It is advisable to wash and dry the surface first. Coloring in small areas, we go over the surface with a roller several times to make sure that the entire surface is painted in an even layer. Let the surface stand and dry.
Clean the surface thoroughly using a fine sandpaper. After this, clean the surface from dust and dirt.
We check the quality of our surface: take a piece of chalk and paint it them the entire treated surface. We remove the remains with a barely damp sponge.

Now you can make such a surface in any place convenient for you. However, do not forget about such a little thing as a small stand at the bottom of the surface to collect falling chalk. Otherwise chalk while writing it will fall straight to the floor.


Slate paint – great option to create a stylish, modern interior. Elements with such a coating will be appropriate almost everywhere – from a children’s room to a solid office. IN Lately they have become a real design trend!
But the use of unusual paint in the interior is justified not only from a design point of view. Slate surfaces are also very practical. They are a great help in raising children, communicating with family, at work, and just in everyday life.
These paints are popularly called chalk paints. They create a durable matte, slightly rough coating on the surface on which you can write with chalk. The effect is like the familiar school board, only much better.

Modern slate paints have high performance characteristics:
On a note! Chalkboard paints are sold in cans (for application with a brush or roller) and in cans (for easy painting of geometrically complex surfaces).

Manufacturers offer ready-made emulsions of the most different colors. Thus, Siberia paint is available in gray, burgundy, brown, black and dark green. Tikkurila offers those who wish to tint the colorless base into one of the three hundred shades of the branded palette. And Rust-Oleum has a completely transparent slate coating. It can be applied to any colored surface in the house.
Chalkboard paints can be used throughout the home:

Important! Some paints become discolored by hot grease, so they should not be applied near a stove.
A variety of materials can be painted to look like lead:

All slate paints are intended for interior work. They do not tolerate low temperatures.
Chalkboard paint is very easy to use. Anyone can paint a wall or make a cute note board with their own hands.

The painting procedure is as follows:
Advice! Slate paints harden quickly, so you need to work with them quickly.

Wash the slate surface with soap or other household chemicals possible only a month after dyeing.
Factory emulsion is sold in cans and jars of 0.5 and 1 liter. But many simply do not need such an amount of material. In this case, paint with a chalkboard effect can be made with your own hands. It's much cheaper.
All you need is:
The ingredients are thoroughly mixed and inexpensive chalkboard paint is ready.
On a note! Dolomite or marble chips. A homemade cement mixture will not provide such a durable coating. It will get scratched faster.
The most difficult and interesting thing in this matter is choosing the color of the emulsion. Many people don't like traditional dark shades. In this case, you can use other colors on which the chalk pattern will be visible. Light, faded, pastel shades are excluded immediately. But it will be almost as convenient to draw on a bright background as on a dark one. Excellent options are bright red, rich purple, grass green, deep blue.
 The slate wall does not have to be black; any color of rich tones can be used for painting
 It will be very interesting if you use several slate panels of different colors in the interior at once.
Before you make slate paint using this recipe, you should make sure that you already have everything you need on hand. If you have to buy each ingredient, then it may be cheaper to immediately purchase a ready-made factory emulsion.
To prepare about 50 ml of slate paint you will need:
First, grout powder or cement is placed in the container - it will provide a rough surface. Then add paint, which will give the finished mixture the desired color, and varnish (it will make the emulsion more plastic). Now all that remains is to add water and mix everything very thoroughly.
Important! The mixture should be well mixed. If there are lumps in the mixture, they will ruin the painted surface.
Do-it-yourself slate paint is applied in the same way as store-bought paint. It is given time to dry and harden before applying the chalk designs.
Don’t forget about careful use of finished surfaces. Despite their high wear resistance, slate panels are easily scratched by hard, sharp objects. Therefore, it is not recommended to draw on them with cheap “school” chalk mixed with sand and pebbles. And if you use soft crayons and wash the drawings with a soft, wet cloth, the slate coverings will decorate the interior for a long time and serve as a convenient field for creativity.


