First, let's talk about the design of interior door locks. Many people believe that if the door is located inside one common room, the lock mechanism can be simple. In general, everything is correct, the task of this device is to indicate that the room is closed and you should not go there at the moment. But what about, for example, those who rent out a multi-room apartment? different people? After all, everyone should have a personal space, reliably protected from the entry of others. And this is not the only situation when you need more than just the latch that everyone is so used to.
Nowadays, absolutely any locks can be installed on interior doors. different types– the point here may not even be the ability to resist hacking, but sometimes simple convenience.
They are installed on doors in apartment spaces more often than others, the reason for this is their low cost and long service life. If you have no fundamental preferences regarding door control, this option is optimal.

They are also quickly becoming fashionable. Their main advantage is ease of operation, because such a lock can be closed and opened even from a distance. They last longer than mechanical ones, no matter how paradoxical it may be, but the cost of such a device is quite high.
These locks are good for those who live in a communal apartment. The device restricts access to the premises common use and this is convenient for many consumers. This type of lock looks neat, is not conspicuous, and has a fairly long service life.

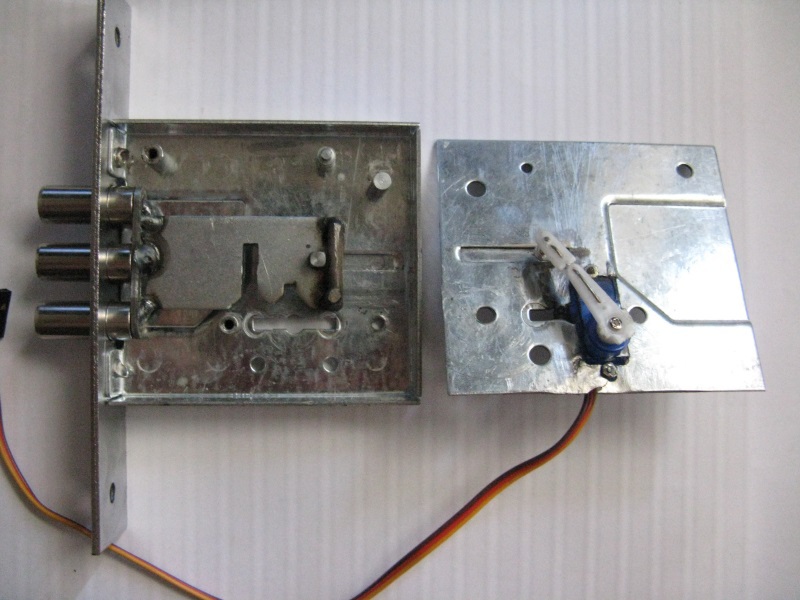
In addition to the listed locks, which are often used in everyday life, there are also completely magnetic devices. They are used much less frequently, and there are certain reasons for this. If you contact a specialist, they will most likely recommend something else.
The fact is that magnetization remains, which affects general work and the mechanism opens and closes unstable. For example, in an apartment where there are children, this is extremely inconvenient. In addition, the magnetic lock often breaks when unlocked, the design is complex, and the cost is unreasonably high.
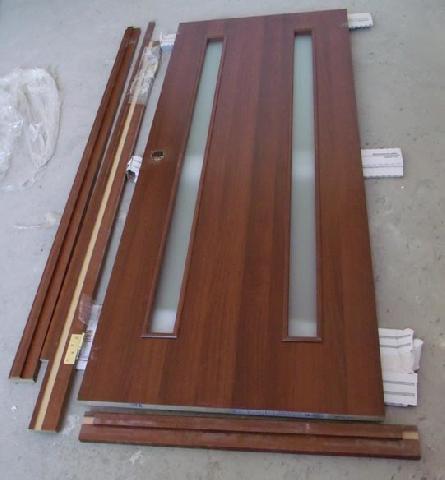
Nowadays doors are an expensive and stylish piece of furniture, so many, not wanting to spoil high-quality wood, entrust all the installation, assembly and finishing work to professional craftsmen. This approach is quite understandable - no one wants to lose a decent amount of money on buying a new door.
However, there are those who are confident in their abilities and are ready to make every effort on their own. Our article is just for those who want to do it themselves, beautifully and accurately, without resorting to the paid help of specialists. We will help you cope with difficulties, smooth out sharp corners and talk about all the important details of the work from the first to the last stage.
Before you take on the work of mortizing a lock, you need to thoroughly familiarize yourself with the theory, so we strongly recommend that you first read the article to the end and only then start working. This way you can avoid unforeseen circumstances, the need for an urgent trip to the store and other incidents. In addition, you will be able to accurately determine for yourself whether it is worth doing it yourself or whether it is better to leave it in the hands of a professional. The final decision should be balanced - compare all the pros and cons. So, let's start understanding how to install locks on interior doors.
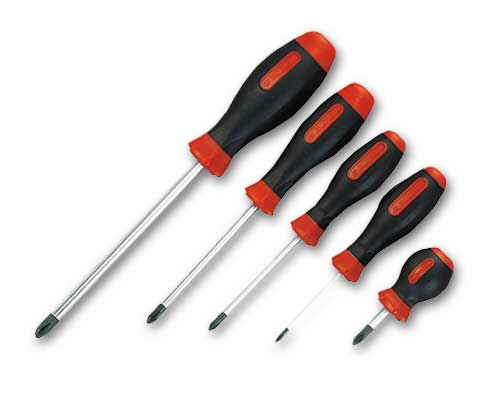
You need to select tools in accordance with the insertion technology. There are only two options for the process - professional installation and artisanal. There is a difference between them, and a significant one.
If you are completely confident not only in your abilities, but also in the utmost clarity and accuracy of your movements, the second option may well be suitable, however, we will warn you that the result may still disappoint you. But the choice is yours; we will only suggest which tools form the basis.
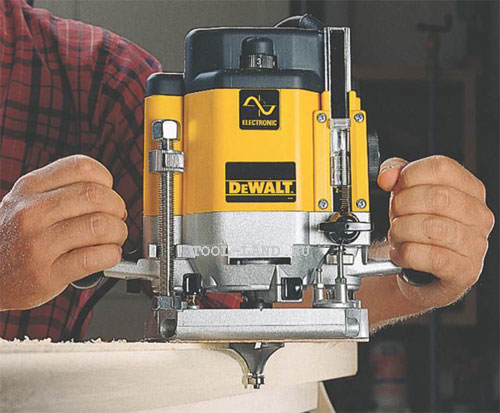
It is needed to provide high accuracy and maximum quality in creating holes for the lock bar itself. This tool is simply irreplaceable, since the speed of rotation ensures accurate cutting of the desired recess without the risk of damaging the beautiful, decorative top covering of the door.
This tool is useful for almost any homework and here we cannot do without him. Those who decide to work using the artisanal method will definitely have to use a hammer, but those who use special equipment may also need it.
They will be needed in order to cut the main hole into which the lock will “sit”. The tool is quite difficult to use; it needs to be worked as carefully as possible, but for those who have experience it will not be difficult.
This tool is necessary in any situation - you will need to make holes for the handles and a large hole for the lock itself.
They are needed to make it more convenient to screw in the screws that will hold the lock and handles on both sides. You can also use a screwdriver, but there is a high risk of damaging the door - if electrical appliance will come off at high rotation speed, there will be no chance to preserve the original appearance of the tree.
They are installed in a drill and used for drilling holes of different diameters.
Everyone knows about its necessity, of course, every centimeter matters, so everything needs to be measured carefully.
In general, this set of tools completely covers all the actions according to the instructions, so we won’t talk about additional professional gizmos that are difficult to get. Let’s limit ourselves to the fact that it’s quite easy for anyone to find, and it won’t be difficult to use.
Let's get straight to work.
First of all, you need to decide how the door will hang, choose a comfortable position: which way it will open, where we will install the hinges and where the lock will be. At this stage, for clarity, it is better to place the door close to the opening and mark all important places with a pencil.
This stage will largely determine the final result. The markings should be clear and understandable; if you roughly mark out the places for drilling, the door will end up sitting crookedly in the opening.
Step back 800-900 mm from the bottom edge of the door, use a tape measure. The handle will be located in this place - put a cross.
Next, let's mark the center point of the end, this is done in this way: put two marks, draw a line between them. The lock axis will be located here. This important detail, which will be decisive for further work.
We measure the lock itself along the length of the part that will cut into the tree and divide the resulting number in half. This is how much we retreat from the cross - the location of the handle - in both directions. This allocated space will become a recess for the lock.
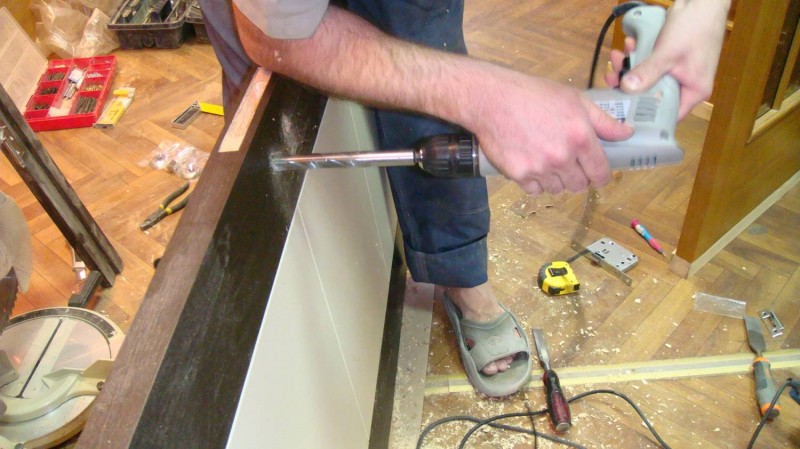
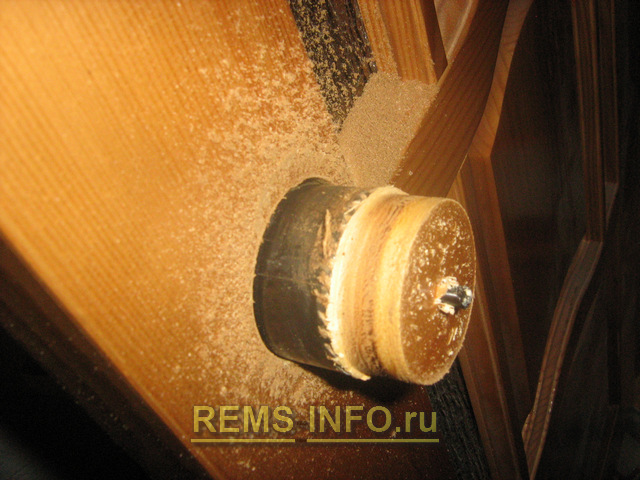
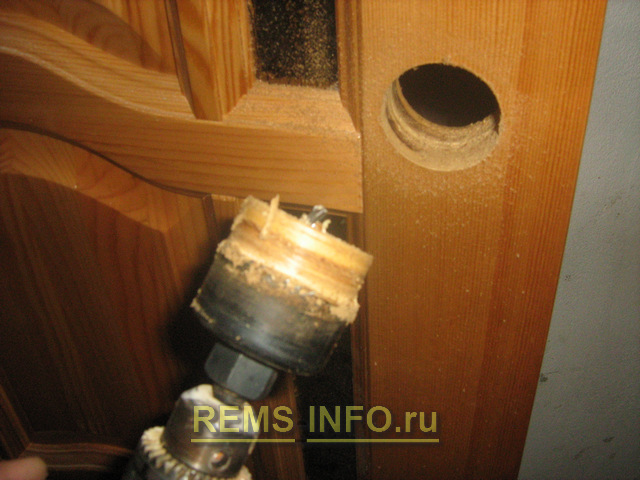
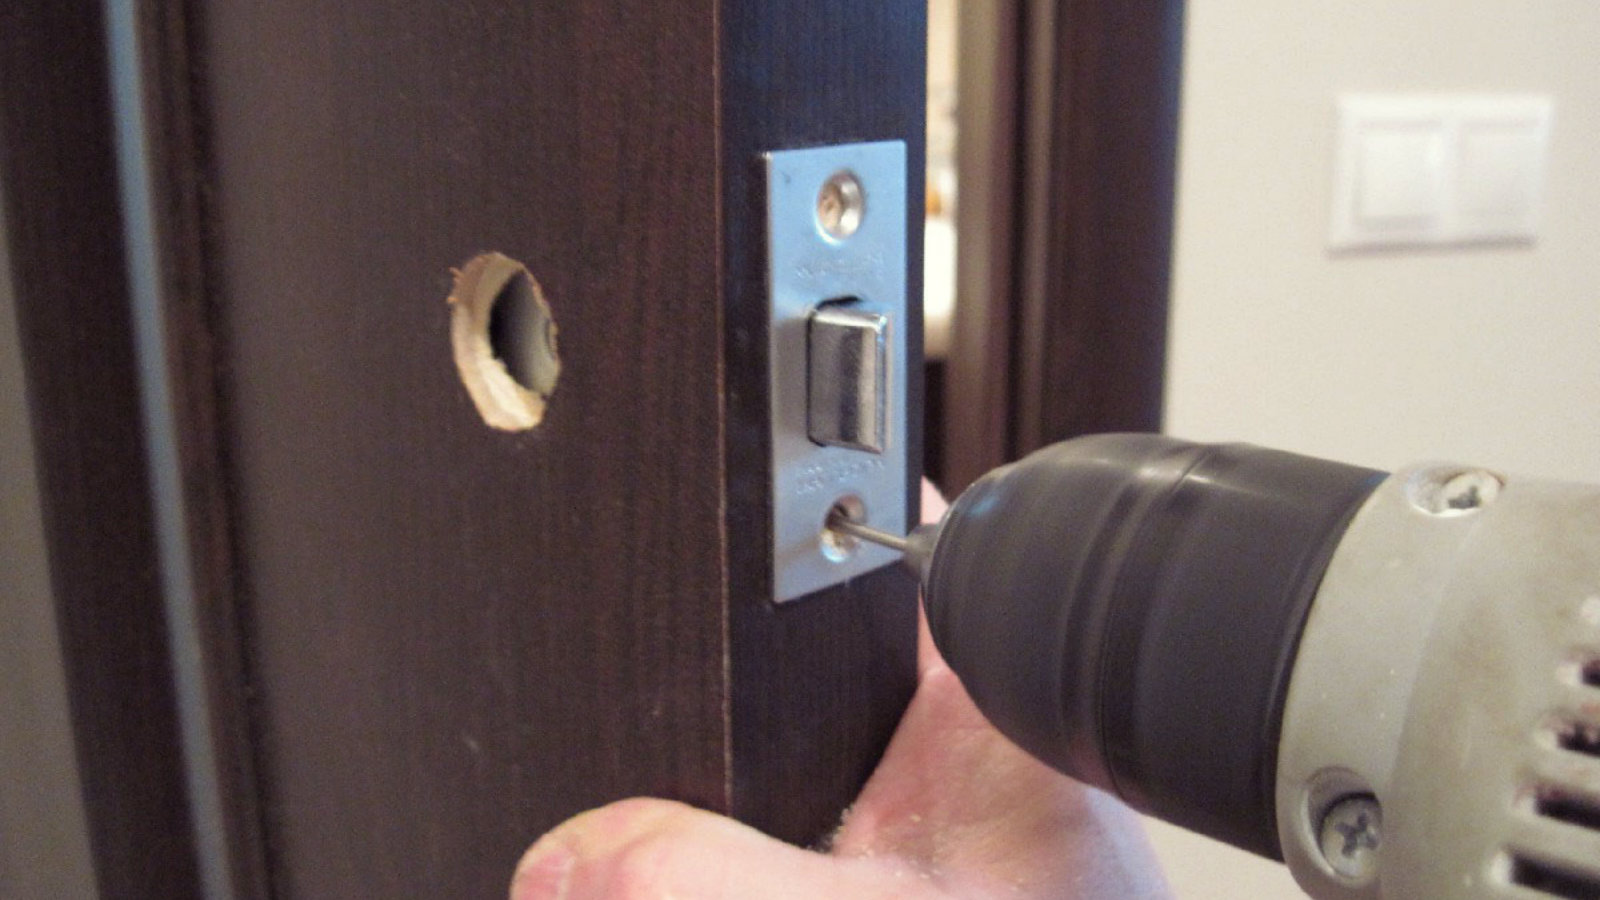
We measure the width of the part that we will embed. We select a drill from the set that is suitable in size and install it on the drill/screwdriver. The drill bit should be a couple of mm larger than the width of the lock. Now, with the already assembled screwdriver, we drill a hole. However, there is a catch: the tip is set to the extreme mark, which fixes the dimensions, then we drill about 1 cm deep. In this way we move deeper and deeper. Gradually, hollowing out a hole one centimeter at a time, you are less likely to make a mistake.

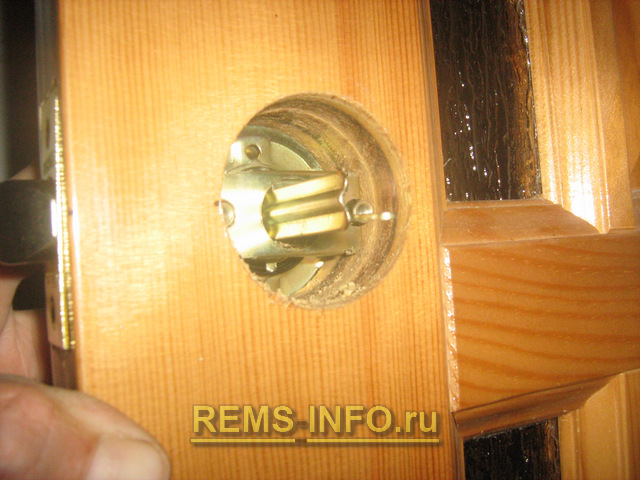
We have formed a hole, we insert a lock into it and mark the secret place for the decorative strip, this is not difficult to do - we draw a pencil around the perimeter and take out the lock. Cut out the recess. This is where it would come in handy for us manual frezer, you can do this action carefully with it.
What to do if there is no router? You can make a secret one without it. We take a hammer and a chisel, place it perpendicular to the end of the door and make small notches, as if outlining a circle. Then we carefully empty this place of wood and get a neat hole. Do not forget about accuracy for a minute - there is still a high chance of damaging the surface of the door leaf.
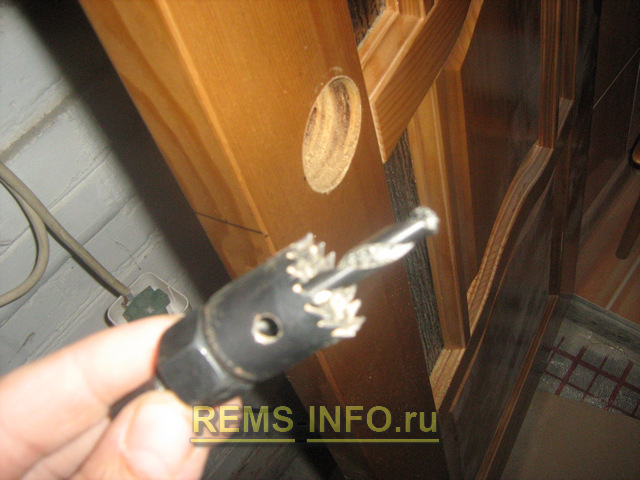
Let's decide on the markup. We find holes on the lock and transfer them using tape measurements to the door. We again attach the feather to the screwdriver, respectively, with a different diameter, larger. We drill holes through the canvas.
There is a caveat at this stage: do not try to drill holes on the same side, it is unlikely that you will be lucky not to damage the door. As a rule, in this case the tree cannot withstand the load. This work must be done slowly and carefully: as soon as you see the tip of the pen on the other side, stop drilling and move the equipment to the other side - drilling in the opposite direction will help preserve the finish.
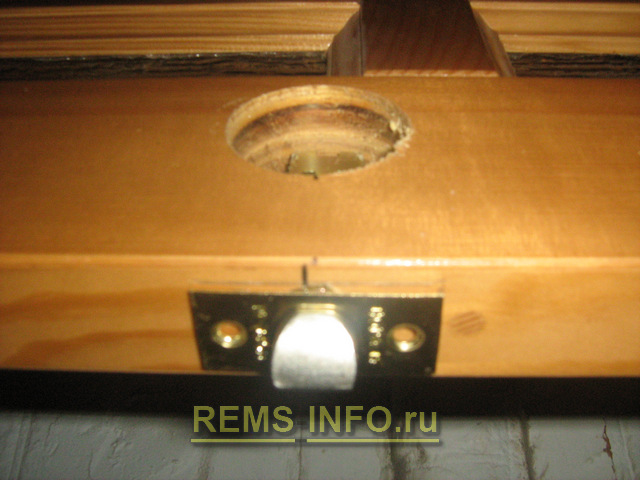
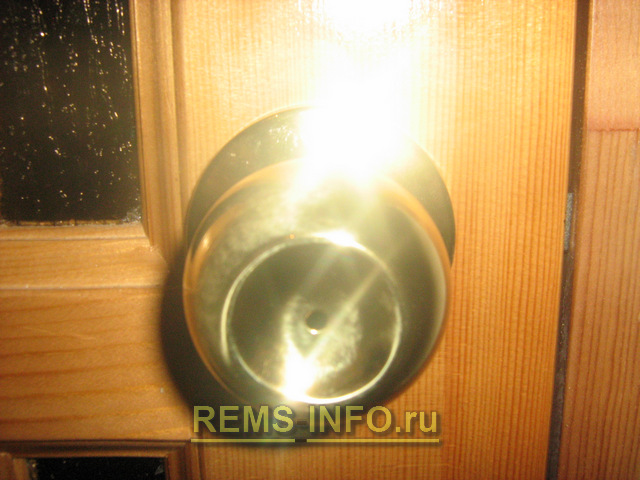
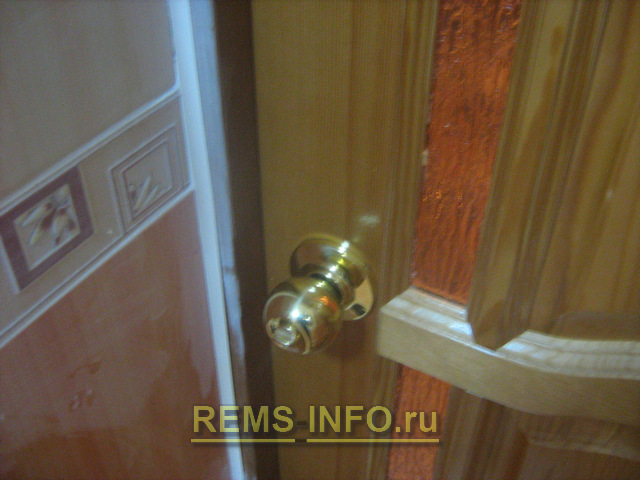
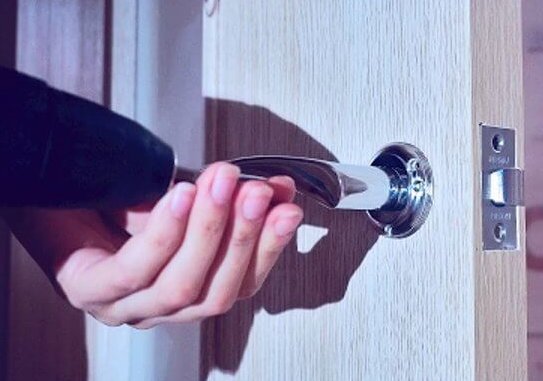
So, we have all the necessary holes cut out and all that remains is to put the puzzle together. But there are small pitfalls here too. Follow the instructions and you won't go wrong! We insert a lock into the end of the door leaf and secure it in the niche using two or three self-tapping screws, then we put a secret and fix it with a screw on the side where the decor is located. Then we install a square in the hole located above, on which we attach the handles using self-tapping screws or ties.
The work is completed, if you performed the entire sequence of actions correctly and did not forget about accuracy, you will probably be pleased with the result. If you are just about to start inserting a lock into interior door with your own hands - be careful, everyone the smallest nuance could be decisive. To more fully imagine the process and draw a picture in your head, we recommend watching a video on how to embed a lock into an interior door.
If you are faced with a task indicated by the words “how to embed a lock into an interior door,” then this page of our website is just for you. Let's look at this process using the example of installing a double-sided handle with a latch and stopper. It should be noted that this is the most simple system constipation, which can be used in this case.
Tools you will need to cut the lock:
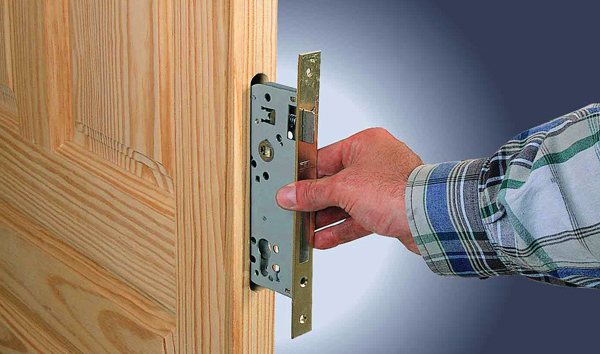
And so, the assembly and installation of the door in the doorway is completed. Before starting to insert the lock, it would be correct to determine the position of the mechanism itself on the plane. To do this, just try to imitate opening with your hand. It's like holding a pen. What height is most suitable for you? What about other family members? It’s worth stopping at the height position that turns out to be the most comfortable.
Now you can proceed directly to the insertion. You have already determined the height. Mark it both on the plane and on the end. Now you need to find out the exact place where the crown drill will be installed to cut out the opening for the double-sided handle.
Take the latch mechanism itself and use a tape measure to measure the distance from its visible edge to the eyelet, into which the pin will subsequently fit into action. This distance should be marked at the height you have chosen in advance, retreating just that much from the edge of the canvas. When the mark is made, it is now important to choose the right crown.

When choosing this tool, you need to make sure that the diameter is suitable. It should be such that the finished slot will subsequently be covered by the visible outer part of the latch. At the same time, all the insides should fit easily into the finished hole.
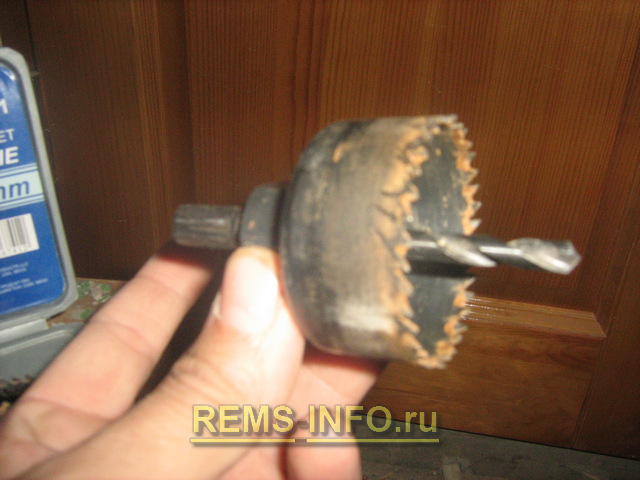
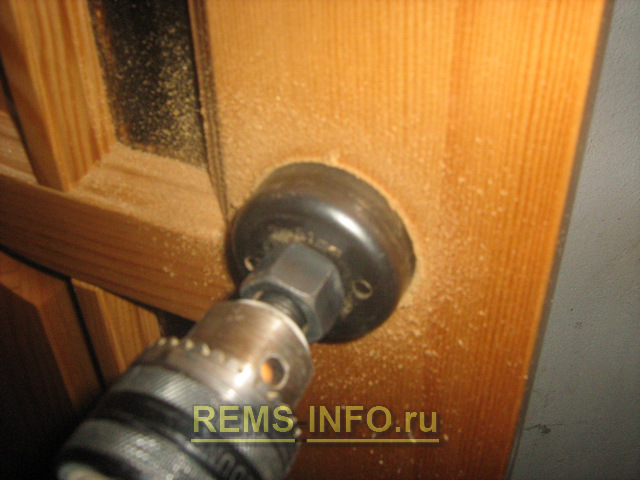
By the way, there are kits on sale specifically for inserting locks of this type. This set includes only two crowns: required diameter. After all the preparations and measurements, you can safely drill a hole in the plane of the door leaf.
![]()
To avoid chipping on the surface of the canvas, it is recommended to make a hole for the lock on both sides. From each to the middle.
When the previous stage has been completed, it is time to drill a hole in the end of the interior door, into which the mechanism itself will subsequently fit. If you have previously marked the height of the cut-in both on the plane of the doors and on the end, then you practically already have the required mark. The main thing is to place the crown drill along this mark in the very center of the end part.

Also choose your crown carefully. It should be such that the device will freely fit into the resulting gap, and at the same time the outer part will close it completely. Now feel free to drill.
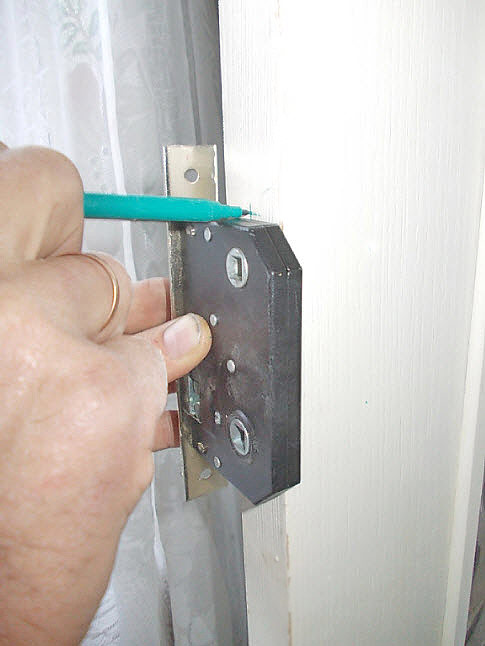
But that's it this stage not finished yet. To complete the insertion of the lock into the installed interior door, it is also necessary to make a recess at the end of the door leaf so that the visible part of the device is recessed and sits flush with the door end. Otherwise, there may be a problem that this part will touch the jamb.
Let's install the mechanism in the resulting pocket and circle it visible part along the perimeter. Let's pull out the latch. Now it's time to do a little chisel work. It is necessary to make a recess of such a nature that the outer plate fits exactly into it. You need to work with a chisel very carefully, so as not to dig too deep and at the same time not spoil the end of the door.
When all the holes are cut, you can already install the lock.
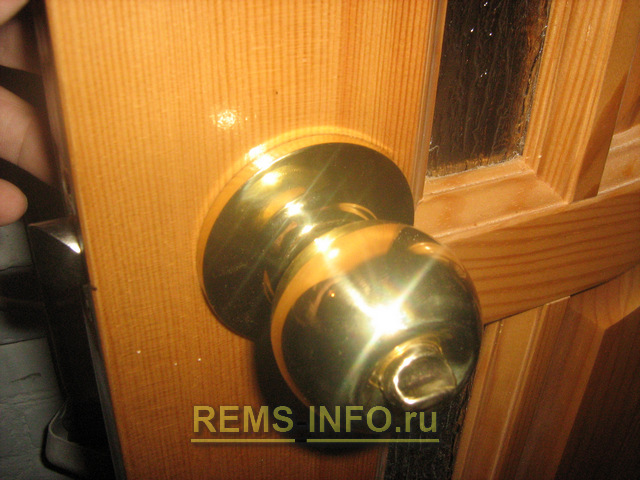
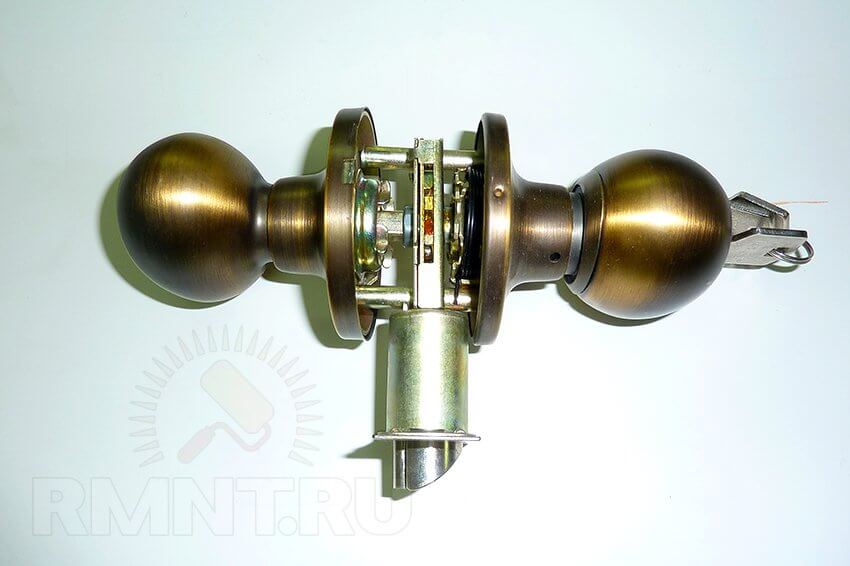
Don't make any mistakes during installation. Handles of this type have a stopper. The tongue of the latch itself is retracted by turning the handle. Moreover, this is possible from any side. But the rotation stopper will only be with one of them. It can be with a key or simply locked by hand. Which side do you need to close on? This constipation should be on that side.
For proper operation established mechanism a counter hole is required in door frame, which will include the tongue of constipation. Making a mark for this device is very simple. And after that you can cut the hole itself.

If you have a special set designed for embedding a lock, then use a smaller drill to dig deeper into the jamb in the right place. If you don’t have one, then use either a large wood drill or the same chisel. Then install decorative overlay to this place, which comes complete with a latch.
Perhaps that's all. We looked at the simplest example of how to embed a lock into wooden door.
If your closing device has a more complex mechanism, one that includes both a secret and a latch with a lock, then the matter will be more complicated. But about conventional design with the stopper, you now have enough knowledge to install it yourself.
It is not necessary to call a specialist; you can do it yourself.
Installing a lock on an interior door with your own hands is not a difficult process, the main thing is to take into account all the nuances and follow the work algorithm so that everything turns out without defects and flaws.
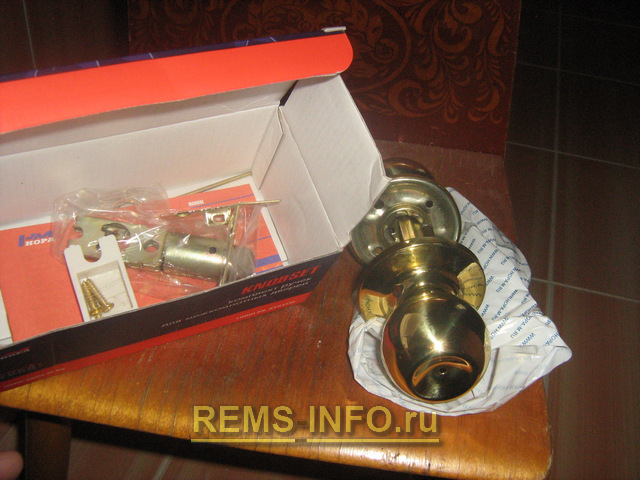
Before you begin installing the handle and lock, you must purchase all necessary materials and accessories that you will definitely need for work.
Replacing the lock will require fewer tools than the initial installation, which involves cutting a hole in the door.
Let's consider an example of a standard wooden interior, since the locks in metal structures a little different.
Although an iron interior door is very rare.
Installation can be carried out in two ways - professionally, using electric tools, and amateur, in which the hole is made not with a drill (or hand cutter), but with a chisel (chisel) and a hammer.
The first method, of course, has an advantage, since it is easier to implement and the result will be reliable and aesthetic. So for installation work, you will need the following tools:
In addition to the tools described, you will also need a tape measure and a pencil to make correct and even markings before the installation process.
To install the lock correctly and beautifully, you must follow a certain algorithm of actions. First you need to determine at what location and distance the castle will be located. Then take measurements and mark all edges on the door with a pencil. Then a hole for the lock is cut according to the marks and drilled for the handle.
To make the handle comfortable to use, it must be installed depending on your own preferences. You need to imagine at what distance it will be located, and whether it will be convenient to open and close.
If installation is planned in a nursery, then it is important to consider optimal height handles so that the child can reach it.
If, in addition to the lock, installation is also required door handle, then you should start with it.
When the height is determined, markings are made on the surface from the main part and from the end.
To install the handle evenly, you need to take a long drill and make a through hole.
Then the distance from the latch to the base of the mechanism is measured, and appropriate markings are made on all sides of the door and at the end.
After this, a crown of the appropriate diameter is selected. At the end, a hole is drilled and the mechanism is mounted.
To install a latch or lock, you also need to drill a hole at the end, where, in fact, the mechanism will be installed. Initially, along with the hole, an end marking is made on the base of the blade. After this, a crown of the same diameter, no larger, is selected, and a hole is drilled.
It is important to make a small depression at the end of the canvas so that the decorative plug is level with the surface and does not cling to doorjamb during opening and closing.
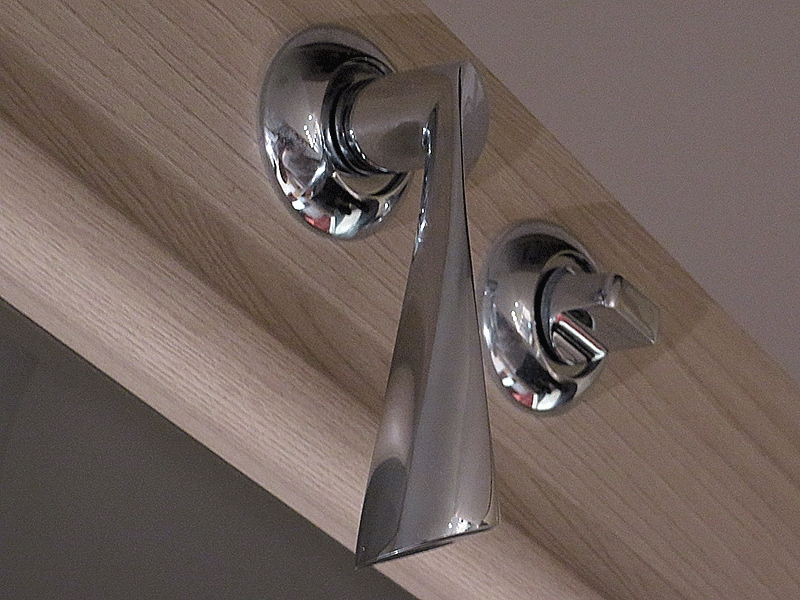
The designs of locks and handles for interior doors most often have a rotation stopper on one side and it is important that it be from the inside of the room, otherwise there will be no point in it. But the door handle tongue works regardless of the side of the pressure. You should pay attention to this during installation.
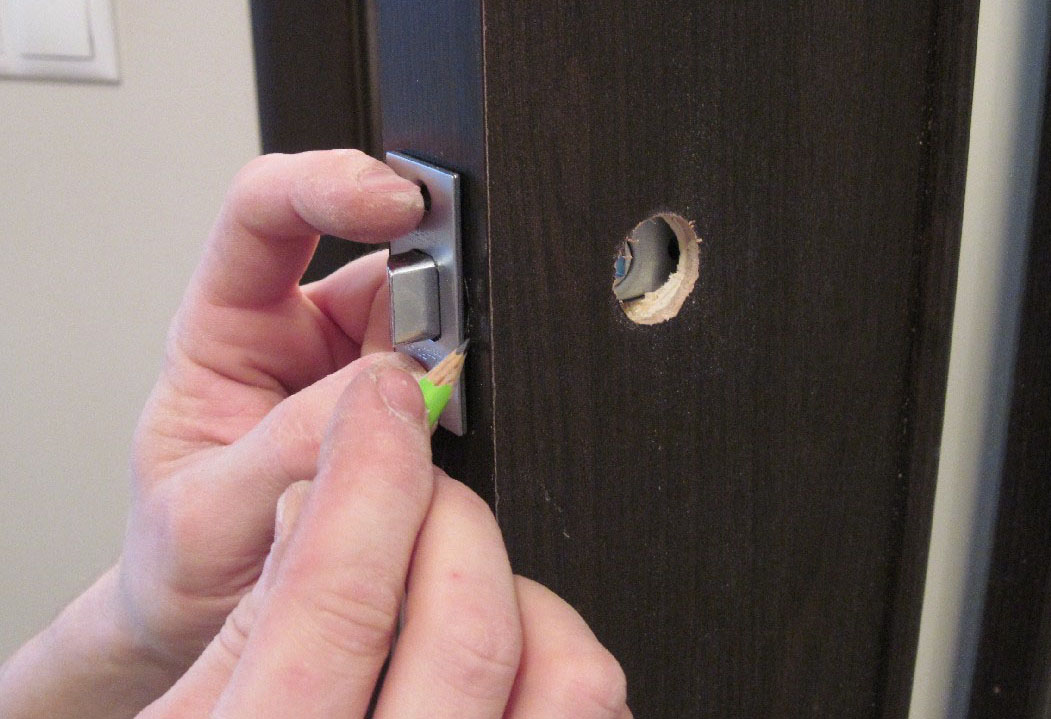
The last step is to make a hole in the door frame at the appropriate level into which the tongue will fit. When marking, it is recommended to measure several times so that the holes match completely. After this, the hole is blown out of dust and sawdust residues and a surface plug is installed, which is secured with screws or self-tapping screws. You can see in the photo how to install a lock on an interior door with your own hands.
To do everything correctly yourself, it is recommended that you familiarize yourself with practical advice from the professionals:
In conclusion, I would like to note that installing a lock on interior doors with your own hands (video) is not difficult. The most important thing is to make all the calculations correctly and make notes on the door on all sides, including on the jamb and at the end. It is necessary to drill carefully, slowly, so as not to provoke a split in the material from which the door is made.
How to insert a lock with your own hands is shown in the video:
Noticed a mistake? Select it and click Ctrl+Enter to let us know.
At first glance, fitting a lock into a door may seem like a difficult task if you take on the job yourself. However, if you have certain skills, there will be no difficulties. All actions can be performed quite professionally.
You will need a number of tools. If something is missing in the house, you can either purchase it at a specialized store or borrow it from friends. It is important to do everything carefully, following the correct sequence.
When starting to install the door lock, you need to assemble necessary tools. You will need:
At the very beginning, it is worth deciding where the mechanism will be located. If done according to GOST, then the distance from the floor is one meter. Entry group must already be installed, then the measurements will be accurate.
Procedure for inserting a door lock:
1. Measurements are taken using a tape measure
We measure from the floor and put a dot at the end of the door in the right place. Apply a square to the point and draw a line. Then, in the center of the end, we draw another line strictly in the center, resulting in an even cross. We apply the lock so that a horizontal line is visible in the round gap. Now you can mark the ends and the top bar. The marking is ready.
2. Use a drill to drill parallel holes between the marked boundaries of the lock.
It is best to use a feather drill. This will allow you to make even cuts. After drilling they remain convex corners, which need to be removed with a chisel. Next, use a standard drill to align the holes. The result is an oval-shaped cavity.
3. Insert the lock, drill holes for fastening
Having fixed the mechanism, stationery knife you need to make cuts along the contour. The lock is removed and, using a chisel, an area equal to the thickness of its perimeter is removed.
4. Now you need to prepare the grooves for the handles
A lock is applied to the end, and the points where the handles are secured on both sides are marked with an awl. The holes are made with a feather drill. It is important to drill not all the way through, but to the middle on each side. Be sure to remove any debris that has gotten inside the connector.
5. The installation of a lock on the door is at the final stage
Having secured the structure back, you can begin installing the handles. They are inserted into the prepared holes and secured with self-tapping screws.
6. It remains to cut out the space for the “tongue”
To do this, you need to close the door, mark the “tongue” with a pencil (upper and lower parts). Make lines using a square. Use a drill to cut out a cavity, then use a chisel to remove excess debris and irregularities. When the door is closed, a little play is needed because the space will be reduced by the thickness of the metal of the striker's adjusting "tab". If the play remains after completion of the work, then the “tongue” can be adjusted in the strike plate mechanism using a screwdriver.
Fitting a lock into a door does not take much time if you approach the issue responsibly and take measurements as accurately as possible. In addition, by doing the work yourself, you can be sure that the quality will be at its best.
Interior doors are sold without fittings. Therefore, the purchase and installation of door handles is carried out separately. To do this, you can use the services of a carpenter or insert it yourself.
When choosing accessories, you need to know what types of handles there are and how they differ from each other. The variety offered in stores allows you to match them to the style of the room and ensures ergonomic use. Depending on the installation method, products are divided into two classes:
Overlays are attached to the surface and, as a rule, there are no difficulties with them. And mortise ones require preliminary preparation of the hole in door leaf.
Mortise products can be of two types:
Which type of product is best to choose depends only on your preferences. You should also consider the style of the room. Designers advise buying them the same for all doors in one room.
The height at which the door handle should be is not clearly defined by any standards. On average, it is placed at a distance of 1 meter from the floor. This value can fluctuate up or down depending on your preferences. It may also depend on the height of those who will constantly use the door. When installing, you can build on the level at which other handles in the room are located so that their height is the same.
In order to insert, you need to have a certain set of tools. It includes:
Using all necessary tools greatly simplifies the work process. It is quite possible to embed the fittings without a screwdriver and a crown, but in this case the work will take much longer.
Installation of fittings is ideally done when the canvas is removed from its hinges. If this cannot be done, then you need to securely fix it in order to carry out the marking and insertion efficiently and evenly.
Before you start cutting, carefully study the instructions for the door handle. All the sizes are listed there, and you will know what diameter of crown and feather you will need for the job.
The instructions below will help you place the handle on the door leaf and avoid mistakes. And for those who are encountering this matter for the first time, it will be useful to watch a video on this topic in order to have a visual idea of upcoming work on installation.
We will pay special attention to each stage of the work, analyzing it in detail.
Installation begins with markings on the door leaf. First you need to decide what height will be chosen for the location of the handle. Using a square, tape measure and pencil, mark the places on the canvas where holes need to be made. To do this, measure the required distance from the floor and draw a horizontal line with a pencil, first on one side, and then transfer it to the end and the other side.
At the end in the middle of the drawn line we mark the place where the hole will be made for the lock tongue. On the same line on both sides at the same distance from the beginning of the blade - this is usually 60 mm - we mark the places where the handle itself will be inserted.
Using a drill and a hole saw, we make a hole for the door handle. You need to check on each side of the canvas to a depth of half. For convenience, experts recommend outside crowns make a mark with a marker. First, we drill on one side to the required depth, and then on the other until it is completely drilled. This is done so that the crown does not move to the side and so as not to damage the appearance when selecting material for fittings. You need to hold the drill at an angle of 90 degrees and do not allow it to deviate either vertically or horizontally. Using a chisel we smooth out all the unevenness.
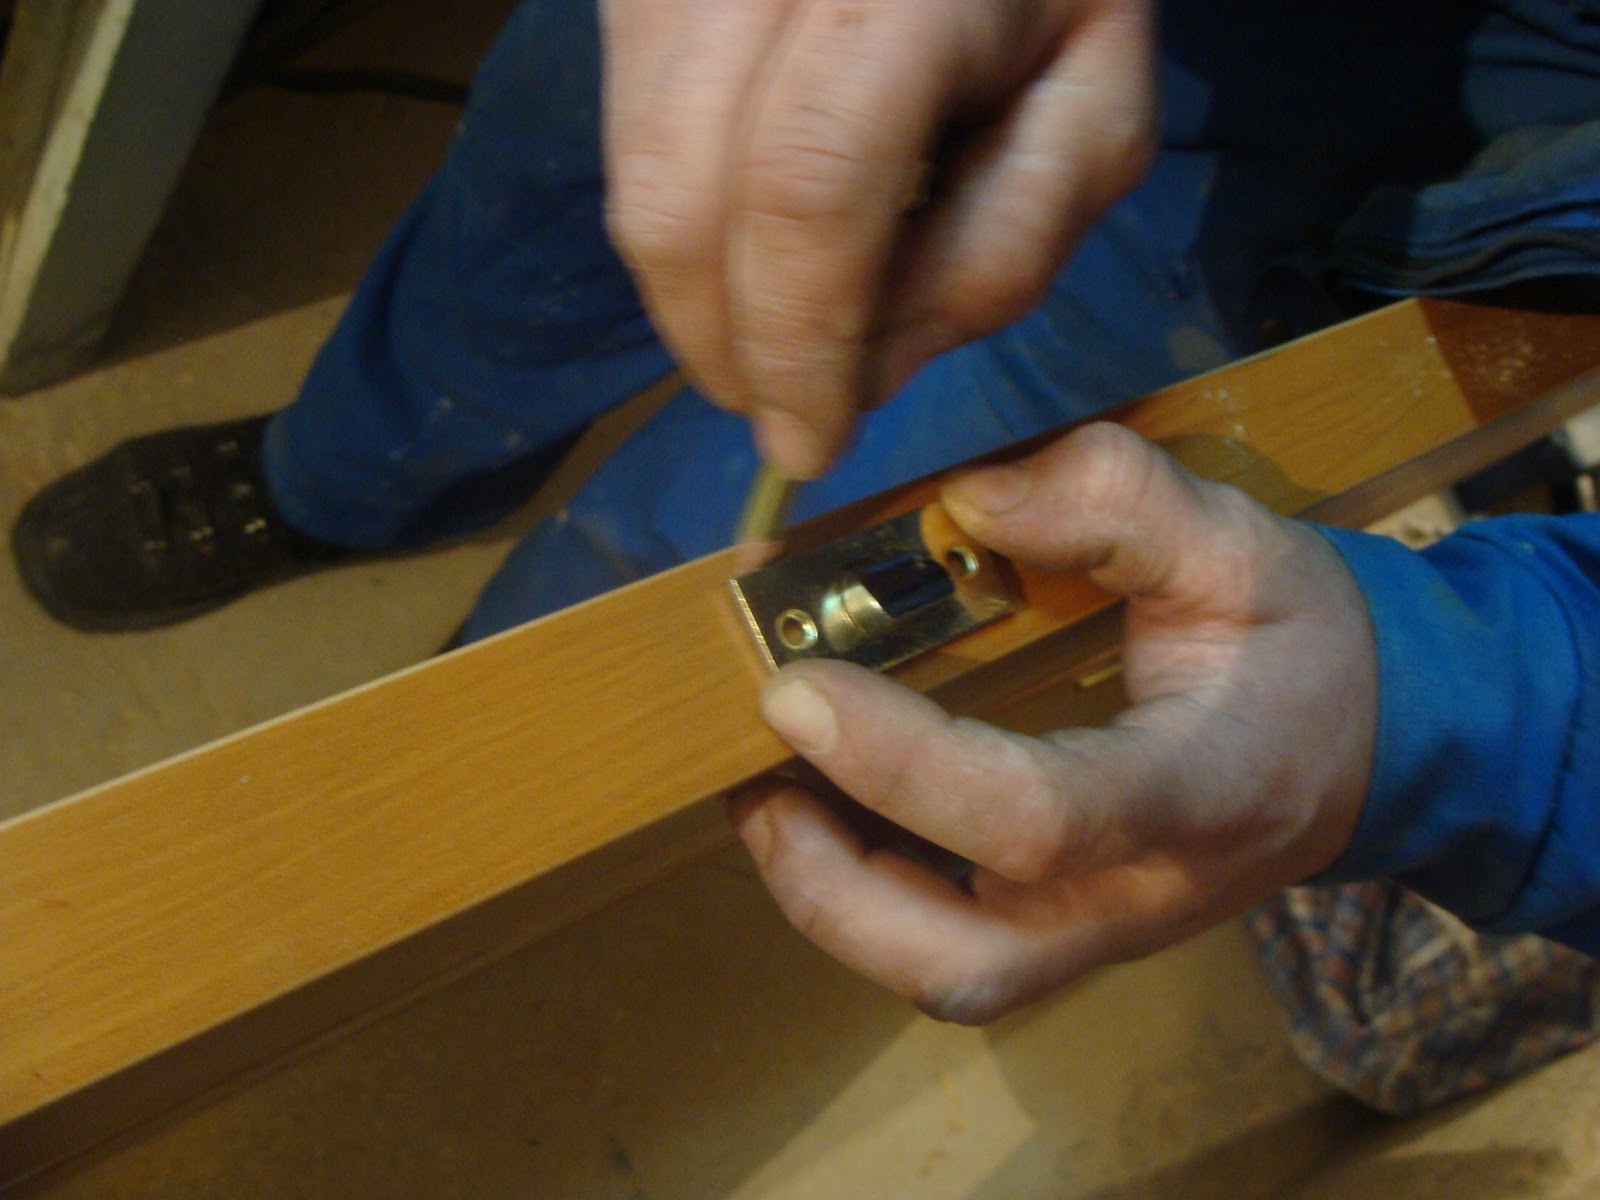
We make the hole for the lock using a drill and a pen. The work should be carried out carefully, since the distance between the pen and the corner of the end is not at all large.
Some experts prefer to make a hole for the latch first, and then for the handle. It doesn’t matter in what order you do this.
![]()
To install the lock, it must be inserted into the corresponding hole. Place the overlay on top and trace it around the perimeter with a pencil. Now you need to use a chisel to select the material to a depth equal to the width of the overlay in order to recess it into the canvas. For ease of work, you can use several chisels of different widths.
The trim is attached to the door with screws. It is recommended to make holes for them in advance using a thin drill, attaching an overlay and marking the right places pencil.
There are products in which the screws are on the outside. There is no need to disassemble them. When putting one part in place, you need to get into the holes of the latch with two guides, which have threads for bolts. Then you need to attach the second half and tighten it with bolts. They need to be tightened evenly so that the handle works well and the latch returns easily.
Products in which the screws are hidden must be disassembled. They come with instructions and a key for disassembly. The handle can be easily removed if you find the stopper on it and press it with a key. The collapsible part is bolted, after which the handle is put in place. Do not use force; assembly should be easy if done correctly.
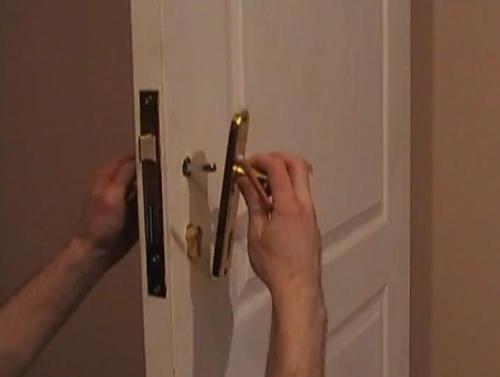
After installing the handle, you need to make a corresponding hole for the tongue in the tray. Therefore, first of all, it is important to carry out the markings correctly so that the door closes well and the lock fits into the groove without effort or friction.
Close the interior door and mark the top and bottom of the tongue on the door with a pencil. Using a square, we determine the exact middle of the castle and mark this value on the loot. Use a drill and a pen to make a hole and remove excess material with a chisel.
Before screwing the trim, it is important to check how the door closes. This will allow you to be sure that the groove for the tongue is made correctly and there will be no difficulties during operation. When closed, the door should have a slight play, that is, it should wobble a little. This is necessary because the metal thickness of the latch strike plate will be added to the groove.
The strap is fastened flush with the tray. To do this, as when installing a lock, it needs to be sunk into the hole to the required depth.
A slight play may remain even after you have screwed the cover on. This defect can be easily corrected. The strike plate always has a tongue with a small hole for a screwdriver. It is designed specifically to be bent. Using a flathead screwdriver inserted into this tab, you can adjust the doors by bending it slightly.
The entire process described can be clearly seen in the video of fitting fittings into interior doors. Installation of the handle can be considered successful if it turns easily and the latch fits into the groove without friction or effort.


