How to properly lay the adhesive cork on the floor. How to lay a cork floor on a balcony - a few secrets from the masters. Adhesive cork floor
Cork flooring is soft, environmentally friendly and comfortable. This floor is appropriate in the children's room and bedroom. It has high soundproofing characteristics. But in order for the coating to last as long as possible, the cork floor is laid in compliance with the technology. Cork tiles can be laid independently if you know some of the nuances of installation and the features of the choice of materials. We will also tell you how much cork flooring costs.
Varieties of glue plugs for the floor by structure
Many useful and beautiful things are made from the bark of the cork tree, including finishing materials.
Floor adhesive cork has several varieties:
- adhesive agglomerated cork coatings;
- self-adhesive strips and tiles made of crushed cork;
- cork laminate.
Agglomerate cork
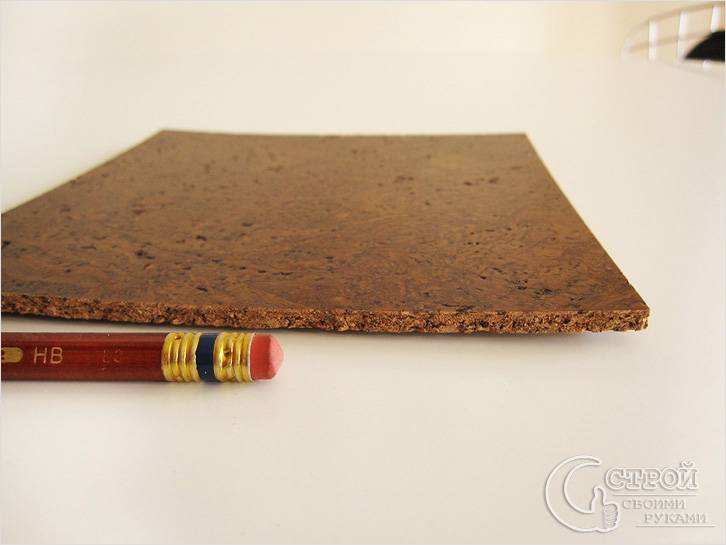
This type of cork coating is made from material crushed into crumbs. It is then mixed with synthetic-based thermosetting resins and pressed. As a result, blocks are obtained having a density of 450-800 kg / m³. The semi-finished product is cut into sheets up to 0.6 cm thick. Further, strips and tiles with a maximum width of 30 cm and a maximum length of 1.2 m are cut out of these sheets on the machine. The products are glued end-to-end, since they have even edges.
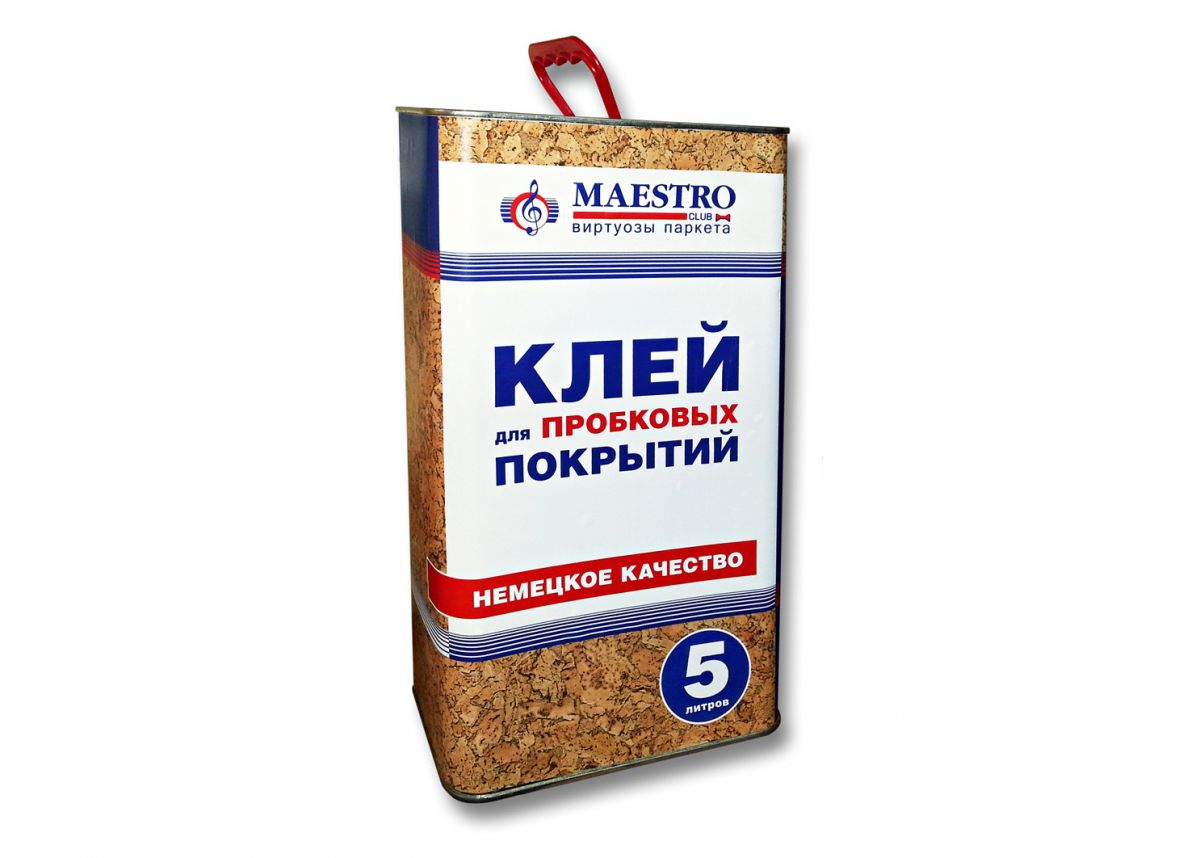
Important! The cost of a cork floor made of agglomerated cork starts at $11.6 per square.
The agglomerated adhesive plug on the floor has the following features:
- It is allowed to be placed on underfloor heating. But at the same time, you need to use a special elastic adhesive, which is marked that it can be used for heated floors.
- Manufacturers do not recommend glue such a cork on a screed with electrical system heating.
- If as finish coat varnishing or waxing is used, then material suitable for indoor installation with increased traffic and significant floor loads, for example, in the living room, corridor, kitchen.
- Adhesive cork floors successfully combined with other floor coverings (laminate, ceramic tiles, parquet).
Self-adhesive cork

These are thin slabs of veneered or traditional agglomerate. An adhesive layer is applied on the back of the material. It is protected by paper on top to prevent the glue from drying out. Self-adhesive products are very convenient to lay on the floor, walls and ceiling.
Important! If you are interested in a self-adhesive cork floor, the price per meter starts at $13.3 per square.
Such cork flooring is produced mainly in the form of square tiles with a side of no more than 300 mm. Their thickness is in the range of 3.6-5 mm. Less common are adhesive-based strips with a width of not more than 180 mm and a length not exceeding 900 mm.
This adhesive cork flooring has the following features:
- The front surface does not have a finish coating and needs to be protected from the ingress of dyes, water, abrasive compounds and household chemicals.
- Gluing is carried out without the use of additional adhesive mixtures, but for better adhesion to the base, it must be carefully and correctly prepared.
- Allowed gluing on floors with a water heating system.
- The self-adhesive cork can only be mounted on the floor in a room with normal humidity, for example, in a bedroom, nursery, living room.
- The coating is suitable for interiors in eco- and retro-style.
Attention! Craftsmen are laying a glue plug at a price of $ 4.8 per square. This price does not include foundation preparation services.
Glue plug laying technology

Before laying the cork floor, you need to prepare necessary tools and materials:
- Before laying the coating, prepare the base. To do this, you will need repair and leveling compounds for a wooden or concrete base (epoxy or cement mixtures, self-leveling floors, plywood, OSB, chipboard, etc.).
- Tiles can only be glued to a primed base. Therefore, for wooden base buy a fungicidal primer, and an adhesive primer is suitable for a mineral floor.
- The technology of laying agglomerated tiles requires the use of polymer adhesive.
- Wax, oil, acrylic or polyurethane varnish is used as a finishing protective coating.
- Brushes and rollers for applying protective compositions.
- To apply the adhesive, you need a short pile velor roller or a notched trowel.
- Level, tape measure, hygrometer, pencil, square, coloring cord.
- Rollers or mallet for rolling the coating to the floor.
- Sponge to remove excess glue.
- Drill for making technological holes and cutter.
Important! The laying of the material is carried out after it has matured in the room where it will be installed, within 1-2 days.
Work is carried out in compliance following conditions in room:
- heaters should not work;
- get rid of drafts;
- the optimum air temperature is in the range of 18-25°C;
- relative humidity 55-65%.
Choosing a cork floor adhesive
The adhesive method of laying involves the selection of a suitable adhesive. So, cork coatings without a finishing layer are allowed to be glued using water-dispersion compositions. Tiles with a lacquer or vinyl protective layer are fixed with solvent-based adhesives.
It is important to remember that everything adhesive mixtures based on solvents are flammable and slightly toxic, therefore, work is carried out using protective equipment and in a ventilated area.
Important! Glue on organic solvents is environmentally friendly and less toxic.
Adhesives for water based they do not like contact with water, so if the room is flooded, there is a risk that the tiles will peel off. If work is carried out in the cold season, then it is better to buy glue that is resistant to cold and temperature extremes.
Choice of laying pattern

If you will use square tiles, then there are only two ways to lay them out:
- according to principle brickwork with a joint shift in each subsequent row by half an element;
- traditional chess laying seam in a seam.
Important! Rectangular and square elements are laid diagonally in the room or traditionally parallel to the walls.
As for the elements rectangular shape, then they are stacked in several ways:
- traditional laying apart;
- ordinary and triple brickwork;
- diagonal styling;
- flooring according to the herringbone principle;
- deck masonry;
- network;
- square flooring.
Foundation preparation
The step-by-step process of laying cork flooring begins with the preparation of the base. Since the elements have a small thickness, all defects in the base will be visible after they are laid. That is why the beauty of the floor depends on the quality of the preparation of the base.

Requirements for the draft base:
- Compressive strength - not less than 150 MPa.
- The maximum allowable height difference is not more than 2 mm per two meters.
- The base should not have cracks, loose and rotten areas.
- There should be no traces of glue, soot, grease, soot, bitumen and remnants of the old coating.
- The indicator of residual moisture for a wooden base is 8-12%, for a concrete base in the range of 0.5-2 percent.
To level the base, a mineral screed or sheet wood materials with shunted edges. To fill the seams between the sheets, acrylic sealants or a mixture of PVA with sawdust are used.
To improve the characteristics of the base, deep penetrating and strengthening primers are used. If you need to increase adhesion to the base and make the absorbency of the floor more uniform, use an adhesive primer.
After that, proceed to the marking of the surface:
- With a tape measure or laser level find the center of the room.
- Through the center, parallel to one of the walls, we draw a line from which we will lay the tiles. At diagonal laying The line is drawn at 45 degrees.
- We carry out a preliminary layout of cork elements in a checkerboard pattern or with an offset.
- We cut the extreme products to the required size, taking into account the centimeter gap around the perimeter of the room.
- If required, technological holes are cut in the elements.
- Sometimes a chamfer is made on the tiles. For this, the edges of the product are treated with fine-grained sandpaper, and the dust is removed with a damp sponge.
Fame and wide recognition among consumers, the cork floor deserved immediately. Relatively inexpensive and affordable prices, and the ability to lay the coating on your own without the involvement of specialists, make the cork floor an even more popular and sought-after product.
Manufacturers offer the buyer a wide choice and the opportunity to purchase, high-quality and affordable price category analogues and substitutes for real cork veneer.
You need to know and understand that there are small nuances and recommendations about cork flooring. In particular, this applies to the choice of all types of premises without exception. Therefore, it is necessary to carefully prepare before going to the store or to construction market for the choice, and then the purchase of cork flooring.
One should try to explore how all cork flooring works. Otherwise, you risk not only wasted purchased material, that is, wasted your money, but also work done in vain, due to your inattention.
Cork flooring categories:
- The most expensive flooring can be safely called - cork board, which is made from real cork oak bark, its second and most popular name, cork veneer. The veneer is made from absolutely environmentally friendly and harmless, natural and natural material. It is produced in huge sheets, the sheet size reaches 6 square meters, and its thickness reaches from 4 to 6 mm. All sheets are rolled into large rolls. It is also known about the production of cork natural tiles. On reverse side The sheets are coated with a durable vinyl film, which makes it easier to lay the sheets on the surface and on the concrete floor during work. Despite the serious advantages of natural cork veneer, it also includes many different disadvantages.
- Of course, in second place, both in price and, accordingly, in quality, are cork panels from MDF(Fibreboard, medium density). They are often misunderstood as cork board, but if you look, then there are significant and considerable differences. First of all, MDF panels are called cork laminate. Consider an approximate technology for its manufacture: a real cork crumb is applied to the MDF base, using dry hot pressing. Then another layer is applied, consisting of cork veneer, approximately 2 to 4 mm. From above, everything is varnished or a good vinyl film. In terms of quality, cork laminate is in no way inferior to natural veneer, and is not so demanding on the surface and the quality of its coating.
- All manufacturers produce cork laminate By standard sizes, which is the same, without exception, for all types of laminate. This refers to the ratio of the length and width of the panels.
- The next material will be pressed cork chips. Quality crumbs are made from crumbs. cork tiles, which for its price is significantly not expensive. The appearance of the tile is difficult to confuse with anything, the structure is made of fine grain, any tile resembles a cork from wine bottle. Aged in their unique and colorful sand-coffee palette, with unique patterns, they certainly attract the eye of the buyer in the store. And in terms of quality, a floor made of cork tiles, practically does not yield to the floor covered with natural cork veneer. And if you compare in terms of costs, then a tile floor will be much cheaper than a floor made of a whole cork laminate. Manufacturers offer us tiles to choose from, sizes - 30 by 30 mm, 60 by 60 mm, 60 by 90 mm. Often in stores you can find waste from natural veneer and trimming it to look like tiles. You can safely buy and collect good coverage from them, it all depends on your taste and the flight of your imagination.
The floor, made of any cork coating, does not slip at all and does not spring at all. Copes with a significant and weighty load directed at him. The cork floor has excellent sound and heat insulation. Its main advantage is that it is completely harmless to health and 100% environmentally friendly. Throughout the history of cork flooring, there has never been a detrimental effect on human health.
With all the virtues and positive qualities corks, unfortunately, it also has disadvantages. First of all, it's too high price, but one cannot fail to note the complex and responsible process of its installation. A rather fragile cork does not tolerate inept and frivolous handling. Without proper experience, it is better not to approach the cork flooring on your own.
Cork has an overestimated threshold of sensitivity to temperature differences. From this entirely depends its internal component and appearance. It can swell from water with the content of organic substances dissolved in it. In addition, the cork perfectly absorbs all odors and keeps them in itself for a long time. If you have a cork from a wine bottle at home, try restoring it to its former glory, or try to get rid of the smell of the part of the cork that was in the bottle. Nothing will work.
Accordingly, based on the foregoing, it can be concluded that the cork floor will not be able to serve for a long time in rooms where there are temperature fluctuations. From any thermal changes, after a short period of time, the cork will crumble and become unusable. Therefore, it is not advisable to make a cork floor in the hallway, in the kitchen and on the balcony. You can try to put a cork laminate with protective coating, although this is also not advisable.
The most unsuitable places for a cork floor are the toilet and bathroom. Absolutely impossible! Too much humidity and temperature changes have a negative effect on the cork, over time, microcracks will appear in it, and moisture will flow through them into the very core of the cork, and swelling will soon occur, which will lead to delamination. This happens invisibly, in places that are inaccessible to our eyes, under baseboards, or under the bathroom.
The cork does not have antiseptic properties, and if we take and open the place of swelling, the so-called bubble, then an unpleasant and not very attractive picture will appear before our eyes. The inner core of the cork will turn into mush.
Places for cork floors
We offer a list of rooms for cork flooring:
- First, the children's room. Any kind of cork floor is suitable for a child's room. Children will be warm to walk on cork floor barefoot in both winter and summer, when falling on the floor, the child will not be injured. Walking barefoot in a traffic jam has a positive effect not only on the psyche of babies, but also develops a sense of connection with wildlife.
- Second, the bedroom. The reasons for choosing are the same and similar to those for children.
- On the third place, . To the reasons described above, you can add good sound insulation.
- In fourth place, the living room. by the most the right choice there will be cork laminate.
Laying technology
There are 3 ways to lay cork flooring.
- You can lay cork laminate according to the principle. The only thing is that you need to observe some nuances regarding the tool and technology, about this, see below.
- It is possible to lay cork laminate and veneer, freely, without special fastening. So it will be called a floating floor.
- You can lay the cork floor on the glue.
Floating cork flooring and adhesive flooring have significantly different laying technologies. Preparing the premises for repairs remains the same, but the tool is different for each floor.
An important and probably the most determining factor is that the cork floor must be laid in warm time of the year. It is necessary to prevent a temperature drop of more than 5 degrees when delivered from the supplier to the house where the floor will be laid. Be sure to check the humidity in the room, and make sure that it is not lower than 60%. At an air humidity of 75%, it is strictly forbidden to lay a cork floor.
What you need at work
Rubber hammer, it is called a mallet, for laying and fitting the floor. You can use a jigsaw, with a very small file or a grinder, for cutting boards. hand saw cannot be used (the cork crumbles very much). If the floor is glued, then you will need a metal and heavy roller (skating rink) for good rolling. Definitely need a level.
It will be necessary to make, for a floating floor, spacer wedges. They are made from scraps of cork laminate. By no means wooden, because the wooden ones will crumble the cork. In order to customize and edit the boards, we use the same rule. A clamp - a hook, for pulling up planks, also cannot be used.
You need to buy a skirting board, it is special for cork flooring. Including, you will need sills, glue and a spatula, preferably wide, in order to spread glue on the boards.
Cork mining
Room preparation
The surface for the floor should be as dry and even as possible. Simple concrete screed, cannot serve good coverage because it has a very rough surface. Over time, the cork floor will play on it. Concrete here acts as an abrasive, respectively, the cork will be wiped.
Wet surface is main enemy cork floor. It is necessary to dry the surface properly before work, otherwise the cork will swell and deteriorate. What was written above, in the section on the bathroom and toilet.
In order to check the moisture content of the concrete floor, it is necessary to cover the floor with a greenhouse film for 24 hours. Check, after the allotted time, if there is moisture on the film, leave for another 24 hours. And so on until reaching desired result, dryness. A wet surface will inevitably damage the floor. Especially carefully inspect and seal the cracks in the radiators, since moisture can also penetrate from the neighbors below.
Leveling the floor
Only with a liquid leveler, it is necessary to equalize the floor under the cork. Cork is harder than any composite found in all dry levelers. In addition, cork is fragile in its composition. The floor, made on a dry basis, can crack at any moment from pressing on it with the leg of a chair or from a woman's heel.
The solidity, reliability and service life of the cork floor depend on the base. Experts advise laying marmoleum before the cork on the surface. Possibly the cheapest as well. It is possible and substandard.
- Marmoleum, in their own way mechanical properties identical with cork, respectively, after laying on it, there will be no failures from the load.
- Marmoleum will smoothly fall on the entire uneven surface base and close all its flaws, remaining smooth on top.
- Marmoleum has bactericidal qualities, which means that the harmful microflora has no chance, both for its inception and for its development.
In the event that plywood, linoleum or laminate is already laid on the floor, you can simply lay the cork floor on top.
floating cork floor
A floating cork floor can be laid with cork laminate or veneer. Of course, this is a job for specialists, as a rule, all attempts to gain a floor on their own lead to all sorts of damage to expensive materials. Accordingly, the price of veneer pieces increases significantly.
Let us consider in detail how the floating flooring is made of cork laminate:
- We measure the room, make the purchase of the laminate itself. Already in place, at home, we unpack and leave it open for 24 hours so that the air temperature and humidity balance.
- While the cork is acclimatizing, we cover the floor with a greenhouse film. We try to make overlaps of 20 centimeters, do not forget to make overlaps on the walls, 15 centimeters. We firmly seal the joints with adhesive tape.
- All boards of the same row, we file in size from the edge of the ridge, we try not to touch the groove. If we lay and shift the seam in half, we cut half of the boards from the edge along the length exactly in the middle.
- . From the corner we put transverse rows and shift the seams by a third. We take the next plank and insert it into the groove of the previous one, while trying to keep it at a slight angle. Press, with a little effort and lower. Align and adjust with a rubber mallet prepared in advance. Be sure to keep a distance of about 20 or 30 mm from the walls, level the outer plank with spacer wedges.
- Trim off any excess greenhouse film.
- We attach the cork plinth to the wall with mounting glue, after placing matches under it. So that it does not come into contact with the floor.
- The floating cork floor is ready.
Floor on glue
The quality of a cork floor on glue directly depends on the choice of the glue itself. From the huge selection, I would like to single out Cascoflex, and similar adhesives. Adhesive, based on which there is no volatile aggressive solvent. It is non-toxic and dries in about 10 minutes, a time suitable for fitting boards, tiles. The price of this glue and others like it is quite high. Based on this, the question arose of the possibility of using PVA glue.
Under no circumstances should a cork floor be laid with PVA. PVA glue is made on a water basis, which harms the cork. When the PVA glue dries, the water evaporates from it, that is, if we attach a plank and wait about 25 minutes, it will stick tightly and it will no longer be possible to correct it. In addition, when working with liquid PVA glue in the room, the humidity of the air increases greatly. Conclusion, PVA glue cannot be used.
Let's consider the technology of adhesive cork flooring:
- We begin to work without fail from the center of the room, and move in a spiral in any direction. Left or right, it doesn't matter.
- Using a spatula prepared in advance, we apply a layer of glue, put a plank and level it.
- Immediately roll it with a roller (skating rink).
- We use a level to check horizontality and a mallet to correct it. If suddenly one of the sides of the plank is higher or lower than the other.
- Any excess glue, carefully wipe with a cloth soaked in solvent. We must remember and know that the glue that dries on the cork cannot be removed. Therefore, it is advisable to throw out the used cloth immediately.
- We leave along the walls, around the entire perimeter of the room, a gap, the same as for the floating cork floor.
- Be sure to wait 24 hours after the end of the flooring and only then fix the skirting board.
- Adhesive cork floor is ready.
What is HDF?
Of all types of cork flooring, HDF (High Density Fibreboard) is the most inexpensive. This is a material topped with pressed cork chips. Simply put, this is an ordinary fiberboard (Wood Strand Board), in its properties and naturally in quality, it is far from a real cork. If you want to create a cheap cork floor illusion then HDF is for you.
Outcome
Reliable and durable, harmful or bad? The cork floor can be anything. Much depends on the choice of the room where it will be placed. And the price and laying technology only affect its decorative features.
Existing types of cork flooring, their advantages and disadvantages in operation, preparatory work, advice before starting installation, laying adhesive and floating floors, further care and home service.
The content of the article:
Laying cork on the floor is a method of installing flooring, which every year is becoming more and more popular and widespread in our homes. This procedure is not particularly technologically complex, but requires preparatory work and careful measurements. There are a number of nuances that require close attention. But, if you use the suggested tips, the process will go much faster and more efficiently.
The main types of cork flooring

There are 2 main ways of laying a cork floor. They demand
different technology works,
different instrument and skills. But the result is always good and
quality coating. So, the main types of cork on the floor are floating and adhesive structures.
The first ones are assembled like a laminate, according to the “thorn and groove” connection principle, so they are not tightly attached to the base. The joints are glued with glue of a special composition, but the floors themselves, if necessary, can be disassembled at any time. For the arrangement of such coatings, cork panels are used, which include several layers. The top one is veneer made of expensive types of wood, decorated with a pattern. It serves as a real decorative decoration of the room.
Another type of cork flooring is much easier to assemble. Such floors are glued to the base. Technologically, they consist of individual tiles, usually square.
For those who are wondering how to choose a cork for the floor, you need to understand in which rooms this surface will serve. The choice depends not only on the appearance, but also on the purpose of the room, as well as on its operation. If we are talking about the offices shopping malls and similar places, then it is more expedient to install a strong adhesive tile.
For houses and apartments, customers are more often recommended a softer floating cork made of natural material. There is an option to purchase cork with various additives. So the coating becomes cheaper, but will be less pleasant to the touch and retain less heat.
Strengths and weaknesses of cork flooring

Among the main advantages of such floors, the following can be emphasized:
- Outstanding thermal conductivity. When touching such a floor, it does not take away heat, but returns it back. In addition, walking on it is a pleasure.
- Soundproofing. It is another hallmark of cork. For this reason, such material is successfully used for finishing ceilings and walls. Its sound absorption coefficient is 0.85.
- Naturalness and environmental friendliness. Due to the springy properties of the floor, it reduces the load on the musculoskeletal system. It does not attract dust, like some other materials, does not rot, does not burn, and is not a source of mold.
- Technological flexibility. This property lies in the fact that the cork on the floor makes it possible to move heavy objects along it or drop the same objects onto the surface. Over the next few hours, the material is restored, and traces are almost 100% disappear.
It should be noted what disadvantages such a coating has. Over time, the cork begins to wear out, collapses and becomes unusable. She is sensitive to pet stains, cuts and claws.
natural qualities material is violated by the use of paints, varnishes and adhesives. Every 1-2 years, such a coating must be varnished to restore its previous appearance.
Preparatory work before laying cork floors

The following tips will be helpful to those who are about to get started.
installation work first:
- Before work, it is necessary to prepare not only the material in the required volume, but also the tools. Before laying cork floors, care must be taken to ensure that a polyethylene film is laid on the base - the so-called underlay.
- Work is not carried out if the room temperature is less than 18°C.
- Like many types of other finishing materials, it is better to place a floor covering such as cork after purchase in its premises for 1-2 days to “get used to it”.
- The base must be carefully prepared. Among other things, you need to ensure that it becomes perfectly even, dry and clean.
- For cutting cork tiles, it is better to use a jigsaw or a hacksaw with fine teeth.
All work on preparing the base for future cork flooring must be carried out thoroughly. The main principle is to ensure that it is perfectly dry, as well as smooth and free from any kind of pollution. The connecting qualities of the coating are increased by cleaning the surface from the remnants of grease, wax, paint, glue and other materials.
It is necessary to ensure that all existing cracks and cracks are carefully sealed. Before laying cork flooring on an existing coating, it is advisable to first strengthen sheets of dense plywood or chipboard, which have water-repellent properties. A leveling agent can be applied on top, which should be carefully sanded.
The base of concrete or cement must comply with building codes in terms of moisture. It should be no more than 25%. If this criterion suddenly turns out to be higher, an additional layer of polyethylene film will be needed. On top of it, you can lay a roll or sheet cork 2 mm thick. Thanks to this, the finished floor will become more thermally insulating and will better repel moisture.
It is also necessary to provide comfortable temperature for laying and drying the cork surface. The room should be from 18 to 20 ° C - this will be optimal. It is better if there is good ventilation at the stage of drying the adhesive solution. At a time when the plates have already been delivered and stored indoors, the humidity in the room should not exceed the threshold of 65%.
Installing underlayment under cork flooring

The main functions that the substrate performs are reduced to protecting the cork from overloads and subsequent deformation. It also protects against condensation and amplification of noise from footsteps on the floor. This
necessary layer, who will be responsible for the sound, noise and
thermal insulation future floor.
It is produced in rolls, and as a flooring under the cork, a thickness of 2 mm will suffice. To protect future surface from moisture, lay a polyethylene coating, which should go on the walls at least a few millimeters. The film for the substrate is laid according to the overlapping principle, and the margin can be up to 20 mm. Separate parts are fixed together with adhesive tape.
The technology for laying the substrate will look like this:
- First you need to establish what state it is in at the moment concrete base gender. If it has noticeable irregularities, each of them must be leveled. At minor fluctuations it is enough to use a self-leveling mixture, which perfectly copes with such flaws. After the mixture has dried, the floor surface is carefully swept.
- At the very base of the wall, a so-called "damper" tape is attached, the task of which is to compensate for the future expansion of the material.
- The substrate can be rolled out from a roll over the entire surface of the floor. Its edges are joined end-to-end and fixed with ordinary construction tape. When laying, you need to take into account that the embossed side should be located below, and the smooth side will look up.
The quality of the future cork coating and its main characteristics will largely depend on the correct laying of the substrate.
How to lay cork adhesive boards on the floor

These works are started after
preparatory stage completely finished. So, the installation of a cork for the floor will consist of the following steps:
- To fix cork tiles, an appropriate adhesive is used, which is applied with a roller or notched trowel. The glue must be allowed to dry for half an hour before laying tiles on it. It can be laid both parallel to the walls in a row, and in a diagonal way of placement.
- After installation of each section of the flooring, it must be tapped with a rubberized hammer or rolled the surface with a heavy roller.
- A small gap should be left along the perimeter of the room, since the cork tends to expand slightly over time. The width must be made at least 3-5 mm. The gap left after all the work has been completed can be successfully closed with a plinth, but this will avoid any deformation of the coating in further operation.
- It is possible to lay a cork surface not only on a concrete base, but also on any existing coating - for example, carpet, linoleum, etc. In this case, installation of a waterproofing layer is not required, but it is necessary to level out all possible defects and irregularities.
- After the masonry is completed, the surface is cleaned of spilled glue: for this, any rag moistened with a small amount white spirit. The floors dry up during the day, then they are cleaned again with special cleaning agents.
- The last step is to apply a protective layer. The floors are varnished, but for this they need to dry for a day and a half.
How to install floating cork flooring

After the base is completely cleaned, and the polyethylene insulation (substrate) is laid, you can proceed with the installation of the cork floor covering:
- Initially, it is better to start mounting the panels from the right front corner. At the same time, it is necessary that they be located perpendicular to the window so that the joints in the mount are not noticeable.
- Starting from the first row, the end parts of the cork panels are connected. At this stage, the end of each new panel must be fixed at a 30° angle to the previous panel.
- When laying, the panel is carefully lowered to the floor, after which the connection is fixed with a tongue-and-groove lock. After that, with a hammer with a rubberized head, they carefully tap on it from the side of the lock, placing a piece of another panel.
- For expansion, a gap of 5-10 mm is subsequently left. The next row must be started from the side of the panel cut, which was laid last in the previous row.
- Experts advise to make installation in this case according to the type of location of the chessboard. Thus, the beginning of each new row will be a panel cut instead of a whole piece.
- Especially carefully should be carried out work in places where various communications appear on the way, for example, heating pipes. In this case, a gap is cut out in the coating for the future expansion of the cork.
- To fix panels close to doorways, use the "threshold" profile. It is fixed at the junction between the panels directly to the floor.
- When installing the cork surface, it is good to use spacer wedges. But they should be removed immediately after the installation process is completed.
- Lastly, a plinth is attached to the wall, under which a gap is left. It is needed so that the coating can move during operation.
Peculiarities of cork care

After all installation work has been carried out, it would be useful to find out how to properly care for this coating so that it lasts a long time and pleases the eyes of visitors to the premises.
In fact, there is nothing technologically complex here, unlike a number of other coatings. After the cork has been laid on the floor, the surface is vacuumed and treated with special cork care products: KorkCare, V-Care, Wikanders Power and others.
In order to minimize the ingress of dust and dirt from the street into the room, with outer side the door will not interfere with an additional rubberized mat. In order not to harm the finished coating once again, circles of cork, rubber or felt are glued to the legs of pieces of furniture. In this case, the surface will not be scratched and retain its attractive appearance longer.
Cork floors are wiped with any damp cloth, but they also tolerate wet cleaning well. They can also be treated with detergents, but the main thing is that they do not contain aggressive particles and similar components. If the floor is additionally covered with vinyl, then once every 3 years it is advisable to rub it with a special mastic.
How to lay a cork on the floor - look at the video:
Thus, when installing cork flooring of any type as a floor, you can do it yourself. It is necessary to carefully calculate the amount of material, since its excess will lead to an increase in costs. It is also advisable to carry out the work on laying the cork with an assistant.

How to lay cork floor? Laying a castle cork floor is not as difficult as it might seem at first glance. A video on laying floating cork floors and expert advice will help you get the job done.
Floating cork floor. What is this?
Interlocking cork floors are often referred to as "floating". The panels are connected to each other in a way reminiscent of laying a laminate. A tongue-and-groove system is used.
They are not firmly attached to the base. If necessary, disassembly of the coating is possible. The joints are glued special glue
for cork, which is not afraid of moisture.
Cork panels are used to equip the castle floor, consisting of several layers. Top glued veneer of precious wood or cork. The uniqueness of the pattern of each panel makes the interior unique.
How to properly install an interlocking (floating) cork floor
Useful tips for laying your own cork floor:
- Before you start installing your cork floor, stock up on tools and supplies. Don't forget the PE film and cork backing for the insulation layer;
- After the purchase, the coating must be placed for a day or two in the room where the laying will be done, for its acclimatization;
- Do not perform work if the room is cold: below + 17C - + 18C;
- Prepare the base. If the old one is linoleum or carpet, it is important to check that it is perfectly even. Deviations from the norm are unacceptable - there will be distortions of cork slabs;
- The concrete surface must be dry, clean and always flat. The consequences of level violations are poor-quality docking, distortions, etc.;
- Use a fine-toothed hacksaw or jigsaw to cut the boards. It is convenient to mark perpendicular angles with a square.
Video on how to install cork flooring.
Laying technology
- Work begins with the laying of a polyethylene film and a substrate, if the base is a cement screed;
- If the base is carpet or PVC coating(linoleum), it is enough to clean it;
- The first panels are fixed in the front right corner, always perpendicular to the window. So the joints are invisible;
- In the first row, the end parts of the panels are connected. To do this, the end of each panel following the one already laid is applied at an angle of 30 degrees to the previous one;
- The panel is gently lowered to the floor, and the lock secures the connection. Lightly tap with a rubber mallet on the short right side through a small piece of panel inserted into the lock located on the short side;
- Be sure to leave a gap for expansion of 5-10 mm;
- The second row is started with trimming the last panel in the first row. Size - at least 20 cm;
- Experts recommend laying cork panels in a checkerboard pattern so that the beginning of every second row is a panel trim, and not a whole product;
- If there are heating pipes on the way, you need to cut a gap in the coating to expand the material. The size is the same as near the walls;
- A profile called a sill will help secure the cork panels in the locations of the doorways. It is attached directly to the floor at the junction between the panels;
- Pegs or spacer wedges are removed immediately after the installation of the floating cork floor;
- The plinth is attached only to the wall, leaving a gap that will allow the coating to move.
Video instruction for laying cork on the floor.
Cork floor underlay
When laying the castle cork floor, a substrate is used. It is made from crushed and pressed bark of a special cork oak.
Substrate- an important layer that is needed for heat, sound and waterproofing. Natural, eco-friendly, non-combustible, durable cork substrate is several times superior to other insulating materials in its characteristics.
Substrate laying
- A day before the start of work, a technical cork in rolls is brought into the room where work will be carried out on arranging the lock floor from the cork;
- First of all, lay pvc film to protect the surface from moisture;
- Entry to the walls - at least 5cm;
- The pieces of the film are overlapped, the margin reaches 20 cm. Between themselves, the parts are fastened with special adhesive tape;
- A rolled cork coating is placed on top of the film layer;
- The distance between the wall and the substrate, as well as between adjacent pieces of technical cork, is 15mm.
Castle cork flooring prices
The cost of cork flooring varies depending on the reputation of the manufacturer, brand, collection, the presence of a moisture-resistant coating, the thickness of the material.
How much does a castle floor from well-known companies cost?
Average price for 1 square meter
:
- - 1033 rubles;
- CORKART - 2083 rubles;
- Ipocork - 1103 rubles;
- Go4cork - 1321 rubles;
- Granorte — 1027 rubles
- KWG 349 - 1027 rubles.
Installation prices
If you are not confident in your abilities or do not have the right amount free time for self-laying lock-type cork floors, contact the experts. brigade experienced craftsmen will quickly and efficiently carry out all the preparatory work, installation of the cork floor and give recommendations on its operation.
An integrated team that performs turnkey floating cork flooring takes for its services, on average, 130 rubles. for 1 sq. meter. IN different regions prices may vary slightly depending on the demand for the service.
Be sure to conclude an agreement that will insure you against unscrupulous performers.
How to care for a cork floor, how to clean it
Natural cork floor care pretty simple:
- Wipe the floors with a damp cloth;
- Vacuum them;
- Use detergents, but without aggressive components, such as solvents or solid particles;
- Cork flooring companies offer special means care for their products. Among them: Wicanders Power emulsion (removes dirt and grease), V-Care (gives shine and protects the surface), KorkCare (creates a protective layer to shine and repel dirt);
- To protect the room from street dust and dirt, place a doormat at the door. Foundation with inside should not be rubber or latex;
- Stick special felt pads or cork circles on the legs of your furniture so that the items do not scratch the floor and do not leave dents. Rubber - not suitable!
- If your cork floor is covered with vinyl, once every three years in residential areas and annually in locations common use rub it with special mastic.
Cork flooring is chosen by connoisseurs of natural materials. There are two ways to lay it: glue and tenon-groove.
The adhesive method is used when using natural cork, produced in the form of thick sheets. The tenon groove is used when installing a cork laminate, which has top layer cork acts, and as a basis - NDF plates, similar to a laminate.
Preparation before installation work
Have you decided how to install cork flooring? In fact, at the stage of preparation - it does not matter, the preparation of the base is carried out in the same way. The base must be perfectly level and smooth. The better the floor is prepared, the longer the service life of the cork coating will be. Floor leveling is carried out by beacons. The base is leveled with self-leveling compounds. This process should be approached with all responsibility.
Note! A varnished cork floor will later reveal the slightest irregularities.
The leveling compound must dry completely. Otherwise under flooring mold will appear. Based on this, to preparatory work it is worth starting in advance, about 3 weeks before the start of laying the cork.
Adhesive mounting method

To lay the cork on the adhesive, you will need the following tools:
- roulette;
- ruler-gon;
- pencil;
- notched trowel;
- rubber mallet;
- roller and container for applying varnish.
Stages of work
- Dust and prime the floor.
- After waiting for the primer to dry, apply markings.
- Draw one line in the middle parallel to the wall and mark the center on it.
- Start laying from a wall along which there is no furniture. In this case, a gap of 5-10 mm should remain between the cork and the wall.
- A couple of days before the installation work, it is necessary to remove the cork from the packaging and leave it in the room where the laying is planned for acclimatization.
Laying the cork in a run
- Shift the plates to half, imitating brickwork.
- Start laying the material from the wall and at the end insert a piece of the slab, and start the next row with the remaining piece. In this case, the amount of waste is reduced to a minimum.
Adhesive tile laying
Apply adhesive to the base in an even layer and lay the first tile, pressing it firmly. The area of the applied glue should exceed the size of one tile, so when laying the next, you will not stain the one already laid. Then apply glue to the next section and fix the second tile.
In the absence of a chamfer at the edges, difficulties may arise at the joints. To fix it, take rubber mallet and hammer in the protruding edge. The entire surface is covered in the same way.
Final row
Note! When laying the last row, you will most likely need to cut the material with a sharp knife and ruler. Do not break the material, but run the knife several times.
Laying technology may vary, depending on the selected adhesive. For example, a polymer-based adhesive is applied directly to the material, not the floor. To avoid unforeseen situations, carefully read the instructions before use.
Final stage
As soon as the cork coating dries, a varnish layer is applied to it.
Note! Especially good in combination with cork coating acrylic lacquer water-based, which is odorless and harmless.
Before work, the floor is dedusted, and all window and door openings are hung. Each mote will be very noticeable under a layer of varnish. If you have unvarnished cork from the manufacturer, you will need to apply at least three coats of varnish.
Video
Tongue-and-groove installation

This method is much easier and you need tools for it:
- Electric jigsaw.
- Roulette.
- Ruler-gon.
- Pencil.
- Substrate cutter.
Cork laminated coating installed in the same way as conventional laminate. The base is cleaned of dust, then laid cork backing, the joints of which are treated with adhesive tape, and the installation process begins.
Laying rules

The first row is laid out from whole planks. The missing part is cut off with a jigsaw. When laying, it is necessary to leave a distance of 1 cm between the material and the wall.
The second row begins with the trim that remains from the first. The row is collected separately, and then moves to the previously laid one. The spike is inserted into the groove at an angle, and then the row is lowered and compacted by tapping the hand. At great length premises, it is advisable to perform this work with a partner.
Note! Installation of cork laminate is carried out in the direction of sunlight.
The final row is cut at one length of the plank, you will need to measure them separately. The entire trimmed row is also completed and snapped into place. Cork laminate does not require the application of a varnish protective layer, as provided by the manufacturer.
This completes the work, and you can enjoy your new, environmentally friendly flooring.
Video


