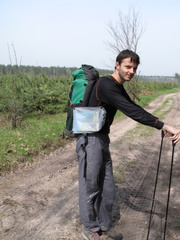
As you understand, once you are in autonomous conditions To survive, you must first think about what you will eat and drink.
If survival is delayed, you will need weapons for hunting. And also for defense against too annoying predators who themselves would like to dine on you.
Of course, if you have a license or hunting license, you can simply go to a hunting gun store ahead of time and purchase whatever you need. But as a rule, in survival conditions, you may not have factory-made weapons and will have to make them yourself. Therefore, today we will look at how to make primitive weapons of our distant ancestors from improvised means.
The most effective weapon that you can make with your own hands. It can be made and mastered in a fairly short time.
Seasoned wood is best for onions. People who have been in conditions for a long time wildlife, would set aside the chosen tree to withstand it. Tension in unseasoned wood does not last long, so you should make several bows and change them as they lose elasticity.
The ideal material for making bows is yew, but it can be successfully replaced with juniper, oak, elm, cedar, birch and willow.
Preparation for onions. Choose a flexible branch. To correctly determine the size of the future bow, place the end of the branch against your thigh with one hand, and straighten and move the other hand to the side. Mark your arm span on the branch: this will be the length of the bow.
Giving the workpiece the desired shape. The width of the bow in the center should be 5 cm, and at the ends 1.5 cm. Grooves for the bowstring are cut at a distance of 1.25 cm from the ends of the bow. The bark from the workpiece must be removed. After giving the onion the proper shape, it should be rubbed with oil or animal fat.
Bowstring. The bowstring can be made from a strip of rawhide 3-4 mm wide, cord or twisted fibers of nettle stems. If the bow bends well, use a shorter string. The string should not be tight - the main tension occurs when you pull it to shoot. The string is tied to the bow at both ends with a full turn and two half-loops. If the wood from which the bow is made is not seasoned, then the string on one side of the unused bow should be untied to relieve its tension.
Arrows. Only smooth wood is suitable for arrows. Birch is best suited for this purpose. The length of the arrow should be 60 cm and its diameter 6 mm. The arrows should be as even and smooth as possible. At the end of the arrow tail, make a slot 6 mm deep and a width equal to the diameter of the bowstring
Arrow fletching:
Arrowheads. The arrow itself can be sharpened and burned over a fire for strength, but it is still better to make a tip from tin from a tin can, bone or flint. Split the end of the shaft, insert the tip into the slot and tightly wrap the end of the arrow with wet tendon - when it dries, it shrinks and holds the tip tightly.
Archery technique. Place the arrow on the string. Raise the bow at arm's length so that its middle is at eye level. Keep your bow under your arrow. Without bending your bow arm, pull the string back evenly so that it passes your chest. In this case, the arrow must be at eye level and in line with the target. After taking aim at the arrow, release the string.
Please note that arrow fletching that hits your hand or cheek can cause severe skin abrasions when fired. Cover your cheek with a piece of cloth wrapped around your face, and wear a leather gaiter or pad to protect your arm from the elbow.
A sling is a throwing weapon, which is a belt or rope with a leather pocket in the middle (if there is no leather, then any durable fabric will do). The whole belt is pulled through the slits at the edges of the pocket, or its halves are tied or sewn to them.
Sling throwing technique. As throwing projectiles, use round smooth pebbles, reaching a diameter of 2 cm. Spin the sling over your head so that the plane of rotation is directed towards the target. Release one end of the belt and the stone will fly towards the target. Accuracy and the required striking range can be achieved by selecting the length of the sling.
Take a strong, elastic branch with a fork (hazel is best suited for this purpose) and a piece of elastic material (a tube from a wheel or an elastic band from clothing). Secure a pocket in the center of the rubber strip, and tie the ends of the strip to the branches of the fork. Use small stones as projectiles. on birds, load your sling and slingshot with several stones at once.
For piercing, a straight stick 1.8 m long is best suited, for a throwing spear (dart) - 90 cm long. To improve the accuracy of the throw, make a wooden throwing device, which should be half as long as the spear. The spear tip can be made from flint, bone or tin can. You can also tie a knife to the spear, but if you only have one, then it’s not worth the risk.
Find a piece of wood with a branch that will serve as a handle. The diameter of the piece of wood should be twice the diameter of the spear. Split it down the center using the knife as a wedge.
Select a smooth groove on the mostly flat surface of the throwing device. The untouched part will become a stop that will strengthen the throw. Holding the spear at shoulder level, point it at the target, and then throw it with a sharp movement, sending the handle of the throwing device forward and slightly downward.
The simplest hunting device also includes a bolas, which is a forked rope with stones tied to each end. A skillfully thrown bolas entangles the animal's legs and deprives it of the ability to move.
Well, let us remind you...
Never, under any circumstances, point a weapon at people, even as a joke. Otherwise, a bowstring falling from your fingers could shorten someone’s life, and send you to jail for several years.
I’ve only been doing cosplay for a year and this is the second full-fledged armor in my life that I made on my own and with my own hands, of course.
Daedric was my first armor, I did everything on a whim, shoveled tons of tutorials, snatched information wherever I could, but overall I wandered in the dark, asking idiotic questions to consultants in hardware stores. Therefore, my first armor was made of fiberglass (car body kits are made from this material) based on paper model made of pepakura, which is certainly very strong, but at the same time very heavy and incredibly restricting movement (for example, it was impossible to bend your back or raise your arms above your shoulders. And the weight is 15 kg. 
Plus the terribly smelly, labor-intensive and painstaking process of creating it, tons of putty and dust during sanding. In general, all these points led me to a more detailed study of the world of cosplay and I learned about the special materials that cosplayers use. This is how I became friends with EVA FOAM. This is a material reminiscent of ordinary tourist foam, only denser and, when heated, takes the desired shape. 
As far as I know, this material is produced in several places in Russia. Personally, I ordered from a supplier from Tolyatti. There are sheets of different thicknesses - 1,2,3,4,5, 10 mm. I used 5 mm as a base and 2 mm for relief. 
In general, unlike pepakura, where the program makes you a pattern based on a 3D model and you then glue it together from paper, with eva foam you make your own pattern. In some cases, you cannot do without a partner or own mannequin. So here's how it's done.
First, you take a picture of the image you want to bring to life. 

Secondly, you start making patterns. Let's say a bib. You wrap yourself in cling film and glue strips on top masking tape(in stripes, without wrapping, otherwise it will squeeze everything and the part will come out small). You mark directly on yourself where the required part begins and ends, you mark some important points, joints, patterns, etc. Carefully cut the masking tape and now you have a sketch of the part. Now we can define it more precisely, figure out how and what.
Cut the part into several parts so that by subsequently gluing them together we get a full-fledged and voluminous part (eva foam, of course, can be bent by heating, but not indefinitely). Next, you transfer the detail onto paper (I used the method of placing a sketch on a glowing white tablet screen and placing the paper on top of the sketch and redrawing along the contours). It is very important to immediately think through all the fasteners of the suit, then it will be difficult to stick on something that is not sticky. 
Cutting out of paper necessary elements, you need to try to connect them together using the same masking tape and try on the result. It would be much more offensive to immediately cut the eva foam and screw it up. Then you pin the paper with the patterns to the eva foam with pins and trace the contours and cut them out. Eva foam can be cut with regular foam stationery knife. When cutting, it is better to take into account how the parts will fit together and cut them at the appropriate angle relative to each other. Otherwise, for example, on the top of my helmet I ended up with a sort of “ridge”, which then had to be ground off. Although, in any case, after gluing, the irregularities will have to be ground down with an engraver or sandpaper. 
As for the glue... yes different variants. Personally, I tried three. 1.Hot-melt adhesive from a glue gun. A huge minus is that if it is hot, there is a possibility that the glue will float and the suit will come apart. 2. Secondary glue. Instantly glues everything together and holds perfectly. But it is terribly harmful and stinks. During my work, I discovered that I was allergic to it and developed angioedema. 3.Good old glue moment. You have to tinker with it longer than with the second one, but it’s tolerable. You smear both sides to be glued, wait 10 minutes and glue. Holds up great. 
If there is a chance of getting confused in the cut out parts, it is better to number them, otherwise it will be too late. 
After creating my black armor, I began to advocate for the suit to be able to move normally and be more or less comfortable. Moreover, I have a habit of walking my cosplay images in hard modes - skiing or boarding at a ski carnival, riding a bike. 
Therefore, this time I paid great attention to the mobility of parts and fasteners. To ensure good bending of the knees, I placed their elements on iron rivets. Excellent mobility of parts and everything holds tightly. Using the same rivets I attached a plate with feathers to the helmet. You saw off the excess glands with an engraver and everything is fine. 

What did you use for armor fastenings? Elastic bands, Velcro, buttons, hooks. All this is quite comfortably sewn onto eva foam and hidden somewhere under patterns or joints. 

The processing of edges and cuts has raised and continues to raise a lot of questions for me. I did this with the grinding attachments of the engraver. Some people simply do this with sandpaper. In any case, after such processing, many irregularities and roughness remain. I tried to smooth them out construction hairdryer. It's better, but not perfect. I was recommended to use a torch and next time I will try this method. To smooth joints and seams it is necessary to use putty. For me the best option is a finishing two-component auto putty. It holds tightly and polishes well. 
But it cannot completely cover the armor, and the material is porous... In short, we will now talk about the primer. And here the opinions of all the cosplayers I interviewed differ. The trick is that eva foam is a fairly flexible material and the applied paint only wrinkles and cracks when bent. I personally haven’t figured out how to avoid this completely, and if you know, I’ll be very glad for your advice. In general, at first, following the recommendations, I tried PVA glue as a primer. I don’t know why, but after applying black acrylic paint to it, it gave such an effect. And the paint completely came off like a film. 
After that, after reading various sources, I decided to simply prime acrylic paint, that is, put more layers and thereby close the pores and level the material. I painted it with a brush. Then spray for an even color. 
Then a brush with silver and a little silver spray for an even color. Then in some places it was finished with gold acrylic. Varnish. Also a separate big question. I haven’t completely decided it for myself either. I tried to cover it with a brush acrylic varnish. It takes a very long time to dry and if you put the parts next to each other, they stick together and spoil each other. She spat and covered it with aerosol varnish.
Why do I worry so much about primer, paint and varnish? Because as you can see in the picture below, a slight bend in the part leads to cracks... I don't know how to solve this problem. Here, the primer, paint and varnish should be elastic... and not peel off... apparently next time I'll try liquid rubber. 
Sword. Made of wood for rigidity. The wings on the sides are glued with epoxy. Sanding, giving relief using pieces of eva foam, putty and sanding. "Stones" on the sword and armor made of two-component cold welding. Primer, painting, varnish. 
To my great regret, I’m not much of an artist and I wasn’t able to give the volume to my armor as much as I wanted. I still have to learn this. 
About fastenings on armor. Down up. The top of the boot is held at the back by a very wide elastic band, the overlay on the boot is also with elastic bands on the toe of the boot and between the heel and toe with an elastic band from the boot. Knee pads with elastic bands and buttons. Plus I forgot to film the production of the top of the knee pads and the armor under the breastplate. This is faux black leather as a base. On top of it, cut out pieces of the same leather are glued with glue and all this is tinted with silver acrylic. So here it is. On the legs, the leather part of the knee pads is attached to the back with hooks; they are attached to the corset with hooks with a small strip of leather so that they do not slip. Gaiters are also attached to the sides of the corset with Velcro. By the way, under one of the leg guards there is a clever pocket for your phone and money. 
The corset has Velcro and hooks at the back. Belt with hooks. The bib has elastic and hooks at the back like a bodice. It's more difficult now. The shoulder pads are attached with fastex to the breastplate at the front, at the back with an elastic band to each other, with an elastic band with hooks to the upper bracers, and with a button to the elbow pads. The lower bracers are two-part. The bottom is like a bracelet with an elastic band, the top is an elastic band with buttons.
The cloak has hooks on the front of the armor and buttons on the shoulder pads. 
By the way, I forgot to write about gloves. These are simple fabric gloves (100 rubles in a fabric store), with cut out pieces of thin eva on top of hot glue.
Well, that’s basically it, I made it all in about 2 months.
I have long wanted to try making some equipment with my own hands. My first pathetic attempt is documented here :)
Went to hardware store Epicenter (there are three of them in Kyiv) in search interesting materials for work. I found there a number of lightweight moisture-proof materials that are used in the construction of houses. They may not be as durable as , but they'll probably last a couple of hikes. Bought 5 linear meters insulating film Strotex from a 1.5 m wide roll. The material is shown on the right. One side is white, the other is covered with aluminum film, which should reflect heat well.
I cut the piece as follows and glued the two pieces together with tape.

I then brought the diagonal edges together and glued them together to form a three meter long tube. Weighs approx. 580 g, and there's enough room for two. Field tests will be held tomorrow night...
Balcony test
I put the sleeping bag into the tube and pulled it up to chin level. The fabric was just lying on the sleeping bag. I didn't lift it with a rope or anything else. As a result, condensation from my body soaked the top side of the sleeping bag, even though I was breathing above the tube. But inside the tube it was 3 degrees warmer than outside it.
Afterword
The idea of a pipe-shaped shelter is not new. The raised entrance, of course, makes the shelter more comfortable. However, materials like Strotex can get wet in heavy rain or snow. They are much inferior to ordinary polyethylene in this regard. The main disadvantage of this design is the accumulation of condensate. I will not use this shelter, since I have a better one, but for some this solution may be quite satisfactory, especially for short trips (1-2 nights), where the issue of condensation is not decisive.
Isomat was originally intended for insulation and soundproofing of floors. I cut it up and taped the pieces together so it folded up and fit in my backpack. Successfully used in . The material is quite fragile, but its thermal insulation properties are more effective than travel rugs (per unit weight).

Report, 2008
Subsequently, the isomat broke and came unglued. But the fact remains: the thermal insulation is excellent.
The simplest project. I cut out a piece and sewed the edges to make a cover. Then, when I purchased sewing machine, altered the seams. Weight - 8 grams. very resistant to punctures, which is superior to silicone and other ultra-light fabrics.

Report, 2011
I still keep my cats in this case. Great use of Tyvek. The fabric becomes softer and softer, but does not pierce.
My simplest and most naive project. Unfortunately, I didn’t get further than the first stage due to the inability to try these snowshoes on the snow! That way I would know what is needed to improve them. The basis for snowshoes is cheap aluminum dumplings weighing 260 grams each. I liked their shape and excellent grip. At the hiking site, I was going to tie straight branches with a diameter of 1-1.5 cm and a length of 60-70 cm to the dumplings. The fastening system shown here is too flimsy to withstand large and multidirectional loads. We should have come up with something more complicated.

Conclusion, 2009
Snowshoes should not be shaped like a circle...
Quite a complex project. I took the pattern from polar socks, “by eye.” Each sock contains three pieces of fabric. They work well, but they slip. You need to add a puff or elastic band. The weight of a pair is 16 grams.

Report, 2009
Sewing socks turned out to be quite difficult. These socks are suitable for sleeping, but not for walking.
Explain, What is this, very difficult 🙂 You have to see and feel it for yourself. Fabric - volume - about 40-45 liters, weight - only 110 grams. There are drawstrings at the ends of the duffel bag, and things can be easily reached along the entire length of the bag. There are several perpendicular seams.


Report, 2010
I haven't gone camping with him yet. I doubt that I will like it, but it would still be worth trying to go with him at least once.
I ordered a kit for sewing these ultra-light pants from thru-hiker.com. Fabric (“Momentum” - ultra-light breathable polyamide with water-repellent impregnation), accessories and pattern are included in the set. Due to my inexperience, I did not check the resulting pant size in the early stages and sewed pants that were too narrow with a wide waist. By the time I realized that my pants didn’t fit well, it was already too late. I decided to contact the studio to have pants sewn for me from another piece of Momentum I ordered (and also in a less disgusting color). The pants turned out great and weigh less than 80 grams. By the way, I abandoned the side zippers. The lightning can be seen in the second photo.


Report, 2010
Momentum is definitely a very advanced fabric. For most windproof products, as well as bivouac bags, Momentum is ideal. But for trousers, I advise you to use heavier fabrics, because... When hiking, you often catch branches and thorns, sit on rocks, fall on snow, etc. Momentum can tear, and sewing up a tear or hole in such a light fabric can be difficult. I still wear trousers (this is my second pair) from Momentum, but I decided that my next pair will no longer weigh 70 grams, but 100 or more.
For the next ultra-light hike in Crimea, I decided to get rid of many of the covers that I was used to hanging on the straps of my backpack (see), and carry only the most necessary things in front: a map and a camera. For them, I came up with a special silicone bag measuring 30 x 25 x 8 cm with two compartments (so that the card can always be put inside, even if the second compartment is filled with things). Product weight - 30 grams.
The bag was supposed to work like this. While you are looking at a map or using a camera, the bag hangs in front of your stomach. When the map and camera are no longer needed, you tighten the hole and dashingly throw the bag over your head back so that it hangs behind you. When you need the bag again, you take the rope from behind your shoulders with your hands and use it to pull the bag over the top of the backpack.
No matter how hard I tried, I could not find a place to tie the rope to the backpack so that the bag would hang on required height both in front and behind, and so that it can be easily reached from behind. If you wear it only in front, it dangles and hits your stomach with every step. Over time it gets boring. And so, the design is not bad.


Conclusion, 2009
Is the design good? I don't agree. I wonder how many hits my camera would have withstood on the backpack when the bag was thrown? :)
Continuation of the previous topic. This bag corrects the shortcomings of the former. Now the bag with the map and camera hangs under the arm in a place where the map (for example, “Atlas of the Crimean Mountains”) is still easy to take out and put in without removing the backpack, and at the same time the bag does not interfere with the use of a trekking stick. In addition, it does not hit the body at all, since the line of attachment of the bag is parallel to the trajectory of movement.
The design is now flat, with two compartments, a drawstring and four loops to allow the bag to be hung in different ways (only the side two are used in the photo). Attaches with ultra-light carabiners to the loop on the backpack and to the shoulder strap. I'm very pleased with the result. During this time, this handbag was my constant assistant and did not interfere with the movement of my hand at all and did not hit my body. Weight including carbines - 23 grams.


Report, 2010
Over time I cut out a divider inside the bag. She was clearly superfluous. In fact, now the bag is practically no different from a regular case for hiking items. Only by the presence of loops and the stupidity of the seams :) As a rule, I attach the front part lower than shown in these photographs. An improved model is presented. Nevertheless, the bag remains one of my most successful inventions and has accompanied me on numerous hikes, incl. and by . Thanks to it, the map is always at hand, and looking at it on the go is not difficult.
Many means have been invented to protect against insects without using a traditional tent. It's worth searching on Google, for example, "bug bivy". At one time I bought a simple, lightweight and relatively cheap mosquito net from Gossamer Gear (70 grams). In anticipation of summer hikes, I decided to make a mosquito net that would weigh less and more reliably protect not only from mosquitoes, but also from ticks and ants that can crawl up to you from below.
The mesh I developed can be used with equal success both on the ground and in a hammock. It can also be used as a mosquito net for the head. The shape of the mesh is an envelope tube, tightened at hip level. Made of ultra-fine mesh (“no-see-um”), through which midges and ticks cannot crawl. Weight - 50 grams. Suspended from an awning, branch or rope. In the photo below, the net is raised 20 cm above the head of the imaginary sleeper. This option is ideal for lightweight athletes who walk like this: they came in the evening, set up camp, immediately lay down, then got up in the morning and walked.

Report, 2008
I used the net while hiking on. The idea may be a good one, but it turned out to be very difficult to climb inside the mesh while sitting in a sleeping bag. From such muscle tension, at the end of a 12-hour day's march, you become completely exhausted.
How light can a backpack be? I think it’s not much lighter than my latest brainchild, which weighs 45 grams and holds 22-24 liters. The body of the backpack is made of whole piece silicones (75 x 75 cm and 24 grams of weight). The backpack is designed for summer hikes in Crimea with a base backpack weight of up to 1-2 kg and maximum load at 6-7 kg.


Report, 2010
Subsequently, this pathetic backpack visited the top of Elbrus behind the shoulders of my friend. My next ultra-light silicone backpack will have a double bottom, external pockets and thicker foam in the straps. A full-fledged backpack for summer PVD can weigh about 100 grams.
Now I gravitate towards the most simple and functional equipment. I wanted to do mosquito net for two, which could easily be used at rest stops as well as at night. The size should be large enough for two people to sit and dine under the net. In Colorado, we already realized how inconvenient it can be without such protection from insects, and decided that we would have to come up with something for our next trip. I had been eyeing a mesh tent from Ray Jardine's site for a long time, but gradually I abandoned this design. Firstly, the tent requires pegs and trekking poles or branches to set up, which makes it useless for short rest stops. Secondly, it is too low to sit in. It was necessary to come up with something simpler and more convenient.
In the end I came up with this design. Essentially it is a pyramid with the top shifted forward and the bottom open. The length of the structure is 2.6 m, width - 1.8 m in front - 1.5 m in back. Top height - 1.2 m. Weight - 200 grams. Pieces of nylon are sewn to the bottom corners, and the bottom edges of the mesh can be held either with something heavy (say, sneakers) resting on the pieces of nylon inside the corners of the tent, or with pegs. Loops for pegs are sewn to the corners and the middle of the long sides. You don’t have to stretch the edges, but simply hang the mesh at the top, on which there is a special tensioner, so that the mesh can be easily raised or lowered without tying knots. It is enough to find a branch to hang a tent in half a minute and protect yourself from mosquitoes. If the awning has a loop at the bottom, then you will attach the mesh to it. We will try this design at the end of December.


Report, 2010
Subsequently, this grid underwent a number of changes. First I added a vertical zipper at the entrance. Then I cut off pieces of mesh at the sides and back and sewed loops around the perimeter of the mesh. But I went too far with reducing the size: I no longer fit under the mesh. I added new pieces of mesh and sewed the entire structure to the rescue blanket for complete protection from insects (particularly ticks). However, we didn’t like how the walls of the “interior” sagged and touched our faces. We leave experiments with mesh and move on to using a two-person bivouac with mesh or shelters with integrated mesh (like the “Hexamid Twin” from Zpacks), that is, essentially, ultra-light single-layer tents.
How to protect yourself from such rain, which falls from morning to night at temperatures of 10 degrees or lower? The umbrella protects the torso well, but the pants (shorts are cold) invariably get wet. Gore-Tex rain pants don't breathe enough and get hot under heavy loads. A poncho is good if you are alone, but if you are alone, you will want a large awning instead of two poncho awnings. The simplest and, it seems to me, effective solution is a “rain skirt” or a kilt made of silicone. The design is a partial cone (imagine a glass without a bottom, with a wide end at the bottom). Fixed with Velcro. As easy as pie. It can also be used as a cover for a backpack or a small bedding for rest stops. It is not hot in such a skirt due to good ventilation. I made one for myself and one for a girl. Weight is 70 grams for me and 55 for the girl. The main difficulties when sewing are to determine the most comfortable length, make the bottom wide enough, draw the bend correctly (see photo on the left) and select optimal places for Velcro (and so that they match at both ends of the skirt!).


There was a need for vapor barrier gloves for girls, because... her hands often get cold. The mittens were sewn from pieces of silicone left over from rain skirts. We were lucky with the size of the mittens: they fit both her and me. They are loose enough to be worn as tops over thin gloves. This way they protect from rain or snow. True, in this case the hand does not breathe, but in certain conditions this can even be a plus (if the hands are cold). Having outlined the hand and 5-10 cm of the wrist on paper, you need to add about 2 cm around the perimeter and a little more in the wrist area so that the hand can fit through the hole formed. Then we cut out the resulting pattern and apply it to silicone or other fabric and outline it with chalk or a marker. Cut out four “handles” to make two mittens. Well, then everything is clear, I hope. The mittens work. Now I want to add elastic at the wrist area to prevent the mittens from slipping. The weight of the pair is 8 grams.


Report, 2010
You don’t need to add 2 cm, but 3-4 depending on whether you wear mittens over gloves. The elastic is a necessary thing, but you need to sew it on before sewing two pieces of silicone. Sew on an elastic band - it’s not a field to cross :)
Numerous moves and the inconvenience of using strangers sewing machines over the past two years they have prevented me from developing self-tailoring projects. But now these issues have largely been resolved. In addition, I feel that the accumulated experience and understanding allows me to sew more intelligently than before. I'm starting to design new equipment... Waterproof pants are designed to correct the shortcomings of the rain skirt. They protect the entire length of the legs from precipitation and do not interfere with stepping over obstacles. You can wear Gore-Tex socks underneath without the risk of water running down your feet and getting inside the socks from above. The trouser legs weigh 66 grams (from 50 for shorter people).


Report, 2010
Preliminary result after testing in: I like it. When combined with Gore-Tex socks, they protect the entire foot from external moisture. Pants should be worn in conjunction with a poncho or raincoat, the lower edge of which is below the groin. Otherwise, moisture will get under the legs from above, and your legs will gradually get wet from the inside. Putting on pants legs in the wind can be difficult. I partially solved this problem by sewing a thin jumper between the legs (see photo on the right).
It seems perfection has been achieved! The bag weighs only 11 grams without carabiners and has easier entry and tightening than the old one. Now the fabric does not get into the lock, and the “Atlas of the Crimean Mountains” slides in easily. In addition, the bag can also be used as a cover for things.


Why windproof mittens, even 15 gram ones? And then, in order to a) protect your hands from cold and wind in summer hikes, b) protect your hands from mosquitoes and c) wear over warm, breathable gloves in cold weather. This combination now weighs only 57 grams. When sewing the mittens, the hardest part was sewing on the elastic. As it turns out, this needs to be done before sewing the two handles. I only succeeded in doing this the third time. Not counting the first glove failure, the project took two hours. By the way, the fabric for the mittens was taken from my wife’s worn-out windpants.
Sketch your future armor. It's better to focus on the basic shapes (their size and how to connect the pieces of armor) rather than on color and details, which can be dealt with later. Decide where and how the individual pieces will connect to keep the armor flexible. Simplify the design as much as you can so that many parts do not knock against each other and so that you do not have to connect them in many places (this will weaken the design). You can also look for ready-made armor templates online, and you can even print some of them.
Take measurements of the person to ensure the armor fits (mark the size of the armor, such as S, M or L). Write down all the necessary volumes that are needed to make a helmet, breastplate, shoulder armor and other various coverings. While this won't be your main guide when choosing armor size, it will be useful whenever you're cutting, joining, or making any changes that you may be unsure of.
Transfer your measurements to the armor stencil (template). You'll get through it faster if you have a friend hold pieces of flexible and rigid paper (like cardboard) in front of you and draw each detail of the sketch separately, making a rough outline so that you can later redo it as you need. It will be more accurate if you make a mannequin and assemble a paper stencil around it.
Give the stencil its final shape. Make sure you have all the parts you need and adjust them to size if necessary. If the template consists of 2 identical parts (two shin plates, two gloves, etc.), choose the best one and discard the other. Thus, you can use the best one as a model for the second one, so that your armor is symmetrical. When you're happy with the result, clean up and soften the outline, mark the original sketch and its corresponding part (noting which ones will be duplicated) and you can cut out.
Transfer the stencil onto the foam sheet. Trace each detail onto sheet foam. ballpoint pen(it will glide over the foam without catching or scratching it), tracing it a second time if necessary. To make very large pieces, you may need to tape 2 sheets of foam together, preferably where it is less noticeable and can blend into the design (such as the seam down the center of the bib). Mark the back and cut out the pieces.
If necessary, “stamp” the design on the armor. Lightly sketch the sketches with a ballpoint pen. Once you're happy with the results, go over the pen a few more times to engrave your designs into the foam (be careful not to tear the material). It is much easier to draw on foam if it is on a flat surface and has not yet been assembled into armor.
Shape and assemble the armor. Exactly how you do this will depend on the intrigue of your design. Below are several factors to address how you work. Gather your armor. How you do this will depend on the complexity of your design. Below are some tips for this job.
Make a raised pattern if desired. To do this, simply paint over the fabric of the already highlighted design on your armor, using a pointed tube. You may need to repeat the procedure for a more obvious effect. When the pattern is sufficiently convex, leave it to dry overnight.
Paint the armor if necessary.
The ghillie suit has its own characteristics. Such special clothing is used by the military, and the suits are also very popular among fishermen and hunters.
In ancient times, a camouflage suit was made from all available materials: branches, leaves, grass. Such equipment was created more for human self-preservation in extreme conditions. The most the best material Animal hair and bird feathers were considered for making costumes. All this was done with the goal of surviving in the wild.
The modern camouflage suit came from the military about 50 years ago. The first ones were used by the English army back in the 19th century, and they were made in khaki color. Gradually the suits improved and began to be produced in several types, with different colors and drawing. Gradually, the camouflage suit flew around the entire planet and began to be used by the army in all countries of the world.
Camouflage clothing is created individually for each location and season. There are two main types of equipment:
Each of them is divided into special subspecies, of which there are a large number.
The summer one is equipped with a jacket with a hood and loose-fitting trousers. The costume is intended for use against a summer background only. Available in a green shade with a special small geometric pattern. If necessary, the camouflage suit can be washed in a washing machine.

Winter clothing is made of thick white fabric and is used in the cold season. It can be produced with various patterns that imitate dirt, or made from woven, dyed pile. For convenience, there are loops that are located on the trousers or on the jacket for attaching a belt. If you purchase a high-quality winter camouflage suit, a person can remain unnoticed at a distance of several meters.
If necessary, you can make a camouflage one. Men's favorite activities are fishing and hunting, which require such equipment. You don’t have to buy it in a store; you can easily do it yourself. There's nothing complicated about it. detailed instructions will explain each step step by step:

These camouflage suits for hunting or fishing can be made from improvised materials.
As can be seen from all of the above, if you need a camouflage suit, you don’t have to buy it in a store.

Having in your arsenal a small supply of information and simple materials, it’s easy to do it yourself. If you still need to buy it, then you need to go to a specialized military equipment store for it. Also, camouflage suits can be purchased at the “Everything for Fishing and Hunting” stores.


