As they say experienced builders, decorating the surface of walls indoors can be done using MDF panels. From the material in our article we will learn what this building material is, we will become familiar with its positive and negative qualities, as well as the technology for installing panel structures on an adhesive mixture or a pre-prepared frame.
Among the huge number of building materials, many are interested in wall products. The catalog is literally overflowing with such designs, but MDF wall panels occupy a special place in it. Such products are used as a decorative element when finishing the surface of walls and ceilings. By design features The described material resembles plastic, which is familiar to many, although such products include natural raw materials from waste from the wood processing industry.
MDF panels are very popular precisely because of their similarity to natural and more noble ones. finishing materials. At the same time, the cost of such panels is much lower.
The term MDF itself is literally translated from English as the usual abbreviation of chipboard or chipboard, but differs from its Soviet counterpart in improved technical characteristics. IN in this case No harmful resins containing phenol are used to connect raw materials. Binder Lignin and, in some cases, paraffin serve here.
The basic composition of the panel contains wood dust, which was obtained after grinding and processing sawdust. This material is heated in special ovens until the binding substance lignin is released from it. It is with the help of such a component that the raw material mass is glued together. The pressing process gives the product even greater strength. The cooled workpiece needs additional processing; first, the released slab is cut into the required parts, then a melamine film is glued to the surface, which imitates the structure of wood.
In structure, MDF lining resembles an intermediate material between cardboard and plywood sheets. Thanks to these properties, the product can be given the required dimensions using a regular hacksaw for this purpose. The material in question has a low thermal conductivity coefficient, but it also has a drawback - the possibility of damage to the melamine film during operation. After mechanical impact Cracks and scratches appear on the surface of the material, but defective areas can be easily masked using regular paint.

A great advantage is the wide choice of shade and texture of panel patterns. In most cases, the pattern imitates various varieties tree.
MDF wall panels are manufactured using the same technology, but the surface of such products may have different finishes. In this regard, the materials under consideration can be divided into several varieties:
The products in question can be used for cladding any of the rooms of the apartment with the exception of the bathroom. The surface of such products differs significantly from the unnatural appearance of plastic. The end consumer can choose an acceptable design and size of the product for himself, paying relatively little money for building materials.

Now let’s pay attention to the dimensions of the product:
When choosing decorating elements, you must remember that the thinnest parts have minimal strength indicators, so they are used to decorate walls. Materials with a thickness of more than 1.2 centimeters are often used as additional heat-insulating layer. In terms of properties, such insulation replaces a brick wall 15 centimeters thick.
When choosing any building material, users take into account its strengths and weak sides. First, let's get acquainted with the advantages that wall panels have. These include:

Flaws:
Many homeowners don't know how to attach MDF panels to the wall. In practice, two popular methods are used: securing products to a pre-aligned frame and installing the material on liquid nails or another composition. When choosing one method or another, you need to pay attention to the following:

Now let’s take a closer look at the method of laying MDF boards on a frame. First, you need to make a sheathing for the walls; usually this design is made from a metal profile or a wooden beam of a certain cross-section. When using wood, choose timber square section with a side length of 3 centimeters. Such a product should have a humidity of no more than 15%. The material is additionally treated with an antiseptic and fire retardants, which prevents the process of burning and rotting.
Next, measure the walls with a construction tape. In this case, the length of the bars should be slightly less than the calculated values. When the panels are positioned horizontally, the sheathing is installed in the vertical direction and vice versa. After marking work, the dimensions are transferred to wooden products and the bars are sawed. During such operations, the hacksaw should be positioned strictly perpendicular to the surface of the wood, which will prevent the formation of crooked ends.
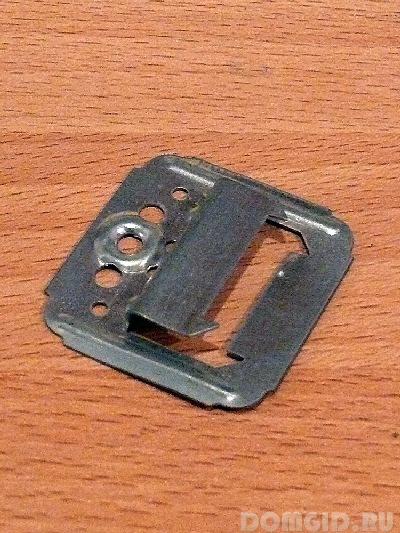
The guide rails are fixed to the surface using dowels (if the base is brick or concrete) or self-tapping screws (if there is a base wooden surface). After this, insulation boards are laid in the spaces between the sheathing elements, for example, mineral wool. To attach the finishing layer, you can use clamps for MDF panels, as well as self-tapping screws with dimensions of 3 * 20 millimeters, which are screwed into the grooves of products or special nails having a thin cap. At the final stage of work, the connecting strips and external as well as internal corners are secured.

The installation of a metal frame made of profiles is almost no different from the installation of wooden sheathing. To begin with, wall guide elements are installed along the perimeter at the top and bottom of the building. Then the main profile is placed at a distance of 40-50 centimeters from each other. All guide parts are fixed to the wall surface using self-tapping screws and hangers, after which they begin laying the finishing coating.
As we have already said, gluing MDF panels to base surface most often used for finishing small rooms with smooth walls. At the initial stage of work, a thorough examination of the base is carried out, defective areas are identified and measures are taken to repair cracks and chips. Sometimes the leveling process takes longer than finishing the wall.
After the surface is leveled and the solution has completely hardened, the surface must be treated with a primer deep penetration. This solution will help increase the strength of the base and increase adhesion to the adhesive mixture. A similar composition is applied to the wall using a paint brush or roller, avoiding smudges. Now you need to cut the MDF panels with a jigsaw or hacksaw into pieces of the required size.
At the next stage of work, mix the required amount of glue and apply the prepared solution to the back surface of the panels. This substance is placed pointwise, and there should be as many places covered with glue as possible. Laying begins from the bottom of the wall.
At this stage, each element must be carefully pressed against the wall and held in this state for several seconds. Similar work continues until the surface is completely covered. At the very end, connecting strips and corners are attached, which are fixed to the surface using the same liquid nails or special glue.
For many developers, the question of the cost of panels remains relevant. The price of the products in question will depend on the popularity of the manufacturer, as well as the overall dimensions of the stove. One of the most popular varieties is considered to be a decorative panel with dimensions of 2.6 * 0.2 meters. The price of such a product in construction stores ranges from 100 to 150 rubles per piece.
This article will be useful to those who decide to do self-installation MDF wall panels, as well as those who for some reason doubt their abilities. MirSovetov will tell you about the advantages and disadvantages of MDF panels and share with you detailed photo report on the installation process.
MDF is a close relative of chipboard. It is also made from wood chips pressed and bonded with special substances. Just thanks special technology Hot pressed MDF has higher performance ratings and does not contain resins and phenol. Because of this and more, MDF, which appeared quite recently, instantly became popular and in demand. MDF panels cover walls, ceilings, and niches. True, despite their environmental friendliness, they are most often used when decorating the walls of corridors, balconies, offices, cafes, bars and are avoided during renovations living rooms. The whole point is that after covering the walls and MDF ceiling it creates a feeling of a “standard box”, and many people do not like this state of affairs.
I often see frames made of wooden planks. I prefer to make a frame from profiles, since wooden blocks, provided the wood is not dried enough, will “lead” over time, and MDF will “swell.” I observed a similar case - desperate owners had to start repairs, as they say, from scratch.

 Now we attach the suspensions to the ceiling at a distance of 600-700 mm from each other. Suspensions are attached using “quick installation” fasteners 40 or 60 mm long. First, we drill holes in the ceiling with a 6 mm drill.
  Next, we attach the SD profiles to the hangers as follows.
  This frame is universal: you can attach both MDF and plastic to it, or. In our case, we attach MDF panels. To do this, we buy MDF gluers and self-tapping screws. But before you start installing the panels, you should stretch electrical communications under ceiling lamps.
  The first strip is attached to corner profile with self-tapping screws, and on the other hand it is secured with gluers (to all frame profiles), which are attached to the frame with pins. In this way, it is typed quite quickly - one panel after another.
 And we install the lamp. There will be no problems with these, the lamps come with comprehensive instructions.
  Now about the walls. First of all, everything electric wires hide in special corrugations - they will prevent a fire in the event of a short circuit or spark in the wiring.
 Next we make a frame on the walls. Using the same hangers, we attach vertical supports from the SD profile to the walls (in corners, near doors and openings). The top of these profiles is attached to the UD profile (which is attached to the finished ceiling), and the bottom is attached to the UD profile attached to the floor.
  Now about horizontal profiles. Usually builders install them according to the “knee-butt-shoulder” principle (at level). That is, at the level where a blow is most likely. Approximately 600-700 mm apart.
 This is what the frame should look like.

 When moving from a large corridor to a small one, we will build an arch. First we make the frame. We buy a special arched UD profile and attach it to the frame as follows:

 This is what the finished arch frame looks like.
  We begin to assemble MDF panels.
  The installation principle is still the same - on a gluer. Don’t skimp, don’t glue MDF, don’t fasten with nails/screws. MDF must “breathe”, so use gluers - they are exactly what you need.


 After the arch is completely covered with MDF panels, a plastic arched corner is glued to the joints. It bends easily, and there will be no problems with gluing. You need to glue it on liquid nails. In order for the corner to “grab” well, we fix it with mounting tape. By the way, after a few hours the tape can be removed, only very carefully and slowly so as not to damage the surface of the MDF.
  Here's what happened as a result:
 Light, cozy and smells of wood.
 MDF panels are one of the most affordable and easiest to install finishing materials for wall decoration. You will need a minimum of components, a little skill and the desire to decorate the room beautifully. And, of course, the most important thing is our instructions for installing lamellas.
After finishing a wall with MDF panels, it may look like this. Cute, isn't it?
MDF or MDF (Medium Density Fiberboard) is a wood-fiber board produced by dry hot pressing. The raw materials used are fine sawdust of industrial wood species, binders and some additives that provide the material with plasticity and relative moisture resistance.
MDF boards are convenient because they can be produced in any thickness and are easy to process, cut, mill, and veneer. Therefore, panels are made from them wall thickness from 6 to 16 mm. The width of the products varies from 12 to 37 cm, length - from 2.4 to 3 m. The surface is most often decorated using plastic or paper-resin films designed to match the texture of wood, natural stone, ceramics, fabric, leather.
MDF panels are equipped with a tongue-and-groove connection system, that is, there is a tongue on one side of the plank and a groove on the other. As components, manufacturers (Kronostar, Soyuz, Kronoshpan, etc.) produce thin outer and inner corners from the same material with a decorative surface imitating wood, stone and other materials.
 The tongue-and-groove system allows you to connect panels firmly and without gaps
 The main method of installing panels is frame or glue. The first is more complex, but reliable. The second requires more careful preparation of the base; accordingly, time, labor and material costs can increase significantly.
To install MDF panels with your own hands, you need the following set of tools and components:
Let's consider the most common method of installing panels on walls with your own hands - frame. The bottom line is that a “skeleton” is formed from wooden slats or steel profiles for gypsum boards on the walls, to which decorative slats are subsequently attached.
When installing MDF boards on a frame, the wall does not need to be thoroughly plastered, puttied, leveled, or removed the old covering in the form of wallpaper or paint.
It is enough to treat mineral crumbling substrates (concrete, plaster, brick, cement) with a deep-penetrating strengthening primer; wooden ones - with a fire-retardant impregnation or an antiseptic non-washable primer to prevent the development of mold, fungi, and bugs.
Installation of MDF is carried out in the following order.
The surface must be treated with a protective and strengthening compound. If necessary, secure thin insulation using plastic dowels or a construction stapler - regular or foil foamed polyethylene (Izolon, Penoizol), EPS up to 7 mm thick (Pufas, QS) or others.
At this stage, work is also carried out with electrical wiring and other communications. Outputs of sockets, switches, cables are marked.
The main rule when installing planks with your own hands is that logs or profiles are attached perpendicular to the direction of installation of the panels. As a rule, MDF is mounted vertically, so the slats need to be fixed horizontally.
First of all, you should check the evenness of the wall with a level and mark it. It is advisable to cut off particularly protruding areas, mark the holes and depressions with a pencil, so that when installing the sheathing, thin fiberboard, chipboard or plywood dies can be placed in these areas for leveling.
First, a frame is formed around the perimeter of the wall. The lower and upper beams or profiles are installed at a distance of 3-5 cm from the floor/ceiling. Between them, the sheathing elements are placed in increments of 40-60 cm. The metal guides are fastened with metal screws or anchors; for wooden slats, you can use nails, dowel-nails or wood screws.

Along the perimeter of door and window openings, the sheathing is installed with an indentation of 3-5 cm from the edge. The distance between adjacent profiles should remain standard - 40-60 cm.
 Additional sheathing strips can be installed around door and window frames to increase rigidity.
 Between the elements of the finished sheathing, you can install insulation boards - mineral wool, polystyrene foam, extruded polystyrene foam and others.
MDF must be carefully cut to size in advance. Installation starts from the corner. The panel is placed against the wall, verticality is checked with a hydraulic level and fixed from the ridge side to the sheathing using small nails or special clamps. The next lamella is inserted with a tenon into the groove of the previous one until it stops and secured on the other side with hardware. The remaining panels are mounted in a similar way.
After the work is completed, the corners and edges around windows and doors are decorated with MDF fittings. Folding corners made of MDF or plastic are attached using Liquid Nails, Titanium and their analogues.
 Initially, an MDF corner is not a corner at all, but a plank. Depending on the type of angle (internal or external), it is bent in the desired direction
 Excess adhesive should be removed immediately with a damp cloth. Upper part can be hidden under decorative plastic or polyurethane cornice, from below you install skirting boards with your own hands to match the color of the floor or wall covering.
The covering of MDF panels is ready. It is recommended to use a vacuum cleaner or a slightly damp cloth to remove dust and dirt. Do not use cloths that are heavily moistened with water, abrasive or aggressive detergents to avoid damage to the surface of the slabs.
Detailed video instructions for installing MDF panels:
At glue method Installation to the base is subject to more stringent requirements. The surface must be strong, smooth and dry. It is advisable to completely remove the remnants of old coatings, then prime them with a compound that increases adhesion.
On reverse side Glue is applied to the panel in a zigzag motion, then the plank is applied to the wall and pressed. The next lamella is also lubricated with glue, connected to the previous one and pressed. After installing all the elements, the corners and edges are decorated with corners, cornices, and other fittings.
The modern interior provides a beautiful and original finish, which especially emphasizes the style of housing. Therefore, recently MDF wall panels have become very popular among designers. Unlike wooden board They are inexpensive, come in various colors and are easy to install, giving the room a refined look.


MDF is a unique building material produced in the form of panels made from wood-fiber raw materials medium density. Since the boards are produced by dry pressing of wood shavings under high temperature and pressure with the addition of urea resin, they are extremely strong and durable in use.
Decorative finishing with such panels has many advantages.


Despite the presence positive characteristics, MDF also has some disadvantages.


Before purchasing facing slabs, it is important to consider that they are produced different sizes depending on the model range each brand.

As a rule, the most common products on the market are thicknesses from 7 mm to 14 mm and sizes 2600×200 mm, 2600×153 mm, 2600×325 mm. Attached wall blocks usually on glue or lathing made from wooden beams and metal profiles. At the same time, installing slabs on a wooden frame is much simpler, but before installation, the wood should be coated with antiseptic solutions that protect it from the formation of mold and mildew.
Today, MDF boards have found wide application in various fields. They are used to sheathe walls, door panels, window sills, ceilings, and screens for heating and heating systems are also made from the material. ventilation systems and arches. This finish looks great in modern interior, since the panels imitate not only expensive types of wood, but also natural stone.


The installation of MDF, like any other material, must begin with a preliminary calculation of the number of panels. To do this, first of all, determine the area of the room: all the necessary measurements are made, and the perimeter is multiplied by the height. It is also important to consider the presence of doors and windows in the room. Their quadrature is calculated in a similar way, multiplying the height by the width, the resulting result is subtracted from the total area of the room.
Then, knowing all the numbers, you can go shopping for wall panels. Since the products are sold in different sizes, you will have to additionally calculate how many square meters are in each slab. Usually manufacturers write this on the packs. If, for example, a panel is purchased with a width of 900 mm and a length of 2600 mm, then it is enough to multiply 2600 mm by 900 mm. As a result, it turns out that there are 2.34 m2 in one slab. Then the area of the room that is planned to be covered must simply be divided by 2.34 m2, and you will get the required number of panels.


Important point before starting MDF sheathing The preparation of the instrument also counts. Since the installation of wall panels is not particularly difficult, it is quite possible to do it yourself, without the help of specialists.
To get the job done quickly and efficiently, you need to have a basic set of tools on hand.

In addition to the above, you will also need the usual tools that everyone has in the house: a screwdriver, a knife, a hammer, drills and a marker.
Before sheathing the walls with MDF, it is necessary to determine how to fasten them. Decorative panels can be installed using glue or on the sheathing. Each of these methods is characterized by its own installation technology.
Before choosing, you should evaluate the condition of the surface, taking into account some nuances.

The installation of wall blocks on a frame is as follows: guides are attached to the surface, serving as the basis for installation, then MDF is fixed to a metal profile or block.
This technique has many advantages.


As for the disadvantages of such cladding, it significantly reduces the area of the room, and if you need to hang pieces of furniture or decorative elements, then it is worth considering that the structure will not withstand such loads.
Unlike the previous method, planting with glue does not have any significant disadvantages. MDF boards are attached directly to the wall; in this case, the connecting element is glue. To additionally secure the panels together, clamps are also used. Thanks to this finishing option, the area of the room is not reduced, installation is carried out quickly, without damaging the material with screws or nails. But if the surface of the cladding is damaged during operation, then it will be necessary to restore not just one fragment of the finish, but the entire wall.
When deciding on the choice of one method or another, it is worth taking into account not only the features of the room, but also calculating the costs of covering. For example, in some cases it is much more economical to putty the walls and not build a frame. For large rooms, of course, it is best to install lathing, since perfectly leveling their walls will be problematic.

MDF panels thanks to their operational characteristics And aesthetically pleasing have found wide application in finishing works. Wall panels can not only be used to decorate the ceilings of a corridor or hallway, but also to sheathe a doorway or window slopes in an original way. Furniture fittings and wall corners can also be easily made from the material at home. Since the product is easy to install, it is quite possible to do all the work yourself. Before attaching MDF, you should prepare the surface for finishing by cleaning it from the old coating and eliminating all defects.


Regardless of whether the cladding is planned on concrete, wood or brick, the base must be primed; this will protect the finish from the appearance of mold and mildew in the future.
For additional thermal insulation of window slopes, walls and doorways, it is recommended to lay insulating material; it will not only serve as a good insulator, but will also cope with the task of vapor and waterproofing.


To install panels on slopes, they can be fastened along or across, it all depends on the size of the slope. This finish, made from a combination of light and dark pieces of slabs, looks original. Installation of panels on walls and ceilings is carried out either using glue or using a pre-assembled frame. To do this, first attach the starting profile, and then the guides, along the length of which you need to correctly join the decorative parts. To make a beautiful corner, before installation you should trim the material, rounding its edges.
It is recommended to saw or cut panels using special tools for working with wood. The best option A jigsaw is considered suitable for this, but if you don’t have one at hand, a fine-toothed saw will do. Having decided on the direction of the MDF sheathing, the panels are measured and cut to the required length. In this case, it is necessary to cut off the tenon along the entire length of the first slab; if this is not done, then difficulties will arise when installing the corners.


When choosing a method for attaching MDF to the sheathing, you will first have to make a durable frame from metal profiles or wooden beams. It is worth paying attention to the fact that a wooden structure requires preliminary impregnation with antiseptic solutions that will protect it from rot and mold. If you plan to lay thermal insulation, then the thickness of the beams is chosen according to the thickness of the insulating material. For plating brick walls and rooms with high humidity, wooden frames are not recommended.
To wooden beams were not deformed during installation; it is worth choosing well-dried wood. The structure is fixed perpendicular to the direction of installation of the panels, leaving a small margin of 5 cm from the floor and 3 cm from the ceiling. First of all, fix the vertical elements, which are placed along the edges of the recesses, in the corners and next to the openings. The planks should be spaced 700 mm apart from each other. To fasten the structure, self-tapping screws or nails with a diameter of 4 to 6 mm are usually used.


For assembly metal structure UD racks and horizontal CD profiles are used. The sheathing pitch is similarly 600-700 mm.
The CD profile is inserted into the rack and everything is secured to the wall with self-tapping screws. Metal profiles can be cut with a special circular saw. If the ceiling is finished with panels, then the frame must be assembled only from horizontal elements, using additional fasteners.


After frame construction ready, start paneling. MDF slabs are fixed to each other using a tongue and groove lock, consisting of a recess and a ridge. The parts are attached to the wooden sheathing with small nails, and they are driven in obliquely with a hammer. To install the material on the metal profile, clamps are used, they are placed in the groove of the slab and secured with self-tapping screws.
When installed vertically, the MDF begins to be fixed from the corner, smoothly redirecting to the left. The first slab is attached to the beam with nails, and from the groove side the fixation is carried out with clamps. Then the ridge of the next slab is placed in the groove of the first. Last panel should be cut to length, leaving a small margin of 5 mm, and its ridge should be cut in half. It must be inserted into the groove of the previous panel and the free edge secured.


Pieces are used for sheathing slopes wall slabs. To beautifully close the skin, use special corners. They are placed on liquid nails or glue, decorating the edges near doors and windows. In addition, MDF is excellent for finishing ceiling surface, in this case, the panels are installed in a direction perpendicular to the base of the walls.
Construction market represented by a huge range of MDF panels. For finishing inside the house, a material with a painted and laminated surface is usually used. It can be used to cover both the surface of walls and ceilings, as well as doorways or an arch, which is pre-installed on a plasterboard frame. Depending on the area of application of wall panels, their installation is carried out in different ways.
The option of surface cladding using MDF panels is currently gaining popularity. The reason is that with their help you can quickly carry out facing work over a large area. An additional plus is that when working with them, the wall will not require additional finishing in the future. It is also worth noting that decorating walls with panels yourself is doubly economical.
An important advantage of the panels is that their installation is simple and understandable to everyone, and anyone can install them.
The easiest way to have a beautiful front lawn
Of course you saw perfect lawn in the cinema, on the alley, and perhaps on the neighbor’s lawn. Those who have ever tried to grow a green area on their site will no doubt say that it is a huge amount of work. The lawn requires careful planting, care, fertilization, and watering. However, only inexperienced gardeners think this way; professionals have long known about the innovative product - liquid lawn AquaGrazz.
MDF - fine faction From this faction are being manufactured wall panels for interior decoration. The manufacturing stages are as follows: wood shavings, fine in composition granules, are sent under a dry press. An important point is processing using high temperature and high pressure.
In order to bind the particles together and make the panel monolithic, special resins (usually urea) are added to it, which are modified with melamine.

An undoubted advantage in choosing MDF panels is that they belong to the class of highly environmentally friendly materials. According to the principle of installation and installation, use in home interior finishing using MDF panels is reminiscent of the process of working with lining. However, such panels are cheaper in price.
Installation is usually carried out in two ways - by mounting on a lathing, which acts as a frame, or by mounting on a wall using various adhesives or “liquid” nails.
Such compositions are used when installing wooden materials, as well as when sealing various holes and cracks, because their structure contains filler in the form of sawdust.
The main thing is to choose an adhesive composition that matches the color, since otherwise the areas of “grease” will stand out inharmoniously against the general background.
It should also be noted that MDF plates are made in a huge range of colors and tones and can have patterns of different relief structures. You can find imitation stone. All this suggests that such panels can be suitable for almost any interior. Their undeniable advantage is that during installation the panels can be combined in both vertical and horizontal positions.

It is worth noting that often, when the room seems not high enough, vertical arrangement panels on the wall will help to visually “grow” the finished wall. For tall but narrow rooms, all recommendations are exactly the opposite.
It is important to consider when choosing that such panels are produced different formats(length and width), so first of all we need to decide what result we want to see in the end.
For convenience and ease of finishing work, it is recommended to prepare and collect the tools necessary for the work in advance. They will speed up the installation of panels and make it quite easy. So, we need:

Installation of MDF panels on any surface is carried out in two ways - using adhesives and installing a frame.
Both installation options can easily be used for finishing private houses and simple residential apartments with MDF panels. When working with adhesive compositions, it is important to take into account one important nuance - the surface of the wall for cladding must be perfectly flat and smooth. In this case, it is recommended to first carry out the work using plasterboard or using plasters or putties.
When installing panels using adhesive compounds, only adhesive compounds or “liquid” nails and some fittings will serve as additional materials.
For cases where it is necessary to hide communications under MDF panels or insulation, it is better to use the option of installing lamellas on a frame base. In addition, such a frame can be made from any, even the most uneven surface ideal plane, which will become an important foundation for reliable MDF installations panels.
The frame itself can be assembled from bars (wooden) or profiles (metal). It should be noted that fastening the panels to wooden frame much easier than with metal. In the case of wood, regular nails or staples from a construction stapler will do. A metal frame will require self-tapping screws, which necessitates the use of an additional tool - a screwdriver.

When a frame is used, a gap is formed between the wall and the cladding; wires, pipes can be removed into it, or insulating materials can be laid. However, it should be understood that such gaps, dark and sometimes damp, are attractive to fungal colonies such as mold. So it is very important to dry the wall before the installation process, if it is wet, and additionally treat it with special protective compounds, in order to avoid the formation of fungi.
So, to build the frame we will need:

You can start preparing the surface only when it has been previously dried (of course, if such a measure is required and the wall in the room is damp). We have already emphasized earlier why this is important. The main thing is to never carry out facing work on top of a damp wall.
The process of preparing the walls itself consists of the following simple steps:

It is important to understand that it is better to carry out such work when using personal protective equipment, such as respirators or masks. Indeed, in case of unintentional inhalation of plaster particles or suspensions infected with fungus, you can get unpleasant consequences for good health.

It is important to install the frame correctly and correctly. First you need to decide how the frame elements will be installed - vertically or horizontally. For horizontal orientation, the guides are installed vertically, and vice versa for vertical orientation.
The frame is attached to a layer of insulation. You should choose a step between the guides of 5-6 centimeters. It is important to observe and control the evenness of the installation.
In order to determine the vertical (ideal), a plumb line is used. An ordinary level is suitable for determining horizontal lines. After marking it, it is not difficult to install our guides for future sheathing. It is important to consider that it is better to install the first guide in the corner of the room or along the floor area.

When the frame is ready, and the communications are installed and hidden properly, we begin the most important process - installation of the panels.
This work begins with the preparation of the panels themselves. With help measuring instruments A marking is made along which a cut is made using a jigsaw or an ordinary hacksaw.
It is important to remember that:

It is worth immediately noting that this option for installing panels is much simpler and easier than the first one, frame method fastenings
Particular attention should be paid to adhesive compositions. They must meet certain requirements. Among them:
“Liquid” nails, which can easily be found in any hardware store, ideally meet these requirements.
So, let's begin. Apply glue to the inner surface of the panel in a thin layer or in waves. After this, the panel is pressed tightly against the wall, torn off, left to stand for 5 minutes, and then pressed again to the required location. It will take half a minute to hold it in this position for secure fixation.

The finishing panel, if necessary, is measured and cut to fit right size. The last panel is fixed with a self-tapping screw.
At the end of the work, we install the fittings. We attach pre-prepared corners and baseboards at the joints of planes and at doorways.
Decorating walls with MDF panels yourself is good, but you should take into account the nuances.
Pros: ease of installation, variety of colors and textures, the ability to install communications when choosing a frame installation method, no additional finishing in the future, ease of maintenance, accessibility.

Minuses: the presence of protrusions and gaps; when choosing a frame, the formation of gaps between the wall and the lamella, which reduces the area of the room, and also provides the opportunity for the development of fungus and mold - if the wall is not carefully treated, insufficient mechanical strength, minimal moisture resistance.
Now that you are so familiar with features of MDF panels and the intricacies of their installation, all that remains is to make your choice of the most suitable lamellas for the design. Finishing MDF walls panels - a good choice for your home. Good luck! And let your home be beautiful and cozy.


