For people uninitiated in the nuances capital construction It is hardly known on the roof why the Mauerlat is needed, what kind of structure it is. And the question of how to make a Mauerlat on aerated concrete causes complete misunderstanding. In fact, it attaches simply. The main thing is to prepare all the components: reinforcement frame, fasteners, timber beams and competently carry out waterproofing and wood processing.
This structure is made of wood beams. Performs the function of additional support for the load from the roof, with further uniform distribution along the entire perimeter of the walls.
If we summarize all of the above, we come to the conclusion that the Mauerlat is responsible for two important tasks:
Mauerlat can be made not only from wooden beams, but also from metal channel or beams.
In this option, the rafter system also needs to be made of steel. But this option is used extremely rarely due to the high cost of the material and difficulties in installation.
The strength and reliability of the roof depends on how securely the Mauerlat is attached to the aerated concrete. Therefore, everything needs to be calculated correctly. The minimum cross-sectional dimensions of wood beams must be no less than 10×10 cm. experienced craftsmen and designers recommend using higher rates.

When using wooden logs for the mauerlat, one side should be hewn. This is necessary for a tight fit to the surface of the upper aerated concrete wall.
As for the type of wood, it is better to choose hardwood. Before installation, be sure to treat it with an antiseptic. Arrange the bars so that they evenly cover the entire top part walls Fasten adjacent parts with a straight lock and reinforce with nails.
The width of wooden beams is smaller than that of gas blocks, so they must be installed by moving them towards the inner edge, not reaching the end by 5 centimeters.
Ultimately, a solid structure with high levels of rigidity and reliable support for the rafter structure should be formed.
As already mentioned, the beams should be treated with antiseptics before installing the Mauerlat on aerated concrete. They will prevent putrefactive processes in wood. Take logs with a section of 100 by 100 mm, but it is better to choose stronger ones 150 by 150 mm. Wrap them with waterproofing material, for example, bitumen-polymer. Ruberoid is not used for these purposes.
Only high-quality materials can create a durable structure; there should be no knots in the logs. Special attention the moisture content of the wood deserves - it must meet the standard indicators. If wet material is used (meaning beams), then the anchor nut must be adjusted.
The nut should be tightened once a year for 5 years. This is necessary because in the first few years the wood is subject to intense shrinkage. And as the material dries, the nut must be tightened all the time. After 5 years, this procedure will have to be done less and less often. The Mauerlat is secured with special anchors with a nut and washer. They must have G- or T-shape with thread size M12 or M14.
According to European and international standards, the distance between two adjacent anchors should be no less and no more than 1-1.2 meters. This is especially true for earthquake-prone regions.
To complete this task, you need to ensure that the power plate is installed correctly and not securely fastened. There are two fastening technologies used by developers: with or without a reinforced belt.

When choosing aerated concrete for building walls, you need to understand that the frame of a house made from it will not cope with the weight of the roof placed on it. Construction reinforced belt will help her cope with this problem.
An armored belt is a reinforced concrete closed structure that envelops the building perimetrically (that is, around the entire building). Tasks put forward to him:
An armored belt is a kind of foundation intended for the roof of a building. Its dimensions are selected in accordance with the width of the walls and are approximately 25 cm. The outermost row should be laid out in blocks like English letter U. They will subsequently perform the task of formwork when pouring concrete.

It is extremely important that the Armopoyas is produced in a continuous monolithic structure.
The step-by-step technology for producing armored belts is as follows:
After completing the construction of the armored belt and removing the formwork, it will be possible to begin installing the Mauerlat.

This element and rafter system must consist of the same materials.
Before installing the Mauerlat on aerated concrete, you must remember to treat it with antiseptic substances. Then wrap it in plastic waterproofing material type: hydroisol, steklomastelastoizol.
The Mauerlat is fixed to the wall structure with studs, iron wire or anchors. If it is made of wood, then it can be secured with special metal brackets.
After this, it will be necessary to fasten the Mauerlat to the rafters. The connection is made by tapping, tapping or sawing down to no more than 25% of the thickness. It is fixed with bolts, self-tapping screws, special angles, and steel plates.
The construction of a reinforced concrete armored belt will be able to prevent unwanted punching in aerated concrete blocks. It will contribute to the uniform distribution of gravity on the house box and the influence of dynamic and static forces pressing on the walls.
The SNiP requirements state that installing a Mauerlat on an aerated concrete house without a reinforced belt is in principle unacceptable. This is allowed to be done only in rare cases. This can be explained by the fact that the aerated concrete structure is not able to cope with the spacer snow load, dynamic and wind. The armored belt provides significant protection against deformation. As an exception, the Mauerlat is allowed to be mounted on a building without an armored belt.
This construction option will speed up and reduce the cost of the construction process. But in this case, you should adhere to the following requirements:
It is very important before installing the Mauerlat on aerated concrete , accurately count the number of fasteners, as well as the distance between two adjacent fasteners.

You need to understand that the service life of the roof directly and largely depends on the strength and correct installation Mauerlat. And for this reason, errors, even seemingly insignificant ones, should not be allowed. This is the only way the roof will not cause deformation of the house, but will serve reliable protection from external and weather factors. This work should be entrusted to experienced developers and roofers.
We continue the traditional series of articles from professional builders. Today we will talk about how to make an armored belt for the roof of a house made of aerated concrete or foam block with your own hands.
My name is Rostislav, I am 37 years old, and I am a builder with twelve years of experience. I started at a construction site, as a helper, like everyone else. He worked according to the principle: “bring it, serve it, hold it and don’t interfere.” But time passed, I grew up - over the years and professionally, acquired a personal instrument, and began to work independently.

My first rule when performing any task is to carefully prepare the material and tools to achieve an excellent final result.
Today, gas or foam blocks have often been used in the construction of private houses and outbuildings. I agree that this material has good characteristics in terms of maintaining heat in the room and speed of installation, but there is one important feature:
– this material cannot withstand long-term point pressure, which is created by the load of the ceiling and the pressure of atmospheric precipitation on the building.
But there is a way out - this is the installation of an armored belt around the entire perimeter, including the partition walls, and now we will figure out how to do this correctly.

So, what do we need for work?
1. OSB board (thickness 10-12mm) quantity depends on the length of the reinforced belt being poured (divide the perimeter plus the length of all partitions by four)
2. Self-tapping screws, length 76mm, for wood, hardened
3. Self-tapping screws, length 40mm, hardened wood
4. Reinforced mesh, masonry. Cell size 50x50mm. Quantity square meters four times more than the number of OSB sheets.
5. Threaded rod. Diameter 10-12mm (the quantity is determined as follows: the number of ceiling beams is multiplied by the points of contact with the walls plus along the gable walls every meter and multiplied by 0.2)
6. Nuts that screw onto studs of the diameter you choose.
7. Washers size: the inner diameter is the diameter of the stud, and the outer one is 10-20mm larger. The more outside diameter, all the better. There will be a large plane of resistance to tearing.
8. Cement (at the rate of grade 400 -220 kg per 1 m3 of finished concrete mixture)
9. Crushed stone fraction 5-20mm (based on how much cubic meters you need concrete, so much crushed stone is needed)
10. River squeak (based on how many cubes of concrete are needed)
11. Plasticizer for concrete.
12. Pine slats 25x50mm
13. Plastic clamps, or knitting wire.
1.Hydraulic level
2. Roulette
3. Construction line
4. Pencil
5. Hacksaw, or electric circular saw, miter saw
6.Screwdriver
7. Grinder (angle grinder)
8.Concrete mixer
9. Scoop shovel and a couple of buckets
10. Trowel
11.Scaffolding or scaffolding
12. Personal protective equipment:
(glasses, gloves, shoes)

1. So where to start? And you always need to start by determining the size and height relative to the hydraulic level
For this we need a tape measure, paper, a pencil and a hydraulic level. Use a tape measure to measure the length of all internal partitions and the perimeter of the building, as well as diagonal dimensions (we need diagonal dimensions for the installation of wooden structures and further robots), and we transfer it all to paper in order to be guided by these data in the future. The next stage is shooting heights using a hydraulic level. The hydraulic level will help us give marks on the building that are located directly in the horizontal plane. This action is inconvenient to carry out on your own, so we work together. We take a pencil, put an arbitrary mark on the corner of the building, approximately at a height of 1.5 meters from the lower base and with the help of a hydraulic level and an assistant, transfer this mark to all the outer corners of the building, as well as inside the building in internal corners, we need this to build formwork in "horizon".

Learn more about how to make a water level and how to use it in.
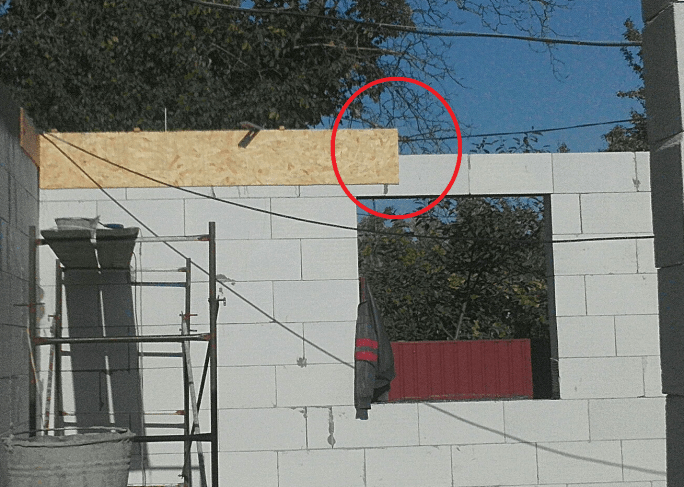
2. We decide on the height of the filling of the armored belt, in my case the filling height is 20 cm. It is quite enough, since the roof is not large and not complex. Based on this size, we cut the OSB board. The slab is cut 5-7cm wider than the height of the concrete pouring; in my case, I cut it 25-27cm wide. over the entire length of the sheet. Practice shows that the width of the armored belt should correspond to the width of the masonry, and the height, according to project documentation. The recommended height of the reinforced base is around 30 cm. The armored belt and the one laid on it Mauerlat should encircle the entire house.
3. At the outer corners of the perimeter of the building, in the last row of the Gas Block masonry, we install 25x50 slats vertically, so that they protrude by 30 cm. higher than the masonry itself. Using a tape measure, we transfer the height marks onto these slats (the same size from the hydraulic level mark, plus the height of concrete pouring). By the way, the slats are mounted using 76mm self-tapping screws. They twist very easily into the foam block, and if twisted at an angle to the horizontal, they hold up well. We stretch the fishing line along these marks; this will be our high-altitude beacon. The high-rise beacon gives us the height of the formwork installation, since our formwork is assembled, that is, it consists of individual components.
4. Installation of formwork. So, what we have: a cut OSB board and a high-altitude lighthouse. We begin to install the formwork. For this we need mounted scaffolding or scaffolding, a screwdriver and good helper. Since one person will exhibit OSB sheet so that the top edge is as close as possible to the fishing line and while your partner holds it, screw the 76 screw into the bottom of the OSB board (where it fits onto the block) but at an angle to the horizontal of approximately 45 degrees. It screws into the Gas Block easily, but when the self-tapping screw is screwed in at an angle, it gains more resistance to tearing off. Thus, we go around the entire outer perimeter, connecting the formwork together through a 25x50 lath, and twisting it together at the corner joints.

5. Once we have the formwork installed along the outer perimeter, we can safely begin marking and installing threaded studs for attaching the ceiling beams. To do this, we need to determine the pitch of the roof rafters. In my case, it was prepared for metal tiles, and design standards do not allow the rafter spacing to be more than 75 cm. Therefore, we take the pitched length and divide it by the number of spaces so that the value is in the range of 65-75 cm. In my situation, it turned out to be just ten beams, with a pitch of 72 cm. Therefore, on the sloped side of the building ( the pitched part of the building is the sections of the perimeter of the building where the rafters will be installed) on the installed external formwork with a pencil, according to our distance, we mark the places where the threaded rods will be installed, as well as in the places where the beam will rest on the internal partitions. It is worth noting that if the gable part of the roof is made of wooden structure, then it is also necessary to install a Mauerlat there, but the distance between the studs should be 80-100cm.
By the way, buildings from gable roofs according to pediments they are divided into two types: a pediment made of block or brick, or, as in my case, built on a pediment wooden frame made of slats, and covered with OSB board. In the first case, the Mauerlat is mounted on the armored belt only from the slope side, and in the second - along the entire perimeter.


6. Preparation and installation of fastening studs. So the studs. What are they needed for? The studs are used for quick and reliable connection mortar construction with wood. For installation of ceiling beams, studs with a diameter of at least 10 mm are used.

To do this, we take a pin, measure the height of our fill, add the height ceiling beam, add 5 cm to the nut-washer, and 5 cm to hammer into the foam block, and cut with a grinder. In my situation, I cut 45 cm (5 cm into the foam block, 20 cm into the fill, 15 cm into the beam, 5 cm into the nut, washer). We screw the nut to a distance of 5 cm, put the washer and hammer it into the middle of the foam block along the pre-marked places until it stops washers into the foam block and as vertically as possible. Additionally, on the stud at a distance where it will be poured with concrete, that is, if the concrete is poured 20 cm, then at a height of 15-18 cm, you can mount additional means of bonding with concrete, some kind of waste reinforcement or rod. As in the example shown in the photo.

7. So, when the studs are installed, we begin making the armored belt. For large foundation robots, reinforcement is used for reinforcement, but in our case, masonry reinforcement mesh with a cell size of 50x50mm is quite sufficient. If the width of the fill, as in my case, is 20cm, then we use a grinder to cut a mesh 60cm wide. In order for the mesh to be completely covered with concrete mortar, we reduced the height by 5cm per side. We take our workpiece and bend two sides of 15 cm each and the center to an angle of 90 degrees to form a parallelepiped with a side height of 15 cm. In places where the sides need to be connected, simply tie them together with knitting wire or plastic clamps. Afterwards, these blanks are laid on the foam block and connected to each other with wire or clamps. In places where studs are installed, the reinforced mesh is cut and tied to the studs. This will further secure the studs.

Unfortunately, there is no photograph of the reinforcement separately, but it can be seen in the left corner of the photo.
8. After completing the installation work, we install the inner part of the formwork - the one that will be inside the building. Just like the external one, we mount a high-rise fishing line, as described in the third paragraph of this article, and mount it with 76 self-tapping screws on a cut OSB board.
When the internal and external formwork is installed, it is necessary to secure them from the top. To do this, we take a 50x25mm strip and cut it to the width of the fill (plus 4cm) for better fixation.
From above, on the formwork, we screw the strip we cut from one side to OSB board, and maintaining the size of the width of the fill (a tape measure, or a cut out exact size template inserted into the middle of the formwork will help us with this), we screw the screws into the other part of the lath so as to fasten the two walls of the formwork through the lath. Such fasteners must be installed in increments of no more than 40cm. Be sure to control the rigidity of the structure. Installation is carried out with 40-gauge self-tapping screws.

9. If the formwork structure has been assembled and the rigidity and stability of the structure has been checked, you can begin filling the formwork with concrete. For this we need a concrete mixer, buckets and a good assistant.
It should be noted that the formwork should be filled with concrete gradually, slowly, but it is advisable to fill the entire perimeter in one day, since the concrete should set without gaps in time to avoid cracks at the joints.
The proportion of sand and crushed stone, according to the norm: one part cement, three parts crushed stone and three parts sand. When pouring, you can periodically tap the walls of the formwork with a hammer and tamp with some kind of pin, in order to maximally expel the air bubbles that arise during pouring. If this is not done, then after dismantling the formwork we will see that the concrete is poured porously and not monolithically, which threatens the loss of strength and service life of the reinforced belt.

GOST standards tell us that concrete grade 200 gains full strength after 21 days, provided that the temperature environment equal to +10 degrees. If the temperature is higher, the moisture from the prepared mixture evaporates faster and the cement does not have time to enter into chemical reaction, that is, the prepared concrete will not gain the required strength.

This is how it happened for me.
That's all our robots for installing armored belts under mansard roof private house completed. Following these simple tips, installing an armored belt will not be so complicated and incomprehensible. Write all questions and additions in the comments. I will be glad to hear your opinion.
Also another video on filling the armored belt from a third-party resource:
Any developer, planning to build a house from aerated concrete, is faced with the need to manufacture an armored belt (it is also called a seismic belt). The armored belt on aerated concrete is a monolithic reinforced concrete strip poured along the entire perimeter of the walls (between the first and second floors, etc.). This element is necessary to evenly distribute the load and connect the walls together. This reduces the risk of cracks due to uneven shrinkage of the building. The armored belt is also placed under the Mauerlat when installing the roof.

Maxim Pan User FORUMHOUSE, Moscow.
You cannot attach timber (mauerlat) directly to aerated concrete using studs. If this is done, then over time, under the influence of wind load, the fastenings will become loose. When installing attic floor armored belt on aerated concrete with wooden floor will redistribute the point load from the beam to the entire wall.

An illustrative example is a forum member with the nickname mad-max which comprehensively answers the question, when you need an armored belt in a house made of aerated concrete . He did not have time to fill the armored belt under the Mauerlat, and the house went into “winter.” Already during the cold weather, the arched openings under the windows in the house cracked exactly in the middle. At first the cracks were small - about 1-2 mm, but gradually they began to increase and for the most part opened up to 4-5 mm. As a result, after the winter, the forum member poured a 40x25 cm belt, into which he installed anchors under the Mauerlat before pouring the concrete solution. This solved the problem with increasing cracks.


mad-max User FORUMHOUSE
I would like to add to this that the foundation for my house is strip-monolithic, the soil is rocky, there was no movement of the foundation before I started building the house. I believe that the reason for the appearance of cracks was the lack of an armored belt under the Mauerlat.

An aerated concrete house, and especially a two-story house, needs an armored belt. When making it, you should remember this rule:
The main condition for the correct “operation” of the armored belt is its continuity, continuity and looping along the entire perimeter of the walls.


There are several options for constructing an armored belt in aerated concrete house. The production of an armored belt begins with the calculation of its cross-section and the choice of the type of formwork - removable or non-removable, as well as the “pie” of the entire structure.

Eyeonenow User FORUMHOUSE
I am building a house from aerated concrete 37.5 cm thick, with brick lining and a ventilated gap of 3.5 cm. I do not want to use special factory-made U-blocks for pouring the reinforced belt. I saw on our forum the following diagram when building a house, how to insulate an armored belt - on wall block installs a partition block 10 cm thick, then insulation (EPS) is applied, and it is installed from inside the house removable formwork. I also saw an option where the insulation is pressed close to brickwork. With this scheme, a belt of greater width is obtained.

To understand which option to choose, let’s turn to the experience of FORUMHOUSE experts.

44alex User FORUMHOUSE
I built a house from aerated concrete 40 cm thick. In my opinion, a ventilated gap of 3.5 cm between the wall and the cladding is not enough; it is optimal to leave a gap of 5 cm. If you look at the “pie” of the armored belt from the inside out, it was as follows:

Private and public construction requires the use of structural elements of varying complexity. When constructing houses from aerated concrete, a special element is used - Mauerlat. There is a special technology that describes fastening the Mauerlat to aerated concrete without an armored belt. This construction method significantly increases the reliability and service life of the future structure.
The technology for building houses from aerated concrete is being improved for objective reasons - in the materials market, the demand for aerated concrete blocks is growing every day. The peculiarities of constructing houses from this material allow for high-quality construction in the shortest possible time. A house built from cellular concrete has beneficial thermal insulation characteristics, and also has a relatively small structural mass.
Aerated concrete has a disadvantage associated with the difficulty of attaching structural elements to each other. The porous base of the walls is difficult to connect to the main frame, and builders have to look for additional solutions. Mauerlat is a structural element connecting the walls of a building and the roof. An armored belt made of reinforced concrete helps solve the problem, but some homeowners use the method of attaching the Mauerlat to aerated concrete without an armored belt.
The peculiarity of aerated concrete structures is that it is difficult for porous concrete to withstand the point pressure of pressing elements. Mauerlat represents an important structural element, performing the load function. Unlike the foundation, the Mauerlat carries the load exerted only by the roofing part of the building - the roof, the inside of the slope and the thermal insulation layers.
Working with a metal or wooden Mauerlat helps in redistributing pressure on the walls. Fastening the Mauerlat also facilitates installation work associated with the installation of rafter elements.
Work on installing the desired material can be performed using the following modules:
Section for wooden beam can be selected within the format of 10 cm*10 cm. If the roof has particularly large dimensions, it is recommended to use modules bigger size(10 cm*15 cm, 15 cm*15 cm, 15 cm*20 cm). There is a certain proportion in accordance with which the Mauerlat is fastened for work - the thickness of the material should be equal to 2 thicknesses of the rafter supports.
The production of a mauerlat from logs is possible, but does not justify the effort expended - the cross-section of the log is difficult to adjust to the configuration of the rafter components. The characteristics of the wood chosen for the job must also be of a high standard. The Mauerlat is fastened using wood, which is tested for wear resistance and absence of mechanical damage.
The best option is considered to be high-quality hardwood, treated with special compounds. It is also possible to use a metal profile for roof fastening work. Carrying out such work is accompanied by the use of a channel or I-beam impregnated with anti-corrosion substances.
A specialist installing a Mauerlat without an armored belt must carry out correct calculation main parameters. The following values are taken into account during operation:

There are various structural forms of the roof, but the most common is the gable roof. As an example, it is beneficial to make calculations for work on this type of roof. The volume of the Mauerlat is measured using the formula V=P*S, Where P– perimeter of the flooring, and S- section of timber or V= N/R, Where N is the mass of the beam, and R– wood density.
Fastening the Mauerlat to aerated concrete without an armored belt can be carried out in accordance with several technologies. Fastening works to aerated concrete blocks pass with the help of special elements.
This method is based on the use of chemical resins with adhesive properties. Liquid dowel or other chemical paste perfectly connects the porous surface of aerated concrete and metal profiles. In small buildings, corners can be fixed using ties, brackets and screws. Anchoring increases the level of protection of the structure.
Work with chemical compounds implies the following list of actions:

It is noted that corners strengthened in this way are distinguished by great durability and long service life (up to 50 years). It is prohibited to carry out welding work with fixed metal profiles, since chemical anchors are sensitive to high temperatures.
Construction studs are perfect for small-sized buildings, where the Mauerlat is fastened so that it serves as a reinforced belt.

Working with pins involves the following list of actions:
Using steel wire of a certain thickness, you can achieve a similar result in installation work. The use of this method involves the following sequence actions:

Supporting rafters on walls made of small blocks of porous concrete can be done using special reinforced beams - brackets. The brackets are made of metal with an anti-corrosion coating. Fixation occurs using wire ties, self-tapping screws, plates and perforated tape.
The need to create an armored belt under the Mauerlat when constructing a roof is not always obvious to novice builders. They often have the wrong idea about reinforced reinforcement of the base for the construction of a roof as something unnecessary and superfluous. However, the armored belt is an important intermediary that distributes the load of the roof onto the walls of the building. Let's consider why an armored belt under the roof is needed, what functions it performs and how to install it yourself.
In this article
Let's start looking at the reinforced roof base with its main functions.
The rafter legs transfer the load to the mauerlat, the main concentration of which is in the places where the rafters support the walls of the house. The task of the Mauerlat and armored belt is to transform this load, making it uniform. The Mauerlat is subject to two types of loads. This is the weight of the roof itself, the snow accumulated on it, the effect of gusts of wind on the roof and other natural phenomena.

Another load is associated with the bursting of the building walls by the rafters. As the weight of the roof increases, it increases significantly. Modern materials for the construction of buildings, such as expanded clay concrete, aerated concrete, with a number of positive characteristics are not able to withstand such a bursting load. Before installing the Mauerlat on them, it is imperative to create a reinforced belt.
Brick walls are more resistant to point loads, so to install the Mauerlat on them, it is enough to use anchors or embedded parts. However, experts recommend the use of an armored belt for brick walls, if the building is being erected in an earthquake-prone region.
The most important and main task of the Mauerlat is to firmly attach the roof to the house. Thus, the Mauerlat itself must be securely mounted to the building. 
The main tasks of a reinforced roof base can be reduced to the following points:

The process of reinforcing the base under the Mauerlat begins with planning and calculations. It is necessary to calculate the dimensions of the armored belt. According to building standards, it should be equal to the width of the wall, and not less than 25 cm. The recommended height of the reinforced base is around 30 cm. The armored belt and the mauerlat laid on it should encircle the entire house.
If the walls are built from aerated concrete, then the top row is made of stone in the shape of the letter U, which creates the formwork. 
It is necessary to lay reinforcing elements in it and fill the entire structure with cement mortar. Before the actual start construction work it is also necessary to prepare the necessary tools and Construction Materials

Installation technology
Creating formwork and laying reinforcement The first stage is the construction of formwork. If these are not available, then the outer part of the formwork is created from sawn 100 mm blocks, and the inner part from boards. Installation is carried out in strict compliance with the horizontal level.
A frame made of reinforcement is laid in the formwork. Its longitudinal part is formed from 4 reinforcement rods with a diameter of 12 mm. Transverse fastenings are made from rods of 8 mm diameter, maintaining a pitch of no more than 25 cm. In projection, the frame looks like a square or rectangle. The frame parts are mounted with an overlap of up to 20 cm. The joints are connected with knitting wire. In solution, such a reinforced frame exists as a monolithic one.

Laying the frame requires compliance with certain rules:
An important part of the work is strengthening the formwork frame. If this is not done, then it will collapse from the weight of the concrete.

Installation of fasteners for the Mauerlat
After working with the formwork and laying the reinforcement, you can begin installing fasteners for the Mauerlat. We recommend using threaded rods. It is convenient to purchase studs with a diameter of 12 mm. The length of the studs is calculated taking into account the fact that their bottom is attached to the frame, and the top protrudes above the Mauerlat by 2-2.5 cm.

Pouring with cement mortar The main feature of the reinforced base for the Mauerlat is its strength. It can only be achieved by pouring concrete mortar
at once. To create a concrete mixture, concrete of at least M200 is used. The best mixture
3 parts of washed sand and the same amount of crushed stone.
The use of plasticizers will help increase the strength and speed of hardening of the mixture.
Since creating an armored belt requires a lot of mixture at once, it is advisable to use a concrete mixer and a special pump to supply the solution. In the absence of equipment, the help of several people will be required to prepare and continuously supply the finished mixture. After pouring concrete into the formwork, it is important to expel all air from any possible air pockets. For this it can be used special device

Removing the formwork from the armored belt is possible as soon as the concrete has hardened sufficiently, and installation on the Mauerlat structure can begin no earlier than 7-10 days after pouring the armored belt.
Before laying, the Mauerlat parts must be specially prepared:

Laying the Mauerlat is preceded by covering the reinforced base with a layer roll waterproofing As a rule, roofing material is used for these purposes.
The Mauerlat is secured with a large washer and nut; locknuts are used for security. After tightening all the fasteners, the remaining tops of the studs are cut off with a grinder.
A reinforced base for the Mauerlat is more of a necessity than a luxury. Roof structure has a rather large impact on the walls of the house, which, although distributed evenly thanks to the Mauerlat, can negatively affect the strength of the entire building.
The creation of an armored belt is necessary in buildings made of gas and expanded clay concrete due to the fragility of these materials, in areas with high seismic activity. It is also advisable to strengthen the walls under the Mauerlat when creating heavy roofing structures.
Reinforcing the upper part of the walls is not a difficult job requiring the involvement of specialists. If you follow a number of rules and involve assistants, it can be done on your own.


