To avoid being in difficult situation When leaving home, you should take care of a permanent place to store your keys. For this purpose, most people use a key holder with a sufficient number of places. By placing it in convenient location, it’s difficult to forget your keys when leaving for work or for a walk. When you return, you can quickly secure the ligament in its designated place. If you make a wall key holder with your own hands, it will definitely become stylish element. You just need to show your imagination and carefully read the master class on making a specific model.
Read in the article
Having decided to make a wall-mounted decorative key holder on your own, you should decide on the size and design. Numerous photos presented by the authors are so useful device, will allow you to find a suitable idea for subsequent implementation. You just need to decide which model deserves attention.

Can be used to make key holders various materials. Depending on the stylistic design corridor or preference is given to metal, wood, plastic, leather, their combination, as well as a number of other materials. The shape and design of the product is selected individually.

Wall-mounted key holders for the home have Beautiful design, and therefore can become a stylish element. You just need to show your creativity and come up with interesting shape and choose non-standard design.

Most often, the wall key holder is made open. In this case, you can quickly place the key in the designated place. Closed models require a special door that must be opened before taking or hanging the key. On the one hand, you don’t have to worry about accidentally falling the ligament. On the other hand, you will have to spend a little time opening/closing the door.


The functional purpose of products can be broader than simply storing keys. Wall key holder with a clock will allow you to control the time. When you are late for work, you can appreciate this opportunity. You don't have to waste precious minutes constantly checking the remaining time.

Product size may also vary. It all depends on their purpose. Key holders can be:
The purpose of the product affects its dimensions. As a rule, wall key holders are large, and pocket key holders are small. This allows the latter to be carried not only in a purse, but also in a trouser pocket, reducing the risk of rubbing the fabric.

Various materials can be used to make all types of products. Each option deserves special attention during the selection process. It is worth studying the features of each material separately, so that later you can make right choice.

Do-it-yourself wall-mounted wooden key holder is made from wooden elements, connected by means of nails and screws, as well as hooks. The most simple option It can be a wooden board of small width into which a certain number of hooks are screwed. The manufacture of such a product requires a minimum of time. Make beautiful product possible even if you have no experience in carpentry.

If you cannot make the product yourself, purchasing a wall-mounted wooden key holder can be the optimal solution. You can always pick up best option for a specific one, choosing an open model of an interesting shape.
Metal products are highly durable and have large capacity. They are in demand in offices, schools, and business centers. In residential buildings, fixtures can add solidity and make the interior unique. They look especially advantageous in ones decorated in the Techno style, or.

Making a beautiful metal product on your own is quite difficult. The lack of special equipment will not allow the formation of a strong connection individual elements. It is best to buy a metal wall-mounted key holder in an online store. Here the price is usually lower than in regular stores, and the assortment is larger.
Metal products have a number of advantages. They:
Good for cutting. It allows you to create a product of any shape and size. It is enough to use it to become the owner of a stylish and functional product.
The advantages of plywood products include:
You can make a wall key holder with your own hands at the same time as key rings. They can be used instead of hooks. It is enough to align the keychain with the groove prepared for it.

To make such a product you should:
To ensure that the finished product holds its shape well, you should use thick cardboard for its manufacture. It is not necessary to purchase it specifically. You can use a box of cookies or any other product. This will significantly reduce the cost of making a key holder.
The photo will help you understand how to make a wall-mounted key holder with your own hands from a box. Based on the images presented, you can develop a sketch of your own product. It will help you understand what materials will be required to make the product. In addition to the cardboard itself, it is worth preparing hooks and materials that will be needed for decoration. Considering the low resistance of cardboard to mechanical impact, plywood overlays can be provided.

Combined designs, in the manufacture of which different materials are used, are somewhat popular. Plastic products are popular. They can be used in any conditions. When making wall-mounted key holders with your own hands, photos on the Internet will come in handy, allowing you to choose the appropriate design.

The sequence of work will depend on the purpose, type of product, material used, as well as the desired design. You should work carefully, carefully completing each step. Special attention should be paid to the design of the product. The decoupage technique will allow you to form beautiful drawing on the surface even in the absence of specialized education.
If the product is planned to be carried in a purse or pocket, its size should be relatively small. You should focus on the dimensions of the big key, which is in the bundle. The material from which the key holder will be made must be durable and soft at the same time. Most often, preference is given to natural or artificial leather.

Do-it-yourself pocket key holders are made in the following sequence:

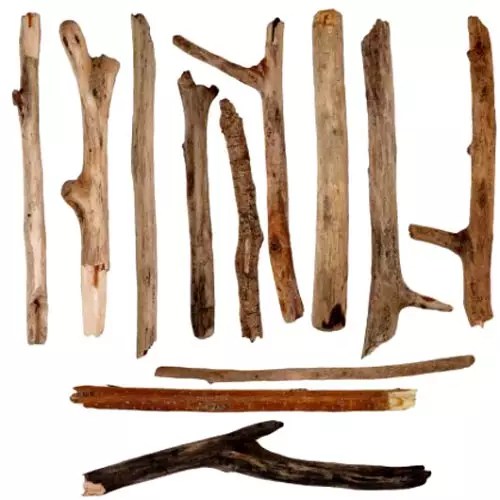
You can make a wall-mounted key holder with your own hands in different ways. One option would be to use a branch of any tree. Preference should be given to oak, larch or other wood. It is advisable to choose a workpiece in the original form. The work is performed in the following sequence:
| Photo | Description |
 | Use sandpaper to sand the wood. It is advisable to completely get rid of the bark, as it can cause insects. |
 | We drill the required number of holes in the piece of wood that will be used to attach hooks and fix the finished product to the wall. The diameter of the hole is selected smaller than the diameter of the hook thread. |
 | Using stain, the finished product is given the desired tone. After the composition has dried, the raised fibers are removed from the tinted surface using fine sandpaper. |
 | The surface is coated with varnish, which gives the product a characteristic shine. Depending on the desired result, preference can be given to a matte or glossy composition. The choice will depend on the desired shine. We attach the key holder to the wall and screw in the hooks. |
A housekeeper for the hallway with your own hands made of wood will look beautiful in or. For a room decorated in a modern style, this option may not be the best choice. Various designs applied by electric burning can be used as decoration. Other options are also possible. For example, drawing a picture.
You can decorate a wall-mounted key holder with your own hands using the decoupage technique as follows:
 | The table on which the work will be performed is being prepared. The tabletop can be covered with old oilcloth or a standard garbage bag. Prepare a blank for the key holder to be decorated, white acrylic paint, sponge. |
 | We dip the sponge into the paint and use a blotting motion to paint the workpiece. Using a sponge instead of a brush allows you to add a unique texture to the surface. If there are unpainted areas, you can use a brush. As a rule, the area where the hooks are attached is painted in this way. |
 | Let the workpiece dry. The paint should not remain on your hands. It takes about an hour for the painted surface to dry completely. Apply a second layer and let the product dry for two hours. If the formed layer turns out to be heterogeneous, the base is visible in some places - another layer of acrylic paint should be applied. |
 | Cooking adhesive composition, consisting of an equal amount of water and PVA glue. With its help, the napkin will stick to the base. |
 | We are preparing a napkin. If it is three-layered, separate it upper layer. The rest will not be needed for work. Extreme care should be taken not to damage the decor. |
 | Using a fan-shaped brush, apply the adhesive composition to the key holder. Carefully glue the napkin in the direction from the middle. Carefully tear off the excess. Apply an additional layer of glue along the edges. Leave until completely dry. |
 | Apply a layer of acrylic varnish using a brush. Let the layer dry. To ensure a sufficient level of protection for the formed decor, a minimum of five layers should be applied varnished coating. This will allow you to securely fix the pattern on the surface and give the surface a characteristic shine. To give clarity to the formed contour, black can be applied to the edges of the product. acrylic paint. After complete drying, any irregularities on the surface of the product can be removed using sandpaper, and then several layers of varnish can be reapplied. |
Article
How to ruin your mood without leaving home? It's very simple, just forget where you put the keys! It’s especially offensive to be late for an important meeting because of such a trifle.
Keep your keys in one place so as not to waste time and nerves looking for them at the right time.
If you are tired of wasting time looking for the keys to your apartment, car, office, garage, basement, there is a simple solution that will allow you to forget about this problem once and for all.When you have a key holder hanging in your hallway, your home is more orderly.

Tested: the sight of empty hooks is the best reminder that you need to look right now, and not just before leaving.
A wall-mounted key holder will not only become a permanent meeting place for all your keys, but will also decorate the hallway: there are many design options for this essential item in every home.You don’t have to look for the key holder of your dreams in the store: you can make it yourself! In this article there are several available master classes in which you will find ideas for making it.

You will have to try a little, but the result will meet your expectations.

“Keepers of the keys” are very diverse. You can choose them to suit a variety of interiors and hallway styles.
How to make a key holder for your home? Very simple! We have selected design solutions, thanks to which you don’t have to spend money on expensive materials: almost every apartment has everything you need for work.
Materials and tools:

To realize the most daring ideas, you need only a few materials and tools.
Do you want your key holder in the hallway to look stylish? This master class describes in a simple and accessible way everything that is required for this.

A few simple steps and you can hang it on the wall.
What you will need:
A key holder made from sawn wood is a suitable option for those who like to work with wood. You can use cut wood of any species, but it is better if it is pine.

Its wood is easy to process and has a beautiful pattern.

This master class is for those who often spend time outdoors and simply adore eco-style in the interior! You don’t need a lot of materials, the main thing is to find a suitable branch.

This key holder is sure to surprise your guests!
What you will need:
There are no two identical branches, which means your key holder will certainly be special!

Making such a key hanger is easy.

You can be proud of the results of your work: the key holder is ready.
Do you have at home old frame from a painting or photograph? Don’t rush to throw it away: a framed key holder is a great way to decorate a wall and define permanent place for keys!

This master class describes not only how to make a key holder, but also how to decorate it.
What you will need:

Necessary materials for work.
To get started, we need to know the internal dimensions of the frame. Using a jigsaw, we cut out a rectangle of the required size from a piece of plywood.We take a thin drill (with a diameter 1-2 mm smaller than the screws on which we will attach the fittings) and drill all the necessary holes.We cover the plywood with acrylic primer or white paint. When the soil is dry, sand it sandpaper medium grit (No. 600-800) and wipe with a damp cloth.

For the frame we use paint that matches the color.
Now we will decorate our product using the decoupage technique. Place the image face down on a stationery file and moisten it well with water, smoothing out the bubbles formed on the surface from the center to the edges.Apply glue to the primed plywood base and immediately attach a file with a decoupage card. Again, smooth the card from the center to the edges (it is convenient to use a pressure roller). The file can now be removed.

If there are small folds left somewhere, the pattern can be smoothed out with wet (!) fingers. Leave to dry for 2 hours.
Now you can tint the frame with diluted acrylic paint. Apply acrylic varnish with a synthetic brush.We insert the plywood into the frame, screw in the hangers and hooks.

If you have a lot of keys, this key holder will keep them organized.
Additionally, you can hang tags with numbers. And to make it easier to navigate, just stick signs under each of the keys with the inscriptions “From the basement”, “From the dacha”, etc.
Do you have 6-10mm thick plywood or a piece of chipboard? Do you have any shelves left over from an old bedside table? Arm yourself with a jigsaw, and you will have an exclusive wall-mounted key holder made from materials you never even thought you could use!

It is much more aesthetically pleasing when there is an original item in the hallway.
What you will need:
We find a suitable picture on the Internet, set the required dimensions and print it out. Simple generalized shapes look impressive: a fish, a key, a leaf, the outline of a flying bird, a cat...

It would be great for budding designers to try their hand at creating open key holders.
The pentagon easily turns into a key house. Even an ordinary circle can be played up if, by adding a few details, you build from it, for example, a similar hot air balloon. We cut out the shape along the contour and trace the resulting pattern with chalk or a simple pencil.Now you will need a jigsaw.

Carefully, slowly, cut out the selected shape along the contour.
It happens that chips form on plywood when working with this technique, especially if the plywood is not in its first youth. It is within our power to make the surface and even the ends of the key holder smooth. We arm ourselves with a spatula or palette knife and apply wood putty to problem areas. We wait until it dries completely.

We sand with sandpaper, first medium and then fine grit, focusing Special attention ends.
Using a drill, we make recesses for the hangers and drill holes for the screws that will hold the hooks.

Turn on your imagination at full capacity and create!
The key holder can be decorated with your own hands using the decoupage technique, as described in the previous master class (in this case, we will additionally need glue and a suitable design).

All that remains is to screw the fittings and hang it on the wall.
How else can you make a key holder? If you think that the best place for your keys is in your pocket, our master class is for you.

A key holder made using the technique described will not require much effort.
What you will need:

You decide for yourself what materials to use and how to decorate the key holder.
The more keys you have, the larger the pattern should be. Exactly according to the pattern, we cut out all the details from leather and suede. Connectingdetails of the outer part and lining.

To make the product look neat, trim the edges with scissors.
All that remains is to unscrew our key holder and admire the result. We attachcarbine - and a leather key holder in your pocket!

Now, no matter how many keys you have, they are all in one keychain.
Your key holder is almost ready. It's time to add some more charm to her! Shabby chic or Provence, cyberpunk or country, ethnic style or retro, painted or embossed... Only you can decide what technique and style the key holder will be decorated in.

This can be done using available materials, so we are collecting ideas.
If your old clock is broken, you can use a few gears, 5-6 unnecessary keys and a little glue - and your steampunk key holder will already decorate the hallway! If you're into decoupage, you might have some craquelure varnish and a waxy patina.

This is enough to give the product the appearance of an antique item: you get a key holder in a retro style.
A stencil and putty - and the key holder is covered with a three-dimensional pattern. Do you have small nails and threads? Take a hammer, draw a few lines on the board, hammer in nails and wrap them with thread - your panel key holder will be super stylish! If you still have old forks or spoons, bend them and nail them to a wooden base - the key holder is ready to take its place on the wall.

Ideas are everywhere, you just have to look around!
Scraps of twine, buttons, chains, beads, castings from plaster or self-hardening plastic, cardboard cuttings, ice cream sticks, fragments ceramic tiles- any little thing that lies idle at home can become the final touch to something that you will be proud of.

The time you could have spent looking for keys will now be put to better use!
The comfort in the house is “assembled” from little things. It is the small details that give a home its originality and coziness, making living much more pleasant and comfortable. One of these small things is a wall key holder. If there is nowhere to put the keys, then you have to look for them for a long time. It ruins your nerves and makes you nervous. A key holder is far from a complicated thing; it is easy to make with your own hands. By the way, a homemade key holder can be an excellent gift.
As you probably understand, there is no strict or official classification. But the whole variety of key holders can be divided into several categories or types. Depending on the location or method of use, there are wall-mounted and pocket key holders.
Pocket ones are a case made of leather, fabric or other similar materials. This case has loops (metal or made of durable cord) to which the keys are attached. Pocket key holders are needed more for convenience and safety of pockets or bags: metal keys can easily tear the thin lining fabric. The second function is to have all the keys in one place. It’s easier to look for them even in a woman’s bag.
Key holders for pockets and bags are one of the profitable and necessary gifts
Wall mounted key hangers can be open or closed. Closed - small boxes with a hinged door with hooks stuffed inside. Doors can also be hinged or lifting. Closed key holders are suitable for keys that are rarely used. Constantly opening and closing the door is not very convenient.

Wall key holder closed type can be of different shapes... at least make it round if you want))
Wall-mounted open key holders are more common and can have a very diverse appearance. The most famous and simple one is a board with small hooks. Any hooks: furniture hooks, nails or screws, pieces of thick copper wire, wooden knots. You can use old forks, furniture handles, and the same old keys bent into a hook. In general, your imagination is not limited; you can secure anything that the key ring fits on. And you don't have to use everything the same. The combination can be very interesting.

Much simpler... but it has its own shine
Wall-mounted key holders are also made from various, sometimes unexpected things or materials, but the most common are wooden or sheet material type of plywood, etc. Wood is especially often used to make key holders with your own hands. It is easier to work with wood or plywood and the result is more or less guaranteed, even if you are doing something yourself for the first time. Make a wall key holder with your own hands - good experience for beginners.
If you decide to make a key holder, it is better to start with something not too complicated. First, decide on the place where you plan to hang the product. This will make it easier and faster to choose a model - long and narrow or closer in shape to a square, circle, etc. Then it's a matter of technique. Most of the models are quite simple, even if you are doing something with your own hands for the first time.

As we have already said, wall-mounted wooden key holders are one of the most common options for DIYers. Now you’ll understand why... Probably, it’s not a problem for anyone to find a few planks. Planks of any format and thickness are suitable. You can use long thin strips - 20-30 mm wide, medium ones - 40-70 mm or even wide. They can be connected to each other, folding them into the shape you need/like. Three samples in the photo below. Once you decide on the shape, you can begin processing.

Processing the wood is also not a problem. You can use different methods. If you want something classic and strict, take sandpaper or a sanding machine and sand the surface until smooth. Next, you can cover it with paint, oil, stain with or without varnish. All this gives different types of surface, and therefore looks different.

If you want a more informal look - a loft or something like that, you can take a wire brush (you can use a drill attachment) and remove some of the soft fibers. A clear wood grain will appear. This is quick and easy to do with pine. You just need to find a board with an interesting design. Next, you can again go through wood oil, stain, varnish on water based With coloring pigment. They all give a different effect, but the protruding parts are painted worse and the wood shows through. The soft part turns out darker. As a result, the wood grain appears more clearly.
Processing gives approximately the same effect, but more “harsh” blowtorch. The soft fibers burn and the structure becomes clearer. But here you have to be careful not to overheat. It will no longer be possible to restore...
A wall-mounted key holder just for keys is not very practical. We usually don’t have enough ligaments to fill a dozen hooks. Therefore, combined models often appear - with a small shelf for small things, which also have a place not far from the door.

Sizes and formats, as you can see, are different. Difficulty level too. Take your pick. You can make an L- or T-shaped structure and attach hooks at the top or bottom.
There is a lot in the photo interesting idea— a magnetic key holder without hooks (on the left in the photo above). There are small magnets glued into the bottom of the shelf that attract keys. It’s convenient to use - you don’t have to “aim”, everything happens very quickly. Magnets - if they are the same and look “civilized”, they can be glued to front surface, if the sizes are different, it is better to make recesses according to the shape. The magnet itself should protrude slightly above the surface - 1-2 mm. This is enough to find it by touch (if necessary).
In some ways, plywood is easier to work with than wood. The surface has already been treated, all you need to do is cut it to shape and run sandpaper along the edge. Then paint, and you can proceed to the final step - attaching the hooks.

What's great about plywood key holders is that you can cut out any shape. Any shape, style. For key holders, images of keys are often used, but it can also be a dog, a bird, a mouse... whatever.
If you have a picture frame or can make one, it would also make a very nice wall key holder. On the reverse side you need to secure some kind of base, for example, a piece of fiberboard or hardboard. It is more convenient to fasten with staples from a construction stapler. As a last resort, use all-purpose glue.

Inside the frame, the surface can be painted, a picture can be pasted, plain paper, a piece of wallpaper... Whatever you want or come up with. The hooks can be attached to the frame or to the inside - again, as you wish. The point is their type and the load that is planned.
You won’t believe it, but there is a wall-mounted key holder without hooks or magnets. It is usually made from natural wood, since this material is the easiest to implement the idea. After all, you can not hang the keys by the ring, but stick them into something. For example, into a gap. All that remains is to make such gaps, and this is not at all difficult.

Moreover, as you can see, the cuts can be either horizontal or at an angle. They can be done using, for example, milling machine. This is the most accurate and safe way. You can also use circular saw. Even a regular saw. It is only important to stop in time and then process the cut well.
If there are old non-working appliances in the pantry that have panels with sockets into which plugs were once inserted, you have a chance to make an exclusive key holder. Carefully cut out this panel and insert the plugs with key rings into the sockets. All is ready. Can be hung on the wall.

It works just as well using the headstock of a guitar/violin/cello or any other stringed instrument. You can use pegs, you can add hooks. By the way, no one bothers you to make an imitation if it’s a shame to spoil the instrument. This could make it even more interesting.
Hooks can be made from the most different materials. For the classics, you can start by going to a retail store furniture fittings. There's plenty to choose from. There are furniture hooks, overhead hooks that are attached to the surface.

Hooks can also be attached to plywood, but to do this they must be glued. The main thing is to find a suitable glue with good adhesion to wood and the plastic or metal from which the selected hooks are made.

There are different kinds/types of self-tapping screws/screws with hooks at the ends. They need to be screwed into the board, so this is not an option for plywood.
There are also picture hooks (pictured below). They are made of plastic and have several metal pins in the body. These pins can be driven in with a hammer and even penetrate concrete without any problems. The only disadvantage of this option is the considerable price. And so, they look good and hold up well.

It's just standard options hooks In general, it can be made from knots, old keys, forks, wire... anything that has a small thickness and a suitable shape, or which can be given this shape.
To make a wall-mounted key holder, the following materials were needed:
Tools: saw, jigsaw, stapler with staples, drill and screwdriver. Well, and a tape measure with a pencil. This is the first thing we did with our own hands, so there are a lot of mistakes.

First of all, the bars were cut to fit the frame. They were connected using staples from a stapler. The result is a frame for the part that is hung on the wall. A piece of fiberboard was cut to size and also attached to the frame with staples.

There are two here best solutions. The first is to connect the bars by sawing them at 45°. It looks much better, although it is more difficult to implement. If you are not sure that you will be able to cut it smoothly, you can do it as in the photo. But it is better to fasten the bars with self-tapping screws. And this is clear. Let there not be a heavy load on the key holder, and fiberboard gives rigidity to the frame, but it is more secure to secure the bars with self-tapping screws.
If the connection is as in the photo, screws - two pieces for each joint - are screwed from above, perpendicular to the top board. To make the screw go easier, holes are pre-drilled. The diameter of the drill is 1-2 mm less than the diameter of the screw.
From the same bars we saw off two sections - according to the internal size of the box. We put them in the case and secure them on the back side with brackets. Let's take it furniture hinges, mark their position on the body, mark the holes for fasteners. We make holes with a drill, screw on the hinges and place a furniture magnet to fix the door closed.

There is also something to be done “more correctly” here. It is better to secure the planks through the walls of the frame with the same self-tapping screws. To prevent them from moving, they can be fixed with staples, but then it is better to screw in two self-tapping screws on each side. To prevent the caps from sticking out, select a drill whose diameter is slightly larger than the diameter of the screw cap. Make a hole for the self-tapping screw (the drill is 1 mm smaller than the diameter of the screw), then make small recesses with a large diameter so that the head can be hidden.
Next we design the door. We cut a piece from the same fiberboard suitable size and fasten with staples. We drill a through hole on one side and install the handle. On the other, we mark where the hinges need to be secured, unscrew them, attach the mating parts, and mark the place for installing the fasteners. Having made the holes, we put the hinges in place, connecting the two parts.

As usual, description best option. As you can see, there is a decent gap between the door and the body. This is inevitable when installing hinges this way. To avoid it, trace the loop around the perimeter with a sharp pencil (it’s better to scratch it with a knife blade), then use a chisel to remove a certain amount of wood - the thickness of the loop plate. Its surface should be flush with the frame. A similar operation is performed with the counterpart. A hinge installed this way will not create a gap, although more work is required.

In general, not bad for a first experience. But to make the wall-mounted key holder look more presentable, it is advisable to trim it. Finishing- this is a matter of taste, but it needs to be at least polished. If not, you can do this with sandpaper attached to a block. To begin with, take a medium grain, then finer ones.

Making a wall-mounted key holder does not necessarily have to be long and arduous. And no one said that non-standard materials cannot be used. As always, in needlework, everything is possible, sometimes even what is prohibited. A few ideas that may please you with their simplicity and unusualness.
The first number is the use of connectors and suitable plugs. We make key rings from the plugs, and screw the “waste” connectors near the front door. All in all - about twenty minutes.

Connectors and plugs - and almost nothing needs to be done
An ordinary stick can also be turned into a key holder. Make hooks from aluminum wires, wrap them around a stick, decorate it with colored twine, and paint it with paints. Fixing it to the wall is also not a problem - the rope is tied at both ends and clings to a nail or hook.

Throwing away wine corks- unheard of waste. They make a very interesting key holder. The corks are glued together, and then screws with hooks are screwed into them. Stylish and unusual, minimum time and cost.

If you just have a piece of good wood, you can polish it and coat it in several layers of wood oil with pigment. It's already turning out beautiful. Finding or making small hooks is not a problem, and the board itself can be decorated with something.

The photo above is a stylized key, but it could be anything. Some interesting thing that resonates with the interior or reflects your hobbies. At least glue a couple of magnets you brought from your travels. It’s already unfashionable to hang them on refrigerators, but here they will be just right.

If you cut a tennis ball about halfway, it will hold perfectly small items. From several of these “holders” you can make a key holder in a sports house. The second option is in the picture on the right. If you can secure the balls to the rod (with glue, for example), inserting small hooks is not a problem. The problem is that they will most likely spin. To prevent this from happening, you can pour a compound inside the ball, which will become hard after drying/polymerizing. The first thing that comes to mind is tile adhesive. You just have to fill it in carefully. If it gets on the surface of the ball and hardens, you won’t be able to wash it off.

If there are a lot of keys, you can make a “multi-page”. This option is suitable for hotels, holiday homes


If keys are more expensive than money... there are key holders with a combination lock


With a separate “built-in” keychain for each family member

The main thing is not to confuse it with a regular outlet.

If you master the inlay technique, you can turn even rot in wood into advantages. In fact, everything is not difficult - place stones/pieces of ceramics on the cleaned voids and fill everything with epoxy glue

We will send the material to you by e-mail
Every apartment should be in order, and all things should be in their places, this also applies to keys. Every person has a bundle from their home, garage or office. In order to keep the item always at hand, a small but very important accessory was invented at one time - a wall-mounted key holder. Making it with your own hands is as easy as shelling pears, you just need to show a little imagination and follow the recommendations of our review.
The most original ideas for your home
In general, key houses can be divided into two main categories: open (metal, wood, leather) and closed models (used for careful or strict storage).Open wall key holders are lightweight design with a holder, which simply complements the overall design of the apartment.
Closed key holders are the most presentable; they look like a small “house” for keys.

To make a key holder for the hallway with your own hands, we will need:
Do-it-yourself decoupage of a wall-mounted key holder, the first stage of work:
| Photo | Description |
|---|---|
 Preparing the surface Preparing the surface | First we prime wooden house two layers, then plaster. |
 Cutting out the image Cutting out the image | Cut out the desired image from a pre-prepared napkin. |
 Place the file face down Place the file face down | It is imperative to separate the layer where the pattern is depicted and apply the adhesive composition. Then we place the image on the file with the pattern down. Spread the resulting result with glue on top. |
 Place the image and apply varnish Place the image and apply varnish | After this, we pick up the stationery file and attach it to our house. We place the image with glue applied and go over the file with a roller. After all the work, carefully remove the file and let the product dry completely. Paint over the borders light color and wait until our key holder is completely dry. After this, apply several layers of matte varnish. |
At the second stage, we decorate the wall decoupage of the key holder with our own hands. We will need a template brickwork and structural paste for further actions.

First you need to glue the roof and, using a palette knife, apply a layer of paste, which gives structure.After drying, apply glitter and a silver tint of paint. Let it dry again, then the house is varnished, dried and the fasteners for the keys are installed.
In addition to wall-mounted and tabletop key holders, there are also pocket models. Such a thing is not just the image of the owner, but also performs several functions. We will describe in a little more detail how to make a pocket key holder with your own hands. Let's take the simplest but most popular option. For this we need:
The pocket keeper will be much cuter if it has rounded edges. To make the markings correctly, you can use a regular bottle cap.

Decorative stitching made of contrasting thread with a slight indentation from the edge will add a special highlight.
Article
The key holder is an interesting and necessary detail home interior, which will help keep the keys to your house, car and garage visible. A thing that is truly necessary for everyday life. It will decorate and complement the interior design, and also speaks of delicate taste and stylish choice owner. The device is attached to the wall, stored on the table or carried in your pocket. You can buy a key holder, but it’s easier to make one yourself from old ones wooden planks, magnets, frames, seat belts and even old spoons and forks.
This device is made of a natural board on which four metal bolts are placed. The key holder attaches directly to the wall and is a great addition to any home decor. Her style combines two directions: rustic and modern. The board was not specially treated to preserve its natural beauty.
The key holder using an old picture frame looks original. It is painted or decorated with flowers, ribbons or fabric - it all depends on the imagination of the master. The hooks are screwed along inside top edge of the frame. Their number is determined by the size of the selected square and the number of sets of keys that need to be stored.

The next key holder was made from a large key, to which several hooks were attached. This device is made in an antique style and has a universal color.

The key holder is made of thin wood in the shape of a small house. Its inhabitants are two wooden figures, which are taken out along with the keys. The front of the house is decorated with a small heart, and the keychains are made in the shape of a man and a woman. The partners' figures are connected in the evening, when the keys are placed in the home.

Ideal for lovers of minimalism and naturalism, a key holder in the shape of a honeycomb. Five magnetic hooks keep your essentials in one convenient place. The wood is sanded and treated with machine oil to bring out its natural warmth.

The second version of a similar device has a cream color combined with golden magnetic hooks.

1) What to do with silverware that is not suitable for food consumption? They can be adapted to fit original key hooks. To do this, take thin forks and spoons (3 pcs.), acrylic paint, small wooden squares, glue and three brass triangular hooks.
Make sure that the fork is straight and the amount of glue is moderate, otherwise the product will come out with a flaw.

2) During hikes and walks in the forest, you often come across natural materials that can be adapted into decorative items. For example, tree bark can become the basis for a key holder in the hallway. It is cleaned of excess, sanded and coated with varnish or paint.


Key holder made from cut pine for a country house.

The shelf, which gives pleasant memories of a holiday by the sea, is made of sea driftwood. It is decorated with a pine cone, cord and beads.

3) Weaving from newspaper tubes It’s not an easy task, but the products turn out to be quite creative. There are few consumables for such crafts - wound tubes, stain and PVA glue. Anyone who is familiar with this type of technology can make a completely budget key holder.

You can make an original piece of furniture from a cut of wood treated with sandpaper and coated with stain.
To create a uniform top layer, apply stain at least 2-3 times. After each application of liquid, the product is dried.

The wood is left in its natural color or a design is applied in decoupage style. The cut is first coated with acrylic varnish, and then the design is tightly applied (face down). After this, the product is dried for 2-3 hours. Before rolling the pattern, the paper must be wetted. The procedure is carried out until the whitish layer is completely cleansed and the pattern is clearly visible. Finally, the top of the key holder is coated with acrylic varnish.

Products in the romantic shabby chic style, when the surface is specially aged, look light and elegant.
The key holder in the shape of a house is decorated with a rustic design using the decoupage technique. Its base is plywood or thin board. Hooks are attached to each corner of the device.

For a universal key holder you need:
To begin, two pieces of wood are cut out, sanded and painted. Hooks are attached to the main shelf on the back.

Using two clamps and liquid nails connect wooden base with shelf.

Then screw in the hooks for the keys and the holder for the flower pot.

The rim of the pot can be painted golden and then placed on a shelf. Choose succulents as a flower or use a pot to store small items.

Scheme for cutting out a key holder from plywood.

Key holder in the form of a house “He and She”


An organizer for small items and keys, made of plywood and decorated using decoupage technique.


A device for storing keys in the shape of a flying mouse.
![]()

For a simple plywood key holder you will need:
A circle is drawn on a piece of plywood, and then the edges are leveled using a caliper. A rectangle is attached to the circle, from which the rod and teeth of the key are made.

The edges are cut with a jigsaw and sanded. Then the base is covered with paper or painted.

The edges of the paper are folded and trimmed with a blade.

To keep the key holder in a horizontal position, 2 crutches are attached to the rod. There are several hooks on the front.

A square (12 x 12 cm) is cut out of a piece of bright leather. Bend the workpiece in half and mark a rectangle (8 x 2 cm) in the center, not reaching the edges 2 cm. Its edges are coated with Moment glue and a zipper is inserted. To decorate the key holder, you can apply embossing using a cliche. The template is preheated through the foil with an iron, and then pressed firmly against the skin with tongs.

The foil is removed. A zipper is sewn into the edges of the accessory. Excess parts are cut off. The edges of the product are covered with glue, not forgetting to insert a loop for keys. Then the ends are connected and secured with clamps. After drying, the corners of the workpiece are cut off and the edges are threaded.

Keys are placed in the ring and excess threads are removed.

A pocket key holder has small dimensions, because it is carried in a purse or in a trouser pocket. Such models are made of leather, felt and leatherette.
A pocket key holder with a carabiner, worn on the trouser belt.

Key holder with buttons and four carabiners.

Model with spring-loaded fittings and ring.

Thick cardboard can also become the basis for a key holder. Pizza or cookie packaging is often used for such things. Consumables will be cheap, but the item may turn out to be quite creative. The cardboard is decorated with fabric, decoupaged, or pebbles and flowers are applied.

Wall fixture made of cardboard base, decorated with fabric and woven newspaper tubes.

Painted cardboard is complemented by bright houses.

Lovers of original things will not be able to pass by this accessory in the form of a hand. Such an item can be made in the form of a picture, where a magnet is installed on each finger.

Key holder in the form of a separate beckoning hand.

Key holder in the shape of a cat. To make it you will need:
The template includes seam allowances.

First, let's cut out the parts according to the diagram.

Using a cobweb we glue part 1 to denim blank 2. Fold the edges of the cotton, iron and sew with a zigzag.

Then the 2 pieces (jeans and cotton) are put together.

The blanks are folded along the seam and passed with an iron.

At the next stage, they begin preparing the ears. Parts 3 are connected at the edges.

Turn it inside out and smooth it out. The ears are sewn to the body, and the sides also go through.

In the picture, pink stripes mark the places for the holes of the cord on which the keys are attached.

All seams are stitched, leaving marked areas. The product is turned inside out and a lace slightly longer than the base itself is prepared. The fish is turned inside out and the edges are sewn together. The cat's face is embroidered.
The lace is inserted into the hole and the keys are attached.

From such a simple box you can make an original key holder using the decoupage technique, and decorate its walls with Chinese characters. They attract good luck and prosperity into the home.

A wooden cigar or tea box will turn into a real masterpiece in just a couple of days of work.

Felt - practical material, soft and comfortable for sewing. Its colors are rich and bright, and the cost of felt is quite affordable. Key holders in the shape of funny animals are mostly made from felt.
You can make funny mice with your children. The keys are held on a cord, which is made of interlacing multi-colored threads.

Accessory “Sneakers” for little athletes.
The accessory can be crocheted or knitted from leftover yarn. It is decorated with embroidery, beads and buttons.

When starting to make a key holder, they take into account the interior design, the number of keys and their financial capabilities.


