Arrangement internal partitions made of brick is considered the traditional, “classical” way of constructing such structures.
When laying bricks next to the door frame in a row, it is necessary to lay L-shaped brackets.
They are characterized by durability, strength, and a high degree of fire resistance.
The mineral nature of the material provides high level soundproofing, and the absence of cavities prevents rodents from getting in. The downside is that such a structure has a considerable weight, and laying brick partitions is considered “wet” work associated with the use cement mortar.
Rules for laying out bricks: a – 2.5 bricks, b – 1.5 bricks, c – 1 brick; 1 – for the tychkovy verst, 2 – for the spoon verst.
In order to somehow smooth out the main drawback, partitions are usually placed in half a brick (12 cm) or on an edge (the resulting thickness is 6.5 cm). Hollow bricks are also sometimes used, but then the quality of sound insulation decreases.
Installation of structures is carried out before arrangement cement screed. To ensure maximum stability and adhesion to the building, metal reinforcement is inserted into the floor slab (base) by drilling, which is then secured in the vertical seam of the partition.
In some cases, it is possible to attach to the ceiling using metal profiles and dowels. It is necessary to level with cement mortar the part of the base on which the partition will rest. Undesirable in places with high humidity, because it does not have sufficient resistance to its effects. After erecting the partition, the surface must be plastered.
The thickness of only 12 cm makes it necessary to take additional measures to strengthen the brick structure. Reinforcement is usually used: after 4-5 rows, metal reinforcement or fine mesh is placed in a horizontal seam, the ends of which are inserted into one of the main structures of the building or secured with dowels. If it is long, then additional vertical reinforcement is used with the help of rods and mesh, passed through the seams and fixed at the base. Particularly difficult is the construction of a partition less than 12 cm thick, that is, “on the edge” of a brick. Such a structure is very shaky, so construction is usually carried out in stages, with the construction of 4-5 rows and their subsequent drying.
The general construction plan indicates all partitions, their sizes, as well as methods and materials of fastening to load-bearing walls.
At the first stage, it is necessary to take measurements of the future partition in order to calculate required quantity bricks The brick structure can have a thickness of 12 or 6.5 cm (the stone is placed on its edge). The dimensions of a standard brick are 250x120x65 mm; when calculating, take into account the thickness of the mortar joint, which is 12 mm.
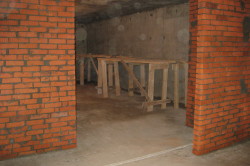
To build a structure at a height, you will need trestles, which can be made from available materials - boards, bars. You can also make a container for mixing the solution (if you don’t have one) yourself - to do this, take a 200-liter steel barrel and cut it lengthwise with a grinder. All that remains is to place the bars for stability - and you can knead!
The solution requires high-quality sand. You can use regular one, after sifting it first. To do this use metal mesh; fits well with the old, “Soviet-style” bed. In addition to bricks you will need:
The partition in the brick floor must be additionally secured at the junction points load-bearing walls.
If necessary, plastic additives can be purchased to add to the solution. They can prolong the “workability” of the mixture or ensure its quality at low air temperatures. The door frame is installed in advance and fixed with spacers.

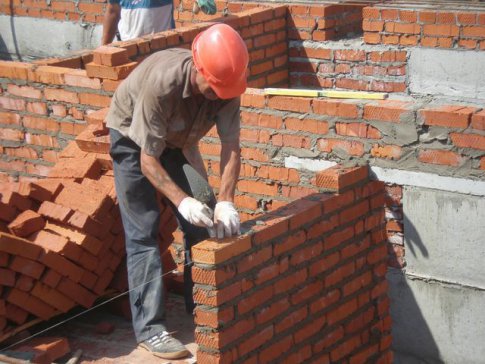
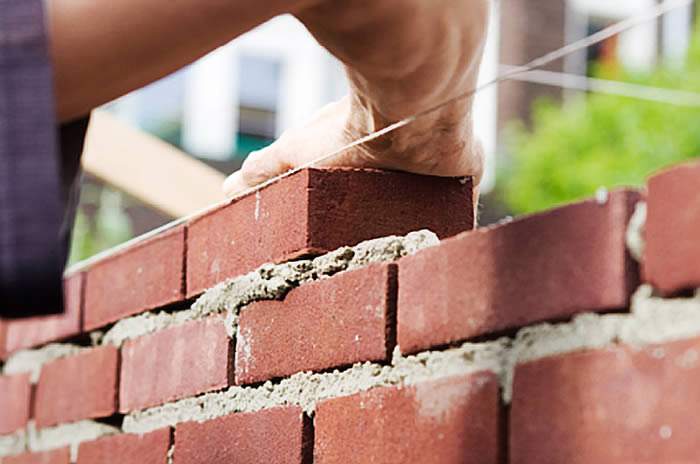
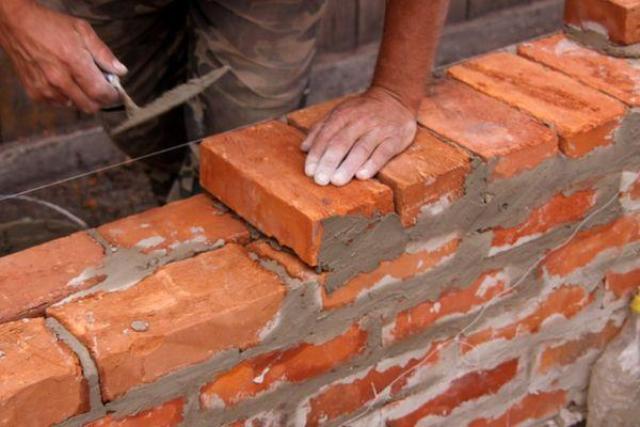
When carrying out masonry, a nylon cord (order) is usually pulled so that the masonry is carried out strictly horizontally.
Prepare the base: clean it down to the floor slab. If there is plaster on the walls, it must be knocked down. Clean the surface to which the partition will adjoin with a broom from dust and moisten it with water. Place the brick so that it can be easily reached without getting in the way.
After the laying of the 12 cm brick partition is completed, you can immediately begin plastering the surface. If it was used, then during the work the mason must unstitch the seams special tool. If you intend to carry out any communications, then you should acquire in advance segments of suitable diameter and length metal pipes. The resulting gap is best sealed polyurethane foam. Before the solution in the partition has more or less set (7-10 days), the wall cannot be touched.
Brick walls freely allow the mounting of any shelves, cabinets and equipment. A well-laid partition will not only fulfill its main function, i.e., divide the living space, but also provide good sound insulation between in separate parts rooms and comfortable accommodation.
There are many varieties of brickwork, each of which differs in the specific placement of products relative to each other. But what is common to all is that they are built on a previously prepared, solid foundation. It is worth noting that such work cannot be carried out in an apartment in a multi-storey building without special permission supervisory authorities, since this design has significant weight.
But when building or remodeling a private house, laying brick walls is the most commonly used method of dividing interior spaces. In contrast to the options for using sheets of plasterboard, ply plywood and a number of other materials for these purposes, a brick partition, although it requires a lot of labor and financial investment, has undeniable advantages:
Good sound insulation;
fire safety;
moisture resistance;
possibility of further finishing with any material;
strength.
The last point from a practical point of view is the most significant, since it is unlikely that it will be possible to hang anything significant on a partition made of gypsum plasterboard (plasterboard). By the way, fastening weighty interior parts (for example, hanging shelves or cabinets) even on a stronger base - blocks of cellular concrete, which are used in the construction interior walls, is also quite problematic.
In practice, for the construction of partitions, a more “economical” brick masonry is usually used, which is called “½” or “¼”. Although the latter method is used less frequently, as a rule, when separating utility rooms(storerooms, toilet rooms etc).
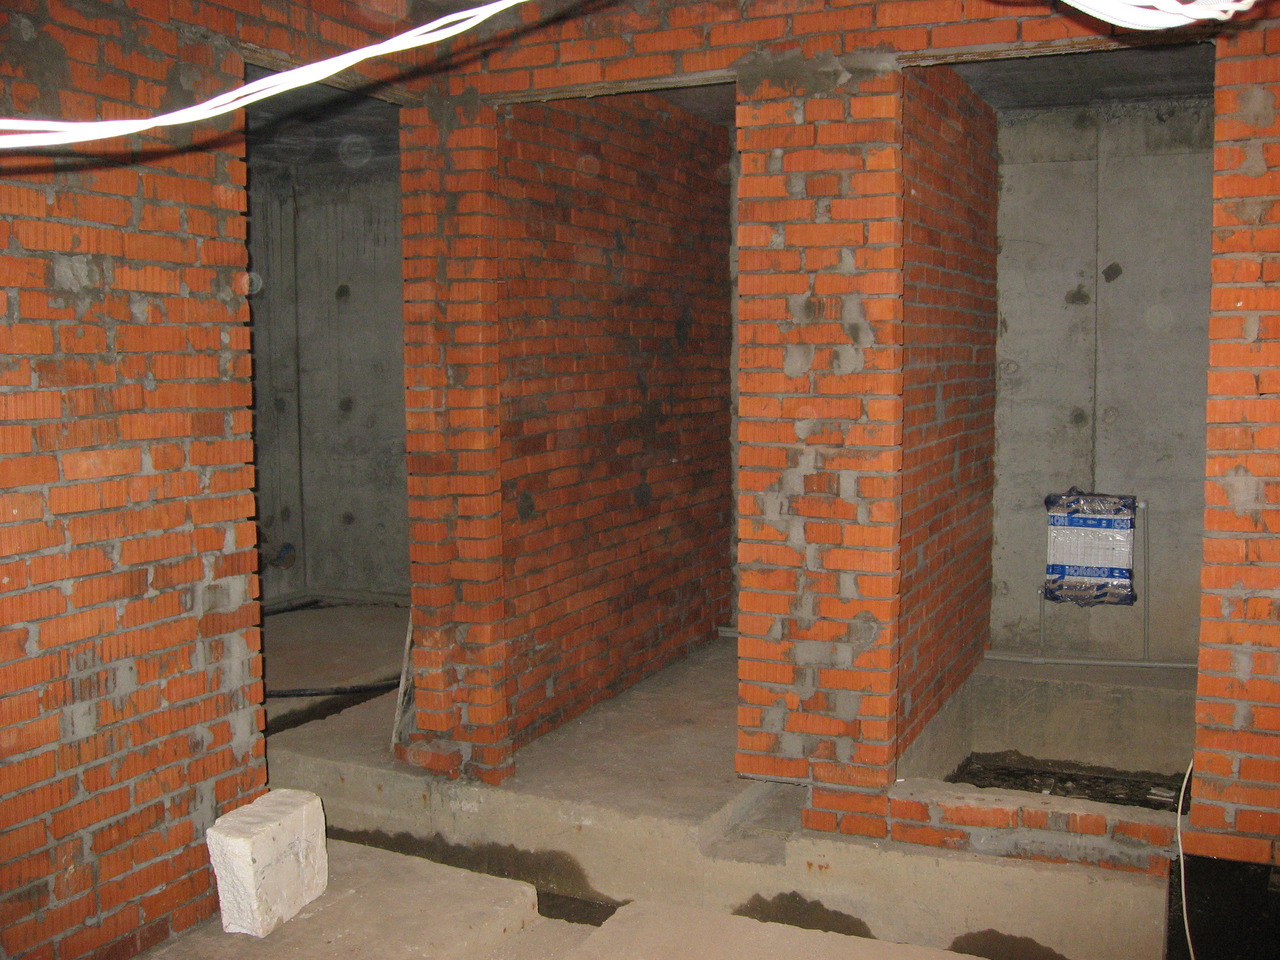
By the way, the installation of partitions (they are also called “partitions”) is much simpler than the installation of masonry in a “new building”, since there are already ready-made landmarks - the floor and walls of the room. Let's consider the methodology for carrying out work using the “half-brick” method.
Preparation

The peculiarity is that, in addition to traditional materials To prepare the mortar, as well as the bricks themselves, you also need to prepare metal plates or reinforcing bars. They will be needed to fasten the partition to adjacent surfaces (load-bearing or internal).
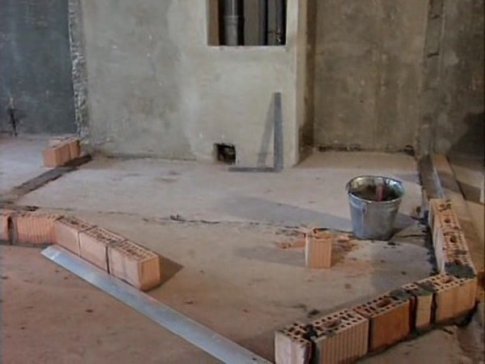
Marking
Perhaps this is the main stage. The evenness of the septum and the quality of work depend on the correct implementation of all operations. First, the outline of the future brick wall is drawn on the floor (2 parallel lines at intervals the width of the brick). In those places where they abut the walls of the room, vertical lines are marked - up to the ceiling.
Experienced craftsmen argue that it is better to spend more time on this and do everything more carefully and efficiently than to redo and change something later. Then further work will go much faster.
First, the 1st row is laid along the entire horizontal marking. It is necessary to do this work especially carefully, maintaining strict symmetry with respect to the lines. The geometry of the entire partition largely depends on the evenness of the bottom row of bricks.
The rest of the technique is simple, but some recommendations must be followed.
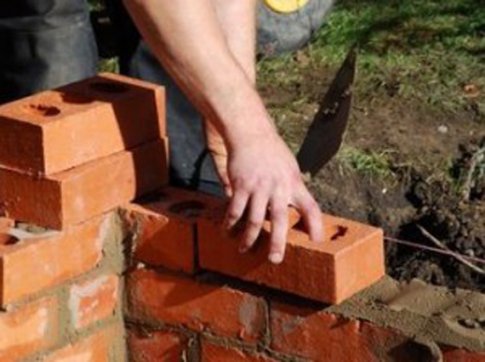
The bricks are laid along the markings (their end parts are joined - “butt” edges).
The middle of the top brick should be located above the seam of the bottom row. This will prevent the formation of a continuous vertical line of mortar, which will degrade the strength of the partition wall.
Except for the first, all other rows are laid out along a stretched string (nylon cord, thick fishing line). The main thing is that there is no “sagging”. How to secure it? Several methods can be recommended.
Firstly, fix the ends of the string on adjacent walls. For example, first tie long nails or a piece of reinforcement on both sides and press down with the same bricks.
Secondly, along the vertical marking lines (which reach the ceiling), place slats, firmly fixing them on adjacent surfaces. You can, for example, put small nails on the racks at certain intervals, onto which you can wind the cord.
Third, make a template. These are the same slats on which high-quality planed boards are stacked horizontally. The result is a shield that will prevent the bricks from skewing in its direction.
The meaning is clear, so each master will figure out for himself how it is easier and more convenient for him to make the appropriate horizontal landmark based on local conditions.
After laying bricks into the wall for about 3-4 rows, you need to check the verticality of the surface along its entire length. Control is carried out by a plumb line or level.
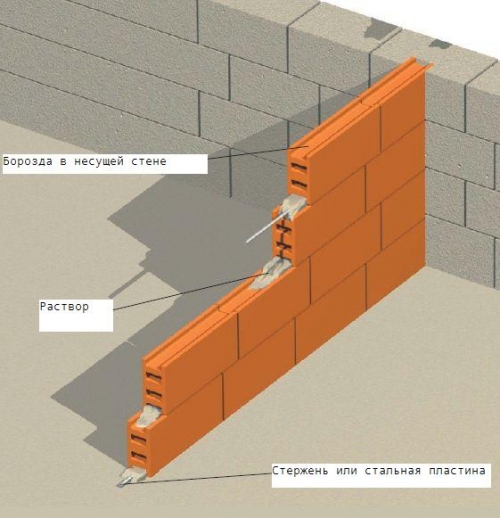
Approximately every 5 rows it is necessary to fasten the masonry to the adjacent surface. If a rod is used for fixation, then a section of it is driven in, “embedded”, and so on (depending on the material of the adjacent wall). If fastening is done using a plate, then it is bent with the letter “G”. Its long part is laid on top of the last brick in the row, and the short part is fixed on the adjacent wall using a dowel and a screw with preliminary drilling of a hole for the “landing”.
If a window frame or doorway is to be installed in the partition, then it is advisable to use a block as an upper lintel. But in order not to complicate your further work, it is advisable to select its thickness so that it is a multiple of 1-2 bricks. Then the order of laying the rows will not be disrupted. It is also necessary to provide wooden inserts on the sides of the openings to which the frame (frame) will be attached.
To make the entire structure more stable, it is advisable to reinforce it with a rod (section up to 6 mm).
The solution used must be at least grade 10.
After laying the last row, there remains a gap between it and the ceiling. Therefore, mortar is spread on the bricks, and then this opening is tightly sealed brick fight, after which its surface coating is carried out.
If not provided external finishing wall with another material, it is advisable to ensure that the seams between the bricks are white. This can be achieved if you use white cement or a mixture - quicklime + slaked lime.
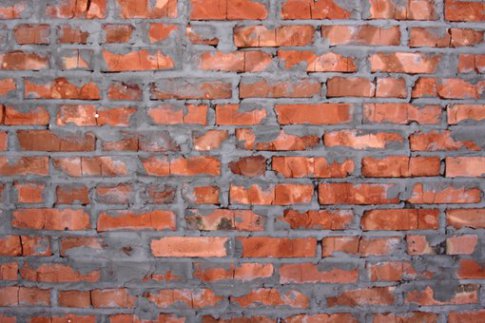
Brick wall masonry is a building structure consisting of ceramic bricks laid in a certain order. artificial stones, fastened with cement mortar. Strength brickwork depends on the quality of the bricks, mortar and compliance with building regulations. The technology for laying brick walls will become clear after studying the material presented in the article.
Brick building structures differ:
These are all positive qualities; the negative ones include the limitation of the number of storeys of buildings being erected due to the relatively low compressive strength and significant specific gravity. Most often used single brick, whose dimensions are 250x120x65 mm: it fits comfortably in the hand. However, there are other options:
The cost of laying brick walls of this size is reduced by saving mortar and time: loading and unloading operations and construction of walls occur faster. In addition, brick can be solid or hollow (it has better thermal insulation qualities). There are also ordinary bricks (used for laying internal walls and piers) and facing bricks (for outer surface buildings).
Masonry walls from ceramic bricks is carried out according to certain rules. Compliance with them is the key to strength building structure. The basic rules are as follows.
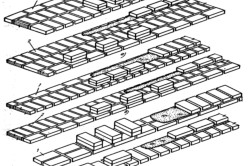
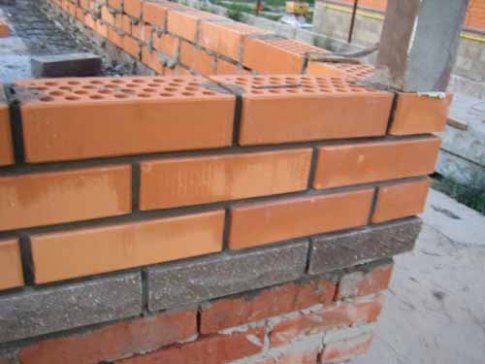
Brick can be used to build walls of various thicknesses. Internal partitions (walls) most often have a thickness of 120 mm (half a brick). The construction of unheated buildings for utility purposes requires the thickness of the walls to be brick, that is, 250 mm. Residential buildings built with walls of one and a half (380 mm), two (510 mm) or two and a half (640 mm) bricks. The bricks are laid on the mortar, which should fill all the gaps between them. The maximum permissible seam thickness is 12 mm. It can be convex or concave. Seam cutting is:
When laying bricks, use the dressing rules.
Brick wall laying for your attention: a video demonstrating the main stages of the process.
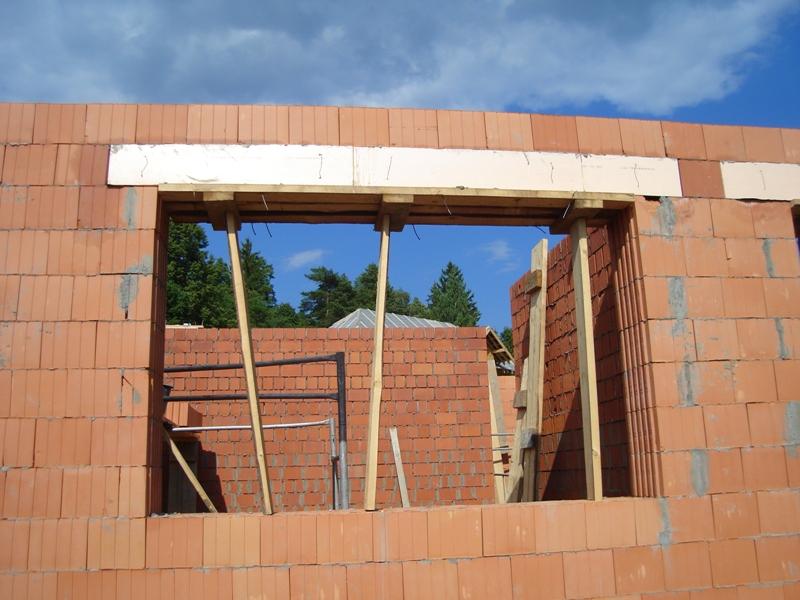
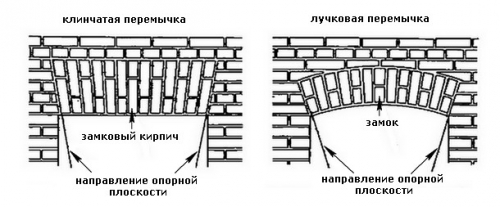
Door and window openings reduce the strength of the building structure, as its integrity is compromised. Therefore, it is necessary to form such openings in compliance with special requirements.
![]()
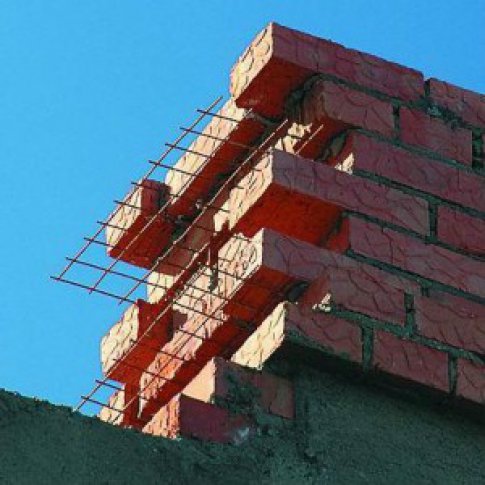
Armopoyas is a brick laid in concrete between rows of bricks (along the perimeter of the building) welded mesh made from steel wire. The armored belt is necessary for:
Installation of reinforcing belts is carried out as follows.
In addition, to strengthen the masonry, a reinforcing mesh of wire is laid between the rows (every three or four). 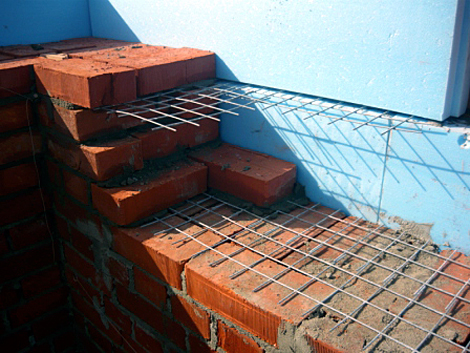
Internal walls (partitions) are most often built with a thickness of half a brick. This is allowed for structures that are not load-bearing. Rubble brick can be used for this. It is characterized by inconsistency in size and uneven edges. This makes it difficult to maintain the level in each row, but the lower cost of such a building material justifies its use. The quality of the surface of the walls of internal partitions requires plastering work. Reinforcement of the rows of masonry walls is not performed.
Masonry walls from sand-lime brick has some differences from ceramic brick laying. They consist of the following.
This building material has good thermal insulation. Larger size(compared to ordinary brick) allows you to make walls thicker. The laying of porous bricks has the following features.
If it is necessary to dismantle a building or part of it, manual, mechanical and explosive methods are used. If you need to disassemble small area walls or remove the partition, all work is done manually. The following tools are used:
The following rules are observed during operation.
We offer a video that clearly demonstrates the dismantling process brick construction.
Internal partitions make it possible to arrange your living space according to your taste. Planning is carried out according to certain needs. Interior walls are constructed from various materials, among which brick is especially popular due to its high performance characteristics. This article will talk about masonry interior partitions made of brick.
Before purchasing, you should familiarize yourself with its types, depending on various characteristics. The manufacture of any product is carried out in accordance with GOST, which specifies the requirements for the production process, the quality of raw materials, geometry and marking of piece elements.
Classification of piece elements is made:

Regardless of the type, brick blocks have a number of common advantages:

Among the disadvantages is the heavy weight of the material. Brick partitions are erected only on concrete and stone floors. Wall masonry cannot be classified as a simple task.
It should be remembered that if it is necessary to drill holes in a brick partition for fastening heavy equipment or make working channels (grooves) for carrying out various types of communications, then the construction must be made with solid brick. A hollow analogue will lose during such work bearing capacity, up to the collapse of the entire structure.
However, despite the complexity of the work, the brick partition will fully meet expectations. Thanks to the efforts and efforts made, it will delight you with reliability and aesthetically pleasing. After all, if you build a wall from facing blocks, you don’t have to plaster it. The natural beauty of brickwork will be appropriate in many modern styles.
For interior walls Usually a standard brick is used, laid on edge. Thus, the thickness of the brick partitions is 120 mm, to this indicator it is necessary to add the thickness of the plaster layers on both sides of the rooms - approximately 30 mm.

It is not at all necessary to purchase separately all the components of the solution; moreover, it is very inconvenient if the construction of partitions is planned to be carried out on top floor skyscrapers.
Today, manufacturers offer a huge selection of dry mixtures, which can simply be diluted with water in accordance with the instructions.
The part of the wall above the doorway is arranged using wooden beam or reinforced concrete element. If plastering of the brick structure is not planned, then selected bricks of at least M75 are used to construct the lintel. The main requirement for this part of the opening is to carefully fill the seams between the clinkers.
There are 3 types of jumpers:
Brick partitions video

A brick wall has the following advantages:
Oddly enough, but clinker masonry will fill the space with comfort. The secret lies in the right shades, accessories and lighting.

However, with all its simultaneous originality and simplicity, such a surface has several disadvantages:
To summarize, it can be noted that laying a brick partition is the optimal solution. Moisture-resistant, durable and fire-resistant material can withstand heavy loads. The variety of shapes, sizes and shades allows you to implement almost any ideas for space distribution and interior design.
Perhaps it’s no secret that laying brick walls is not only about strength and durability performance characteristics, but also a number of positive aspects. Brick houses are the most common type among private construction today.
This is a completely normal phenomenon, since bricks on the market building materials has long occupied its consumer niche. We invite you to familiarize yourself with the recommendations for correct installation brickwork and learn all the subtleties and nuances of building a house.
According to their own technical specifications brick definition is a stone made artificially from a special clay composition. Strength this material imparted by firing.
After such processing, the material is ready for use in construction.
But this stone, like other materials, has its own abbreviations that help specialists work with it and comply with masonry conditions.
Masons use precisely these definitions in their work that help them carry out work with the help of drawings and building plans.
In order for the masonry of a brick wall to be strong, the correct ligation of the stones must be observed during work. This is done so that in the future the wall does not fall apart or crack.
In the construction of brick masonry, there are three main ways of tying the rows together:
Important!
Please note that the use of one or another dressing system directly depends on the selected thickness of the wall masonry.
Before you get to work with brick and start building something out of it, you need to know what kind of masonry there is. A professional bricklayer knows exactly what it is to lay a brick wall; you also need to familiarize yourself with these technical parameters before starting work.
Like any other solid material, brick has its own dimensions, and they allow us to talk about how wide the masonry will be. Standard sizes The stones are as follows: length two hundred and fifty millimeters, width one hundred and twenty millimeters, height sixty-five millimeters.
So we get various options laying stone, these are the main types that are used in construction.
Information!
As you may have noticed, the width of the future wall depends on the type of masonry used.
Therefore, before construction, you need to know exactly what walls you would like to have in the house.
The design office will help you make these calculations.
It is worth noting a very important point, this is the construction of the foundation. As a rule, the foundation carries the entire load and distributes it evenly over the entire area.
Before you start building a building, you need to know exactly how wide the walls are planned when building the house. This will directly determine what kind of foundation for the building needs to be prepared.
Accordingly, when constructing the foundation, all parameters of the future construction are taken into account; will it be possible in the future? If so, then the foundation must be strengthened and strengthened.
Usually, before starting construction, you need to go through a basic documentary procedure, without which you simply cannot begin construction. Also, the construction of walls means laying stone in large volumes.
As a rule, such work must have the correct technical specifications for the brickwork of the walls. This abbreviation stands for “standard routing for the construction of the walls of the building."
What should this documentation include?
Information!
Any construction company or design office will help you draw up such documentation.
Very important points in building a house is financial side this issue. And before starting work, you need to know approximately what financial resources need to be allocated for construction.
For these purposes, there are state elemental estimate standards for construction works, abbreviated as “GESN”. To simplify and explain in ordinary language, then before starting work you need to draw up a construction estimate, which will indicate the price of materials and construction work.
Such documentation, as a rule, facilitates the system of mutual settlements between the customer and the contractor, and also takes into account in advance the consumption of material that will be used during the work.
You also need to pay attention to documented norms and prices when carrying out construction work, in our case this is ENIR brick masonry walls. This technical documentation includes all technical aspects construction and standards.
Taking into account all stages of construction from the foundation to the erection of the roof, this document contains all technological conditions in accordance with existing SNiP and GOST standards.
Now that all the documentary procedures are behind us, construction work on the construction of walls can begin. In our example, it is assumed that the foundation is already ready and work on installing the brickwork can begin.
It is also worth noting that, as an example, we will consider the option of constructing walls of one and a half bricks, in in this case it is the middle ground in construction.
Thanks to this design, it is possible to build a two-story building, which, according to technical documentation complies with all regulatory specifications. We will look at how a builder lays a brick wall, and we will analyze all the nuances of a mason's work.
Before you begin laying the first row of bricks, it is necessary to create a layer of waterproofing between the foundation and the future walls of the building. Typically, roofing felt is used for these purposes, cutting it to the required width.
But not only roofing felt can serve as a foundation waterproofing layer; you can also use cellophane film or ready-made waterproofing compounds.
We also advise you to prepare before starting work the appropriate tool that you will need during the work process. We assume that you want to learn the profession of a bricklayer and will lay bricks with your own hands, guided by our advice.
Here's what you'll need:
When all the tools are assembled, you can begin laying the first row of the wall, to do this, initial stage it is necessary to spread the material along the length of the foundation. Thus, we will be able to identify places of undercuts, as well as window and door openings.
Important!
Before you start laying on the mortar, do not forget to make an indent from the edge of the foundation for cladding the building.
This is done only if it is planned in your house design.
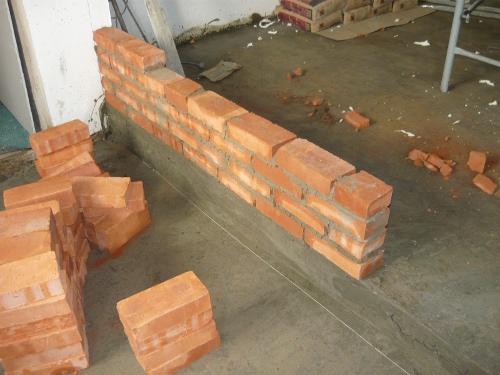
The correct start to laying brick walls is to first lay out the corners of the building. It is from them that they begin to create an even plane of the wall. To start installing the wall, install corner brick pyramids on the mortar, using the dressing rules.
After this, you need to pull the string from one corner to the other; we have a thread prepared for this purpose in our arsenal; it will serve as a guide for laying the brick evenly. The instructions for constructing brick walls also recommend installing an additional beacon in the center.
This will be a brick that will remove the sagging, the laces on long distance and will allow you to maintain a horizontally even seam; in the future it can be removed if it does not fit into the masonry.
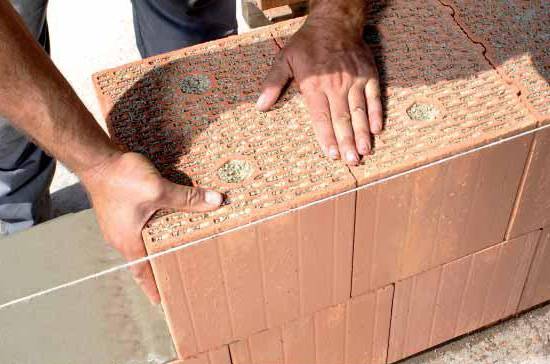
Now, using a trowel, we lay the mortar on the foundation and, thread by thread, we begin to lay the first row with a spoon on the foundation, that is, we lay the brick widthwise. We strictly adhere to the guideline in the form of a thread.
The gap from the edge of the brick to the thread should not be more than two millimeters, and if you start to maintain a gap, then it must be maintained along the entire length of the row.
Having thus laid the row along its length, you can begin installing the inner row into brick. In this case, the entire row will be laid along the length of the stone, butting against the already laid brick.
Information!
As a rule, during masonry a large number of voids are formed; these are the places where the mortar did not reach.
In this case, be sure to fill all voids with mortar, minimizing defects.
While installing the wall, the next row should be laid in the opposite order. To begin, raise the lace one row higher, and install a brick in the center, which will reduce the sag of the thread.
Next, the stone is laid by pushing it onto the front of the wall along its entire length. Now we align the plane along the edge of the end of the stone. In this case, you can immediately install the stone with inside walls, spoon.
When using a pick or hammer in your work, be sure to tap the stone on fresh mortar, ensuring that it is horizontally aligned with the plane. All voids created during the laying process must be additionally sealed with mortar.
Important!
If something went wrong during the laying process and you had to remove an already installed brick from its place, do not try to correct the situation by putting it back in place and tapping it.
In this case, the old mortar should be removed and the masonry laid over a new one, since the moisture has left the used mortar and it will not interact with the material.Self-poured concrete lintel
Very often at this stage some questions arise, namely what can be used to make lintels over the openings.
Let's look at the options that are advisable to use in this case.
- Metal reinforcement, as a rule, this system is not capable of withstanding heavy loads, but as an option it is used in small buildings.
- Ready-made concrete beams, a more common option for constructing lintels, the beam is installed and secured above the opening, then lined with brickwork.
- Pouring the lintel with concrete is the most common option for constructing a lintel. A properly reinforced structure becomes integral part walls can withstand heavy loads.
The most optimal solution would, of course, be the third version of the jumper. After installing the door and window openings, the laying of walls can be continued up to the level of the reinforcing belt.
Finally
In the video presented in this article you will find Additional information on this topic.


