How to install siding yourself with minimal losses.
Installation of siding generally does not cause any particular difficulties, but requires strict adherence to the siding installation technology and the recommendations given by the manufacturer regarding the installation of this finishing material.
Repairing an old and dilapidated building is quite difficult and labor-intensive process, especially if we're talking about about a wooden house with a long service life. There are two main ways to solve this problem:
Attention! Siding belongs to the category of ventilated facades, therefore wooden walls will not rot under it, continuing to “breathe » .
The choice of siding as a finishing material in in this case obvious. It is worth noting that this type exterior finishing can also be used for brick and concrete houses, as it allows you to quickly and easily carry out renovation work and give the building a beautiful appearance.
Before carrying out the main work, you need to decide which ones are right for you.
You can see photos of examples of covering a house with siding with your own hands. There are quite a lot of successful examples there.
The following few questions remain to be answered:
In the instructions for installing siding, we will try to answer all these questions in order.
 Most owners who carry out repairs with their own hands allow gross mistake, performing calculations based on the square footage of the building walls. What's the catch? The fact is that the strips are made in a standard length, it is slightly less than six meters. Then it needs to be joined. As a result of counting by quadrature, many segments remain and often there is simply not enough material. Therefore, it is necessary to calculate the total amount of material in order to avoid overspending as much as possible, taking into account the length and width of the strip.
If you have difficulty making calculations, you can use a special calculator, a program that is often available on various construction sites.
 At this stage it will be necessary to collect construction tool, install scaffolding, and most importantly, decide whether the work will be done independently or with the involvement of a professional team. If selected last option, then it’s easy to calculate the additional costs. The cost of the team’s services will cost 50-75% of the cost of construction material. If you don’t have the opportunity or desire to spend that amount, then you can do the installation yourself. Agreeing with construction crew, you need to take into account that all problems associated with calculation, preparation and installation will be solved by the workers of this team.
You can calculate it yourself, think about where you can save money and where to add elements, based on your financial capabilities.
You can get acquainted with the siding sizes. And you can find detailed description features of calculating siding for a house.
What tools might you need to install siding?
To cover a building with siding you will need a standard set of tools. Namely:
If possible, you can also use a circular saw; it helps to accurately cut the required angle and increase the quality of work.
Is it necessary to prepare the surface?
 For wooden house This is a mandatory part of the installation. For brick building Basically, no preparatory work is required. Wooden house is prepared as follows:
It is quite important to check the windows in the house to determine their compliance with the horizontal and vertical planes. Any unevenness will be clearly visible, so you may have to trim them or replace them with plastic ones. After completing the preparatory work, you can proceed to arranging the sheathing.
How to install profiles under the siding (make lathing) and insulate the walls?
 Is it necessary to install sheathing under the siding? In short, yes! The fact is that the lathing is a kind of shock absorber between the walls of the building and the material itself. During the shrinkage of the building, cracks in the strips or their deformation can be avoided. In addition, the lathing eliminates uneven walls. So, she is needed! In addition, it can be used to insulate the walls of a building. How is the sheathing installed?
Now you can start covering with siding.
Where to begin?
Setting up the starting line
 First you need to do the marking.
Moreover, the requirement here is that the lower part of the bar does not lie on the ground. The gap between it and the blind area of the building should be at least a few centimeters. The strip is fastened using galvanized nails.
It is better to install the starting siding strip immediately along the entire perimeter of the building. This is where the level comes in handy. With its help we mark the zero, and with the help of a construction cord we establish a common horizon for the four sides. Since there is already insulation on the walls, marks can be made directly on the profile.
Installing fittings and trims
 The installation process is quite easy, but you should still follow the basic recommendations:
Corners must be protected with special fittings. Are there rules in this regard?
 The outer corner helps to increase the strength of the finish and at the same time hide the place where the planks join each other. Recommendations for installing this fittings are as follows:
How to install the J bar?
 In order to improve door and window openings, it is necessary to install the so-called J-bar. If you have a circular saw at hand, this will be much easier.
For deep slopes, you can use a double-sided J-profile.
[сaution] Siding strips should be installed from top to bottom. It is quite important to leave certain gaps when installing between the end of the plank and the connecting profiles and corners. Siding panels must stand freely. This is necessary to create space for thermal expansion of the material.
 If the length of the strip is not enough and you have to extend it, you can use the following tips:
Otherwise, installation of siding is not difficult.
Some owners of private houses prefer to use metal siding for cladding their houses. just like vinyl, it is simple.
Helpful Tips:
Finishing with siding allows you to restore an old house quickly and efficiently with the possibility of additional insulation and, most importantly, independently. All this is possible only if you listen to the recommendations regarding its installation.
Video instruction from a large Russian manufacturer vinyl and basement siding.
You can improve the appearance of a house or any other extension by installing siding; moreover, it perfectly protects the walls from precipitation and wind blowing. This facade material also used for cladding industrial buildings.
Siding is a practical and popular facing building material. It is produced in the form of panels from 3 to 4 meters long, each of which has a latch lock and an edge with holes for fasteners. Siding has good performance characteristics and aesthetic appearance. From positive qualities you can note:
Low-quality and cheap siding fades under the influence of the sun after 2 years, since a small amount of titanium dioxide is added to it during production.
Finishing panels are available in a variety of textures and come in a wide range of colors. Siding is produced in several types:
Let's take a closer look at each type:


Before installing the siding, you need to make a reliable frame. The sheathing can be made of wooden beams or metal profiles. It is fixed to the walls with brackets. The sheathing posts are attached opposite to the direction of the siding, that is, if the panels are mounted horizontally, then the sheathing is made vertically, and vice versa. The distance between the elements in the structure depends on the weight of the siding - the heavier the material, the more often the racks are attached.
Step-by-step instructions for making the sheathing:

You can insulate the walls immediately after installing the U-shaped brackets. The thermal insulation material is put on the hangers and secured with umbrella dowels, after which it is covered with waterproofing, and the sheathing is installed for installing the siding.
For regions with warm climates, thermal insulation is not provided, but for cold zones, the thickness of the insulation should be at least 15 cm.
Before installing the starting strip, flashings are installed. They are secured with self-tapping screws with a distance between them of 40 cm. When joining, the ebbs are placed on top of each other. The overlap width is at least 2.5 cm. A building level is used to indicate an even angle.
The starting or starting bar refers to the load-bearing elements. Installed from the top edge of the ebb or at the very bottom of the wall. The first sheet of siding is installed on it. The initial plank is attached, checking the level, since the evenness of the entire wall cladding depends on its installation.

Installation of the starting strip:

The siding is attached to the façade of the building or to the sheathing. Fastening methods depend on the type of facing material:

Corner panels are load-bearing elements. Attached after starting profile. Designed to cover and secure the edges of siding, and also serve as guides.
Installation of corner strips:

When the siding is shorter than the length of the sheathed wall, a connecting strip is installed to extend the panels horizontally. The connecting profile covers the joints of the siding, which makes it more durable and protects it from precipitation getting under the cladding. In addition, this way the appearance of the facade will look more beautiful and look like one whole.
Siding panels can also be lengthened using the “overlapping” method. The profile sheets should be arranged in a checkerboard pattern, avoiding butt joints at the same level in a row. The length of overlap of one panel on another must be at least 5 cm, with the obligatory coincidence of the factory holes for fasteners.
H-profile refers to additional load-bearing elements. Used to connect two horizontal sheathing panels if the wall length is larger size facing material. It is also used when connecting soffit (eaves) siding.
Fastening the connecting strip begins from the top of the wall. The first fastener is made at the top of the hole, subsequent screws are screwed in the middle of the holes. The H-profile should retreat 0.5 cm from the cornice and be 6 mm below the starting strip. On both sides, the connecting profile has a 0.6 cm indentation from the starting panels, that is, it is located between them.
During installation, the siding is not inserted into the H-profile all the way, but so that there is a gap of 5-6 mm for thermal expansion.

For smooth and neat finishing of the facade of the building, it is necessary to use a level, the length of which must be at least 80 cm.
The first siding panel with its end side is inserted into corner strip, and the lower part is brought into the lock-bend of the initial one and snapped into place. After which, if necessary, it is pulled up to level the horizontality of the row. Tightening the fasteners on the panel is done from the center to the edges. It is necessary to leave 5 mm between adjacent planks for thermal expansion.
The fasteners must not be screwed in completely. A gap of 1-2 mm is left from the screw head to the panel. You cannot pull the profile up after lock connection will snap into place on the starting bar.
Subsequent rows of panels are installed in a similar way - one side of the siding is placed in the corner groove, and the other in the H-profile or in the opposite corner. The installed panel snaps into the lock of the previous one and is screwed to the sheathing.
The siding facing the façade is installed up to the top of the wall, but so that there is space left for installing the finishing strip and the last profile.

The finishing line is decorative element, which is used to provide a beautiful and sealed finish to the top edge of the last panel. Install with the side with the factory mounting holes facing down and the panel locking mount facing up.
The procedure for installing the finishing strip:
Fasteners are screwed onto finishing line through 3-5 holes and in their center.

Before covering the siding, the window and door openings are trimmed with special additional elements (platbands). Along the perimeter inside windows (doors) are secured with slats to which the finishing profile is screwed.
At the upper and lower window strips, the edges on the inside are cut by 2 cm and bent in the shape of “tongues”. The upper and lower trim are inserted into the finishing groove, then secured with screws to the sheathing. When installing the side window trims, the “tongues” are inserted inward.
If the width of the siding panel does not fit under the window or above the window (or door), it is shortened to the required depth along the width of the opening. At the cut site, holes are made for fasteners, which should be the same size as the factory ones. Then slide the siding panel under the window element and secure it. From below window opening a low tide is installed, the upper edge of which is raised along the entire length from the window. The width of the window sill should be 5 cm larger than the opening.
The profile is mounted above the window (door) in the same way. To cover the walls on the side of the openings, the panels are cut to the required length. Then they are brought under the platbands.
When the walls are covered with highly embossed siding, for example, a block house, then the installation of window trims is done after the installation of the panels.

On final stage start cladding the pediment. If the attic will be used for living space, the gable will be insulated.
First, the roof overhangs and the end part of the roof are prepared. Remove old siding, flashings and wind boards. The roofing material is cut so that it is flush with the front overhangs. The sheathing for the gable siding is done in the same order as for the walls.
Installation of siding on the gable:
The cornice is finished with a special facing material - soffit. To install the panels, the edges of the cornice are sheathed on the inside with slats. J-bars are attached to them. Soffit siding is quite flexible, so it can be easily installed with a slight downward bend and inserted into the grooves of the J-plank. You will hear a click when the panel is inserted correctly. The distance between them is 0.2-0.3 cm for thermal expansion. The cladding of the building is completed by the installation of roofing strips - drip edges. Placed on the outer part of the slopes.
You can install siding yourself. The main thing is to strictly follow the manufacturer's instructions and follow all recommendations. You should buy building materials in one batch at once, so that there is enough to finish all the walls, plus 5-10% more than the calculated quantity (for adjustment). Additional elements are purchased from the same manufacturer.
Providing a supply of high quality Canadian vinyl siding, official dealers of Mitten Inc. They also provide house cladding services. If you are confident in your abilities and are going to install vinyl siding yourself, we offer several useful recommendations that will help you avoid mistakes.
For determining total area space that you plan to cover with siding, you can use the geometric partitioning method. The building is broken down into simple geometric figures, the areas of which are subsequently summed up.
You can quickly and easily calculate the amount of material using the calculator on our website.

Installing siding on a wall without using a substructure. This is only possible if the wall is flat, otherwise (if the surface is uneven or we are doing insulation) it is necessary to use a substructure.
Surface cladding with horizontal siding is carried out in six stages:
The instructions for installing vertical siding are fundamentally different from those described above. Since vertical vinyl panels are not widely used in Russia, we will present only the main installation steps:
N.B. If you need detailed instructions on siding installation, you can download it in PDF format.
With its help you can avoid the most common mistakes. However, it must be taken into account that any installation instructions describe only typical aspects of installation work.
Before you begin installing siding, you need to download the instructions and make sure that you have the basic tools at hand:

In addition, when planning to install siding yourself, do not forget to prepare a jigsaw, hammer, level, chalk and tape measure. It is recommended to protect your eyes with special glasses. You will also need galvanized steel or aluminum fasteners - nails, screws and staples, which must fit into the sheathing at least 20 mm.

The surface for cladding is leveled so that it is level from any angle of view. For long-term operation of vinyl siding, installation according to the instructions must be carried out over insulating material, protecting walls from moisture and freezing. Places where siding comes into contact with stone, plaster, brick and other building materials, as well as the space around all openings, must be insulated.

Do-it-yourself siding installation begins with a visual inspection of the building. It is very important to correctly determine where you will install the first row of panels. It may coincide with the old cladding (for houses in use). If this is a new building, the first horizontal row should cover the upper edge of the foundation. To correctly construct a horizontal starting line, use a plumb line to ensure a clear vertical arrangement corners
The instructions for installing siding include a complete list of necessary accessories (external and internal corners, starting strip, trim, etc.). You need to start with them, and only then move on to hanging profiles. First the corners are set. It is important that there is a small distance of 6.4 mm between the cornice/soffit and the top of the corner.


If the first panel is installed, then the rest of the siding will also lie flat. Having determined the border of the 1st row, mark the width of the starting panel on it and draw an even horizontal line along the wall. This line will serve as a guide for setting the top edge of the starting profile. Leave a gap of 12.7mm between the edges of adjacent strips.
Now proceed to installing the components on the window and door openings. Install platbands, window trims, ebbs, and secure finishing trims. Join the finishing strips at an angle of 45° - this will give the entire structure a finished, neat look.

A basic, but in principle uncomplicated stage. Do-it-yourself vinyl siding installation is done from the bottom up, from the starting strip. Insert the main panel into the starting profile and nail it in place. But not “tightly”. Touch the panel, move it from side to side. If it moves, it means you did everything correctly and you can continue working. The panels are fixed at intervals of 40.5 cm. Where the siding joins the accessories, leave a gap of 6 to 12.5 mm. The panels overlap each other exactly halfway from the factory mark. Avoid frequent vertical overlaps and try to keep the joints as inconspicuous as possible from the façade.
 Then install siding around doors, windows and downspouts (the website has a siding installation diagram for difficult areas). You can use special panels or cut holes in the profile yourself the right size and shapes.
When installing siding yourself, be especially careful at the final stage. When you reach the top edge, install the profiles in the same way as below window openings and doors (siding installation instructions are illustrated detailed diagrams). Use whole panels under the roof edge, do not cut anything. The panel is cut to the required angle only for installation on gables.
Finish the last horizontal row with a J-profile or finishing overlay. For the top of the J-profiles, 6 mm holes are required, drilled every 60 cm. This is necessary to drain water from the roof of the building. At this stage, if necessary, the transition to the installation of vertical siding begins.
We have introduced you to the basic sequence of work. All details (drawings, calculations for each step) are contained in the proprietary siding installation instructions. You can download the document. Follow our recommendations and everything will work out.
If you don’t know how to choose siding panels or, you can always get qualified help by contacting the company’s managers by phone 8-800-333-08-44, or ordering a call back via special form Online.
– this is modern facing material for finishing buildings with a wide range of colors and textures.
It performs several main functions:
Siding panels are made from various materials: wood, steel, cement, ceramics, vinyl.
Vinyl siding has gained particular popularity in construction market, thanks to the low price, durability, decorative properties and quality characteristics:
The undoubted advantage of siding is that you can use it for cladding a house without inviting specialists, with your own hands.

Fastening the panels is recommended with galvanized or aluminum nails, staples to wood, but practitioners often use self-tapping screws, which are convenient for working at heights using a screwdriver and a magnetic attachment. The main thing is resistance to corrosion, otherwise over time the appearance will be spoiled by rusty spots.
The procedure for installing the panels is as follows:
 Despite general rules and the order of work, each type of siding has some of its own characteristics:

Main components include:
Additionally, you will need ventilation vents and other possible accessories made of the same material as.
Surface preparation includes the following necessary work:
In order to create thermal insulation and reduce the load on the walls, the sheathing is fastened to the prepared sheathing. It is impossible to mount the profile on walls, even fairly smooth ones.
 Installation of wooden sheathing
 If the new wooden walls are perfectly smooth, no lathing is done. But this happens very rarely. For stone and block surfaces, sheathing is required. Its installation is necessary to ensure support of the siding in one plane.
The sheathing frame maintains free space between the wall and the sheathing, which allows it to retain heat in winter and protect it from overheating in summer.
The material for the sheathing is selected depending on the type of surface:
The procedure for making the sheathing is as follows:
At the same time, the building can be insulated with polystyrene foam, glass wool or polyethylene, provided that the ventilation space is preserved. Therefore, the thickness of the timber or sheathing slats should be greater than the insulation layer. Do not allow moisture to accumulate behind the siding panels to prevent mold or mildew from developing.

Finishing with siding is the second life of a house, which has retained its strength and received a new aesthetic appearance.
Do you want your home to look new without making a big investment? Then an excellent and, most importantly, modern option is to decorate the facade with siding. It is used for finishing a wide variety of buildings: the facade of a bathhouse, garage, house and others. It prevents direct sunlight from hitting the walls, protects from rain, protects the house from temperature changes, and is also excellent protection from the wind. Moreover, it is easy to operate. It can be easily cleaned by washing and wiping damp cloth. These are just some of the benefits of choosing wall siding. Now let's look at how to install siding with your own hands, find out what tools you will need for this, and how to prepare for the work.
Before starting preparatory work, you should make sure that you have all the tools. To install siding you will need:

In addition to the tools, you should purchase all building materials in advance. In addition to the siding itself and its components, you need to stock up on nails, screws, staples, etc. Now that you have everything at hand, you can begin the preparatory work.
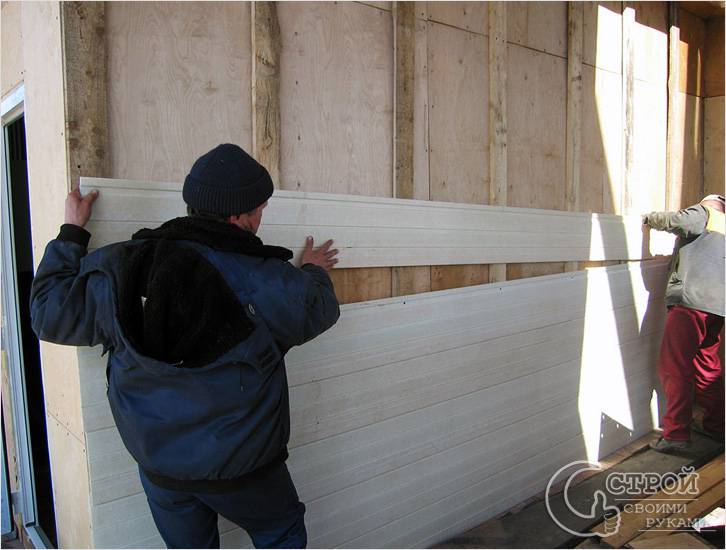
Please note that you cannot install the siding yourself. Therefore, take care of a reliable partner. Together, using a water level (or its laser variation), you can mark the facade. An exact mark is made at each corner of the building.
Note! It is extremely important that the last mark matches the first mark. If the marks do not match, then the measurements are inaccurate. Accordingly, the procedure must be repeated. If you ignore this, you will end up with uneven walls.
Then you need to find the highest mark using the base as a guide. Next, a mark is placed at each corner from the base, which will show the level of the first strip.
One of important stages work is the manufacture of lathing. For this you can use wooden blocks.
Note! If the siding will be laid horizontally, then the sheathing should be installed only vertically, and vice versa.

To make the frame, it is necessary to prepare a sufficient quantity of bars with a cross-section of 50×50 mm and 25×80 mm. When purchasing, make sure that they are perfectly level, otherwise after installing the siding the wall will repeat the shape " sea wave" When installing the lathing, you need to ensure the distance between the bars, which should be 30-40 cm. If you want to pre-insulate the facade, then the lathing is first made according to the width of the insulation. The frame for the insulation will be made perpendicular to the sheathing for the siding. It is also necessary to cover the windows with wooden blocks. After laying the insulation, the surface must be covered with a waterproofing film using a stapler. This film must be laid with an overlap of ten centimeters wide.
When everything is ready, you can begin making the frame directly for the siding. You can also use a metal profile for this. This has its advantages. For example, wooden blocks need to be treated with an antiseptic against corrosion. Moreover, under the influence weather conditions the bars may become deformed or dry out. Because of this, the siding may not hold up well. Concerning metal profile, then he is not in danger.

When installing siding, one mandatory condition must be met. It is to ensure that the siding moves under the influence of temperature changes. For this purpose, nails should be driven into the provided holes in the center. It is also important to drive nails carefully. Do not use excessive force to drive them in.
Note! Do not nail the nail head close to the sheathing panel. It is recommended to leave a gap of 1.5 mm. This also applies to self-tapping screws if you use them to secure siding.
Under no circumstances should the panel be allowed to stretch. Otherwise, the subsequent panel may become uneven, resulting in warping. There can be a distance of up to 400 mm between nails.

The first step is to line the window opening. For this purpose, you should take the window trim and cut it to the desired size.

The strip, which is mounted on the inner perimeter of the slope, is installed to the final strip. To begin with, the plank is installed on the lower slope, then on the side slope, and only lastly on the upper slope.

Before installing siding on the facade, first decide whether it will be installed on the plinth. If yes, then this work needs to be done first. For this, a starting bar is set. It is extremely important to install it exactly horizontally. To accurately fit the first panel to the corner, its edge is trimmed. Next, the next panel is installed. When it comes to the last panel, it needs to be cut so that there is a small gap between the panel and the corner.

The first step is to mark the base ebb line using a level. It is on top of it that the starting bar will be installed. Next, the H-profile is mounted. It is necessary for beautiful joining of siding. Some decide to do without it. However, over time, dust can accumulate there, and moisture can also accumulate there.
Accordingly, the joint will be visible. Moreover, with strong gusts of wind, this joint may not withstand and tear off. For this reason, it is best to use an H-profile to connect siding. Next, the assembly of the panels begins. Naturally, installation begins with the lower starting strip, onto which the next regular strip is snapped. And so row after row, until the very top. As for the last row, then last panel must be adjusted to the exact size.
This method is used to install siding panels. The main advantage of the technology is that this work can be done without the help of specialists.
If you have already done this work, you can share your opinion. Perhaps you encountered some problems while working, tell us how you dealt with them. If you have questions, please ask us.
This is how it works correct installation siding:
And this typical mistakes installation:


