Kitchen - absolutely special place in an apartment with its own microclimate. The latter is constantly changing (from humid to hot), which means that the ceiling of this room must have appropriate resistance. Developments from past years and new technical discoveries offer a variety of options for kitchen ceiling coverings. Each of them has its own advantages and disadvantages.
The most traditional and budget option. Simple work are carried out in the sequence below.
Step 1. The kitchen is cleared of furnishings as much as possible, and what remains is well packed in durable plastic film.
Step 2. The ceiling is gradually, in sections, moistened with a soap solution.
Step 3. From the wetted areas, the old layer of whitewash is successively removed with a spatula.
Step 4. The cleaned surface is washed off completely using a soap solution.
Step 5. The ceiling is covered with a water suspension containing chalk, blue and wood glue or slaked lime, salt and aluminum alum.

Table No. 1. Advantages and disadvantages of whitewashing the ceiling.
| Advantages | Flaws |
|---|---|
| Cheapness. | Instability to high humidity and temperature changes. |
| The fine-porous coating provides a “breathable” layer with good air exchange. | Can't be washed. To eliminate the resulting stains and sooty areas, it is necessary to whitewash the ceiling again each time. |
| Extremely simple technology that does not require special qualifications from the performer. | Whitewashing does not hide, but reveals defects. Preliminary careful alignment of the working plane is necessary. |
| Minimum financial costs. | Fragility - cracks and shedding appear quite quickly. |

Price water-based painting depends on the price Supplies. As is most often the case, the highest quality layer is provided by the most expensive paint compositions with silicone - they form a film permeable to water vapor, which covers small irregularities and allows washing with non-abrasive agents.
In general terms, the sequence of work is as follows:

Important! In this case, the last layer of paint is located parallel to the main flow of light from the window in the kitchen.
Table No. 2. Advantages and disadvantages of painting the ceiling.
| Advantages | Flaws |
|---|---|
| Moisture resistance - unlike bleached, painted ceilings can be washed. | Fragility - cracks and peeling appear soon enough. |
| A simple technology of work that does not require third-party qualified assistance. | Color fading, yellowing of the white coating. |
| The ability to obtain a variety of colors, not just white, by adding coloring pigments. | Peeling of paint due to moisture seeping from rooms above. |
| No toxic components or pungent odor. | Before painting, careful leveling of the working area is necessary. |
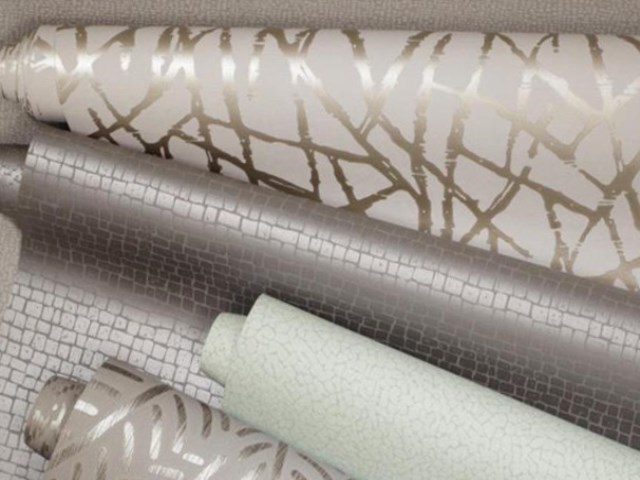
Relatively inexpensive way decor. Washable (vinyl) wallpaper with a dense texture is best suited for the kitchen.
 Wallpaper for the ceiling
 Wallpapering a lamp
  Wallpapered ceiling
To paste them on the ceiling, you need:
Table No. 3. Advantages and disadvantages of wallpapering the ceiling.
| Advantages | Flaws |
|---|---|
| Not the highest cost, possibility of repairing individual areas. | Difficulties in fixing dense and fairly heavy wallpaper, additionally coated with thick glue. |
| Masking of surface defects. | Evaporation and hot air flows, as a rule, lead to deformation of the wallpaper and its divergence at the joints. |
| Resistance to washing (with appropriate texture). | Leakage from above irreversibly damages the ceiling wallpaper. |
This coating is a completely budget-friendly and hygienic option. It is the highest quality, most reliable and durable when properly prepared.

ceiling tiles

Table No. 4. Advantages and disadvantages of finishing the ceiling with foam tiles.
| Advantages | Flaws |
|---|---|
| Low cost. | Rustic, monotonous and somewhat old-fashioned appearance finished coating. |
| There is no need for particularly careful leveling of the working area. | The porous surface of cheap foam blocks cannot be washed clean. More expensive laminated tiles do not have this drawback. |
| Foamed polymer tiles provide additional heat and sound insulation. | Fire hazard - at least in some varieties. Information about resistance to high heat and open flame is indicated on the packaging. |
| Washable and resistant to moisture penetration from rooms located above. | From prolonged exposure to bright light, the tiles gradually turn yellow, fade and lose strength. |
| Possibility of local repair. | An abundance of joints, visually crushing a flat plane. This visual defect has been eliminated in seamless tiles that have more high cost. |
How to properly glue tiles to the ceiling?
In you will find not only step by step instructions And useful tips, but also comparative analysis possible finishing materials. It is important to approach this moment with all possible attention, because the tile must meet the owner’s requirements both in terms of external qualities and material characteristics.
This material is in the middle price range. Its most popular type is “lining”, i.e. long strips about 10 cm wide made of polyvinyl chloride material.

During installation, minimal preparation is performed - old layers of wallpaper, tiles are removed, and crumbling plaster is removed.


Table No. 5. Advantages and disadvantages of finishing the ceiling with plastic panels.
| Advantages | Flaws |
|---|---|
| Irregularities don't matter: panel system hides laid wires and pipes, allows the placement of heat and sound insulating fillers. | The hanging structure reduces the overall height of the kitchen by 10-15 cm. |
| Not too complicated installation that does not require special qualifications and equipment | Instability to the ultraviolet part of the spectrum - the color gradually fades in light, and the white panels turn yellow. |
| High moisture resistance. The panels do not lose their shape and impeccable appearance even with strong leakage from the upper rooms. | The synthetic material of cheaper panels can release harmful pollutants into the air. |
| Easy to maintain - surface stains can be easily removed. | When exposed to open fire, plastic melts and emits acrid smoke. |
| Possibility of local repairs with replacement of the required panel without dismantling the entire structure. | Low mechanical strength– Sufficient care must be taken during installation. |
This type of coating comes in plastic and aluminum. The latter option is more reliable, but at the same time more expensive. By virtue of design features mounted with a larger or smaller gap between the slats. Only gapless installation is suitable for the kitchen. Rack and pinion systems are supplied to the retail chain fully equipped with the necessary fasteners.
Installation proceeds in the sequence below.
Step 1. Markings are applied to the walls where the corner guide profile is attached.
Step 2. The transverse strips to which the slats will be attached are mounted. Here you will also need hangers that are fixed in the ceiling.
Step 3. Sequentially, one after another, slats are installed with openings for light sources pre-cut in the required places.
Step 4. The perimeter is decorated with a complete plinth.

A suspended kitchen ceiling made from inexpensive moisture-resistant plasterboard allows you to implement multi-level combined structures with various options lighting and decor. Preparation for such finishing is minimal - you only need to remove the crumbling plaster. Then they begin installation.

Step 1. Carry out markings along the walls, focusing on the lowest point.
drywall

Step 2. According to the markings, the guide profile (UD) is attached, and the supporting profiles (CD) are secured on the entire plane with mounting strips and dowel-nails, forming a suspended frame.

Frame assembly
Step 3. Plasterboard sheets fixed to the assembled frame with screws with a distance between fastening points of no more than 20 cm.

Step 4. The sheathed frame is sequentially puttied - first the seams are sealed, they are covered with sickle tape, then both the seams and the entire surface are puttied again.
Step 5. After complete drying, the sealed smooth ceiling is painted or covered with wallpaper.
Table No. 6. Advantages and disadvantages of finishing the ceiling with gypsum board sheets.
| Advantages | Flaws |
|---|---|
| The ability to hide defects, electrical wiring and other communications. | Installing a suspended frame reduces the height of the room by at least 7 cm. |
| Environmentally friendly - the material is non-flammable and does not emit harmful volatile impurities. | Even moisture resistant drywall does not withstand prolonged direct exposure to water. Serious leaks from neighbors above are hopelessly ruining it. |
| Design capabilities that allow you to create multi-level systems with perfectly flat planes and smooth contours. | Low strength - the material can be easily pierced by hitting it hard with your hand. Care must be taken during installation. |
| During installation, you can additionally insulate and soundproof the kitchen. | Instability to deformation - sheets of drywall should be stored exclusively in a horizontal position, and only in dry rooms. |
| Resistance to high humidity and temperature changes (only for special types of drywall). | Need for further painting works after installation - masking the seams, painting, wallpapering. |
| The plasterboard base can be updated - repainted, fresh wallpaper glued. | High-quality installation requires certain skills and the help of a partner. |
Not cheap, but subject to compliance necessary conditions, the most durable option. This is the only reliable way to protect everything home environment in case of a “flood” from above. The synthetic film does not break through, but only sag under the pressure of accumulating water. After the accident has been eliminated, this moisture is carefully drained using a hose, and in order to wash the film, dry it and re-tension it, you will need the help of specialists. In the event that through ceilings leaked process water from the heating system, you will need complete replacement films.
suspended ceiling

When installing a tension system, a closed wall profile is attached around the perimeter, and ceiling lamps are dismantled. Then the canvas is suspended from the profile, heated with a heat gun, and tucked, first of all, in the corners, then along all sides, starting from their middles.

Reinforcing rings are glued to the places where the lamps are attached, the fabric inside them is cut out, the wiring is removed and the lighting fixtures are installed. At the very end, the lower groove of the profile is completely closed around the entire perimeter with a plug - thick polyvinyl chloride tape. The whole process requires special skills.
Table No. 7. Advantages and disadvantages of suspended ceilings in the kitchen.
| Advantages | Flaws |
|---|---|
| Quick installation - all work requires from 3 hours. | Installation requires special professional equipment and mandatory involvement of qualified specialists. |
| Masking of defects. | Reducing the height of the kitchen by at least 4 cm. |
| Particularly resistant to distributed loads – with a thickness of only 2 mm square meter The tension covering holds, without breaking through, up to 100 liters of water flowing from above. | Punctures and cuts easily form in a thin film, which can be difficult to eliminate. |
| An exceptional variety of colors, textures and patterns. | It is impossible to move chandeliers and ceiling lights, since the holes for them are made only once during installation. |
| Fire safety - the material does not ignite and does not support combustion. | The limited power of lamps is up to 60 watts for incandescent lamps and up to 35 watts for halogen lamps. Intense local heating can melt the film. |
| Durability – up to 20 years if observed necessary conditions operation. | Unsuitable for unheated premises- For country kitchen, For example. |
| Resistant to corrosion, rotting, no condensation. | Cheap films can emit harmful volatile substances for a long time. |
When deciding which ceiling will be best for the kitchen, you need to determine the main priority and take into account the condition of the surface. Suitable for really flat ceilings budget options whitewashing and painting. Washable wallpaper allows for minor imperfections. Inexpensive tiles can mask more significant, but not too sudden, changes in height. Suspension systems are guaranteed to hide all unevenness, as well as communications. The cheapest of them are plasterboard, the more expensive are plastic and aluminum. For those who are particularly concerned about safety kitchen furniture and equipment in the event of a “flood disaster” among the neighbors above, the optimal and only option will be stretched polymer sheets. In addition, it is quite acceptable to combine different types of coatings in one kitchen.
When starting a kitchen renovation, you are always faced with the question: what kind of ceiling to make - suspended, plastered or suspended, and what materials are best to use. In addition, it is necessary to consider the issue of lighting in different areas. kitchen area depending on the selected ceiling type.
Which ceiling is better to make in the kitchen?– it’s up to you to decide, but in order to make the right choice, let’s take a closer look at all types from the point of view of its practicality and durability.
For the right choice ceiling for the kitchen, you must first understand its differences and features in comparison with other rooms in the apartment or house.
So, having examined the features of the ceiling in the kitchen in terms of functionality, we can move on to the question of which ceiling is best to make in the kitchen , having considered various materials from which it is made.


Until recently, one of the most common types of ceiling finishing in the kitchen was plaster. Its advantages include, firstly, the fact that it is not afraid of fluctuations in humidity in the room. It is therefore not surprising that plastered buildings do not suffer from seasonal fluctuations in humidity or precipitation for decades.
Secondly, the plaster is also resistant to temperature fluctuations, so neither frost nor heat causes harm to the plastered surfaces, at least for ten years.
And finally, the plastered ceiling is not afraid of fires: neither the plaster itself, nor modern putties, nor water-based paints are flammable materials.
But the disadvantages of a plastered ceiling include its vulnerability during flooding. In the event of a more or less serious flood from above, you are guaranteed at least stains on the ceiling, and in the worst case scenario, peeling or falling off plaster. Therefore, a plastered ceiling will in no case be able to protect your kitchen from flooding.
Another disadvantage of plaster finishing is that without special treatment of such a surface it becomes very dirty, absorbs all odors and absorbs the fat that gets on it. At the same time, further processing of the plastered ceiling - puttying and painting - will make its surface smooth, and it will not absorb moisture and other substances, and such a ceiling can also be washed. All that remains is to decide on the paint that is best suited for painting the ceiling in the kitchen. We recommend using acrylic or silicone-based water-based paint, which will allow you to wash the ceiling surface an unlimited number of times without fear of abrasion.
Several different designs, differing in the materials used, quality and cost. The only common condition for their use in the kitchen is that when installing a suspended ceiling, you cannot use wooden sheathing. An alternative is a frame made of galvanized steel or aluminum. But how to decorate this frame is not such a simple question and there are several possible answers to it.
Cassette designs

These are ready-made standard frame elements, which, while being easy to install, have large sizes, therefore occupying quite a significant space under the ceiling. It is advisable to use them only in rooms with high ceilings: In standard "Khrushchev" buildings, this design will make your ceiling very low and may force you to constantly bend down.
Frames made of galvanized steel or aluminum are not afraid of corrosion; these materials are also resistant to changes in humidity or temperature, which is typical for kitchen areas. This is an undeniable advantage such a ceiling design. However, the quality of such a ceiling depends on what the cells of the cassette structure are filled with.
Let's consider the use of standard panels with a cassette ceiling - mineral fiber or gypsum on a fabric basis. Let's note their advantages:
– moisture resistance.
– resistance to high and low temperatures and their changes. The panels used are usually placed in cells and they are held in them only under pressure by their own weight, so they can freely expand somewhat without being deformed.
– cassette structures of all types are made of materials that are not afraid of fire.
As for the disadvantages cassette structures the following factors include:
– from mineral fiber and gypsum panels It is almost impossible to wash off splashes of water, grease and soot.
– the panels are susceptible to damage under the influence of water if your kitchen is flooded by neighbors above. However, this disadvantage is also an advantage of the panels, since you only have to replace a few panels. Replacing a damaged panel is quite simple - just follow detailed instructions panel manufacturers.
Metal ceilings
Choosing which ceiling is best for the kitchen , It is necessary to pay attention to cassette and slatted metal ceilings. They are also mounted on a rigid frame, however, unlike cassette structures, such a ceiling can be assembled almost close to the ceiling, so the ceiling height will decrease by no more than 4 cm.
Firstly aluminum and galvanization are moisture resistant, so in the most unfavorable conditions they will last at least until the next overhaul.
Secondly , metal ceilings, even without taking into account the movable fastening, perfectly tolerate temperature fluctuations.
Third , thanks to its glossy surface and the absence of pores on it, metal cassettes and slats practically do not get dirty and are very easy to clean. However, please note that on perforated metal panels soot may accumulate from gas stove, from where it will not be easy to remove it.
Fourth dignity metal ceilings is their resistance to fire.
And finally, in case of any flood from above, after drying, all you have to do is wipe off possible stains. However, your property will be guaranteed to be protected from damage by water.
PVC wall panels on a galvanized frame are the best option kitchen ceiling if your renovation budget is limited. In addition, it is quite easy to install yourself.
Among the advantages of this type of ceiling, in addition to its low cost, we highlight the following:
The disadvantages are the following characteristics:
When deciding which ceiling is best for the kitchen, one cannot help but consider tension structures.
Stretch ceilings, including in the kitchen, have ceased to be a sign of luxury. All that remains is to choose the type of stretch ceiling for the kitchen: fabric or PVC film.
To decide what material for a stretch ceiling would be better suited, it is necessary to compare their qualitative characteristics.
Fabric ceilings are more durable, so it is almost impossible to damage them accidentally, and with great difficulty on purpose. But ceilings made of PVC film tear from contact with any sharp object.
On the other side, fabric ceilings although in small quantities, they allow water to pass through, while PVC film, on the contrary, retains it. So, according to manufacturers, such a fabric can hold from 60 to 150 liters of water per square meter.
Fabric ceilings also cannot be dismantled, so if necessary, you will have to stretch a new fabric over the old baguette. But PVC film with harpoon mounting can be removed to drain water and dry after flooding an unlimited number of times.
Considering all the above characteristics, we can clearly give preference to polyvinyl chloride film with harpoon mount, despite its lower strength.
As for the advantages of using such a ceiling in the kitchen, among them we note the following:
Another interest Ask concerning the ceilings in the kitchen is the choice and location of lighting fixtures. Perhaps our recommendations will help you make the right choice.
It is better to place the main light source above dining table. It could be like classic version- chandelier, and, for example, .
Above work area, as well as above the stove and sink, it is better to place local lighting. Here, the type of light source depends on the set of furniture in the kitchen - the presence or absence of wall cabinets, the type and height of the ceiling. For example, halogen or LED spotlights can be embedded into a suspended ceiling, and a convenient and multifunctional tripod with rotating lamps or a strip of LED light bulbs will look great under the cabinets.
Finishing the ceiling in the kitchen is quite a responsible task. And the question is not only that the ceiling harmonizes well with the rest of the interior. In the kitchen, unlike other rooms of the house or apartment, steam, soot and fumes are formed in fairly large quantities. All this, rising up, settles on the ceiling. Therefore, the ceiling in the kitchen will need to be washed and cleaned much more often than in other rooms. Naturally, in order for the ceiling to withstand such “aggressive maintenance” and retain its attractiveness for a long time, it is necessary to take a rather responsible approach to the choice of materials from which it will be made.
Modern construction market offers quite a lot of options for finishing the kitchen ceiling - from “banal” whitewash to “newfangled” stretch ceilings. Let's take a closer look at the advantages and disadvantages of the most popular materials that can be used to decorate the ceiling in the kitchen.
The “oldest and kindest” way to finish the ceiling in the house (and the kitchen is no exception) is chalk or lime whitewash. But given that we are talking specifically about the kitchen, it is better to immediately exclude chalk whitewash, since chalk absorbs moisture quite strongly, which will certainly lead to the formation of cracks on the ceiling or even cause it to crumble. Therefore, it is recommended to use only lime whitewash in the kitchen.
Chalk whitewash on the ceiling is short-lived - chalk absorbs moisture too well
To give the whitewash increased strength, and in the kitchen this will obviously not be superfluous, we recommend using whitewash with the addition of glue.
The advantages of whitewashing include the fact that “classic” white ceiling never goes out of fashion and combines with almost any interior - from “classic” to “high-tech”. In addition, only natural, environmentally friendly materials are used in whitewashing, which is undoubtedly another significant advantage.
However, along with the advantages of whitewashing, it also has a number of quite noticeable disadvantages. Firstly, to create a flat ceiling surface you will have to resort to quite complex and labor-intensive process putty, and in some cases plasters. Secondly, the whitewashing process itself, and especially those preceding it preparatory work associated with the appearance of large amounts of dirt and debris. And finally, it is very problematic to properly care for a whitewashed ceiling - it is simply impossible to wash such a ceiling.
In its technology, painting is in many ways similar to whitewashing. Before this, you will also need to level the ceiling as efficiently as possible using plaster and putty.
Before painting the ceiling, it must be carefully leveled.
Please note that even if you use colored paint, the ceiling must be thoroughly cleaned of all existing stains, since otherwise they will show through the main color, which will undoubtedly ruin the entire appearance of the ceiling, and the kitchen as a whole.
But unlike whitewashing, paint is much more durable coating and a painted ceiling will be much easier to clean or even wash, especially if you use quality paint washable type.
One of the most popular options for finishing the ceiling in the kitchen (as well as in other rooms) is to cover it with wallpaper. Here are the main advantages of this method:
Wallpaper on the ceiling - quite simple and economical way finishing
The disadvantages of wallpaper include the fact that if there are serious irregularities on the ceiling, it will not be possible to do without preliminary putty.
This type of ceiling belongs to the class of suspended ceilings and is mounted using special metal brackets.
When choosing a hanging suspension system ceiling for the kitchen, it should be taken into account that its level will be at least 5 centimeters lower than the real ceiling. Therefore, it is not recommended to use such systems in rooms with low height (for example, in Khrushchev buildings).
Hanging plastic ceilings have the following advantages:
Suspended ceilings will “steal” several centimeters of kitchen space
The disadvantages of this type of coating, in addition to the reduction in ceiling level mentioned above, include the rather high cost of the structure.
Another variety suspended ceilings is a plasterboard ceiling. It, just like the design made of plastic panels, makes it possible to hide defects in the main ceiling covering, thereby significantly simplifying the preparatory work. In addition, under a plasterboard ceiling you can hide all kitchen communications, including the exhaust system, although in this case the ceiling level will noticeably decrease.
Drywall as a ceiling covering allows you to give free rein to your imagination and come up with your own original design
Another significant “plus” plasterboard ceilings is the possibility of creating “multi-level surfaces”, which undoubtedly gives great scope for the implementation of the most various designs kitchens.
The disadvantages of plasterboard ceilings are the need for additional finishing(painting or wallpapering) and a rather complex installation system that will require special skills and tools.
Since the kitchen is a room with a high level of humidity, it is recommended to use only special moisture-resistant drywall.
Stretch ceilings are a relatively “young” technology, so some people have a reasonable question: “Is it possible to install such ceilings in the kitchen?” Answering it, we can say an affirmative “Yes”, and some properties of suspended ceilings make their use even more desirable than the use of other materials. It is true that it is worth noting that not all types of suspended ceilings are suitable for use in the kitchen, but only those made of PVC film.
A special feature of such ceilings is that they are waterproof, which not only simplifies their maintenance, but also sufficiently protects the kitchen from possible flooding by neighbors on the upper floor.
PVC stretch ceilings reliably protect against moisture
Please note that suspended ceilings are “afraid” of mechanical damage. Therefore, when caring for them, it is necessary to exercise some caution and not use objects with sharp edges.
 Artistic
Of course, everyone is free to choose the type of stretch ceilings that they like best, but most experts agree that for the kitchen (especially if we are talking about small rooms) glossy stretch ceilings are best suited because of their ability to visually enlarge the space, and also due to the ease of care.
The list of advantages of suspended ceilings made of PVC film is quite wide:
The only serious drawback of suspended ceilings is the fact that the installation work is almost impossible to do independently. In addition to certain skills, this will require special equipment, namely a heat gun, the cost of which significantly exceeds the price of installing suspended ceilings.
As you can see, modern construction technologies give a fairly wide choice of options for finishing the ceiling in the kitchen. Which one to choose is up to you, based on your preferences and financial capabilities. Good luck with your renovation!
When choosing a good ceiling covering for the kitchen, the technical and aesthetic characteristics of the room are considered, because perfect kitchen This is not only modern technology and a new set, but also beautiful ceilings. The ceiling in the kitchen is the first to absorb all the soot, humidity and fumes. That's why Special attention depends on what material it is made of.
Before choosing, it is necessary to study the various properties of the selected surface. The covering for the room must have the following characteristics:
It must be taken into account that the humidity in this room is no less than in the bathroom. When cooking, steam is not removed immediately. And all negative factors are reflected on the ceiling.
The formation of smoke and grease cannot be avoided in the kitchen, even if effective ventilation is installed or. Cooking with gas increases the amount of soot.
Pre-switched on ventilation above the stove during cooking will make the heating of the ceiling surface uniform and the air will be cleaner.
Plaster is an economical surface option. The material is not subject to strong changes in humidity and temperature. Its advantages:
With all its advantages, plaster has some negative points:
The plastered ceiling is used in further work: painting or whitewashing the surface.
Whitewashing is a simple and inexpensive type of finishing the ceiling surface. Chalk is used - whiteness and freshness, or lime (bactericidal properties).
The advantages of application are low cost and ease of repair. Required Tools: bucket, brush, newspapers or film to protect furniture and floors.
The disadvantages are various factors:
If the kitchen ceiling is fairly flat, then it can be painted water-based paint. It will give a nice matte finish.

How to paint a ceiling correctly.
The surface is easy to care for; the paint can be washed. Due to the thin layer of material, the formation of sagging will not occur soon.
When painting the ceiling, use a roller rather than a brush. The surface will be smoother.
Often the ceiling in the kitchen is covered with wallpaper. First, the surface is leveled and the joints are sealed. The undoubted advantage of the material:

Wallpaper on the ceiling is an inexpensive way to transform your kitchen.
In front of everyone positive aspects There are also disadvantages to a stretch ceiling:
Matte canvas is used for the kitchen. There are no visible grease stains on it.
Drywall - universal material, applicable for various finishing works. With its help, a single-level (hard) ceiling or a multi-level (floating) suspended surface is made. Used for painting.
Pros of use:
Drywall is a plastic material. Any surface shape can be made from it.

Taking into account all the features and proper installation (on a special lathing) of the structure, plasterboard will become a durable and functional covering for the ceiling.
Disadvantages of drywall:
Used for coloring the material acrylic paint, not emulsion. This will allow you to remove grease from the surface with detergents.
Two-level structures are made using the tension method and are made of plasterboard. Installation from sheets is easier than installation from vinyl.

A multi-level ceiling highlights different zones and focuses attention on parts of the room.
The surface has its advantages:
When installing the tension two-level ceiling no need for perfect plastering. The canvas will create flat surface. There are many different shades to choose from.
The ceiling is easy to clean and simple to install. Using a multi-level ceiling, you can hide ventilation or electrical wiring in the kitchen.
For more information about this, see the video instructions:
Slat ceilings look stunning. The kitchen will be radically transformed
There are three types of slatted surfaces:
The slats are perfect for the kitchen area. They have a number of advantages:
The only drawback is that the panels significantly reduce the height of the room.
In any case, when choosing material for the ceiling in the kitchen, the nuances of the food preparation room are taken into account: the presence of a ventilation system, the height of the walls, the area of the room.
An ambiguous solution that is used quite rarely. It is assumed that the strips are glued to a previously leveled and primed base. If the material is loose and thick, for example foam, small irregularities can be left. They will be invisible under the wallpaper. Let us list the advantages of this design:
Among the disadvantages, it is worth noting low moisture resistance. Even if the manufacturer positions the wallpaper as washable, light wet cleaning is preferable. This may not be enough for the kitchen. above, the design will most likely be hopelessly damaged. In addition, gluing strips to a vertical base is inconvenient and quite difficult.
Various embodiments are possible: from wood panels luxury class to inexpensive lining. Despite the significant difference in cost, all varieties have common advantages:
There are quite a lot of disadvantages. First of all, it is low resistance to moisture. Wood absorbs water and becomes deformed. Damp wood is a favorable environment for the development of mold and fungi. To prevent this from happening, it is mandatory. It is carried out regularly. In addition, disadvantages include flammability, difficulty in processing and high cost.
It is impossible to answer unequivocally what is the best material to make a kitchen ceiling from: there can be many solutions. Each with its own pros and cons. It’s worth getting to know each of them carefully and their photos, “trying them on” for your apartment, and comparing them with your financial capabilities and desires. Only after this can you make the right decision.