There are times when the entrance is blocked by some elements. This creates discomfort. It is important to consider the recommendations for arranging a check-in and familiarize yourself with the main ideas on this matter.
It is important to consider the main steps of how to make a good entry into the site.

First you should start filling the pillow. Crushed stone most suitable option in this case. Before filling the bottom of the ditch with it, you should prepare and clean this area.

The functional load of such a pillow is to support concrete pipes. After all, they should not sink into the surface of the earth. The pipe material is most often plastic, the size of which is 0.46/6 m. If we're talking about about a concrete pipe, then its size fluctuates around 0.5/2.5 m.


The next step is laying pipes using a truck crane. If the passage width is small, it is permissible to use plastic pipes.

Note! Plastic material pipes are not the worst option comparatively concrete material. The load of the passage should be taken into account when choosing.

The second stage of how to make a convenient entry to the site is to install retaining walls. By using them running waters will not wash away pre-sprinkled materials. This also has a beneficial effect on the race itself. It is not destroyed, it can be longer gap time to use.

Before direct installation, you should in the right way install the formwork. A double mesh is installed and filled with concrete-based mortar. Among good brands solution can be distinguished M200, M250 and M300.

At the third stage of creating a drive to the site with your own hands, the solution hardens. The duration of the process is about a week, during which concrete mortar hardens, becomes a certain shape, and has the appropriate quality characteristics.

Important! When pouring concrete mortar, certain temperature regime. In particular, this applies to temperatures not lower than 5.
Summer, autumn or spring time considered the most the best option. At temperatures significantly below 5, special mixtures are used that provide for this condition.


The distance between the retaining walls should be filled with crushed stone. Geological textiles are laid on top of its area. Thus, this will increase the service life of access to the site through the pipe.

After month period During this work, the materials gradually shrink. After three days the end of all installation work check-in can be used.

When performing any work, its cost is of significant importance. According to preliminary calculations of companies that specialize in this area, average price is in the range of 30,000 rubles. This cost individual order may change.

If you cooperate with your neighbors, you can reduce the price. When using a collective construction of a check-in, the price will cost 6,000 rubles less than an individual construction. This is a significant saving.

By building houses, or cottages, bathhouses, and other outbuildings, good companies give discounts to their regular customers. This condition should be immediately considered as the optimal option.

The photo of arrival at the site shows how important it is to choose a good place for check-in, for comfortable and long-term use. When locating a driveway through a ditch area, certain rules must be followed.

Decide on the location of the house. This is especially true for the planning stage.

In the event that the house is deep in the plot, then check-in can be done anywhere. The process is not particularly complicated.

Keep one rule in mind. If your house is located on the right side of the road, then you should enter on the right side.

The drive width is optimal provided it is at least 6 m. The pipe diameter is 9 m.


When arranging your entry into the territory, you should carefully consider every detail. The planning process will protect you from extra costs materials, time. Arriving with a pipe is optimal for homemade execution. The option of using a reinforced concrete slab is good, but labor-intensive for independent use.

Follow the step-by-step recommendations to avoid mistakes. If you are not confident in your skills, you should use the help of a specialist in this field. The team is able to perform all the necessary work efficiently in a short period of time.

You should also take into account discounts and opportunities to save money. In particular, this applies to collective work.

In addition to being durable, a driveway can look attractive. To do this, you can plant trees, flower beds, and make a flower bed.


Good day! Tell me how (or what is better) to make a drive to the dacha if the site is on a slope?
Evgeniy, Obninsk.
Hello, Evgeniy from Obninsk!
/Your city is good, but I haven’t been to it since 1968, I’ve even lost contact with the relatives who lived there./
There are two options for entering areas with a slope. Either in full accordance with the slope of the terrain, or by cutting the soil in such a way that a car parking area is obtained, surrounded on three sides by soil, which is reinforced with walls. The second is done less frequently because it is labor-intensive, especially with large relief slopes.
In the simplest versions, everything is done in the usual way. The entrance is planned, including its marking, soil removal in full accordance with the slope to a depth of approximately 15-20 centimeters. That is, it is necessary to remove the root system of the grass. After which the entire area is backfilled with a layer of sand or ASG of at least 10 centimeters.
Then the sides of the entrance are decorated with formwork from edged boards with their fastening to vertically driven pegs. After which they fill the entire entrance area with broken stones or crushed stone. For greater strength, cards are laid across the entire area. welded mesh(0.5*2 meters) with its edges overlapping each other. And concrete is poured on top at the rate of approximately three parts of cement and two parts of gravel.
The layer of solution is from 5 to 10 centimeters. Using a long rule (can be made from a profiled pipe of small cross-section) the pouring surface is leveled.
To avoid cracking of the coating over its entire width, every two linear meters squares are laid on edge wooden slats at least a centimeter thick. The wood is pre-treated bitumen mastic. The top surface of the slats should be flush with the concrete surface.
In the simplest cases, a layer of material is simply poured over the entire entry area. This could be gravel, crushed stone, small broken stones, etc. That is, something that cannot be washed away by streams of rainwater.
It is advisable to compact the material well; this is partially done with the help of a car, repeatedly rolling over the poured material. The thickness of the coating layer ranges from five to 10 centimeters, depending on the financial capabilities of the owner.
In some cases, when the soil is subject to subsidence due to its characteristics, after a few years the operation of pouring new portions of material should be repeated. Lime crushed stone ( distinguishing feature- her White color) is undesirable to use; although it is cheap, in some cases its maximum can last no more than five years.
Sometimes drainage grooves are made along the sides of the road for drainage. They are also covered with the same materials.
So nothing complicated.
Other questions on the topic of garden and sidewalk paths:
Sidewalk paths
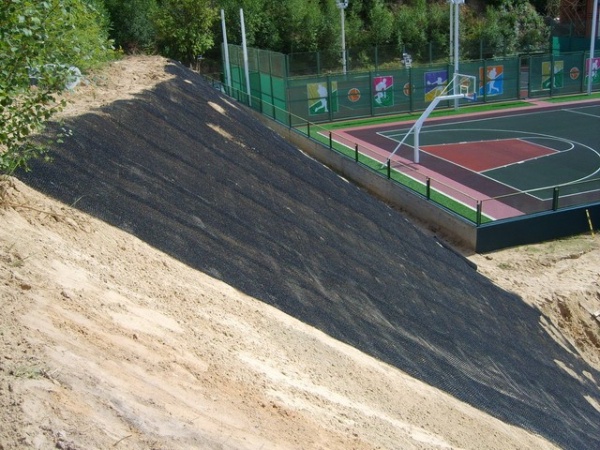
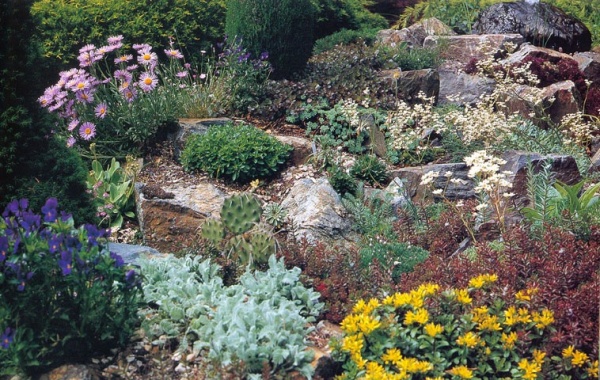
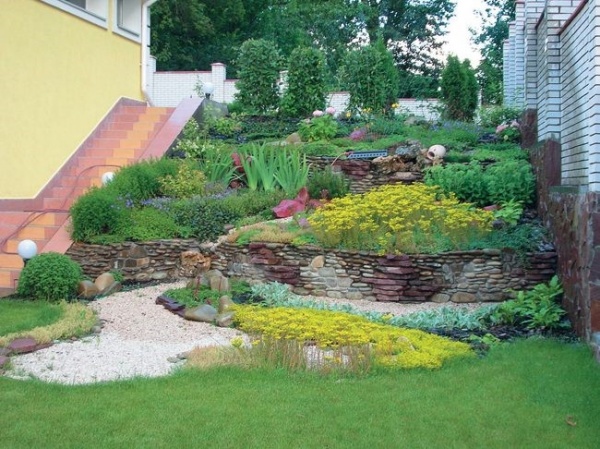
Owners of a plot on a slope are in an ambiguous position. Standard methods for placing beds are unacceptable here, and the arrangement of such a site requires significant material costs. However, after studying existing approaches to design, the owner most often comes to the conclusion about the advantages similar situation. Landscape design for a site on a slope will be developed and implemented by specialists. The ideas presented can transform the territory, making it unique, immersing it in the beauty of mountain landscapes.
Landscaping begins with work to strengthen the slopes on the site. This will prevent further destructive processes that can damage buildings and landscape design.
When strengthening slopes they use various methods and designs. Landscape design allows you to use stones and concrete blocks, biomats and gabions, logs and lawn grates. To properly strengthen the slopes, it is necessary to study and calculate the following points:
With a slight slope, it allows you to solve the problem of fixing the soil by planting trees and shrubs with a developed root system. If the slope is significant, terracing or the use of geotextiles will be required.
The simplest and inexpensive option landscape design when strengthening the slope on the site - planting plants with a developed root system. This solution is acceptable provided that the slope and its area are small. Plants are planted in cells, which act as a reinforcing structure. Subsequently, developed root system intertwined with fastening elements and prevents landslides or soil erosion. Juniper is the leader in this method of strengthening the soil; it is also recommended to plant Chinese blackberry, lilac and hawthorn.

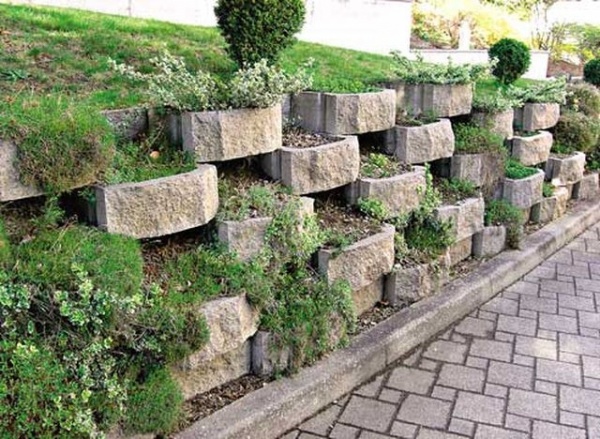
Slopes on summer cottage often reinforced with fences made of concrete slabs, sandstone, brick or limestone. The advantage of this method of landscape design is as follows:
high level of resistance to external destructive factors;
Such fences are erected subject to certain conditions:
The landscape design of the site provides the opportunity to decorate such a structure with flower beds, decorative stairs, flashlights.
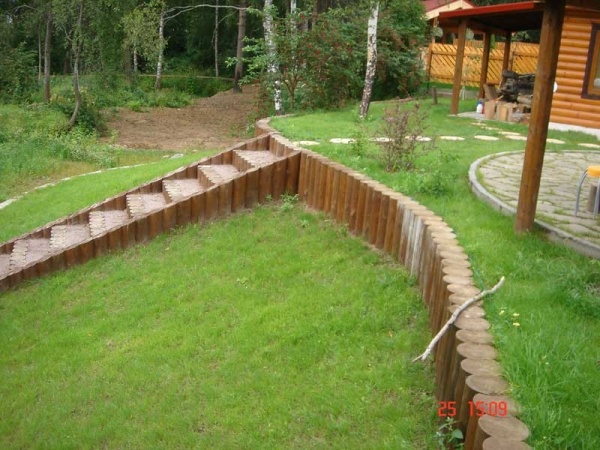
Another option for strengthening the slope on the site is the use of stones and logs. They are dug into the ground after first studying the type of soil and the condition of the surface. At the same time, do not forget about aesthetically pleasing site and take care of the presence of drainage. Such inexpensive way landscape design is acceptable on both small and large slopes.
Modern developments in landscape design suggest using geotextiles in arranging a site on a slope. This product in rolls, consisting of polyester and polypropylene fibers, has the following advantages:
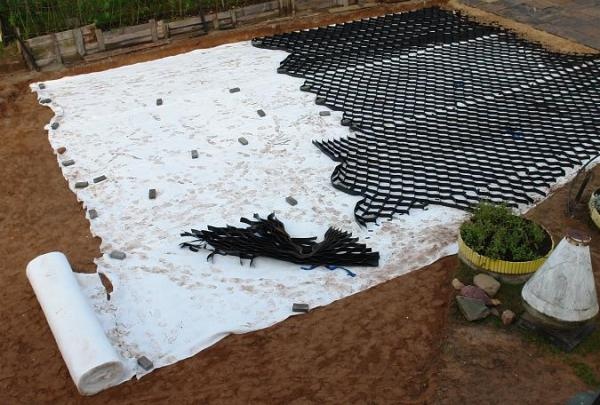
Another option acceptable when developing landscape design on a slope is laying geomats. This waterproof material consists of polypropylene grids, superimposed on each other and connected by exposure to high temperatures. Geomats have the following features:
The presented methods of landscape design when strengthening a slope can be done with your own hands or with the help of professionals. Their choice depends on the preferences of the owner and further plans for the development of the site.
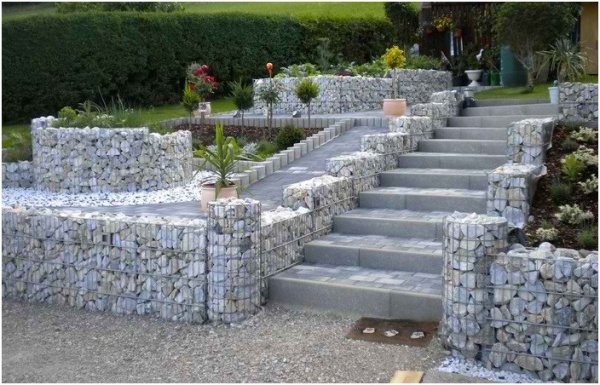
The landscape design of a site on a slope opens up wide prospects for the realization of bright fantasies and bold ideas. Considering the need for serious financial investments in landscaping, the approach to planning a site on a slope requires special care and thoughtfulness. Development design work landscape design must be preceded by study technical indicators water supply and soil characteristics. Special attention deserves the location of future outbuildings and recreation areas. Already starting from their location, they plan the construction of future terraces, flights of stairs, retaining walls and other landscaping elements. When landscaping a site on a slope, its location relative to the cardinal points must be taken into account.
Having decided to use terracing in the landscape design of a site on a slope, avoid excessively long retaining walls in a straight line. This design will create the impression of a huge staircase. Landscape design experts recommend arranging terraces randomly with ledges or cascades. This will create a picturesque picture of the overall view.

Winding paths or paths are provided between the terraces, and several steps are designed on steep slopes. Retaining walls on the site are made of various materials: natural stone and brick, wood and concrete. It is better to equip a steep climb with retaining walls using cement mortar, in a flat place, dry masonry will be sufficient.

Original ideas in the design of retaining walls on the site are welcome. Avoid straight lines; rounded shapes will ensure smooth relief transitions and visually make them less conspicuous. Terraces with different functional purposes will allow you to move away from standard approaches. Landscape design allows you to place vegetable beds and shrub plantings in separate areas. Combining them with winding paths will visually create a single picture of incompatible things.

Terrace location on wet ground assumes the presence of drainage fill made of crushed stone. It is located between the wall and the ground with a width of 10-15 cm. It is recommended to supplement the masonry with pipe scraps, which will ensure the release of moisture to the outside and will not allow it to accumulate behind the retaining wall. The absence of such protective measures will provoke rapid destruction of the structure.
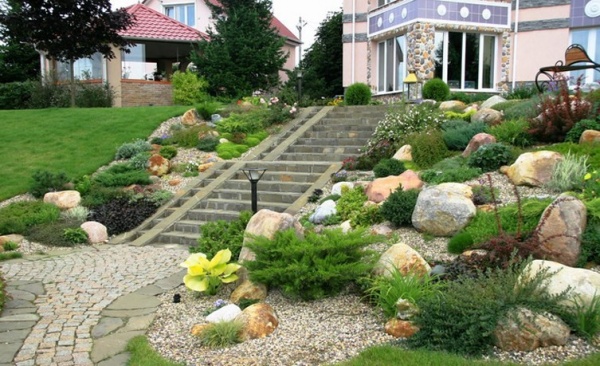
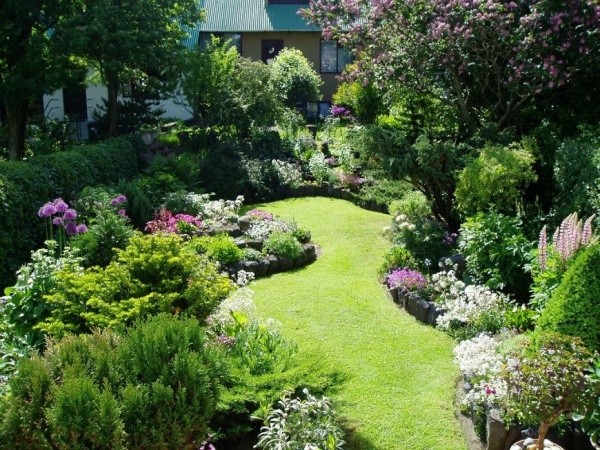
An indispensable attribute of landscape design are neat paths that help achieve an organic connection between the terraces. To ensure compatibility, it is better to make them from similar material.
Important ! Large decorative elements, be it stones, tiles or circles of wood, can create good visibility and a bright perception of the path.

The winding shape of the path hides the steepness of the slope, while the serpentine layout, on the contrary, emphasizes it. Following the rules of landscape design for a site on a slope, it is better to emphasize the bends of paths with low trees, shrubs or evergreens. Stairs to steep slope area will definitely be needed. In width it can correspond to the path that continues it or be slightly narrower, but not less than 60 cm. If the staircase has many steps, it is better to separate them with landings. It is advisable to equip them in places where the direction of movement changes. If the size is sufficient, the area is decorated with a bench, an elegant statue or an original flowerpot. Landscape design experts recommend that stairs located in a shady place be made from building materials lighter shade.
Remember! The beauty of landscape design must be combined with safety; choose non-slip material for paths and stairs.
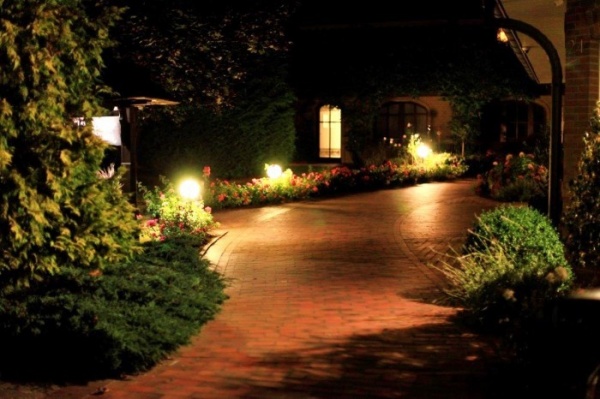
Thoughtful landscape design will provide comfort during evening walks with the help of proper lighting. There are many ways to design it, and choose the appropriate one general style option will be easy.
When choosing a floristry concept, the best option for landscape design would be the style of a mountainous area. In this case, the location of the territory relative to the cardinal directions must be taken into account. In this aspect, a site on the northern slope has its advantages, due to the possibility of decorating it with moisture-loving plants that are accustomed to a shady location. For the south side, herbs and flowers that can withstand high temperature and drought.

Landscape design is developed in such a way that the planted plants have different flowering periods. Tulips, hyacinths and crocuses will be the first to please the owners in early spring. They may be replaced by decorative onions, California poppies and marigolds, and autumn will delight with the bright colors of asters and chrysanthemums. Disembarkation perennial plants will make gardening easier.
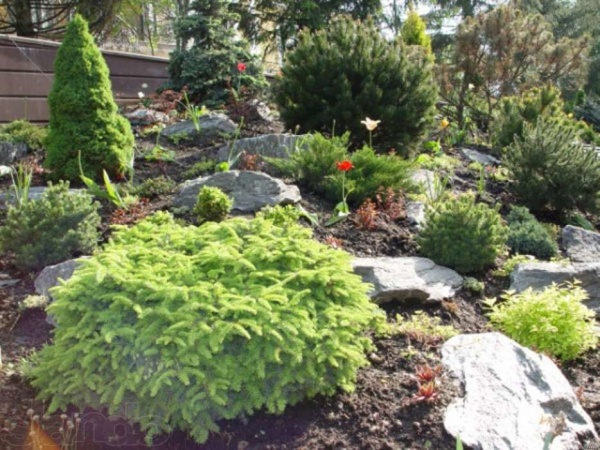
Trees on a site with a slope, according to the rules of landscape design, are planted in a special way. If the house is located at the top, next to it there are tall plantings in the form of thuja, spruce or pyramidal poplar. Barberry or lilac will help create an interesting composition.
Please note! Planted trees and shrubs should not cover the house.
The shorter plants are found further down the slope. Evergreen shrubs and colorful flower beds can add nobility and sophistication. Juniper, magnolia, and boxwood would be appropriate here. The region in which the site is located also plays a role. Therefore, when choosing green spaces, take into account the features climatic conditions your locality.
The basic rules for landscape design of a site on a slope are as follows:
It often happens that the only convenient entrance to a site is blocked by a drainage or drainage ditch. This creates additional difficulties in the construction of the driveway and complicates landscaping and decking work. road surface. Today we will share the main tricks for driving through a ditch.
A ditch near a site, be it a drainage trench or a natural stream, is always part of a more complex system responsible for the hydrogeological balance of water over a fairly large area. Failure to operate this system almost always and quite quickly leads to flooding and soaking of the soil, including its supporting layers. It is in your interests to carry out such structures competently and in accordance with technical regulations.
It is necessary to transfer the profile of the ditch to scale onto the sketch, reflecting the gentleness of the slopes and the topography of the adjacent territory. Based on the two highest points from which the descent begins, the width of the ditch is determined, and the difference between the line connecting these points and the bottom of the ditch is conventionally taken as the height. Don’t make a mistake in your calculations: usually under one or both banks there are dumps of soil, over the years under open air turned into gentle ramparts. You need to start from the plane of the adjacent territory, without taking into account the “swells” in front of and behind the ditch.

If the stream is natural, one bank may be lower than the other, while each remains in its own plane. In this situation, it will be necessary to artificially raise the lower level by embankment. Note that the methods we describe are suitable for constructing passages through a ditch up to 2.5 meters deep and 5-6 meters wide; larger ditches require an individual and professional approach.
The passage width can be up to four meters (for trucks), while one meter on each side is left as protective zones that do not bear the operational load. In general, the width of the area that will be graded is 6 meters, which correlates well with the standard length of pipes used for drainage.
The first planning task is to give the ditch a constant profile across the entire width of the passage, eliminating bends and narrowings. The trench at the passage site should take the shape of an inverted trapezoid with flat bottom, width from 40 cm to a meter, depending on the diameter of the pipe used. To prevent the pipe from being sucked into the ground, the bottom is deepened with a rectangular pit 250 mm deep to install an incompressible backfill.

It is almost always necessary to widen the ditch—to trim the walls; the soil from the dump is used to level the adjacent area. If the difference between the bank levels is up to 20-30 cm, leveling can only be done with excavated soil. If more - upper layer the embankment should consist of quartzite crushed stone of a fraction of 30-35 mm and be at least 1 cm thick. It is better to dump the removed black soil separately and save it until landscaping begins.
The protective zones on the sides of the passage need to be expanded by making half-meter cuts into the walls of the ditch. They must be dug up to the highest point of the bank along the very edge of the embankment, and if the ditch is more than 5 meters wide, with an additional 0.5 meter approach to flat areas.
The pit at the bottom is filled with road crushed stone of a fraction of up to 50 mm, and the cuts are also partially filled with it to give inclined trenches constant depth of at least 60 cm.

A flow channel is laid across the passage across its entire width, the lower edge of which is at the same level as the bottom of the ditch or below it. Typically the channel is made of a steel pipe with a cross-section from 300 to 500 mm, preferably lined. The outside of the pipe must be either primed and painted, or covered with bitumen mastic. Ends steel pipes due to their small cross-section, they must be equipped with a removable welded grille with a cell size of no more than 150 mm to protect against clogging.
The wider the channel, the lower the probability of its silting, but with a lumen diameter of 600 mm or more, such a pipe can even be considered serviceable. Large cross-section channels are best made from reinforced concrete rings with a quarter lock. With the same success, you can lay concrete U-shaped boxes (inverted trays), which are used in the construction of heating mains.

Road drainage pipes, corrugated with stiffening ribs, or the most durable HDPE for main pipelines are also suitable. Remember that the width of the channel used determines the geometry of the ditch profile at the planning stage: the bottom of the “trapezoid” should be 30-40 cm wider than the pipe. Also note that even with a significant slope of the ditch, the flow pipe is laid strictly horizontally, and the difference in levels is compensated by the increased diameter.
The purpose of the “cuts” at the edges of the protective zones is to protect the embankment of the roadway from being squeezed out. Stone-lined sides are used as stops for the embankment, sand-lime brick or cast reinforced concrete with a slab thickness of 70-80 mm.
The formwork is constructed in such a way that the edge of the channel protrudes beyond it by 100 mm on each side. It is often easier to fill the bottom of the ditch with a sand and gravel mixture to level and hide the pipe, and then install the sides.

The board should protrude 150-200 mm above the highest point (banks). The top of the sides is the starting point for the construction of the road surface and bedding pie; as a result, the surface should be 50-100 mm higher than the adjacent territory. After installing the sides, the trench inside must be filled with crushed stone to a level 250 mm below the upper edges.
Next, with an indentation of 80 cm inward from the sides, two curb stones up to 100 mm wide are cast (laid). To create a chamfer on the edge, you can put a glazing bead on the formwork, which makes it quite easy to level the mixture.

The border separates the flowerbed on the side of the road, so that the resulting space can immediately be filled to the top with black soil. It is optimal if the length of the curbs corresponds to the length of the sides, that is, two small trenches were previously dug along the entire length of the driveway. In this case, it is better to close the ends of the flower beds under acute angle for more convenient entry with a turn.
For the construction of the roadway, a rectangular recess was created with curbs on the sides and a total depth of 250 mm. Of these, 100 mm are filled with more than fine crushed stone, which is well compacted and spilled with water several times. At the same time, the lower layers of the embankment also sink, so quartzite must be added periodically until the shrinkage disappears. In the remaining 150 mm, a layer of asphalt concrete or paving slabs can be laid on a 20 mm backfill of granite screenings.

The resulting driveway is completely protected from subsidence; accordingly, it can be paved with anything at all or simply left in bulk. It is much more important to properly design the flower beds and adjacent parts of the ditch. Flowers or lawn grass. Adjacent sections of the ditch of 2.5-3 meters each need to strengthen the slopes.

Moisture-loving plants should be planted on them, mainly shrubs with a dense branched root system: irises, willow or rose hips; you can also sow creeping herbs or create a hedge. Landscaping these places will not only protect the slopes from erosion, but will also visually smooth out the topography and get rid of unpleasant dampness.
When developing the territory of a country house, it is possible that the owners may encounter the problem of organizing an access area due to the close location of drainage and sewer ditches laid along the perimeter or along the road.
Problems with arranging a drive-in may also arise in the event of a large terrain or a desire to have an underground garage.
It is necessary to provide a convenient access area to the site at the design stage, initial stage construction work.
This review will look at how to properly organize entry to a site by hand.
Before starting work, it is necessary to determine the width of the opening.
Usually, standard width the gate is four meters, so you can build on this indicator.
But you need to take into account that for the entry of long vehicles, trucks with a trailer or semi-trailer this will not be enough.
Planning entry zone, it is equally important to decide on the area and form of parking, which can be arranged immediately outside the gate or in front of the garage.
Even if you do not have personal vehicles, you should not rule out that when carrying out construction and repair work you will need to order special equipment to deliver the necessary building materials, furniture, black soil, firewood, and coal.
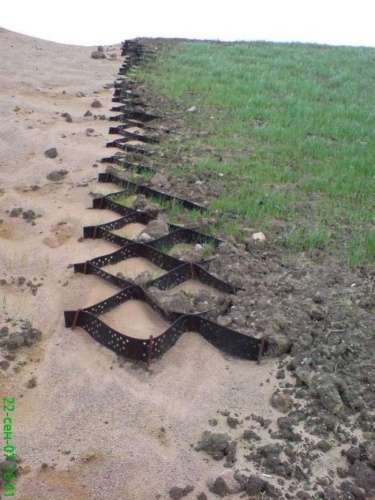
The elements are laid on top of the “pillow” and covered with a layer of crushed stone and gravel (fraction 70). Such a design will prevent the pipe from eventually falling into soil washed away by precipitation and melt water.
At the next stage, the gravel is laid on top drainage pipe, which is covered with coarse sand and gravel on top. They are compacting. It is best to perform a two-layer backfill, placing geotextiles between the layers.
All layers must be well compacted. To prevent the embankment from collapsing, concreting is done on the sides of the trench.
Free ends are left on each side of the drainage pipe and formwork is erected, consisting of two walls with supports. For greater reliability and strength, the retaining bars are reinforced with welded metal frame from reinforcement.
Fill with concrete-cement mixture using concrete grade M400. You can drive through the passage only after five to six days, after the concrete composition has completely hardened.
To ensure that the drainage pipe raised above the level of the bottom of the trench is not contaminated with plant debris, special filter grates are installed along the edges that will trap large foreign particles.
The final stage is decorating the access area with lumber, paving slabs, paving stones, clinker bricks, and several other facing building materials. You can also make a concrete screed on top of the crushed stone.
Old wooden railway sleepers can be chosen as an alternative, budget-friendly option when arranging the entrance to your site. Thanks to special impregnations and resins with which the wood is coated, sleepers are not subject to corrosion, are not afraid of moisture, and other unfavorable external factors.
Having chosen this option for arranging the access area, it is necessary to take into account that such a drive does not have a high degree of strength and reliability, and is completely unsuitable for the entry of loaded vehicles. But if the budget is limited, railway sleepers are quite suitable as a material for arranging the entrance to the site.
The advantages of this option include:
A significant drawback is the specific smell, which is especially noticeable in the sun, in warm time years, insufficient level of strength and reliability. In addition, during the spring flood period, the structure is exposed to large quantities melt water may disperse.
With the help of reinforced concrete slabs you can create a practical, reliable entrance to the site. But this option is acceptable only on hard soils, since in the lowlands in the event of flooding, displacement, damage, and fracture of slabs cannot be ruled out.
The large weight of reinforced concrete structures does not allow organizing a concrete entrance to the site with your own hands. The process is quite complex, labor-intensive, and costly.
The wider the passage, the wider the slabs will be required. To lay the slabs, it is necessary to use special equipment and additional equipment.
Before starting work, it is mandatory to take soil samples along the edges of the drainage ditch for analysis. Weak soils are strengthened with concrete supports installed along the walls of the trench.
Formwork is erected, double reinforcement is laid, and concrete is poured. The gaps that have formed between the supports and the walls are filled with clay and coarse sand.
Depending on the width of the slabs used, the top layer of soil is removed along the edges of the trench to a depth of 22-32 cm. Before laying the slabs using special equipment, the area is leveled and compacted. The problem of height differences between the ground and the slabs is solved by adding or removing excess soil.
The advantages of this organization of the access area to your site include: reliability, long service life. High price building materials, the need for soil analysis, and the complexity of installation are significant disadvantages of this method.
What should be the width of the entrance - in the video:
You can create a convenient access area by constructing an embankment and sides. Despite the fact that this option for organizing entry to the site does not imply large financial costs and investments, the work process is quite complex and labor-intensive. Sequence of work:
To correctly determine required quantity building materials, calculate their thickness, and measure the height of the channel before carrying out work. If there is a need to increase the depth so as not to disrupt the natural outflow groundwater remove the top layer of soil at a slight angle. If you skip this one, reduce the thickness of the top layer to 50 cm.

If the area has a pronounced relief, the drive can be made on a slope, up or down from the road.
For personal safety, you need to ensure sufficiently reliable, strong adhesion of the wheelbase to the road surface.
If you plan to build an underground garage, the terrain has a slope angle, the access to the site can be done like a car ramp. In this case, the slope angle should not exceed 23%.
The height difference per meter should be no more than 23 cm. Before parking, car parking The slope angle is gradually reduced until a perfectly flat horizontal surface is formed.
When planning the arrangement of an access area with a slope, perform in the following sequence:
If you have a large enough area to organize an access area, you can arrange the entrance to your site along a curve, reducing the angle of inclination, increasing the path. This option for arranging a check-in allows you to arrange parking for several cars at the same time.
When planning the arrangement of a convenient access area to the site, you can choose any of the above, based on your financial capabilities, level of skill, experience in carrying out construction and repair work, taking into account the advantages and disadvantages of each method.
To protect the driveway from icing, you can build a beautiful one from polycarbonate sheets. arched canopy, install an electric heating system for concrete slabs.


