Raising rabbits is a profitable activity that does not require much time. Animals do not require special care or specific living conditions. Therefore, you can have several fluffies in a private household. Beginning farmers often have a desire to breed these animals, but the first thing they have to face is how to make cages for rabbits according to drawings with dimensions.
When installing cages for rabbits, you need to pay attention to certain conditions in which the animals may be. First you need to choose the right place where the cells will stand.. They can be placed:
Of course, devices can be placed outdoors only in regions with a more or less warm climate. At severe frosts Rabbits can simply freeze. If the air temperature all year round optimal, then the following must be taken into account:
It's important to consider the details. They are useful both for keeping rabbits outdoors and indoors:

If the site is located in cold regions of the country, this implies the mandatory presence of an enclosed space for placing the houses. A shed may be suitable for this. Need to create the right conditions for a comfortable stay for furry ones:


Having built a high-quality and comfortable cage for animals, the owner does only a small part of the work. The most important element is feeding, keeping and breeding rabbits in comfortable conditions for them. You will need to feed them the right food in a dry state. Wet or steamed food can adversely affect the health of rabbits and lead to death of the animals.
 Many people are interested in how to make a rabbitry with their own hands. There are different schemes in the pictures (one- and two-tier, large or small, queen cells, homemade, industrial, wooden and metal, Italian, wandering, homemade, etc.), just as there are many approaches, for example, the method of Mikhailov, Zolotukhin , Maklyaka. Simple design can be done for little money, but, unfortunately, not for free.
Before you start working, you will need, in addition to the diagram, to select the right material for the work.
To create such structures, it is desirable to use natural materials to imitate conditions similar to natural ones. Therefore, as a basis for the design should be used wooden blocks, which are treated with environmentally friendly antiseptics. To build cells you will need the following materials:

The interior walls are made of plywood, as it is moisture-resistant and very strong. Chipboard is not suitable for such purposes, since it strongly absorbs moisture and collapses over time due to swelling.
All good cells have common characteristics, but still they can be divided into several types, each of which has its own individual differences. First important factor is what breeds and individuals will live in such structures. Each farm should have several types of cages. Depending on how much space there is in height in the barn, structures are divided into the following:
At a certain age, rabbits must be housed. Types of cells can be divided into the following types:

Nest cages are made for pregnant rabbits and recently born rabbits. They are also called queen cells because they have a box, tank or booth inside that imitates a burrow in natural conditions. In it, the expectant mother makes a nest for her children. There they spend the first two months of their lives.
The size of the cells may also depend on what breed you want to breed:
It also matters for what purpose the animals are bred. They can be both for the soul and for sale.
Cell designs can be different, and their parameters can vary significantly. But, on the other hand, you can make a cage according to general rules, and then complete the necessary parts.
 Lovers of a country lifestyle are often interested in the question of how to build a rabbitry with their own hands. There are many drawings on the Internet, so there are plenty of options. The most common way to build typical design- this is the presence of two sections. In one part there will be adult livestock, and in the other there will be a queen cell.
If there is no female with cubs on the farm yet, you can put additional houses in the nesting compartment and put adult rabbits there so that they can hide there if they feel unwell. For owners who do not know how to build a rabbit cage with their own hands, step-by-step instructions are given below. Cell production occurs in stages:

 Making a rabbit house using the Mikhailov method involves creating a multi-tiered mini-farm. In other words, this is a kind of shed consisting of mini-farms. Each of them has a separate cage for the queen cell (for two rabbits), and on the other side - separate design for the fattening period of young animals that have been disconnected from the mother's nest. After four months, you can get real giants weighing 8-12 kg using this method. Rabbit breeding using this method is quite a profitable business.
It is a little more difficult to make a cage for a female rabbit with a queen cell using Mikhailov’s method than a structure for fattening rabbits.
Thus, this method is rightfully considered the best in all respects for production breeding purposes.


How to build a rabbit cage yourself? This question usually arises among beginners who decide to start rabbit farming. Experienced farmers usually develop designs that are convenient for themselves, making it easier to care for animals.
Cells can have different structures and be made from a variety of materials. They are made completely simple or additionally equipped with “conveniences”, such as running water or heating. In the construction of the cage, much will depend on the planned number of rabbits, their breed and size, on the availability of retreat materials and on the place where it will be installed, on the desire and ability to equip it with various devices, as well as on the ability to work with carpentry and plumbing tools.
Rabbit cages can be located in utility rooms, such as, for example, or directly on the street. Therefore, they can be divided into three types according to their location and the method of breeding rabbits:
Experienced rabbit breeders believe that the most optimal way to breed these animals is to keep them outdoors all year round, as this promotes the development of immunity to various diseases and the formation of healthy, high-quality hair. In addition, when raising rabbits outdoors, the productivity of females significantly improves, which increases the number of rabbits in the litter and their endurance.
Rabbit cages are most often installed outdoors if you plan to breed a large number of animals - a hundred or more animals.

Convenience of arranging rabbit hutches in street conditions is to have more space and ease of care for your “menagerie”, since each of the cells needs periodic cleaning.
Rabbit cage
To build outdoor cages, fairly durable materials are used, since the structure must be reliable and stable - these qualities will help protect rabbits from adverse natural factors, as well as from the penetration of predatory animals - dogs, foxes, cats or rats - into the cages.

It is advisable that the building be located under a large front canopy so that any precipitation, as well as direct Sun rays They didn’t bother the pets much.

If the rabbits will be outside all year round, then it is necessary to take care of insulating one of the parts of the cage. These animals tolerate low winter temperatures well, but it would still be a good idea to create for them comfortable conditions and a special place where they can warm themselves on particularly cold days and nights.

Cages placed in non-ventilated areas can be made entirely of metal mesh attached to a wooden frame and have a wooden lattice floor. If breeding pets is carried out indoors, it is important to think carefully about the convenient disposal of their waste.

In another case, if funds and space allow, cages are built in two places - both on the street and in a barn. This method of farming is unlikely to be suitable for those farmers who raise a large number of pets, since installing winter and summer cages will require a fairly large area.
Rabbit cages can be single-tiered or multi-tiered. In addition, their design may vary depending on the main purpose - for breeding, for raising young animals or for keeping adult pets.
Cells can be single-tiered or multi-tiered, but they are arranged in no more than three tiers.
Single-tier buildings are raised above the ground by 700÷800 mm and covered with a roof made of or metal sheets. If this type of building will be located on the street, then it is better to choose a slate roof, since the metal heats up quickly, and rabbits do not tolerate extreme heat very well.

To collect and dispose of animal waste, a metal tray made in the form of a drain is often installed in a single-tier cage for the convenience of its regular cleaning.
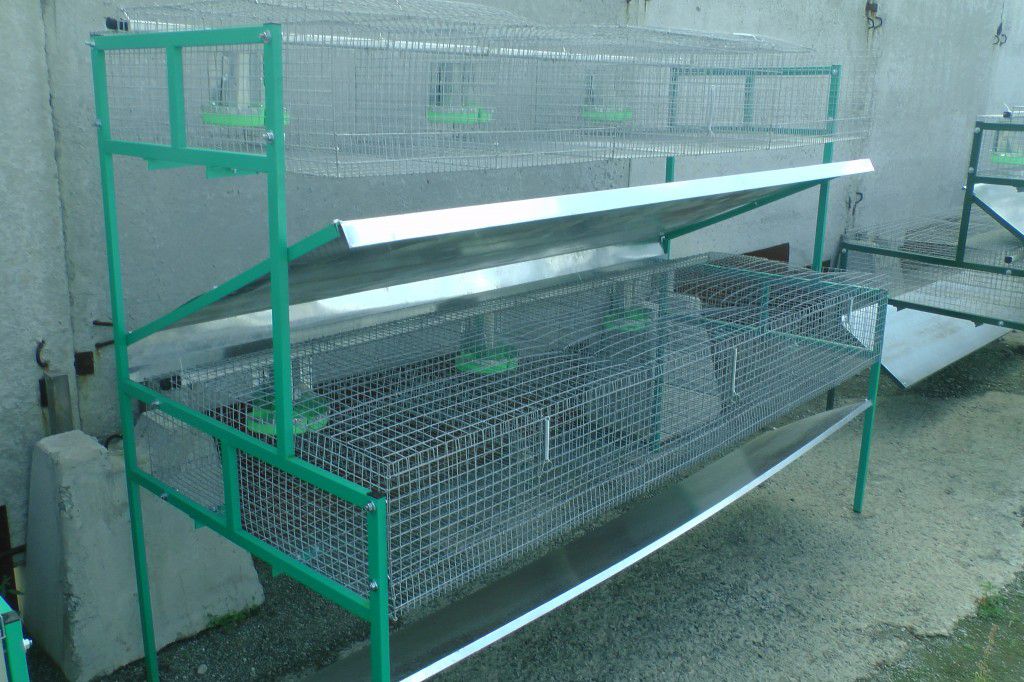
More often, multi-tiered cages are practiced, which can have two or three tiers, and on each of which a different number of sections are placed. Such structures are most often made of bars, boards and galvanized mesh, and are used for breeding rabbits, both outdoors and indoors.

Such cage designs are called sheds - in them, tiers with sections are located one above the other, which helps to significantly save space.
A two-tier design is considered the best option, as it will allow for comfortable care and monitoring of pets.
It is recommended to raise the shad above the ground by 500÷600 mm when installed indoors, and by 700÷750 mm when installed outdoors. This cage is considered the best for keeping rabbits, so it is used most often.
When building multi-tiered cages, there must be a space of at least 150 mm high between each of the tiers. An inclined one is installed above the cells metal roof. In the space between the tiers and under the lower tier, inclined tides are fixed. They are necessary so that rabbit waste does not fall into the lower cages and does not linger on the lower roof, but flows to the ground or into a common or separate drain for each tier located at the back of the structure. At each of these ebbs, sides are bent on the sides to prevent waste from falling beyond this plane.

Some owners prefer to use removable plastic trays, which are mounted on skids under the slatted floor and can be removed for cleaning and rinsing.
Another option is for the trays to be installed directly in the cages. In addition, sometimes cages are made with a solid floor. Both of the latter options are probably still not very convenient, since the bedding in the cages will have to be changed quite often - once every two to three days.
In cages intended for breeding, special chambers are installed on the sides, or space is provided for installing a mobile queen cell. In a design with a stationary compartment, the walls, removable floor and ceiling are made solid, since it must be well insulated and not blown through by drafts, otherwise the rabbits will die.

The floor in the rest of the cage, where the food section is located, is made of wooden blocks or metal mesh.
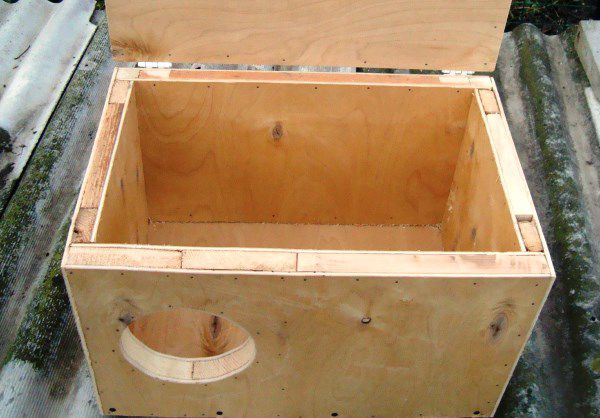
The mobile queen cell is a completely closed box with a round hole for entry. The box should also have an additional side door to allow it to be cleaned and dried.
breeding cages

A mobile queen cell is convenient because it can be rearranged, if necessary, into different cells, and it is also easier to clean and change bedding.
This chamber is insulated dry, not damaged by mold hay or shavings. It is not recommended to use small sawdust, as they can get into the respiratory tract of the rabbits, and they will die.
If breeding is carried out in winter, then a few days before it, it is recommended to place an electric heating pad in the queen cell to create comfortable conditions for the female rabbit.

During the cold season, it is often impossible to do without heating the uterine tract, so instead of a heating pad, you can also use a regular light bulb, which is kept constantly on during this period. It is placed in a compartment located behind the wall of the uterine chamber. Having chosen this heating option, it is necessary to take care of fire safety, so the chamber where the lamp will be located must be sheathed with a thin metal sheet.
Another way to heat this part of the cage is, which is fixed to the bottom of the queen cell, and a removable floor panel is placed on top of it. When using this option, it is imperative to ensure that the cable located in the cage is solid, without splicing. This system, installed in accordance with all the rules, allows you to regulate the temperature in the uterine compartment depending on the temperature outside - it can be connected to a thermostatic regulator.
For cages located indoors in barns, it is best to make queen cells mobile so that they can be taken outside for thorough cleaning, ventilation and drying in the sun. If a built-in uterine chamber is planned, then the floor must be removable.

Each section of cells of this type usually has a length of 1000÷1200 mm, a depth of 550÷650 mm, a height on the front side of 550÷600 mm and 400÷450 mm on the rear wall. The built-in uterine chamber is made 350÷400 mm wide.
Cages for young animals should be designed to accommodate 8÷20 rabbits at a time, aged from three to five months. A group cage is made with an area of approximately 0.25 - 0.3 m² per pet, with a wall height of at least 350 mm.

If the cages are made multi-tiered and installed on the street, then they must be raised above the ground by at least 700÷750 mm.

In cages for young animals, the warm nesting compartment should also be well insulated for the winter, in approximately the same way as for newborn rabbits. For insulation, hay or straw is used, laid 15÷20 mm thick. You should not choose for insulation artificial materials, as they have a bad effect on the development and growth of babies of all breeds of rabbits.

For adult rabbits of medium-sized breeds, cages are made with sections 600÷700 mm deep, a front height of 600 mm and a length of 1000 mm - these are the minimum dimensions for comfortable development adult animal. The same block design is used for these cells; each block contains two cells separated by a wall.

It is also necessary to provide for the union of these cells into one, for example, for the mating period - for this, the partition between them is made removable. It is recommended to make the floor in cages for adults from galvanized mesh.
It is very important to take into account that pets must move freely inside the cages, since their growth and development will depend on this.
This cage design is well suited for keeping young animals or for rabbits of reproductive age. The cage consists of two compartments - an area completely enclosed by walls and a roof and a mesh enclosure. The two compartments are connected by a round or rectangular entrance cut into the rear wall of the cage with solid surfaces. Rabbits in such cages have the opportunity to move freely and safely, which is beneficial for their development and growth.

The dimensions of such structures may vary, but usually the depth of a closed cage is 600÷650 mm, and the depth of the enclosure is 800÷1000 mm. Most often, a regular single-tier block is built, consisting of two separate cages, and then, if there is space behind it, a mesh enclosure is attached to it.
Large rabbits of the “giant” meat-skin breed require a special approach, since not standard cages are built for them, but those with more significant parameters. Individuals of this breed grow to sizes from 550 to 650 mm in length, and their weight ranges from 5.5 to 7.5 kg. These numbers must be used as a starting point when drawing up a construction design drawing.

For one adult “giant” rabbit, you will need a cage measuring at least 960 mm in length, 700 mm in depth and 600÷700 mm in height.
For young animals of this breed, in one litter of which there are on average eight rabbits, you will need a cage of 1.2 m², at least 400 mm high.
Since “giant” rabbits have quite a lot of weight, the floor of the cage should be reinforced - it is also covered with galvanized mesh, but made of thicker wire, for example, 2÷2.2 mm. In addition, to prevent the mesh from bending under the weight of the animal, when making the floor, you must first secure bars measuring 30×30 mm, laid at a distance of 35÷40 mm from each other, and then lay and secure a metal mesh on top of them.

Some farmers put a solid floor in their cages, but in this case, the best option would be to install plastic or rubber trays in them. If you choose this option for arranging the cage, then you will have to clean it of waste daily or once every two days.
metal aviary
This breed of rabbits (a hybrid of the New Zealand breed, the Soviet chinchilla and the Russian ermine) is quite popular due to its ease of care and resistance to negative winter temperatures. In size, adult individuals of the Californian breed are smaller than “giants” and their length is 450÷500 mm, but their weight sometimes reaches up to 4.5÷5 kg. The cage for these rabbits should be approximately 0.4÷0.5 m² in size. The paws of pets of this breed are covered with coarse hair, so they will be quite comfortable in cages with mesh or slatted floors.

When California rabbits are raised exclusively for meat, they are often kept in a pit measuring 2000x2000 and 1000 mm deep. The walls of the pit are reinforced with slate, a plank or mesh floor is laid on the floors, a low fence is installed around the pit and a roof is built.

An earthen niche is made in one of the walls of the pit, which is not reinforced in any way. It is necessary in order to create conditions close to natural environment habitat of these animals. Rabbits will happily dig holes in the ground, and with proper care they will reproduce well and raise young on their own.
To make caring for your pets easier, it is worth considering a convenient supply of food and water for them. There are many different designs, both feeders and drinkers. They can be purchased ready-made or even made yourself.
Rabbits need a lot of clean water and if you pour it into a bowl that is not fixed at a certain height, then various debris will fall into it, or, even worse, a rabbit, stepping on it with its paw, will simply knock it over and spill water.

It is very important to decide on the choice of material from which the drinkers will be made. For example, if you install products made of thin plastic, they will not last for a long time, as rabbits will chew them. In metal cans, water will quickly become dirty and cloudy. Therefore, experienced rabbit breeders have developed several simple designs that allow them to constantly provide the animals with the necessary amount of water.
This type of drinker is often used both on large farms and in small households. The design of this drinking bowl consists of a bowl connected to a container filled with water. Moreover, the bowl is in the cage, and the container is located outside, so it is easy to replenish it with new supplies of fresh water.

The principle of operation of such devices is quite simple - as the water decreases from the bowl, a new portion of liquid will flow into it from the container. In this case, the float system is triggered - there is little water left in the bowl, so the valve installed in the container opens and the drinking bowl is replenished with water. It is quite difficult to make such a drinking bowl yourself, but it can be purchased ready-made.
The nipple type of drinker is convenient and practical, since in this case the animals cannot spill the water - it remains in the tube until the rabbit begins to drink, performing sucking movements.

The disadvantage of this water delivery system is that at low temperatures the water in the container and in the tubes quickly freezes, so this drinker can only be used in the warm season.

There are several ways to make a drinking bowl from an ordinary one plastic bottle, and they should be considered so that the manufacturing process can be carried out independently.
The operating principle of this design is based on the laws of physics, and to make it, you need to proceed as follows:


This drinker works on the principle of a conventional hand washbasin, that is, when you press the throttle installed together with the valve in the bottle cap, water begins to flow down the throttle through the resulting hole.

There should not be a hole in the lid big size, but the throttle should move up and down easily in it. A rubber gasket can be used as a valve, which holds the throttle well and covers the hole in the bottle cap in a calm state.
The bottle with this device is fixed vertically on the cage, at a height of 250÷300 mm from the floor.
This is a very simple version of a drinking bowl, made from a plastic bottle; it is suspended on wire holders at a height of 250÷300 mm from the floor. To make such a drinker, a cutout is made in the side of the bottle, 100÷120 mm wide and almost the entire length of the bottle, 50÷60 mm away from the lid and bottom.

The drinking bowl is secured with outside cells so that the hole cut in the bottle is turned inward. In the cage at this level, part of the mesh wall is also cut out so that the rabbits can easily reach the water. Such a drinking bowl will have to be replenished with water quite often, but it is extremely simple to manufacture.
It is advisable to plan the feeders at the stage of drawing up the drawing of the entire structure. Feed supply devices can be of three types:


Feeders for feed can be made of metal sheet used for laying sewers or other materials. An important condition, which must be fulfilled for efficient work This device is responsible for the correct and reliable fastening of the container to the cell wall. The principle of operation of such a device is that food independently enters a bowl located in the cage from a container fixed outside it, as it decreases.
Before purchasing materials, it is recommended to draw up an accurate drawing of a cage or multi-tiered complex. It is necessary to foresee the location of feeders and drinkers on the plan, especially in cases where they will be built into the overall structure.

IN in this case presented step by step description manufacturing a three-tier cage 1400 mm wide, 1900 mm high and 600 mm deep.
For work you will need the following materials:
| Name of materials or components | Size, mm | Quantity |
|---|---|---|
| Board | 100×30 | 10 m |
| timber | 50×30 | 27 m |
| Plywood 15 mm | Standard | 1÷2 sheets |
| Metal grid | Wire 0.7 mm, mesh 25×25 mm | 8 m² |
| Metal galvanized sheet | Thickness 0.6÷0.9 mm | 3 m² |
| Self-tapping screws | 50 | 300÷500 pcs. |
| Nails | 60÷70 | 100 pieces. |
| Latch locks for queen cells | Standard | 6 pcs. |
| Hinges for securing the hinged doors of the queen cell. | 12 pcs. |
The table below describes the cage installation process step by step:
| Illustration | Brief description of the operation performed |
|---|---|
 | From the purchased boards it is necessary to make parts for mounting the frame: - 100×30×2250 mm – 4 pcs.; - 50×30×1340 mm – 12 pcs.; - 50×30×540 mm – 12 pcs.; - 25×30×540 mm – 72 pcs. |
 | Six identical frame frames measuring 1340x600 mm are assembled from prepared lumber. |
 | Making frames is easy. First, one is assembled with precise dimensions and squareness, and then it is used as a template for making the rest. To assemble each frame, you will need two beams measuring 50x30x540 mm and two beams measuring 50x30x1340 mm. Smaller bars are secured between two long ones using two self-tapping screws at each connection |
 | The result of installation should be six neat, even frames of the same size. |
 | The next step is to position the frames and fix them on boards measuring 100x30x2250 mm, laid at a distance of the width of the frame. The distance between the frames forming the frame and the floor of the cage of each tier should be 400 mm. The space left between tiers is 180 mm. The first tier should be raised 400 mm above the ground. The frames are secured with two self-tapping screws, screwed in along the diagonal intersection line at the joints of the frame frame and side boards. |
 | The next step is to fasten the frames along the top edge with two boards laid parallel to the bottom ones. It is important here to ensure that the frames are perfectly vertical. To check their verticality, a building level is used. |
 | Next, the blocks for installation of the grated floor are prepared. Their size should be 25x30x540 mm. |
 | The distance between the sheathing bars should be 15÷20 mm (lightwise). They are installed inside the frame frame, and through it, on the side, secured with self-tapping screws on both sides. |
 | The floor of the cells on all three tiers is lined in exactly the same way. If it is planned to make a queen cell on one of the tiers, where breeding occurs, and where the rabbits will be kept until a certain age, then in this place the floor of the cage should be solid and removable. The arrangement of the queen cell was described above. |
 | Will each of the tiers be divided into two separate cells? between which a hay box is mounted in the shape of the Latin letter V. Hay or grass for rabbits will be placed here. The sennik is formed from four bars, which are installed on both sides of the frame. The size of the hay is 150÷200 mm in the upper part, and 6÷8 mm in the lower part. Naturally, it is necessary to achieve a clear correspondence in the location of the inclined crossbars on both sides of the frame. |
 | To ensure that the doors have the correct rectangular shape, a hay barn can be made from boards by cutting one of their sides at a certain angle and connecting them at the bottom from the inside of the cage. Thus, the outer edge of the hay barn will be smooth and will act as a wall to which the door will adjoin. In addition, the front parts of the hay barn can be cut from plywood 15 mm thick. |
 | The frame of the hay barn is sheathed inside along installed bars (or cutouts made at an angle in boards or plywood) with a mesh of 0.7 mm wire having cells of 25 × 25 mm. |
 | If you plan to make a queen cell in the cage, then it is separated from the cage by a plywood or plank wall with a small entrance. To make it easier to attach this wall, additional bars are mounted into the structure, to which the plywood jumper will be attached. |
 | The entrance to the wall can be round or semicircular, but it must be located at a height of 100–120 mm from the floor of the cage - this distance must be maintained so that the rabbits cannot get into the large cage until they can overcome this height on their own. The width of the entrance to the queen cell should be approximately 150 mm. After the hole is cut, it must be cleaned with sandpaper, since its edges must be absolutely smooth. |
 | The width of the queen cell is usually 300÷350 mm. The jumper wall is fixed on the bars, then the same wall is mounted with outside cages, and then the roof panel is fixed. If in the main space of the cage the roof can be covered with a metal mesh, then in the queen cell it should be continuous. Lastly, a bottom made of plywood is placed in the queen cell compartment. However, it should not be secured to the lower bars with self-tapping screws, since after the rabbits grow up and are moved to other, more spacious cages, the bottom part is removed from the uterine chamber, washed, dried and put in place for the next birth. |
 | The final stage in the installation of the queen cell is the installation of a hinged external door on it across the entire width of the chamber. At the bottom, the door is secured to the beam with two metal hinges. |
 | A latch lock or latch is installed in the middle of the upper part of the door panel. |
 | Next, the cage door frame is made from 30x30 mm bars. It is made according to the size of the opening formed in the cell wall. The door frame bars are fastened together at the corners with two self-tapping screws. |
 | The illustration shows the finished door frame before it is covered with metal mesh. |
 | The mesh is fixed to the frame using staples and a stapler - such fixation will be quite sufficient. |
 | A door with a mesh installed on the inside looks like this. |
 | Hinges on mesh doors can be mounted at the bottom (in which case the door will be hinged), or on one side of the opening (in which case it will be hinged). It all depends on ease of use in specific conditions. |
 | If the cages will be installed under a roof, for example, in a barn or other indoor utility room, then the walls and roof of the cages can also be lined with mesh. When installing the structure outdoors, the side and rear walls and roof must be covered with plywood or boards |
 | It is very important to make the correct tides under each tier of cages so that animal waste from the upper cages does not fall into the lower ones. To make ebbs, a metal sheet is used, on which the edges are folded on the sides - these sides should have a height of 80÷100 mm. The ebbs are attached to the front lower part of the frame under the cage, and its other edge is laid on the rear wall of the lower cage and extends beyond it by 300÷350 mm. Thus, the ebb tides are tilted and they protrude back beyond the structure so that they do not interfere with the approach to the rabbitry from the front side. |
 | The result should be something like this cell. In terms of complexity, this design option can be called the simplest and most accessible even for beginners. |
If you understand the principles of constructing cages for rabbits, then when drawing up a drawing, if desired, you can make your own adjustments. But it is still necessary to always keep in mind that any adult rabbit requires at least 0.5 m² of living space. It’s even better to adhere to the recommended section sizes, about 1000 mm in length, 600÷ 700 in depth, and from 400 to 600 mm in height.
And at the end of the article, there is a video in which the rabbit breeder shares the secrets of the design of improved cages:
Breeding rabbits in households can be profitable, as well as result in complete losses. Rabbits actively breed, grow quickly, eat green food, and their meat and skins are expensive - and this brings considerable profit to the breeder. However, they are capricious in maintenance and subject to high mortality. Therefore, the construction of a rabbitry should be given the closest attention. We will tell you how to create a rabbitry with your own hands in this article.
The word "rabbit" has a double meaning. This is the name given to the room where rabbit enclosures are located, as well as cages placed together and mini-farms located on the street.
Most often, rabbit farms are heated and lit rooms with good ventilation, where cages are located in tiers. In regions with a mild climate, open rabbitries are more often used, which are a structure of two or three walls covered with a canopy.

Rabbit farm - inside view
A good rabbitry must meet the following requirements:
Buildings for rabbitry are made one-story and rectangular. They are built in accordance with GOST 23838.
In practice, cages with these animals can be placed in a frame-type barn.

A standard indoor rabbitry is an enclosed room equipped with lighting, ventilation and heating systems, and, less commonly, a water supply system. There are cages in long rows, usually in three tiers. There are passages between them, optimal width which is equal to 1.5 m. Often part of the rabbitry is separated for technical rooms and feed storage.

This is one of the most controversial decisions; there are approximately equal numbers of supporters and opponents of this design.

An example of “pit” rabbit keeping
Pros of “pit” content:
Disadvantages of “pit” content:
 Example No. 1 of keeping rabbits in pits
  Example No. 2 of keeping rabbits in pits
  Example No. 3 of keeping rabbits in pits
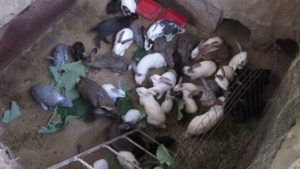
For pit-keeping in a rabbitry, a hole with a depth of 1 to 2 meters is dug around the entire perimeter. The floor and walls are concreted to prevent escapes. The resulting hole is filled with sand approximately 20 cm thick, on which a net is laid for easy cleaning. Feeders and drinking bowls are placed inside, and you can let rabbits in.
According to a number of farmers, pit housing is the best option, as it is as close as possible to natural conditions residence of rabbits. It is believed that the characteristics of meat from rabbits living underground are much better. However, despite all the advantages, organizing such housing is associated with a number of difficulties. dealing with rabbits in pits in .
The climate of Russia is such that in most of its territory the winter is too cold for keeping rodents outdoors or in uninsulated rooms. Therefore, to successfully keep rabbits, you need to think about insulation. There are two options here, and to achieve best result they need to be combined. Either heat the rabbitry or insulate the compartments themselves in which the animals are kept.

The temperature in the place where they are kept should not fall below -5. The ideal range for this time of year is considered to be from +5 to +15-20 degrees. Approaching upper threshold the indicated range is most desirable; in warm conditions, rabbits reproduce well and gain weight. This will help prevent seasonal “breaks” in this type of business.
In the queen cell, the temperature should not fall below 10 degrees, otherwise the rabbits may die, or, under the best circumstances, they will lag significantly behind in development, and the farmer will spend more on maintaining the young than he will ultimately make a profit. It must be taken into account that rabbits are born naked and are very sensitive to cold. Although the female herself takes care of heating the cubs and insulating the nest, both mole rats and rabbits that have already grown up and have grown fur - low temperatures are all harmful. Systematic freezing leads to slow growth and poor weight gain, as well as decreased immunity.
Russian rabbit breeders came up with an original way to insulate compartments. A “pocket” made of thick plywood is attached to the bottom of the compartment, into which an EG-1 (or other) electric heating pad is placed. Using a transformer, if necessary, the heating pad is switched to a reduced mode, thereby heating the floor of the cage.

Regardless of the chosen design of the rabbitry and cages, there are certain sanitary and hygienic standards that must be observed. In particular, there are certain standards for lighting, temperature and ventilation of cells. When creating a rabbitry, they must be adhered to.

From the description of large structures, let's move on to small ones, that is, to cells. They can be used either autonomously, to keep one or two animals separately from the rest, or stand in a barn-type rabbitry or be part of a collapsible mini-farm complex.
There are a lot of options for rabbit cages. But they can all be divided into three conditional groups, depending on their purpose.

These are specially designed cages where female rabbits are placed for lambing. There she gives birth and lives with the cubs until they reach twenty days of age.
A distinctive feature is the presence of a nest. It is a box made from scrap materials, such as plywood, and has dimensions of 40 cm x 40 cm x 30 cm.
Rules for building a nest:

This type of design is good for housing two adult animals. At positive temperatures it is permissible to display it outdoors; at sub-zero temperatures it is recommended to use it indoors, including heated ones.

A two-section cage is a wooden box 1.4 - 2 m long, 0.5 to 0.7 m high and 0.5-0.7 m wide. The top, bottom, side and rear walls are made solid. It is best to use structures made of sanded, unpainted boards knocked down without cracks for this purpose, but other solutions are also possible, for example, from fine mesh or tin. In the last two cases, it is worth taking care of a rigid, strong frame that will support the entire structure.

Drinkers and feeders are placed along the edges, so that animals cannot climb into them with their paws.
Two-section cages can also be made multi-tiered. This will help to use the rabbitry area more efficiently.
Video - DIY two-section cage
Cage with nest
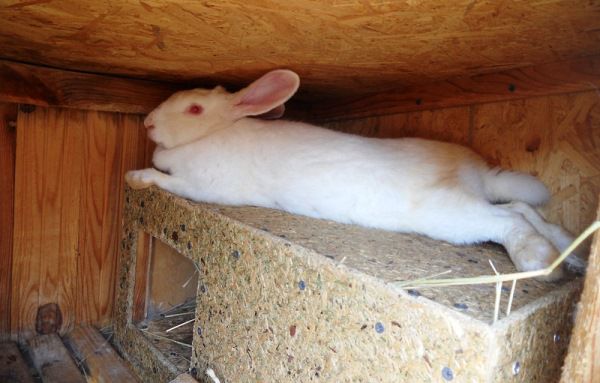
This option is a little more complicated to make, but allows the rabbit to lead a more natural lifestyle. In this case, the cell is divided into two compartments with a hole between them. The smaller compartment is insulated with hay and serves as a nest.
Group cells
Enclosures for young animals 3-6 months old, also called group cages. Animals can be either different-sex or same-sex. Please note that uncastrated males may begin to show aggression towards each other early, in which case they must be placed in individual compartments. The typical dimensions of this cage are 120 by 50 by 40 cm.
How to create a blueprint for a rabbitry
Of course, you can make a drawing of an individual cage or a whole rabbitry yourself, or simply adjust any of the above options to your size. The main parameter you need to know is the number of rabbits that you plan to keep in the cage.
- One young animal requires a minimum of 0.1-0.2 m2. For a comfortable stay, this norm should be increased to 0.5 m2. Males that are planned to be allowed to breed need 2 times more space.
- An adult animal needs at least half a meter of free space. Ideally, a meter to be able to move fully.
- For large breed rabbits, these standards need to be increased. The dimensions should be such that the animal can freely stretch out to its full length along the cage without resting its body against the walls, and can sit without touching the lid with its ears.
- The queen cell must have a separate nest. Its typical dimensions are 40 cm x 40 cm x 30 cm.
When the dimensions are determined, you can begin the drawing. You should start by drawing out the top view: draw a rectangle of the required dimensions, if necessary, divide it into sections. Then, all elements are indicated on the drawing: partitions, doors, manholes, feeders, etc. Dimensions are indicated everywhere. Based on the top view, a side view is drawn. The imaginary cut should pass through the most technologically complex section, for example, along the nest of the queen cell. The sizes must match. You can draw the view from below, paying particular attention to the legs and support structure.
Nuances in making a rabbitry
If this is your first time building a cage, here are a few tips that will come in handy. They are not obvious to new farmers and will help to avoid mistakes.
Watching a video, where you can personally observe the construction process by professionals, also helps to avoid mistakes.
Video - Step-by-step construction of a cage for rabbits
Tools and materials
To build a rabbitry you don’t need anything particularly rare or expensive. As for the tools, a regular construction kit is sufficient. Having a welding machine will be a plus.
Prices for popular models of jigsaws
Jigsaw
Usually for construction they take clapboard, timber or regular boards. It’s just not recommended to use them; rabbits chew through the wood. Therefore, it is combined with the following materials:
Let's look at what materials the parts for creating cells are made from.
- Frame. It is made from wooden blocks.
- Side and back walls. They are made from thick boards. There are recommendations to make walls from plywood, but this should not be done. Plywood is less durable, it warps from moisture, delaminates and bubbles, and, most importantly, rabbits quickly chew through it.
- Front wall. Made from fine mesh. Iron mesh can only be used if it is painted or coated, otherwise it will rust.
- Floor. It is made of fine mesh or boards stuffed in parallel.
- Roof. Made from wood, roofing felt, slate. But corrugated sheeting can be used exclusively for covering cages standing under a canopy or indoors - it gets very hot in the sun.
How to choose a place
Regardless of whether you want to build a building, a mini-farm, or just put a few cages under a canopy, you need to start by choosing a suitable location.
Accepted in Russian Federation building codes allow construction on personal plot outbuilding with an area of 15 sq. m. and a building for keeping farm animals or poultry with an area of 40 square meters. m. The residential building must be located at a distance of at least 15 m from the two above-mentioned buildings.
Additionally, you need to take care of the following:
Even if there is no place on your personal plot that fully satisfies all these conditions, try to get as close to the ideal as possible. Minor discrepancies are not critical.
Prices for various types of timber
Step-by-step instructions for creating a rabbitry for beginners
At first glance, it seems that such a structure is very difficult to build on your own, but this is just an illusion. Even for a delitant it is quite possible to make a rabbitry on your own, spending from several hours to several days on it.
If you decide to build a rabbitry with your own hands, the algorithm of actions should be as follows.
Step 1. Using the tips above, choose a place for the future rabbitry, decide on its size, layout, and material for construction.
Step 2. Build the cage frame according to the dimensions in the drawing. It can be wooden or metal. If several cells stand side by side, the frame should be solid.
Step 3. Using a carpenter's square and level, attach the shelf and upper frame to the frame;
Step 4. The bottom and lid are assembled on a frame made of wooden beams or cut separately from thick plywood. In the latter case, it is necessary to cut holes for the legs at the corners.
Step 5. The bottom and lid are attached to the frame.
Step 6. A mesh is nailed to the door. Attach it to the frame with furniture dowels.
We nail the frame, which will later contain the mesh.
Shchag 7. Cover the sides of the cage with mesh or boards. The mesh is cut with metal scissors and placed on the screws with a screwdriver.
Prices for popular models of screwdrivers
Screwdrivers
Watching a video of the manufacturing process will also help with construction.
Video - Do-it-yourself rabbit cage from professionals
This video shows in detail all stages of construction, gives useful tips for beginners.
As you can see from the article, making a rabbitry with your own hands is quite possible even for a beginner. You just need to strictly follow the advice, and everything will work out.
Rabbits grow quickly and produce offspring, besides, their meat and skin are very are valued consumers.
If we add to this unpretentiousness animals, then it becomes clear: their breeding in household may be enough profitable business.
But you can’t place lop-eared pets on the street - they’ll run away and you’ll have to make some houses.
And to create for rabbits optimal conditions For development, cells must be comfortable and adaptable to different situations.
Eat some types of rabbit cells. They differ in design and purpose.
Currently, the industry produces cells of all types; many options can be made with your own hands from improvised means.
For a review of the mini-farm for rabbits Maklyak-6, see in the video:
Not always needed for rabbits solid dwellings:

Note! According to veterinary standards, one rabbit requires space 0.72 m², but for giant breeds this may not be enough and larger premises should be provided.
 To make a rabbit cage you will be needed the following tools:
Can use materials remaining after repair and construction work, or purchase new ones. You will need:
 Before you start cutting materials, you should work on drawing with dimensions.
In the picture it is necessary to provide places where sections, feeders, drinkers and doors will be installed.
Square, required for one female rabbit with offspring, - 1.2 x 0.65 m. Optimal height the front wall is at least 0.75 m, the rear wall is at least 0.5 m.
 Costs take account following:

 When all necessary for the manufacture of the cage is available, you can start to the assembly of the structure:
Important! Regardless of what material you use for the cage - new or previously used, make sure that there are no nicks or other dangers for rabbits.
 So that your pets are healthy and happy, it is necessary observe the following rules:
 The cage needs to be periodically disinfect. Processing is required in the following cases:
For disinfection, special veterinary drugs:
Before disinfection rabbits removed from the cage. All surfaces are carefully are cleared using water and a scraper, then are being processed disinfectant.
Attention! When working with disinfectants, precautions must be taken. After finishing the treatment, the room must be ventilated and hands washed with soap.
Another way is disinfection using blowtorch. In this case, fire is treated wooden surfaces until they turn brown. Influenced high temperature kills all microbes. Removable metal, plastic and ceramic parts are best boil.
For step-by-step construction of a rabbit cage with dimensions, see the following video:
Owners of fluffy, charming rabbits ask themselves, first of all, the question of what conditions their pets should live in.
Let us first dwell on the homestead keeping of eared animals. There are two options:
To select the location for installing the cages, you must follow the rules.
In winter, places where rabbits are kept should be insulated so that the temperature fluctuates in the range of 10-20 C. Special attention paid to the insulation of queen cells and compartments for rabbits.
If animals are kept indoors, it must be:
IN ideal The room for keeping cages with animals should have a window on the south side that fills the entire wall.
It is advisable to place cells in open space in accordance with the cardinal points - front side to the East.
And one more nuance - the cages need to be installed at a height of 0.8-1.0 m from the ground. This will protect the rabbits from being bitten by domestic rodents and will make it much easier for the breeder to maintain the cage.

The classic version of a cage for keeping rabbits is a design of the following dimensions:
The entire space of the cage is divided into a walking room and a remote nook, where rabbits of any age find refuge in moments of “danger” and bad weather. The length of the walking compartment can vary, but is usually up to 50 cm in length and width. The cubby favorite of rabbits is a box 25 cm long and 50 cm wide. It is sheathed tightly, and only on the front side is a removable door attached. The hole is located in the wall adjacent to the walking area and is usually 17*17 cm.
The specificity of the structure of a rabbit cage is that a mesh or slatted floor is usually installed to allow free passage of waste into a tray located under the floor.
The height of the front side of the cage is usually 55 cm, and the back wall is 30 cm. That is, the cage assumes a sloping roof, which, in the case of a “tiered” arrangement of cages, will also be a tray for the higher cages, and therefore is usually lined with galvanized iron.

When choosing materials for making cells, it is better to give preference to high-quality and ecological tree. Wooden beams are suitable for constructing the frame. Boards or plywood work well for cladding walls. Chipboard is unacceptable because it takes on water, swells and crumbles.
Used for flooring welded mesh with cells 1.7*1.7 cm, or wooden slats up to 3 cm wide. The slats are placed at a distance of 1.5 cm from each other, for free passage of waste into the pallet. If the distance between the slats is greater than specified, or the mesh cells are larger, then this is fraught with fractures of the paws when getting stuck in large openings. Floor slats can be plastic.
One condition must be strictly observed - the material for making cells must be smooth, without traumatic foreign inclusions.
The size of rabbit cages is directly dependent on:
In practice, houses of two connected cells measuring 100*55cm are often used. In these cages, the uterine compartments are adjacent to the outer walls of the cage and communicate with the feeding compartments through 17*17 cm manholes. On the front side of the house there are doors: two solid ones in the nesting compartments, and two mesh ones in the walking spaces. Between them there are nurseries and drinking bowls. Feeders are usually attached to the face of screen doors.

This type of cage is intended for placement in livestock-type premises and even in ordinary hay barns. The walls and ceiling of the cages are lined with a mesh with cells of 2.5-5 cm, the floor - 1.7 * 1.7 cm.
The main advantage of these cells is the simplicity and accessibility of cleaning and disinfection. All you need is a good brush and a propane torch, which will help you easily get rid of unnecessary microorganisms and accumulations of rabbit fluff.
All-wire cages occupy significantly less space, which is also their advantage when running a farm.
The main problem when making a cage with your own hands is the lack of high-quality and detailed drawings, or the unjustified high cost of licensed options (for example, drawings from Rabbitax).
The second difficulty faced House master– this is the non-standard size of the building materials used. And as a result, the need to purchase materials to order. If we add to this the lack of experience in the manufacture of cells, then the cost of materials turns out to be prohibitively high.

Novice craftsmen make similar mistakes when building cells:
To reduce stress when laying young animals, you can use a cage with a stationary cubbyhole for baby rabbits, in which a hole measuring 12*12 cm will not allow the mother rabbit to constantly be with the babies. And the moment of separation of the rabbits will no longer be so stressful.

N.I. cells are very popular. Zolotukhina. Their main the difference is the absence of pallets, i.e. solid floor made of flat slate , and the presence of a mesh only on the back side of the cells to a width of 15-20 cm. The staggered arrangement of one cell above another helps to get rid of waste from the “upper floors” to the “lower ones.” A characteristic feature is also the absence of nesting compartments. The female rabbit is given the opportunity to build her own queen cell from hay. The door feeders are mounted on rotating nails and, thanks to their hinged design, are easy to clean.
On our website there is an article dedicated to it in which you will find everything practical advice and recommendations from the author, in addition you can familiarize yourself with the drawings and dimensions of the cells.
This is a kind of four-apartment house, with an equipped ventilation and “sewage” system. There are also mounted queen cells and gravity feeders and drinkers. The hay manger is covered with galvanized mesh and secured to the frame with nails. All vulnerable parts are reinforced with tin plates. In winter, the compartments for young rabbits and queen cells are heated with ordinary medical-grade heating pads. Unusual is the face of the cage facing south.
Cells from the Rabbitax company are distinguished by their unique decor and environmental friendliness ( a system of air flow redirection characteristic only of them). They are mainly intended for large farms. But there are acceptable options, for example, a cage with two compartments. For a novice master, the drawings are still a bit complicated. And the main disadvantage is the high cost of production.
I would like to mention Mikhailov’s rabbit cages. The main advantage of mini-farms is their compactness (the ability to contain 25 individuals on an area of 25 sq.m., taking into account the distance between houses of 70 cm). An undoubted advantage is also the automation of waste collection into a sealed container. A significant disadvantage of Mikhailov cells is the expensive materials for construction and the undoubted professionalism of the performer.
The design of E. Ovdienko attracts attention. Its characteristic feature is a special gate that protects the four-tiered structure, accommodating 24 cells, from the wind and vagaries of the weather.

Decorative eared creatures can also live well in a homemade cage. For simple solution you need to decide on the question of how often your pet is supposed to walk in open space. If the rabbit walks for at least 3 hours a day, then a cage size of 70*40 cm is sufficient. If your pet spends most of the time at home, then the cage size should be 100*50 cm. Otherwise, you should adhere to the same construction rules cages, as for farm rabbits.
Of all the above cages for rabbits, a novice master will be able to choose for himself best option, combining ease of execution, ease of maintenance and reasonable cost.
If you decide to have a decorative rabbit, we recommend that you read the same, and is no less important.
Watch also the video - how to make a cage with your own hands.