Nowadays, building materials are very expensive, so it is not surprising that many homeowners try to save on everything possible during renovations. To prevent the desire to save money from leading to a deterioration in the quality of repairs, in this article I will tell you how to make putty with your own hands, which in terms of performance is not inferior to many store-bought analogues.
Putty is building material paste-like consistency, the task of which is to eliminate minor defects on various surfaces. It follows that this material must have good adhesion. In addition, its important qualities are hardening and strength gain after application.
It should also be noted that for different types different putties are used on surfaces. In this article we will look at the process of preparing compositions intended for puttying walls and ceilings, as well as wooden and wood-shaving surfaces.
So, all the above requirements are met the following types putties that you can prepare yourself:

To make oil putty, you need to prepare the following ingredients:

The instructions for making this putty are as follows:
To give the composition the required color, you can add not a large number of wood dust.
This putty is intended primarily for wooden surfaces. Moreover, it is not afraid of exposure to moisture. Thanks to this, it can be used for repairing floors, wooden frames, window sills, etc.

If the wooden surface will be painted after preparation oil paint, then it is better to putty it with oil-adhesive putty. To make it you need to prepare the following ingredients:
Making putty with your own hands in in this case It’s extremely simple – you just need to mix all the ingredients until a homogeneous composition is formed.

For puttingtying walls and ceilings, an excellent solution is gypsum-chalk putty, which can also be made at home. To do this you will need:

This putty is made as follows:
To thoroughly mix the mixture, it is advisable to use a construction mixer or a drill with an attachment.
Keep in mind that this putty hardens quickly (within 20-25 minutes), so you should not use it in large quantities.
To increase drying time gypsum putty, you can increase the glue content in the composition up to 10 percent.
Another feature is its susceptibility to moisture. Therefore, this composition is only suitable for use in dry rooms.

Resin putty is usually used for puttying wooden or wood-shaving surfaces. For its preparation the following components are required:
To prepare resin putty, you must perform the following steps:
It should be noted that this putty is applied hot. Therefore, it must be warmed up before use.

Asbestos putty is widely used for filling walls and ceilings. The following ingredients are used to make it:
This composition is prepared quite simply:

A universal putty, which is suitable for both wood and walls, can be made using benzene. To make it you will need the following components:
You can prepare this putty with your own hands as follows:
The advantage of this composition is that it can be stored for several days. This allows you to immediately prepare it in the required volume.

If you need a heat-resistant putty, for example, for puttingtying coarse wood or a fireplace, it can be made based on magnesia oxide. To do this you need to prepare the following ingredients:
This putty is made quite simply:

There is also another simple recipe for making heat-resistant putty, for which we will need:
The cooking process is carried out according to the scheme described above. The result is a paste that can withstand temperatures up to 1500 degrees.
Latex paint is known to many for its elasticity, wear resistance, good adhesion to various surfaces and other performance qualities. Latex putty has approximately the same characteristics.

To prepare it at home, you need to prepare the following components:
Latex putty is prepared in the following sequence:
This composition is excellent for finishing puttying walls, for example, for subsequent painting with latex paint.

You can make high-quality putty using acrylic varnish. It is excellent for surface restoration.
The composition of this putty is quite simple - you only need chalk and water-soluble acrylic lacquer. For example, you can use Irkom. Chalk should be added to the varnish until a paste-like consistency is obtained.
If the composition turns out to be too thick, a small amount of water should be added to it immediately before application. To correct the color, in cases where puttying is performed before the surface is subsequently opened with varnish, you need to add a small amount of pigments for water-soluble paint.
It must be said that this putty is intended for finishing putty. If you need to eliminate significant unevenness, you should add sawdust to the mixture.
Among the advantages of this composition are high strength and moisture resistance. At the same time, the price of the composition is significantly lower than a similar putty from the store.

Chalk putty is excellent for leveling wooden surfaces for subsequent painting. To prepare it you will need the following ingredients:
To prepare this putty, you must first mix the drying oil with the drying agent, then gradually add chalk and mix until a homogeneous paste-like consistency is formed.
This putty can even be used on surfaces that are exposed to temperature changes and moisture.

We figured out how to make putty at home for different purposes. Finally, I will give a few rules for its preparation, which are often violated by beginners, which leads to various negative consequences:
There are quite a lot of options for making putties. Therefore, when choosing, you should focus on the type of surface, operating conditions and, of course, the presence or absence of ingredients at your fingertips. Otherwise, just follow the recommendations above.
See the video in this article for more information. If you have any questions regarding the preparation of putty, ask them in the comments and I will be happy to answer you.
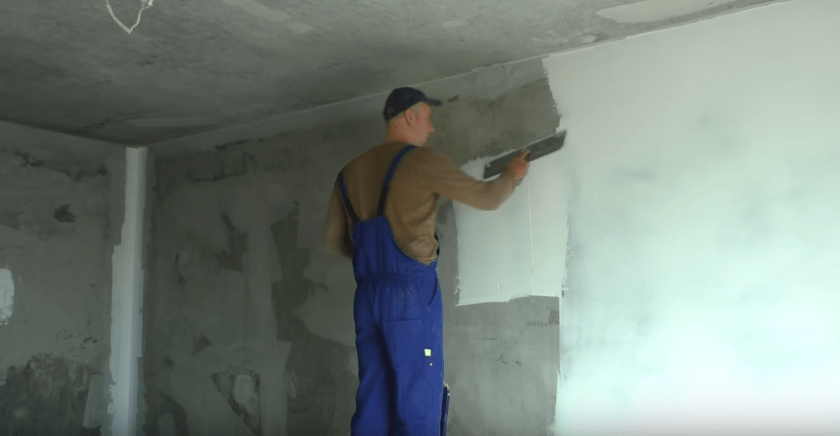
Today there are many different finishing materials, but the use of wallpaper does not lose popularity. There is no point in tackling the wallpaper right away, first you need to prepare the surface for better quality Be sure to level the walls. It is very important to initially prepare the surface; our result will depend on this.
Liquid wallpaper can be applied to walls with protrusions and defects; they will hide these defects well due to their structure. Now we will tell you how to level the walls with putty. Thin wallpaper and paint will highlight all the disadvantages of an unprepared wall.
There is no need to close your eyes; this is this stage of work. Uneven walls and roughness occur not only in a private house, but also in new apartment. Even in new buildings, walls require preparation before applying wallpaper or paint.
Do-it-yourself puttying of walls under wallpaper is needed to fill not only large flaws, but also very small ones. Because of its structure, it penetrates where plaster cannot reach. This material creates a smooth surface and the wallpaper will stick much better.
If you had to glue wallpaper on a plasterboard wall, it is also necessary to use putty. And the point is not that the plasterboard wall is crooked. In the future, when you decide to change the wallpaper, the old layer will have to be torn off along with the cardboard and more serious repairs will be required.
All work can be divided into 2 stages.
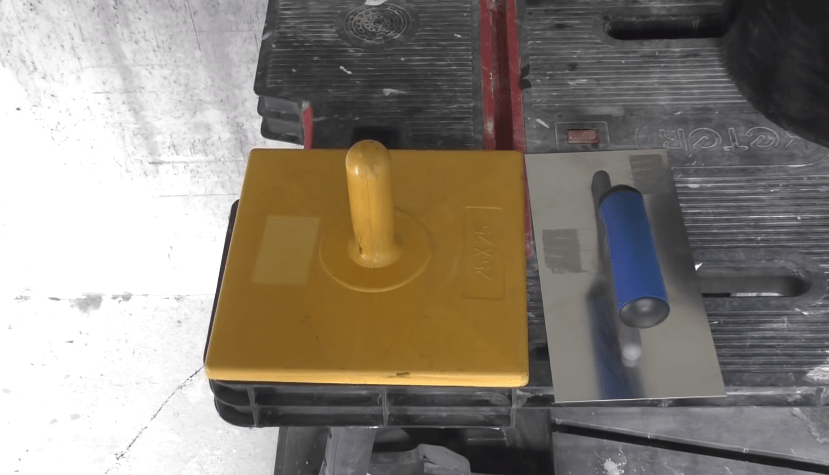
To apply putty with your own hands, you will need the following tools:
Tools for wall putty

Working with an angle spatula

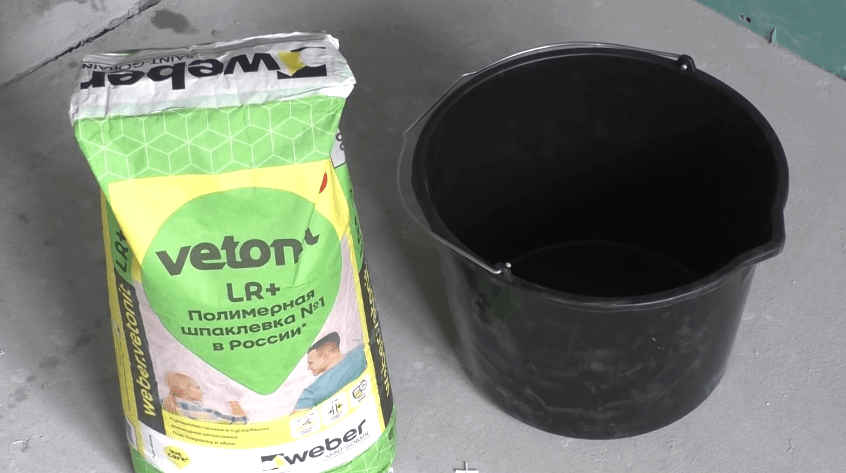
Putty can be bought in different types. In the finished state, it will either be a dry mixture that requires mixing before use.
Ready-made mixtures are sold in plastic buckets. Very convenient themes that you don’t need an additional container for mixing and you don’t need a drill with a mixer attachment. At the moment you need, you can tightly close the bucket with a lid and stop working. It will not dry out and retain its condition. It is better to use the mixture all at once, otherwise it will dry out, become hard and unusable.

Ready mix
The finished putty is made using polymer and latex based. Because of its advantages, it has a high price and therefore many people prefer to use dry mixtures.
We apply putty in two layers, so you need to buy two types. The grain of the first layer is coarser and thanks to this the second layer will adhere securely.
The second layer is made of fine gypsum powder. After applying it, the wall becomes very smooth, which is suitable for applying wallpaper or paint.
Note! There are also universal formulations putties suitable for the first and second layers.
When I buy putty, pay attention to the information printed on the packaging. If the expiration date has passed, then such a mixture will have poor adhesion to the wall and the putty will fall off.
If we buy dry mixture, pay attention to the condition of the packaging. By appearance paper bag you can understand how the putty was stored. If it is clear that the material was stored in a damp room, then you should not buy such a composition, it will be unsuitable.

I buy putty of the first and second layers at once, it is recommended to take mixtures from the same manufacturer, they will suit each other as best as possible.
Do I need to prime the walls before applying putty? Of course yes, but before that you need to prepare the surface. It is necessary to remove old coatings, such as:

paint, water-based emulsion, plaster, etc.
You can prepare the surface in different ways:
If, after cleaning the old coating from the net, you notice cracks, they need to be repaired. If this is not done, the putty will repeat all the cracks after drying.


Removing dust and small debris


Sealing drywall seams with serpyanka

The primer will prevent mold from appearing and must be applied with a roller and brush. Use a roller to quickly cover the walls, and use a brush to go over hard-to-reach places.
After applying the primer, the wall should dry and sometimes it is recommended to apply the primer 2-3 times. And after each application, the surface must be dried until completely dry.
To properly mix the composition for leveling walls with putty, pay attention to the packaging; there must be instructions on how and in what proportions to mix the putty.
Mixing steps:


Mix the mixture until smooth
 Initial recommendations for work.
Hold the wide spatula at an angle of 45 degrees, so there will be no noticeable marks from the edge of the spatula.

leveling the walls with putty. Apply the solution with a wide spatula

Rubbing the wall in a circular motion counterclock-wise.

Grouting by hand
How to apply finishing putty on the wall? The application of the composition differs only in the layer thickness (up to 2 mm)
Just like in the first layer, we divide all the work into stages:

IN different parts light sources are installed in the room so that the rays intersect on the wall

Putting walls under wallpaper with your own hands is a complex process, so we will highlight recommendations for beginners.
If you are a beginner and you have no experience in such work as leveling walls with putty, you should not think that it is easy. Try to putty a section of the wall where your mistakes will not be visible. For example, in the place of a missing closet. If the work goes well and everything works out for you, continue to putty the wall with your own hands. If you can’t do it, then it’s better to entrust the puttying of the walls under the wallpaper to professionals.
The video clearly shows how to apply wall putty under wallpaper with your own hands.
there is abiting
Taking into account exactly how the finishing coating will be performed And actual state of the surfaces, putty can be of two types.

The choice of putty is provided influence as the listed factors, so and preferences and skill of builders.Experienced builders can achieve perfect quality t va on top of the site and starting points mi, and the inexperienced spoil T finishing wall.
Industrial companies use various components to make mixtures; their composition has a great influence on physical characteristics and cost.
| Type of putty | Manufacturing materials and brief technical specifications |
|---|---|
| Traditional material is distinguished by the highest physical strength and resistance to moisture. It has a low cost and is recommended for use under heavy finishing wall coverings, including tiles made of natural stone. Can be start or finish. |
| Most often used as a finish for painting or wallpapering. By all operational characteristics much inferior to cement: it absorbs moisture and has very low strength parameters. Often used when sealing joints between plasterboard boards. |
| More modern material, has increased adhesion rates with finishing materials walls based on wood, chipboard, fiberboard, OSB, etc. It has high ductility, which allows it to well compensate for minor fluctuations in the linear dimensions of surfaces without the formation of cracks. |
| The most modern and most expensive. The main advantage is high technology. It is easy for builders to work with, it stretches well, does not harden for a relatively long time, which allows you to accurately follow the application technology. |
Putties
Builders distinguish between three types of work, each with its own strengths and weaknesses.
It is applied with special airless application devices (putty stations). A very fast method, due to the strong impact of the mixture on the wall surface, maximum adhesion is ensured.Disadvantage - it is necessary have sophisticated equipment. Unprofessionalbuilders should buy it for renovation only own home is not economically viable.

Putty is appliedusing an ordinary compressor and a texture gun. By inferior speed mechanized, but much faster traditional handmade.


Are used various spatulas and trowels, the master applies the putty on the wall in parts with his hands.

The third technique is the most common and accessible to beginners, and Let's dwell on it in detail.
We will give a list the most necessary tools for applying putty to various surfaces.

Important. Beginners are urged It is recommended to purchase only high-quality tools.
Case is that the higher quality – the easier it is not only work, but also study.Crooked and rough spatulas make it very difficult to apply putty even for experienced professionals, let alone beginners. The material is permanently glued not to the wall, but to the surface of the spatula, does not flow, the toolnt leaves behind noticeable traces, etc.
Currently, most craftsmen are switching to polymer putty; it is more expensive than usual, but significantly increases labor productivity. For s Even so, the increase in cost has almost no negative impact on the construction estimate.What needs to be prepared for sp and pecking?

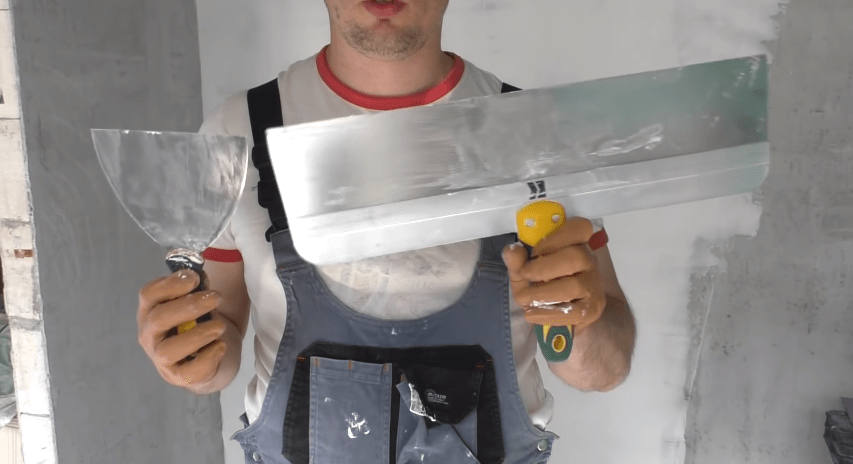
Large and small spatulas


To perform puttying work, you need not only theoretical knowledge, but also experience. Required train muscle memory , movements should not be with To hardened, but light.You shouldn’t be afraid of work; the skill will appear after just a few hours of independent action. You will be worked out dexterity, hands will work automatically, hold correct angle and speed of movement.By the sound of the spatula you can determine thickness of applied material and condition wall surface.
Step 1. Read the instructions carefully and prepare putty.

Beginners do not need to experiment and change the consistency; such actions can only be performed professional builders. Water is always poured into the container first, and thenadd dry putty. Pour water about three liters, enough for the first time,no need to cooka large amount of material. Pour dry putty into the water until its cone rises about 5-10 cm above the water level, then add a little water or putty as needed.
You can mix with a trowel (long, difficult and poor quality) or with a mixer.

Construction mixer

Step 2. Prepare the wall surface for application material Do This can be done while the prepared putty is infusing.Carefully cut off any irregularities with a spatula.

If there are suspicions about the quality of the plaster, then you need to check the surface of the wall. Done this is a long level silt and any smooth slats, apply it in different places on the wall and look at the light.
Practical advice. To level the wall, it is recommended to use cheap Chinese spatulas.
When cutting and unevenness can damage the surface of the tool; during puttying, stripes of nicks will be left. You don’t mind using Chinese spatulas; use them regularly for such work.Do you need putty? apply with new high-quality tools.
Step 3. Progress the wall.

This is very important tap, never don't miss it unt o in It performs very important functions.
It is better to apply the composition with a roller with an extension, inhard to reachIn places you need to use a paint brush.

Deep penetration primer
Step 4. Proceed to putty the wall, you can use several methods.


The movements of the spatula must be coordinated, simultaneously downwards and to the side. Why is this operation done? The fact is that during work the spatula must always be at the same angle to the wall, on it superimposed only part of the putty from the tool. Most remain on it at the same angle. After removal and applicationa new portion of material onto the wall iron again removes that part of the mass that has an angle greater than the previously specified slope.You need to constantly keep the iron in the same position; these actions are also trained until a stable muscle memory is developed.

Do not start learning with long spatulas; if you are not used to it, it will be difficult for you to perform the technology correctly. Beginners are recommended to purchase a main spatula no more than 35 cm long, and an auxiliary spatula 10 cm long. With the advent of practical experience, you can move on to working with larger tools.
Following the recommendations of professionals is much easierIt's a learning process, don't trythose to invent new techniques. E then only on the first pores it seems that only you know how to putty correctly, and all the masters have worked before Badly . All students go through this period only then they begin to understand that they still don’t understand anything about work, they need to study for a long time, and all the advice of professionals was correct.

Correct movement of the spatula is the key to quality work

As you can see, at first glance it is not difficult to putty, but this is a deeply erroneous impression; it is not for nothing that high-class craftsmen are worth their weight in gold. U Cheer up, don’t despair, learn a new profession.
In the kitchen, interior renovation is required more often than in other rooms. Usually it is enough to re-paste the wallpaper yourself or paint the walls. This article covers the intricacies of technology finishing works in the kitchen. A video to help a beginner will tell you how to properly putty walls for wallpaper or painting.
Are the walls in your kitchen worn out and cracked? Is your wallpaper covered in oil stains? No wonder! The kitchen is a room where the interior often needs to be updated. In order to carry out repair work correctly, you must follow some rules.

Wall repair includes three stages of preparatory and repair work:
When performing repair work on your own, the rough preparation of the walls is often not carried out or is carried out in places. Neglect of leveling and plastering walls will affect overall quality completed repair: the paint lays unevenly on an unprepared surface, burrs are visible on the surface, “bubbles” may form under the wallpaper.

Applying a layer of plaster to the walls reduces the number of cracks and scratches, and reliably smoothes out plaster sagging. And leveling the surface of the walls with putty helps to obtain an ideal surface, the finishing of which is absolutely no difficulty.
The technology for applying putty to walls for painting and wallpapering has significant differences. The process of applying the working composition to the walls has its own techniques and methods. Preparation of putty also has its own characteristics.

To prepare putty, it is best to use ready-made dry mixtures, which are offered in abundance modern manufacturers. Before purchasing a dry mixture, you must carefully familiarize yourself with the recipe for preparing the mixture and the consumption rates per 1 m2.
Advice! It is very important to strictly follow the putty preparation recipe in accordance with the manufacturer’s recommendations. A properly prepared mixture will ensure a more even smoothing of the layer and better adhesion to the wall surface.
It is important to remember that the layer of putty applied to the wall under the wallpaper should not exceed 2 mm in thickness. Preliminary preparation of walls should be done especially carefully. Small cracks and scratches must be repaired; deep potholes must first be cleared and then carefully filled with plaster. Sometimes there are deposits of old plaster on the walls; such places need to be thoroughly cleaned, knocking down the protruding parts.
Special Requirement for Removal old whitewash– the walls should be cleaned completely. Ideally, wash it and then let it dry.
Important! Putty applied over old lime is not durable. Wallpaper that is heavy, especially vinyl and non-woven wallpaper, will not hold up on poorly treated walls.
After removing the old coating from the kitchen walls, you need to treat the surface with a stiff metal brush - this operation will remove the maximum amount of dirt. After cleaning the walls with a brush, you can begin applying the primer. This is done only if the wall is relatively flat. If there are significant curvatures, you should first correct the curvature of the walls with plaster.
It is convenient to use a roller to apply the primer, thus easily achieving uniform distribution of the primer over the wall. The primer composition can be purchased ready-made; you can always find the primer on sale in the required packaging.
Advice! It is difficult to use a roller in the corners of a room. For better application of primer in corners, use a narrow brush with long, stiff bristles.
After applying the primer, dry the walls thoroughly. Do not apply putty to a wet surface. When applying putty on plasterboard walls, having a smooth and flat surface, it is enough to apply one layer of putty, which will be the finishing layer. Old, plastered surfaces are smoothed with plaster until absolutely smooth.
You can find out how to putty the surface under wallpaper in the video for this article.
Special actions for applying putty for subsequent painting of walls should be considered multilayer (it will not be possible to get by with just one layer). Sometimes, on particularly problematic walls, it may be necessary to glue a layer of painting mesh, which is alternately covered with several layers of plaster mixture, followed by sanding. and only then putty is applied.
Attention! It is important to purchase only high-quality tools for the job. The spatula must have an absolutely smooth blade without nicks or scratches.
Manufacturers produce a variety of mixtures for wall putty. The consumption of raw materials per 1 m2 can vary significantly:
Here are the average rates of material consumption, provided perfect condition walls

From possible types putty, choose the one that suits you
As when preparing walls for wallpapering, walls to be painted before applying plaster must be carefully prepared: remove old paint or wallpaper, repulse the plaster composition, clean deep cracks.
Important! All wooden plugs, nails, screws and other fasteners should be removed from the walls. Holes in the wall need to be sealed cement mortar. The same composition is used to fill old holes for wiring, deep cracks and potholes.
Cleaning the walls continues with a wire brush, after which you can begin applying primer. Application of putty is allowed no earlier than 24 hours after the primer layer has dried.
It is convenient to start applying the composition from the right corner of the wall. It is worth monitoring the thickness of the applied layer - it should not exceed 2 mm.

Do not be upset if the first layer of putty is not ideal; re-application of the composition will correct the situation. It is important not to start applying the second layer of putty until the first layer has set. This will take about 12 hours.
Ideally even corners are made using special tool– corner spatula. It is worth ensuring that the thickness of the applied layer in the corners does not exceed 5 mm.


We will send the material to you by e-mail
Watching the work of professional plasterers, you can’t help but admire how smoothly and evenly they manage everything. It seems that it is simply impossible to repeat this with your own hands. This is wrong. Puttying is not a complicated job and does not require specialized knowledge. We will describe in detail how to putty walls correctly, how to choose the composition of the mixture and what tools you will need for the work.
Putty - a leveling layer to eliminate minor wall defects
Putty is a mixture of water and a dry compound. The dry composition may contain only gypsum powder or gypsum powder with the addition of chalk, plasticizers or other fillers.
The question often arises: from putty. Nobody really knows the answer to that. The composition of putty and putty is the same, the application method is also identical. So it turns out that both of these names mean the same material intended for leveling walls.
The main task of putty is to create a perfectly flat surface suitable for painting or. Without gypsum mixture Not a single repair is necessary; this material is used at the final stage of finishing.The putty is applied in several thin layers, each of which fills the smallest irregularities on the surface. Using this composition you can fill uneven areas up to 2 cm deep.

Important! Professionals do not advise applying the putty mixture in a thick layer; it may fall off within a couple of days after the completion of the repair.
On average, one layer of putty should not exceed 7 millimeters, and the finishing layer should not exceed 2 millimeters.
The range of tools for plastering work is very large. IN hardware store I'm just confused about what to choose?For putty you will need a wide flat metal spatula with a smooth edge and a spatula - a spatula.

When choosing a façade trowel, pay attention to its edge: it is important that it is perfectly smooth, without jagged edges. The metal on the edge should not bend. To work outside the building, use a tool up to 60 centimeters wide. For interior work, a width of 30-40 centimeters is sufficient.
Small spatulas are designed for neat processing of corners. If you decide to do such work for the first time, do not take too much wide instrument, it will be more convenient for little ones to work.

Another important point in the selection of a spatula - its weight. The lighter the tool, the better.It is convenient if the second spatula, spatula, has a wooden handle. It doesn't slip in your hand. The spatula is selected in such a size that it is convenient to scoop the mixture from the bucket.
The metal part of the tool must be made of stainless steel. Any other option is not suitable, since contact with water will quickly rust and leave marks on the surface being treated. You can find spatulas made of durable plastic on sale, but they are much more expensive than metal ones.

Putty mixtures can have different contents; let’s look at each type in more detail:
| Type of mixture | Application Features | Application area |
|---|---|---|
 Acrylic | Acrylic-based putty is elastic and resistant to high humidity. As a result, you will get a smooth surface that is resistant to mechanical damage, does not shrink and does not form cracks. | External and internal work, leveling, roughing, starting and finishing |
 Latex | The plastic mixture forms very thin layers that do not crack or fall off. This finish reacts negatively to lower temperatures. | Only for interior decoration |
 Plaster | Used to level walls and can be applied in a thick layer. It reacts poorly to humid air and is destroyed by water. Does not withstand mechanical stress. | For interior works |
 Cement | Not afraid negative temperature, does not react to humidity, is resistant to mechanical damage. It shrinks when applied and may crack during use. | Suitable for facade works and interior decoration |
It is impossible to give a definite answer which of the listed mixtures is better. For different conditions you need to select the appropriate compositions. For the facade of a building it is better to take cement putty, for or - acrylic, for living rooms– latex. If you are wondering what to use, take plaster.
The putty mixture can be divided into three types according to purpose:
The difference lies in the grain size of the filler. The starting mixture has larger fractions. With its help, you can level surfaces with significant damage: cracks, differences, potholes. The starting putty can be applied in a layer 2 centimeters thick. It is thrown directly onto the layer of plaster and leveled using the rule.

The purpose of the finishing layer is to complete the leveling before application. The fractions of this mixture are very small, and the resulting layer looks smooth and even. The final putty has a layer no thicker than 5 mm.The universal mixture can be used both as a starting and finishing layer. This type of composition is used in cases where the walls do not have significant defects.

Expert's point of view
Dmitry Kholodok
Technical director of the repair and construction company "ILASSTROY"
Ask a Question“If there are significant flaws on the surface being treated, take the starting one and finishing mixture, and not one universal one. The universal one costs more. In addition, the result of using two mixtures is much better.”
- the costly part of the construction budget. If you want to save money, do it yourself. It’s only scary before starting work; after the first wall the process will improve.

The main thing is to follow the sequence of work, clearly separating the stages and fulfilling all requirements.Let's look at how to properly putty walls for painting or wallpaper.
Preparing the foundation is a critical stage of the work. The result of your efforts depends on it. If the walls were wallpapered or painted, all layers decorative covering needs to be removed. Wallpaper can be soaked so that it comes off the wall easily. Particularly resistant layers should be treated with hot steam.

Paint is much more difficult to remove. You can mechanize the process using a drill with an attachment. But cleaning must be done very carefully, otherwise you will have to devote a lot of time to puttying. It is better to remove the paint by hand using sandpaper, fixed on a wooden block.
Important! During the process of cleaning the walls, a suspension of cement, whitewash and dust will hang in the air. Be sure to use a respirator to protect your respiratory system.
Oil paint can be softened with a solvent, but all such compositions have a pungent odor; you can only work in a well-ventilated area.After cleaning the decorative coating, the walls should be brushed and wiped with a slightly damp cloth. This will remove any remaining dust and construction debris.

Essentially, a primer is an adhesive that forms a durable film on the wall. It consists of different components: resin, lime, bitumen, alum. If you want to know whether a primer is suitable for your walls, pay attention to the recommendations for use on the composition packaging. There are mixtures designed for processing metal, concrete, and plastic.
You can cook it yourself. In this case, it will cost you a little less, and the quality will not be inferior to the purchased composition. The ingredients for the mixture are not difficult to find; you will need ordinary gypsum powder and chalk, which is used for whitewashing. For hardening and plasticity, a solution of laundry soap, wood glue, drying oil and varnish are added to the chalk. During the manufacturing process, chalk and gypsum are first mixed dry, and then the powder is poured into the adhesive solution. And now a few putty recipes for different surfaces:
| Ingredients | Purpose | Peculiarities |
|---|---|---|
| Chalk – 2 kg Plaster – 1 kg Wood glue solution 3-5% | Concrete walls, alignment of seams on plasterboard slabs. Designed for dry rooms. | Hardens quickly after application. This mixture must be prepared in small portions. |
| Chalk – 1 kg Wood glue – 100 g Drying oil – 1 kg | For finishing wooden surfaces that will subsequently be painted with oil paint. Suitable for rooms with high humidity. | Hardens slowly, forming an airtight film. To prepare, heated glue is mixed with drying oil and then chalk is added. |
| Chalk – 2 kg Wood glue solution 10% Drying oil – 25 g Laundry soap – 50 g | Designed for puttying ceilings and plastered walls. | Soap must be dissolved in small quantity water, add glue to the desired percentage and then add chalk. |
Leveling walls with your own hands using “homemade” putty is no different from working with a factory-made mixture.
To prepare the mixture, you need to select clean dishes and, preferably, a construction mixer. Manually mixing putty without lumps is difficult and physically difficult.

Don't try to mix the whole package at once, especially if you're new to this business. The composition dries quickly, so while you are training on small area walls, the whole batch may freeze and have to be thrown away.

For kneading, use water at room temperature. After preparing the putty, let it sit for a quarter of an hour. The consistency of the finished putty should be similar to thick sour cream. If you have prepared a polymer, acrylic or latex mixture and have not had time to use it completely, fill the container with putty with water. Next time, carefully drain the surface layer of water and use the composition.
What does the process of starting to putty walls with your own hands look like:
| Illustration | Description of work |
|---|---|
 | Mix the mixture according to the instructions on the mixture packaging. Use a construction mixer for quality mixing. |
 | Scoop up the thick mixture with a spatula and apply it to a spatula, spreading it over the entire length. |
 | Using an upward motion, apply the putty to the surface. Fill the wall section this way. |
 | Using a wide spatula, using upward and sideways movements, smooth out all the seams that have formed. |
 | After the putty has hardened, level the surface with sandpaper. |
For a beginner in this business, video material on how to putty walls with your own hands:
You are lucky if the main surface is made with high quality, in compliance with the level and without major flaws. If not, you can level it with putty.For perfect results on uneven wall beacons will be required. To set them, you need to pull the thread along the wall, vertically and diagonally. The direction of the thread should be checked with a building level.

After the marks have dried, the main putty work is carried out.
How to properly level walls with putty using beacons, in the following video material:
As a finishing layer you should use polymer composition– acrylic or latex.
| Illustration | Description of work |
|---|---|
 | For kneading finishing coating you need to carefully measure the proportions and prepare the amount of water recommended in the instructions. |
 | The mixture is poured into water, and not vice versa. It is necessary to thoroughly mix the solution until the consistency of sour cream is obtained. |
 | To apply the finishing layer, use a spatula 30-40 centimeters wide |
 | The first layer of topcoat should be the thinnest, it will help reveal all existing irregularities |
 | The second layer of putty is applied only a day later, after the first has completely dried. |
Beginners most often face the question of how to work with a spatula correctly. Not everyone succeeds the first time. Pay attention to the video recommendation on how to apply finishing putty to the wall:
Related article:
We'll talk about different compositions and purposes of solutions, methods of their preparation, necessary tools and materials, as well as about the application technology itself.
No matter how hard you try, after the finishing layer of putty, traces of a spatula will remain on the wall. If you don't remove them, they will show through. On final stage the surface needs to be sanded. This is a labor-intensive task, but without sanding you will never achieve the desired result.


