Even in our time, it is quite difficult to do without the simplest agricultural tools, such as ordinary garden rakes. With their help, you can loosen the soil, remove debris on the site and rake mowed grass. This is a common device, invented many years ago, and to this day remains a faithful assistant to gardeners and gardeners.
The device of this garden tool is quite simple and consists of two parts: a handle and a transverse bar with teeth attached to it, which serves as the working part of the structure. The number and size of teeth can vary for different modifications of the tool and depend on its purpose and the material from which it is made.
Simple garden rakes are most often made from the following materials:
- iron coated with paint (disadvantages: large mass and rapid wear);
- steel (advantage - long service life; disadvantage - very heavy);
- aluminum (advantages: good quality and relatively low weight);
- plastic (dignity - lightness; disadvantage - low strength);
- wood (advantages: lightness and strength).
Currently, you can buy all garden tools in stores, but high-quality metal rakes are quite expensive, and wooden ones are practically not on sale at all. That is why many summer residents and gardeners prefer to make the tool they need with their own hands.
To make a stalk and the main working part with your own hands from wood, you need to stock up on several types of wood. To make a cutting, it is better to take light wood species, for example, these:
- pine - light, moisture resistant, but not too strong;
- birch - light, durable, well machinable;
- poplar - light and easy to process.
To make a working part with teeth with your own hands, you will need harder and more durable types of wood, such as oak, mountain ash, elm, etc. They are quite heavy and difficult to process, but they will last longer.
First you need to make a bar measuring 60x5x3 centimeters from a suitable tree and plan it with a planer. Then, with a drill, drill several holes in the resulting wooden block with a diameter of 1 to 1.5 cm for the teeth at a distance of about 4 cm from one another.
The next stage is the production of teeth. It will be easiest to plan them out of their wooden blanks with a sharp knife. The length of the teeth is from 10 to 12 cm. The shape is any, but the ends of the teeth must be sharpened. It is important to remember that the diameters of the tooth heads should be 1-2 mm larger than the diameters of the drilled holes in the block.
The handle for the tool is usually made straight. It is desirable to sand the surface of the wood with sandpaper. At one end of the future cutting, make a cut about 25 cm long and secure it with a coupler and nails. Then spread the sawn parts in different directions to a width of 15 cm and sharpen each one a little.
 In order to make stronger metal rakes from improvised materials with your own hands, you will need a welding machine.
First you need to find a suitable steel pipe with thin walls and cut off two pieces of different lengths from it: one is larger (from 30 to 35 cm), the other is smaller (15 cm). The teeth will be welded on a long segment, and the short one will connect the handle and the working part. Then you need to make about 6-7 teeth up to 15 cm long, sawing them off from the reinforcing bar.
After that, it is required to flatten a long piece of pipe to a flat state (for example, using a sledgehammer or a hammer), then weld the teeth to the resulting strip at an equal distance from each other. In the middle of the strip at an angle of 90 degrees to the teeth, weld the handle holder (a short piece of pipe), in which a hole should be drilled for attaching the handle with a self-tapping screw.
Do-it-yourself rakes often become the most convenient and favorite tool for working on the site. This is not surprising, because home-made equipment is adjusted to the physical parameters of its owner, as well as to the types of work for which it was made.
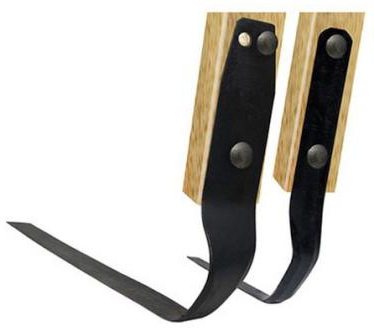
Hello dear reader. I have eight types of rakes on the farm, but the most convenient and effective are home-made ones, which I inherited from the former mistress of the house. Firstly, they are reliable, secondly, they have optimal weight, and thirdly, they have long teeth - 85mm. At least, I have not seen a better rake. They harrow beautifully. Since I did not make the rake, I can assume that they were made in the forge, because no traces of welding were found. I'll tell you how my friend repeated this design.
Cut off a strip of steel 430mm long. We round the corners. We bend (see photo). In accordance with the drawing, holes with a diameter of 5.8 mm are marked and drilled. On one side, the holes are countersinked for welding. The workpiece is heated red-hot and pre-prepared teeth are driven into the holes. When the whole thing cools down, the back tips of the teeth are welded to the strip. Next, we take a piece of pipe and make a cut with a length of 80mm (we will cut it off later in size 200mm). In order not to forget, we drill a hole for attaching the handle. We heat the sawn end red-hot and form it in accordance with the photo. It is unlikely that it will be possible to dilute the ends of the pipe at such an angle on a cold one. In conclusion, sawing off the desired part of the pipe, we weld the whole thing together. It is more convenient to weld like this: a strip with teeth is stuck into the ground, a wooden handle is inserted into the tube, and having correctly positioned the components, they are welded. The rake is ready. Do it - you won't regret it. Yes, even if you come across a pipe with a seam, then cut along the seam, otherwise, when the pipe is deformed, it may disperse. Goodbye. K.V.Yu.
Foreword
There are a huge number of different rakes, from tiny ones for picking berries to huge tractor ones, and it is very important to be able to understand them in order to use them with maximum efficiency.
The design of the first rakes was extremely simple. For surface loosening of the soil, either a snag with several curved root processes, or a branch with a stump of the trunk, on which there were several short knots, was used. It is logical that then there was no need to rake the leaves, due to the lack of even the slightest idea about landscape design. Of course, there are no photos of such primitive tools; museums have rough sketches.
In the future, a tool for raking the soil was made of wood by turning wooden teeth and driving them into holes made in a transverse bar - the “ridge”. These products are still in use today. In accordance with the name of the inventory in question, the so-called specialties of workers sounded: rower or rower, from the word rake, row. There was also such a thing as cluttering the grass after mowing it, hence the names of those doing this work came from: a hulk or a hulk.
In rural areas, these words are still in use, but are used less and less, as more and more varieties of large agricultural tractor rakes are used today. Of the manual inventory, the popularity is given to the metal tine rakes, which are produced by stamping in large quantities. Wooden ones are more difficult to manufacture (you need to grind the teeth separately and then insert them into the "ridge"), but they are cheaper, since the cost of wood is lower.
Various models of fan rakes are made from elastic rods, which are very convenient for cleaning lawn and house lawn leaves, as well as cleaning the site as a whole. Landowners also use numerous options for small plastic rakes for loosening the earth in a greenhouse, in flower pots, and in flower beds. You can choose them from the photo in the catalogs.
As a rule, any garden equipment for working with the earth is equipped with a long handle, this also applies to a rake, with the exception of small plastic models. For the most part, you have to work with this tool in the garden, among bushes and other plantings, and therefore a fairly long handle is needed. The movement of the rake is always performed on yourself. First, the tool is thrown forward, after capturing grass, leaves or clods of earth, it is pulled up.
When leveling loose soil, alternation of movements directed towards and away from oneself is allowed. Often large clods of earth are broken with a rake; after digging up the garden with a shovel, flat turned teeth are convenient for this purpose. Leaves and grass cuttings are best raked and turned with a tool with wide flat teeth, the gaps between which are narrower.
It is convenient to perform such work with the help of milling double-sided rakes, an awl-shaped frequent comb of teeth in one row will allow you to clean lawns from leaves and pebbles, and rarer flat knives will help in removing moss and grass. Such rakes are sometimes equipped with wheels at the ends of the transverse "ridge" to reduce the effort invested in the movement, which looks very unusual in the photo. For everyday care of the garden, flower beds, house lawn, it is more efficient to use one of two types of fan rakes. Distinguish between plate and wire.
The former are made of narrow elastic strips of metal, they are slightly springy during operation, which allows cleaning in areas with a large number of irregularities. Wire models are given greater rigidity, which allows you to work on flat areas with high useful plantings without damaging their stems and leaves. Movements with any type of fan rake can be performed both longitudinal, forward and towards you, and transverse - from side to side, holding them vertically.
In a small area, it is possible to level the loosened earth, break up clods, and collect grass after weeding in stacks with a hand garden tool. But if it comes to several tens of acres, you will need at least light equipment and appropriate adaptations for it. It is in such cases that agricultural rakes are used, large ones for tractors, and small ones like. The only thing they have in common with manual equipment is that they have teeth, the number of which, however, has been increased upwards.
The width of the beam with mounted teeth reached from 2.17 to 2.74 meters compared to manual ones, the working area of which is from 10 to 73 centimeters. Once upon a time, when processing large areas (chopping clods after plowing before sowing, harvesting hay and ears in stacks), they could not do without horse rakes. An attachment with long curved teeth was installed on the frame, which was brought into a working or idle position using a special lifting projectile.
The frame was mounted on wheels, and the whole structure was hitched to a horse harness by means of a drawbar, or was supplied with shafts, in front there was a seat for a worker driving a horse. The most popular were various models of English horse-drawn rakes. All this equipment can be seen in museums in the photo. Today, completely different devices are hung on heavy equipment.
For example, it is difficult to overestimate the efficiency and productivity of side rotary rakes, which consist of several short combs with long teeth, the beams of which diverge from the rotor installed in the center. Such equipment is installed in at least one pair, with counter rotation towards the center, but there can be 5-6 such paired devices on two rods placed at a slight angle to the sides. With such a rake, you can stir and swath hay, wrap ready-made windrows, double them into one, and, if necessary, scatter them.
The productivity of another type of side rake is also high - wheel-finger rakes, the efficiency of which is ensured not only by their own rotation, but also by the speed of the tractor. The design of these devices is more complex: spring pins are installed on the base of the wheel on the outer side of the rim. They are tilted against rotation, so that grass or hay is easily thrown away.
Such wheels are installed in sections of 5–6 pieces on rods arranged in a wedge, depending on the direction of which, the raked stalks or ears are collected in rolls or, conversely, scattered. But the simplest and most convenient is the transverse rake model, which is based on a wheeled frame that attaches to a tractor or walk-behind tractor, depending on the size of the device.
The transverse ridge can rotate around its longitudinal axis by raising and lowering long curved teeth. To clean the latter, rods rigidly fixed in the middle horizontal position are provided, one per section of a dozen teeth. When raked hay accumulates under the tine arcs, the lifting unit hydraulics actuate and the bar turns, the rake rises and releases the swath. On a walk-behind tractor, you have to manually turn the “ridge” with a special lever.
At the side rakes, the windrows are laid, stretching in the direction of travel, and at the transverse rakes, they are raked perpendicular to the tractor.
Garden tools can take on a rather original form, but are rarely surprising. Another thing is the non-standard use of devices with familiar names. For example, there is a practice of expanding the functionality of a conventional hand scythe with a rake that is attached to the handle above the blade. With this addition, it is much easier to stack ears of cut rye or wheat in even sheaves.
This device is called a hornbeam and is equipped with especially long teeth, which is why it remotely resembles. True, today farmers know about such equipment only from the photo. Even in ancient times, the forest supplied the villagers not only with mushrooms, but also with berries. And it would be a mistake to think that women, going for blueberries or lingonberries, picked the berries one by one, so they would lose too much time and not have time to manage the household.
To harvest the "harvest" in the forest clearings, special devices were used - rakes. They are most similar to a scoop with a comb located along the edge, however, this is one of the varieties of hand rakes. In the past, this inventory was made of wood, such specimens are preserved for the most part in the photo, today there are handicraft models made of metal. The disadvantage of the rake is that, along with the ripe berries, unripe ones are also picked from the bushes.
Another interesting rake option has nothing to do with agriculture. They do not have the usual bar, the teeth are located around the rotating cylinder in several rows, powerful magnets are located inside. In addition to the cylindrical one, there is also a flat version, with wheels at the ends of the crossbar with teeth. These rakes are used by criminal investigators to search for metal objects at the crime scene in difficult conditions, in puddles and mud. That is, this adaptation to the countryside is indirectly related, since most often such a rake is needed outside the city.
When preparing the soil for planting, various garden tools are used, however, in the subsequent care of seedlings and young plants, it is necessary to use only a fan rake, which is ideal for these activities.
Fan rakes are widely used when a small gentle load on the soil surface is required due to their lightness, elasticity and relative softness. They are great for:
– cleaning of small litter;
- cleaning old fallen leaves;
– gentle cleaning of the garden area for young plants and grass;
- “combing” and thinning the lawn;
- loosening the soil to saturate it with oxygen.
The device of this garden tool is quite simple and consists of two main parts: a handle and a transverse nozzle with thin teeth connected to each other in the form of a fan about half a meter wide. The teeth are usually made of wire and are slightly bent at the ends at an angle of 90 degrees. The weight of the whole structure is much less than the mass of ordinary traditional metal rakes. It is quite possible to make such a simple hand tool with your own hands.
To make a base in the form of a fan with your own hands, you will need about 15 meters of stainless steel wire with a diameter of 4 mm. It is stainless steel that has the ability to absorb in contact with the surface, has sufficient strength and durability.
 As a handle, you can use old holders from any garden tool or a plastic thick-walled pipe from a heating system of a convenient length. But you can make a stalk of wood with your own hands. The best option would be pine wood or other deciduous trees. It is desirable that the fan rake results in light and comfortable work.
When preparing the cutting, it is important to remember that its diameter should be a couple of millimeters larger than the diameter of the pipe - so that it sits more tightly.
To protect against exposure to moisture and insect pests, it is desirable to treat the stalk with stain or impregnation and varnish.
Epoxy resin can be used to connect the handle and the work surface (fan of rods). You need to warm it up, dip one end of the handle into it and insert it into the hole of a piece of pipe with a fan. For additional strength of the connection, you can make a hole in the pipe and hammer a carnation into it.
Do-it-yourself fan rakes from improvised materials will cost the gardener much less than those bought at a hardware store and, perhaps, will become much stronger and more reliable than store-bought ones.
Any work in the country cannot be done without inventory. It is chosen depending on the destination. What happens for loosening the soil and how to do it yourself, read the article.
It is very important to loosen and level the surface layers of the soil before planting. This can be done with a simple tool - a rake, which is made from different materials. It is not recommended to process heavy soil with a wooden rake. They are very light, so you will have to make some physical effort while working with them. It is better to loosen such soil with an iron rake.
When choosing garden tools for loosening the soil, you need to carefully examine it, especially the reverse side. It is important to know that a solid metal bar is stronger than a composite one. A wide one is better than a narrow one. Typically, a rake has twelve teeth, but for loosening large areas, sixteen or more are needed.
For those who prefer to work without the use of machinery, there is a manual cultivator. It is used when it becomes necessary to loosen the surface layer of compacted soil or plow up weeds. This inventory is a metal plate with three or five teeth, to which a long handle is attached. A person loosens the soil with such a cultivator, standing upright.
In the household of any gardener or gardener there is a broken saw. A triangular blade is easily and quickly cut out of it, to which a metal pipe, fifteen centimeters long, bent at a small angle, is riveted. A round wooden stick is inserted into it. Its length varies from one to one and a half meters, depending on the height of the person who will work with this equipment. The blade is an isosceles triangle. It can be made in different shapes. The size of the blade depends on where you need to loosen the soil. If these are narrow row spacings, it is better to use garden tools for loosening the soil with a small blade.

It is also used for loosening the earth and weeding weeds in greenhouses, between raspberry and strawberry bushes. The small plate has a width of seven to eight centimeters and a length of six and a half. For loosening the soil under the bushes of currants, gooseberries, grapes, equipment with an average blade size is used, the width of which is fifteen centimeters and the length is ten. They can loosen beds with melons, cucumbers and tomatoes.
For under fruit trees, it is more convenient to use a large blade, which is equipped with garden tools for loosening the soil. A do-it-yourself ripper can easily cope with labor-intensive work. Blade width - twenty-five centimeters, length - fourteen. You can take any other sizes.
It is very easy to make such an inventory. You need to take an ordinary chopper and weld a curved steel plate to the central part of the blade. Drill two holes on its free end. Then a piece of pipe with a diameter of two and a half centimeters is selected. On one side, two square-shaped cheeks are welded to it, on each of which five coaxial holes are drilled. The cheeks are arranged symmetrically with respect to each other.

The distance between them should correspond to the thickness of the curved plate, which is inserted between the cheeks and fixed. A wooden handle is inserted into the pipe segment from the opposite side. This is how you can make garden tools for loosening the soil with your own hands. The photo clearly demonstrates how you can change the angle of inclination in relation to the ground.
To cultivate the soil under a shrub, garden tools are required. A do-it-yourself ripper will facilitate work and increase productivity. To make a tool, you will need soft iron, from which hoops are made. This will be the starting material.

A small strip is cut with a chisel, the width of which is three and a half centimeters, and the length is twenty. At one end, teeth are machined four centimeters long. Usually no more than three pieces are obtained. A couple of holes are drilled at the other end. With the help of nails, a wooden handle is fixed. Garden equipment for loosening the soil is ready.
This garden tool loosens the soil to a depth of twenty-five centimeters. The width of the strip dug up by him can be forty-two, forty-eight or fifty-five centimeters, it depends on the inventory model. The soil cultivator "Mole" is characterized by simplicity and reliability. The design is a frame with teeth and a pair of opposite, articulated forks.

To work with the tool, you do not need to have any special skills. It is enough to press the pitchfork with your foot, and they will enter the ground, and when lowering the handle, they will rise up with your hand. Lumps of soil will push through the teeth and fall to the place from which they were raised, already loosened. The layer of earth does not turn over during such processing. Weeds will be released from the ground, but not cut. They, along with the roots, will be on the surface of the beds. They can be collected in a bucket and taken out of the garden, or you can leave them. They will still dry out and die.
Garden tools for loosening the soil "Mole" is a universal tool. It can be used by people with different sides of support on the leg: right or left. But this tool does not process dense virgin soil. It needs to be opened first.
This garden tool is called Fokin's flat cutter, after the name of its inventor. It is designed for loosening the soil and its weeding. With the help of inventory, you can do twenty types of different work in the garden and garden. The main function of the flat cutter is to pull out or cut weeds at a depth of two to five centimeters. This method of tillage is gentle, because the structure of the soil does not change, animals and insects are not harmed, and a lot of physical effort and time are not spent.
Loosening is carried out without wrapping the earth layer, so the surface layer does not need to be changed. Of course, it is impossible to plow the soil to a great depth with a flat cutter. In traditional agriculture, he rather plays the role of a chopper. But, if the soil is porous and with a mulch layer, Fokine's garden tools for loosening the soil can work wonders. Its design is very simple. Two plates, bent at a certain angle, resemble staples. The surfaces with which weeds are cut are sharpened sharply.
Fokin flat cutters have six varieties, each of which is designed for a specific job on the land. So, for example, beds are weeded with a small tool and dense seedlings are thinned out. With the help of a large inventory, the preparation, formation and hilling of beds is carried out. They also mow the grass. Heavy clay soils are best loosened with a flat cutter "Krepysh", with a shortened blade. For hilling tall plants, the "Powerful" is suitable - it has a wide blade.
It is better to loosen the soil with a large tool. First you need to mow the weeds with tall stems. If the soil surface is heavily overgrown with grass, you need to cover it with black polyethylene. So the weeds will not have the strength to grow. This work should be done half a month before the start of loosening the soil.
So, the tip of the inventory is stuck into the ground and deepened by three centimeters. The blade should be set parallel to the ground or at a slight angle. It is strictly forbidden to put it perpendicular to the surface. Then, with a smooth movement, the tool is dragged towards itself. The blade will move and cut grass roots. When working with a flat cutter, you need to carefully monitor that the soil does not move, but remains in the same place. If soil remains at the feet, something is done wrong in working with the tool. Perhaps the movements were too fast. With a well-sharpened tool, work progresses quickly and does not require much effort.
Tilling the soil is not easy. To get a rich harvest of planted crops, you need to dig and loosen the soil, get rid of weeds and weed the plants. These jobs take a lot of time and physical effort. It is possible to facilitate work with the help of a manual cultivator "Tornado". Its design is surprisingly simple. A handle is attached to one side of the central metal rod, and curved teeth are attached to the other. Moreover, they are turned in relation to the rod against the clock. That's all the inventory for loosening the soil "Tornado" saves gardeners and gardeners from heavy monotonous work.

To work with the cultivator, you need to put it vertically and rotate around the axis. The teeth will gradually screw into the ground. With the help of this tool, the soil is loosened and weeds are destroyed. Moreover, in the process of work there is a uniform distribution of the entire load on the body. The person gets tired less and does more work.


