Constantly bubbling water in the tank and, as a result, the money that is paid for water supply flowing down the drain is a typical picture of a broken toilet. To solve this problem, you need to change the fittings for the flush tank. How to do this and how to choose the right one will be described in this article.
Everyone knows the sound of running water in the toilet. This sound indicates that it is time to repair the toilet. At first glance, the problem is very serious and insoluble without the appropriate knowledge and skills. However, this is only at first glance. In fact, toilet repair is most often the repair or replacement of broken cistern fittings. This procedure is simple and will not take you much time.
How is a flush tank arranged? In fact, it has two devices independent of each other - a filling valve (through which water enters the tank) and a drain column (it ensures the flow of water from the tank into the toilet bowl and, accordingly, flushing). The combination of these two devices forms the fittings for the toilet flush tank. Various manufacturers offer their models with some unique designs, different forms and colours. Despite such a variety, it is important to understand that almost all of them are universal (the probability that a universal fitting bought in a store will suit you is about 95%). That is, knowing the type of yours, you can easily buy the fittings you need in any plumbing store. Within the framework of this article, fittings for built-in tanks are absolutely not considered. The fact is that they just do not fall into the above 95% of universal options.

And so, it remains only to find out what types of fittings are and how you can independently determine which one is needed in your case.
Since the reinforcement, as mentioned above, consists of two independent devices, the classification can be carried out according to:

It should be noted that push-button columns, in turn, are also divided into two subspecies:

Fittings for a double flush cistern are considered more economical - you can choose the desired mode yourself. Columns with single and double flush are interchangeable, that is, nothing prevents you from buying and installing the one that suits you best, but it should be noted that the tanks have different displacements. With a small volume, a half flush may not be enough.
Under the push-button fittings in the lid of the tank, a hole of a larger diameter was made than under the stock. Therefore, in most cases, replacing a column of one type with a column of another will not work.
So, taking into account all the above, we get six types of fittings: with a stem with a side supply, with a rod with a bottom supply, with a single button with a side supply, with a single button with a bottom supply, with a double button with a side supply and a double button with a bottom supply .
Separately, it is worth dwelling on the fittings of the old model. Now there are still a lot of cisterns installed on the toilet with such fittings, or cisterns mounted on the wall and connected to the toilet with a pipe, in which old-style fittings are also mounted. It consists of a column with a stem (vertical or lateral) and a side filling valve. By virtue of design features and softer requirements for efficiency, the drain column from such fittings cannot be replaced with a modern one. It remains either to repair and adjust the fittings for the tank so that it does not let water through, and this is very difficult to achieve, or just buy a toilet bowl with a modern tank, which is more preferable, especially if you have a water meter installed.
Summing up, we illustrate all types of fittings:
 Fill valves. From left to right: bottom inlet, side inlet, old style
 Drain columns. From left to right: push-button, with stem, old-style
Now let's move from theory to practice. When it comes to buying a new cistern fitting, it's natural to want to save some money. It often leads to some characteristic errors:
Here the question arises, how to determine the type of your fittings?
To determine the type of inlet valve, just look at your tank, namely, where the flexible water supply hose is connected to it. If on the side, then you have a valve with a side supply. If there is no hose on the side, then the valve is with a lower supply. Look under the tank and see for yourself.

To determine the type of waste column, pay attention to what action is performed when flushing. If you press the button, then the push-button, if you pull the stem, then the column with the stem.
Determine the type of your fittings and choose the appropriate name for you (one of the above) - it is this that you will need to tell the seller when buying.
Most likely, in the store you will be offered a choice of several options from different manufacturers and, accordingly, with different prices. What to choose?
The price range is quite wide - from 150 rubles. up to several thousand. To choose a quality one and at the same time not overpay, you should pay attention to a few nuances:

Generally speaking, you need to know that the price of acceptable quality rod valves starts from 10 USD. e., for push-buttons - from 15 c.u. e. At a price of 30 at. That is, you can buy very good fittings with an increased resource (as a rule, this is reflected in the extended warranty period).
So, the armature is bought, it remains to mount it.
Replacement of fittings begins with the dismantling of the old one. In some cases, there is no need to completely change the fittings. It is enough, for example, to change only the drain column or the filling valve. If you change the column, you will have to completely remove the tank. Replacing the filling valve will not require this. In any case, you must first dismantle the old elements. Let's take a look at this process step by step. specific example. As an experimental sample, let's take this toilet:

It can be seen that it has a one-button armature with a lower supply. The procedure for replacing any other, including a rod one, for example, with a lateral supply, will not differ much from that described. Differences in operations will be indicated.
All work begins with shutting off the water at the inlet to the tank or the entire water supply line. After that, it is necessary to flush the water in the tank into the toilet.
1. Dismantle the button. In our case, it turns counterclockwise. It happens that the button is attached to the lid of the tank. The cover will then be removed without dismantling it. Then just go to the second step. For rod fittings - unscrew the decorative knob on the rod and unscrew the trim that closes the hole in the tank through which the rod passes (of course, if it was screwed).

2. Remove the cover and see this picture. In the center is a drain column. Side filler valve. If the length of the supply hose is sufficient to remove the tank and put it on top of the toilet, then proceed to the next step. Otherwise, turn off the eyeliner.

3. The drain column is collapsible - it consists of two parts. To make it easier to carry out work, we dismantle upper part. To do this, rotate it by 90 ° (it will detach from the bottom with a snap off):

and take out:

The lower part of the column will remain inside. On the sides of it are visible bolt heads that secure the tank to the toilet.

4. Unscrew the fixing nuts under the tank. As a rule, this can be done simply by hand.

After the drain will remain a small amount of water. When you unscrew the nuts, this water will flow out. So put on a rag.
5. Nothing prevents now to lift the tank up and put it on the toilet for the convenience of subsequent work.


The sealing gasket remained at the landing site:

6. The dismantling of the tank in our case could be done without first disconnecting the liner. If it is necessary to change the filling valve, then we perform this operation now.

Flexible hoses are wrapped and turned away by hand. The key is used only when absolutely necessary.
7. Unscrew the column fastening nut:

and valve nut:

8. We take everything out of the tank. Here, in fact, this is the dismantled fittings:

Now you can start installing the new fittings. All operations are carried out in reverse order, the only caveat is that for convenience it makes sense to put the gasket between the tank and the toilet on the mounting nut before installation.

The whole operation takes five to ten minutes. Threaded connections, as mentioned, are wrapped by hand and only if necessary are tightened with a wrench.
You can endlessly try to fix old leaking fittings, surprised every month with huge water bills, or you can spend 10 minutes and solve the problem for a long time by simply replacing the fitting completely. How to do it, you now know.
The fittings of the toilet bowl are a kind of “stuffing that provides work on the collection, retention and discharge of water. The material for the manufacture of fittings can be plastic or metal (brass, steel).
In this article, we will get acquainted with how to adjust the fittings in the toilet cistern, as well as with its types and features.
Mostly modern models toilet bowls are equipped plastic fittings. It is quite durable, not subject to corrosion processes and the negative impact chemical substances present in the water.
 The operation of the toilet bowl is directly dependent on correct operation shut-off valves, which are responsible for draining and supplying water. Today in the market of sanitary products you can see a lot of different models of this device. Moreover, there are not many types, since the valves are of the same type, suitable for different modifications.
Shut-off valves by design can be separate and combined.
 Previously, only a separate configuration was used for the toilet device. In it, the installation of the filler and drain valve takes place separately, and they work autonomously. The operation of the filling valve is controlled by a float.
When the water in the tank rises and is blocked by a float under the action of thrust.
The drain assembly is a neck with a valve.
The valve is of two types - air and mechanical. Operated by pedal, button or key.
The advantage of shutoff valves is that in the event of a breakdown, only the damaged unit can be replaced or repaired, rather than changing the entire system.
This affects family budget and facilitates assembly and disassembly work. Therefore, the use of such systems is relevant at the present time.
 The elite class represents the latest product models that use stop valves in a new design. In her general system connects the drain and fill valves.
Setting up this type of fitting is quite complicated. But at correct installation ensures safe and trouble-free operation of the unit.
The disadvantage of this system is the need complete replacement in case of breakage and difficult repair.
Shutoff valves are also distinguished by the material of manufacture.
 Mainly used for its production polymer materials. The quality of the materials that make up the plastic determines the quality of work and durability.
Metal fittings are distinguished as the most durable and durable. These materials are characterized by moisture resistance and resistance to mechanical stress.
Usage single shut-off metal fittings provided by manufacturers only for elite models. Separate systems can be installed in any toilet.
 Shut-off valves are divided according to such criteria as the installation site and the method of water supply.
The design of the system will depend on which side of the barrel it is built in, which will definitely be taken into account when replacing damaged elements.
 Differences in the installation have fittings with upper and lower water supply. Both systems involve the closing of the valve by the action of a control rod, which is connected to a float, which is a container made of plastic or foam.
When installing fittings, careful balancing must be carried out. This is necessary for the productive operation of the system, which is dependent on the water level of the drain barrel.
 In domestic toilets, fittings with an upper water supply are installed.
This system is placed in the side of the tank.
The disadvantage of this design is the noise that the system creates when supplying water.
Toilet bowls foreign manufacturers equipped mainly with shut-off valves with bottom water supply. This design is silent, more comfortable and gives the model a stylish look.
The upper system is installed after installation work in the tank, and the bottom reinforcement is arranged before its location on the structure.
 The drain valve is much simpler than the water supply unit.
There are no locking mechanisms, as this design does not need it. Controlled drain valve thrust.
It is a chain or bar.
Previously, when installing a toilet bowl, a lever located on the side or at the top of the cistern was widely used.
 Now most models are equipped with a button.
Such a mechanism provides for two modes of draining water. With different intensity of pressing the button, either a complete drain of the tank or half can be performed.
By pressing the lever or button, the damper opens, which closes the upper fitting and the water is drained into the toilet. Then, under the weight of the damper, it returns to its place and the valve closes.
You can use separate fittings, but it will be better and easier to use branded systems that come with toilets. In this case, exactly all the elements will match.
Materials that will be required to complete the work on the installation of the tank:

 Start work on the installation of the tank should be from the base of the drain device. A rubber gasket is laid between the bottom and the base of the tank. After the tanks are directly placed on the toilet, installing a rubber ring between them, preventing their surfaces from touching each other.
The cistern is screwed to the toilet with bolts.
The most important thing here is the good fixing of the rubber gasket to prevent leaks.
 For the upper reinforcement, these elements are not needed, since it is above the water. These nodes are mounted after the installation of the tank.
Installation for one and the other type is basically the same. The tube is pushed through the hole in the tank and twisted on both sides with nuts.
The next step is to connect the flexible hose to the water supply riser, namely to the fitting, and install a tap that allows you to carry out repair work turn off the water in the toilet.
The modern hose is equipped with a nut-grommet clamp, which provides reliable connection. But plumbers usually play it safe and use fuma.
 Having brought the tank to the water supply, it will be necessary to adjust the float. The water level should be about fifteen centimeters lower than the edge of the tank.
It consists of installing a water drain mechanism with equipment. The top element is inserted through the hole in the lid and secured with a decorative element covering the hole.
Several factors affect the price of toilet cistern replacement services.
Such as:
The cost of dismantling and installing new fittings is from five hundred to eight hundred rubles, and about two thousand rubles will have to be paid for replacing the drain tank.
 For the establishment of expensive plumbing, many companies use an additional coefficient. In general, high-quality work on replacing the drain tank and the price are in no way connected. There are a lot of companies and they all work in different price categories.
During the operation of the cistern, problems such as leakage or constant flow of water may occur. The reason may be in the thrust or in the membrane, and they will need to be replaced.
 If filling the tank is difficult, then first of all check the connections and the supply hose.
If you do not understand this, then in order to avoid trouble, it is better to seek help from qualified specialists.
Looking at the ingenious interweaving of sewer, water pipes, hoses, having had a lot of “talking” with the gentlemen plumbers from the housing department, who arrived on their regular visit about an extraordinary blockage or leak, after a superficial study of the structure of the toilet bowl, after re-reading a bunch of responses and advice from experienced ones, you come to the conclusion that the toilet bowl with the bottom water supply - best option.
The undoubted advantages include:
There are also disadvantages:
The efficiency of sanitary ware directly depends on the quality of sediment cleaning from the outlet pipe elbow, this function is performed by fittings for the toilet flush tank.
The flush tank consists of:

Initially, the diameter of the water intake pipe is measured with a tape measure, a ruler. At 1.5 cm eyeliner - 3/8 inch, at 2.0 cm - ½ inch.
It is better to buy fittings of the same model as the old one. To do this, dismantle the failed mechanism, show a sample to the sales assistant. Now fittings are more often sold already in assembled which does not require any additional effort. 
The materials from which fittings are made are plastic, metal, bronze. Plastic is the most popular, but fragile material, the cost of a product made of it is low, bronze, respectively, is more durable material and the cost of the product from it is quite high. There is nothing complicated in the structure of the fittings of the drain tank. Despite the variety of models, the principle of constructing reinforcement is the same. 
The fittings intended for the lower eyeliner are divided into:
The push-button device, in turn, is divided into:
Materials and tools required for installation and replacement of fittings
A non-professional can also install the mechanism in the flush tank. Initially, you should read the instructions attached to the kit, neglect its study, the right is not worth it.
If the drain test gives poor results, an adjustment should be made. The rod is disconnected from the overflow pipe, the drain system lock is released so that the glass moves easily. The position of the fittings is carefully adjusted to the required level - about 5 cm to the top of the drain tank, fix it, bring the rod so that the water overflow tube is immersed in water by 2 cm. The flush mechanism can have the functions of draining a full and half tank. The system for draining half of the tank is adjusted by adjusting the float of the smaller drain. 
Complies with the requirements of TU 4953-001-02903999-2014
AB 69.57.55.3
It is intended for filling a flush tank (popularly a drain tank) with water and supplying it for flushing into the toilet.
The materials used for the manufacture of fittings, under operating conditions, do not emit into environment harmful substances and do not provide harmful effects on the human body through direct contact. Working with fittings does not require special precautions.
Fittings kit includes:
Product storage and care
Valves should be stored in a dry enclosed spaces at a distance of but less than 0.6 m from heating appliances.
Not allowed to use detergents, which include abrasive, acid - alkali-containing substances, organic solvents.
Guaranteed service life of valves - five years from the date of commissioning, but not more than six years from the date of issue. Service life of valves - 6 years.
To increase the reliability and durability of the fittings, it is recommended to additionally install a filter in the water supply network.
The fittings are delivered assembled, complete and configured for a specific type of tank

After installing the fittings, do not allow the moving parts of the valves to touch each other and the walls of the tank.

When connecting water hose to the inlet valve hold the valve from turning.

To avoid leakage from under the gasket, tighten the fixing wing nuts evenly on both sides.

Check that there is a gap of 3 - 19 mm between the tank cap and the button assembly, inserted all the way into the thread of the exhaust valve (without screwing in).

For reliable centering of the threads, before screwing in, make 1 - 2 turns counterclockwise until a characteristic click, which will show that the thread has “sat down” in its place.
Attach the rod to the overflow body.


* For long stem fittings
** when setting to this division, remove the overflow pipe 7
| Rack scale division | Height H, mm | Rack scale division | Height H, mm |
| M** | 285-304 | 15 | 360-379 |
| 1 | 290-309 | 16 | 365-384 |
| 2 | 295-314 | 17 | 370-389 |
| 3 | 300-319 | 18 | 375-394 |
| 4 | 305-324 | 19 | 380-399 |
| 5 | 310-329 | 20 | 385-404 |
| 6 | 315-334 | 21 | 390-409 |
| 7 | 320-339 | 22 | 395-414 |
| 8 | 325-344 | 23 | 400-419 |
| 9 | 330-349 | 24* | 405-424 |
| 10 | 335-354 | 25* | 410-429 |
| 11 | 340-359 | 26* | 415-434 |
| 12 | 345-364 | 27* | 420-439 |
| 13 | 350-369 | 28* | 425-444 |
| 14 | 355-374 | 29* | 430-449 |
| Fault name | Probable Cause | Remedy |
| Valve does not close | ||
| Valve does not open | Clogged hole in slider assembly 5 - guide 3 | Disconnect the guide 3 and wash the assembly with the slider |
| Slow tank filling | Clogged filter 11 | Unscrew the water supply hose, remove the filter 11 from the housing 8 and rinse |
| Water is leaking into the toilet | Incorrectly installed bottom valve 13 on the overflow body 12 | Adjust landing bottom! valve 13 on the overflow body 12 J by turning around the axis |
| Loose nut 21 | Tighten nut 21 | |
| Overflow pipe set incorrectly 7 | adjust | |
| Rod set incorrectly 23 | adjust | |
NOTE: Due to the presence of various impurities in the water, the performance of the outlet valve may deteriorate over time due to sedimentation on its parts. In this case, it is necessary to disconnect the valve from the seat, flush it and reinstall it.


Video provided by uklad.net
To write the article, I used the instructions that come with the fittings with the tank.
I also offer you:
The video provides extensive instructions for assembling and installing toilet seats.
With plastic adjustable, with plastic non-adjustable fasteners, microlift and metal fasteners.
I wish you successful installation!
Even the most reliable plumbing fixture can break. It is especially unpleasant if this is a product used daily by all family members. If the fittings of the toilet cistern are out of order, then you don’t want to wait a couple of days until the plumber comes, do you agree? Moreover, such a problem can be successfully solved on its own.
Before proceeding with the repair, it is necessary to understand the design of the tank, the device drain mechanism and understand the principle of operation of the spillway. The article discusses in detail all of the above points, as well as describes possible breakdowns toilet fittings and ways to eliminate them.
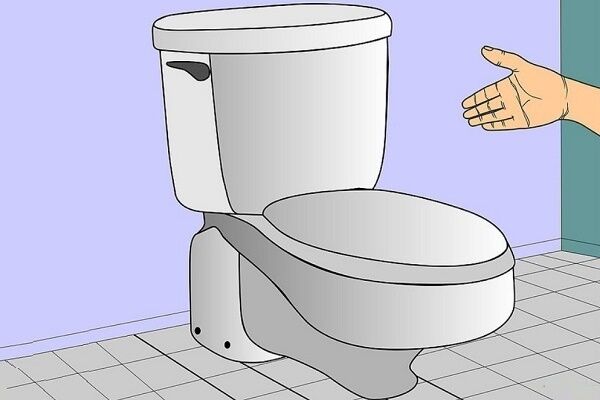
The toilet is the centerpiece of any bathroom. If you can do without a shower or bath using a ablution tray, then the toilet is an indispensable device not only for every family member, but even for some pets.
Therefore, it is simply necessary to know its features and device so that on Saturday morning you will not be alone with such a breakdown.
You can repair or replace the fittings of the tank with your own hands. The main thing is to turn off the water before starting work and read the manufacturer's recommendations for adjusting the structure
Tanks for toilet bowls differ in the material of manufacture, the method of installation and connection to the water supply, the type of location of the button / lever. And the price range of this type of plumbing fixtures is very wide - from inexpensive domestic models to exclusive design options from famous plumbing manufacturers.
According to the material of manufacture distinguish the following types toilet cisterns:
The drain fittings used for toilet bowls are mainly made of plastic. This applies even to expensive models.

Only in exclusive versions of plumbing use metal fittings. Moreover, it is made of brass and bronze alloys.
faience cisterns received recognition and the greatest distribution around the world. It is this material that can most often be found in bathrooms, where a pair of toilet + cistern is installed.

Faience products are produced as domestic producers and well-known Western firms. Choosing the best option for your bathroom is not difficult
plastic models drain tanks have a flattened shape. This is due to the specifics of their application - the so-called, when the flush device is installed in the wall. The design is reliable, easy to maintain and long service life.

Plastic tanks for toilets after installation must have an inspection window. It is usually located behind the flush button.
Cast iron tanks is a relic of the past. Heavy, bulky and unpresentable designs are still used by many zealous residents of our country. But during repairs, old cast-iron products are often replaced with a beautiful one. modern plumbing.
According to the method of connection to the water supply, there are tanks for toilet bowls with an upper and lower connection. The latter are more preferable - they look more presentable and create less noise during operation.

The top connection option is produced by many Russian plumbing companies. To reduce noise during filling after draining, the fittings have been improved
There are three ways to install the drain tank:
Top mount is a retro version. This arrangement of the drain device is used in bathrooms made in retro style.

Retro style toilet bowls are very popular among owners of large bathrooms. In a modest bathroom, such a product would be inappropriate, and its price is very high.
Toilet installation is used for suspended models when the tank is hidden in the wall. This allows you to save space in the bathroom and harmoniously fit plumbing into general style bathroom/toilet.

Cisterns built into the installation, hidden by a false wall, have a higher price compared to inexpensive domestic faience sanitary ware
Installation on the toilet shelf – traditional solution. These are the usual models of a plumbing pair, when the drain system is mounted on the shelf of the toilet bowl.
Advantages: simplicity and affordability. And the choice is very wide - you can choose both a domestic version and elite plumbing fixtures from Italian, French or German manufacturers.

A cistern on the toilet shelf is the most maintenance-friendly option. If there is a need for repair, then getting to the fittings is easy
Inside each cistern there is a shut-off valve to control the operation of the toilet. For many models, fittings come with all the necessary fasteners and nuts.
According to the method of water supply and the installation location in the tank, the following types of fittings are distinguished:
Top entry design built into the collection tank. A flexible tube for water supply is attached from above. This must be taken into account, because such fittings are not suitable for every model of a drain tank. Basically, only domestic manufacturers provide for top connections in their plumbing products.
Fittings with bottom connection comes with most drain cisterns Western production. Moreover, the design is plastic, but the quality of all components is high.
Most often, you may encounter such problems:
Problem #1. Filling does not take place if the inlet diaphragm is heavily clogged. Then you can not do without cleaning or replacing it. If the condition of the membrane is working, and the tank is not filled with working fluid, then you need to check the correct functioning of the float. Perhaps to come.

In built-in models, inspection, adjustment and repair of valves passes through an inspection hole hidden behind decorative panel with button
Problem #2. Water constantly flows into the toilet, increasing the meter reading cold water. This problem occurs when large debris or other objects enter the tank. Everything superfluous interferes with the normal operation of the filler valve of the tank. Needed and removed from it foreign objects.
It can also cause misalignment, loosening or breakage of the float. You can repair the float valve without much difficulty with your own hands:
Image Gallery
Before proceeding with the repair of the float valve that controls the water supply to the tank, we shut off the water supply to it
We flush all the water from the toilet bowl by pressing the key, button or handle intended for this
The screws that attach the valve to the float, located around it, unscrew
If necessary, move the device holding the float of the toilet bowl
Remove the membrane or washer from the valve locking mechanism. If they are damaged, we change them to similar ones.
Using vinegar and a brush, instead of which you can take an old toothbrush, remove calcium and rust deposits around the float valve
We install the membrane or washer back, assemble plumbing fixtures, close the tank with a lid
We check the operation of the repaired float valve. If everything is in order, we proceed to operation
Step 1: Turn off the water supply to the tank
Step 2: Flushing all the water from the cistern
Step 3: Loosen the fasteners around the valve
Step 4: Float Holder Offset
Step 5: Removing the Washer or Valve Diaphragm
Step 6: Removing sediment around the float valve
Step 7: Reinstalling the Washer or Diaphragm
Step 8: Checking the function of the float valve
In the case when everything is in order with the float, you need to check the condition of other plastic parts of the armature - the rod, the diaphragm lever or the float spoke.
Problem #3. When you press the flush button, nothing happens. Here it is necessary to check the presence of gaps in those places where they should not be - at the joints. Also, plastic fittings may be broken, which is especially common in cheap models that have served for more than 3 years.
A common cause of a violation of the water supply to the tank is the inappropriate length of the drain and fill pipes or their damage. In dealing with the situation, we perform the following steps:
Image Gallery
If the water enters the tank too weakly or splashes when it enters, we check the condition of the drain-overflow mechanism. The overflow tube should be approximately 1 cm below the drain button or handle
If splashing occurs when draining water from the tank, shorten the filling tube to the required length
If damage is found on the filling tube or its condition does not inspire confidence in long-term service, cut off a tube of equal length. It should be equal in diameter to the worn tube
We insert a new segment into the seat of the old filling tube, if necessary, adjust it in length
Step 1: Checking the position of the overflow tube
Step 2: Checking the condition and length of the filling tube
Step 3: Cutting the new filling tube for replacement
Step 4: Putting the New Tube in Place
Problem #4. Another trouble that occurs with the toilet cistern is leakage in places threaded connection. To eliminate this trouble, you will need to replace the sealing gasket. If this part has not yet had time to wear out, then you need to check whether the nuts are well tightened and if there are any distortions.


