Any area must be protected from prying eyes by a reliable fence. It can be constructed from different materials. The most popular and budget option is a fence made of corrugated sheets.
It is suitable for those who want save on material and do not spend a lot of time building a fence. How to make a fence from corrugated sheets with your own hands is discussed in this article.
Corrugated fence has a number of advantages before others:
An important advantage of the design is the small amount of excavation work and ease of installation.
If you didn’t find a helper for you, don’t worry! With a fence like this I can handle it on my own.
The benefits of a fence made from such material include its opacity. This is important for free movement on the site. At the same time, you don’t have to be in sight of your neighbors.
Cons of corrugated sheets:

What if a welding machine is not available, or a self-taught master does not know how to work with welding? You can install a fence without welding, with the help of auxiliary: brackets, bolts, self-tapping screws and a construction clamp.
With this type of fastening, you cannot use parts that can damage the protective coating.
In addition to profiled sheets, transverse fencing profiles called joists are used. It’s easy to attach the logs to the post: a bracket and a construction clamp will allow do without using a welding machine.
The following advantages are highlighted in using the bracket:

Welding work is provided metal elements fence reliable fastening. After welding the fasteners, the surface is treated with a special primer to secure the work done and give the product greater thickness.
 A fence with posts (example in the photo on the left) is chosen by the owners of households who What is important is the highest stability of the sheets and a respectable appearance.
Just like for metal pillars, markings are made for future masonry for brick fortifications.
Craftsmen make a hole into which concrete is poured. This procedure is important because large weight of the future structure. The building material is laid out in an area of 1.5 by 1.5 bricks.
Throughout the laying of a brick pillar, a level and plumb line are used for accuracy.
At a height of 0.2-0.3 meters and 1.5-1.7 meters from the top edge of the soil, they are laid inside the column brackets to support the structure. After completion of the masonry, logs are welded to the brackets and covered protective coating.
After completion of the masonry, the surface of each pillar covered with a special roof for guard brick pillars from precipitation.
Sometimes the owner of the future fence decides to install a fencing structure made of profiled sheets without a foundation. Before making such a decision you need to consult a specialist, which will tell you about the type of soil and its swampiness.
 If there are changes in the area, strong winds and watery soil, installation cannot be done without a foundation.
If the soil layer allows this type of construction, it is best to use a profile pipe 100 mm in diameter. The height of the pipe is selected based on the planned height of the fence. The top of the support is welded to prevent moisture from entering.
A building with a foundation is much more reliable than without it. If you have the financial opportunity and extra time, it is best to dig holes. They are filled with gravel mixed with broken bricks. The hole is filled with cement, with pre-fixed supports.
Fixed pillars should not be touched for four days until the cement is completely dry.
Work with a profiled sheet begins with a drawing detailed diagram, which will take into account all the points:
At this stage, you need to decide what type of fence will be on the site: continuous or sectional. Continuous construction involves a continuous arrangement of corrugated sheets around the entire perimeter.
A sectional fence is divided into segments separated by pillars.
 When choosing a material, you need to pay attention to the height of the sheet and its thickness. The material should not be too thin.
For country house located in a temperate climate, the best choice would be a fence with plastisol or polyester coating.
 Carrying out foundation laying work - one of the important stages, because it is at this moment that places for future pillars are marked. And from correct location The evenness of the structure will depend.
First produced marking the future fence. For this procedure, you can use pegs with a rope attached and a hydraulic level for accuracy. Then the places for installing the pipes are outlined. In the indicated places, recesses are made (recommended depth - 1 meter).
The pillars serve as support for the profiled sheet. From the strength of the material from which they are made, the reliability of the fence depends. The height of the pipe should be selected taking into account the depth to which the support will go into the hole.
Pillars made of profiled pipes 40x20 are popular. The thinner the corrugated sheet, the smaller the distance between the supports should be..
A budget option for supporting a fence is wood. Wooden pillars less in demand due to fragility. However, they are able to withstand significant loads. With this choice, you need to carefully treat the pillars with an antibacterial solution.
Pillars needs to be adjusted in height. In relatively flat terrain, the fence along the horizontal line should not have significant deviations or differences. To do this, use a watery level. A mark is placed on the posts and the extra centimeters are cut off with a grinder.
 The pillars are installed in pre-dug holes and filled with concrete with the addition of crushed stone. The surface of the concrete is covered with a film to prevent moisture from entering and speed up drying.
Installing poles is difficult, but it can be done with your own hands. The main thing is to be precise in your work.. It is recommended to carry out installation together with an assistant.
After the concrete has successfully dried the surface of vertical posts and logs is coated with paint or primer. If you do not carry out this procedure in advance, then later, when the sheets are already tightly held, they will interfere with surface treatment.
It is best to install corrugated sheets with a partner. One holds the bottom of the sheet at the level of the tensioned thread, and the other secures the surface with a screwdriver at the top.
After checking that the sheet is horizontal, it is strengthened in three or four more places. The sheets are fastened with self-tapping screws or bolts. Can Make the job easier with a screwdriver with low revs. Self-tapping screws must be screwed through one wave.
Despite the fact that a self-tapping screw can be easily screwed into a corrugated sheet, it is better to make a preliminary hole in the material with a diameter slightly larger than the diameter of the self-tapping screw. This is important when the metal expands linearly due to sudden temperature fluctuations.
Perpendicular screwing of the self-tapping screw - necessary condition fastening of corrugated sheets. For better sealing of the fastening, special neoprene washers are used, which should fit tightly to the sheet.
 For installation accuracy, use a level. It is important to install the first sheet evenly, since all other work will be carried out from him. The sheet is attached in four places with a distance of 20 cm from the edge. The next sheet is laid with an overlap in one wave.
To accurately hit the crossbars with a self-tapping screw, you need to pull the string with outside at their level.
It is unacceptable to make a minimum number of fastenings: due to gusts of wind, the fence will be subject to loosening.
The final stage of installation is the installation of the end strip. It will cover the edges and create the appearance of a finished structure.
We quickly and easily build a fence from corrugated sheets without a foundation - video instructions:
Fences made of corrugated sheets are used everywhere. This material is popular due to its ease and speed of installation, attractive appearance and affordability. If you agree with this statement and are planning to build yourself such a fence, we suggest that you familiarize yourself with step by step process its construction.
 If the site where the fence will be erected is located in the city, you need to submit an application to the appropriate authorities asking for permission to carry out the work before installing a corrugated sheet fence. The application must be accompanied by drawings of the future fence and construction estimates, legally approved by architectural and construction control authorities.
The permission received and project documentation should be registered with local authorities and only after that construction should begin.
If the fence will be erected on a site located in the suburbs, it is not necessary to obtain permission. You will only need documents confirming your rights to it.
Failure to comply with current legislation may result in a fine or demolition of the illegally erected fence at the expense of the owner of the site. Also, it will not be possible to sell such a house in the future.
 Before erecting a fence, you need to decide which ones to build. Gates can be swing, sliding, sliding. It is easier to build swing gates, but this type of gate requires extra space on the site to open it. To avoid any problems, you should choose the type of gate at the site planning stage. It is written in more detail about planning a suburban area.
 Before construction begins, it is necessary to calculate the material taking into account the perimeter of the area to be fenced and the height of the fence. Remember the overlap. It is maintained within the range of 3 to 10 centimeters.
The boundaries of the location of the entrance gates and entrance gate are immediately marked, the installation pitch of vertical supports is calculated (usually 2.5-3 meters), the area is leveled and cleared of debris.
To mark the area you will need a tape measure, cord, and stakes. The latter are installed in the corners where the main pillars will be, and a cord is stretched between them. Then, with a certain step (2.5-3 meters), auxiliary pegs are driven in between the main pegs. They don’t forget about the future gate with a wicket; markings are also made for them.
To build a fence you need to buy: 
Pouring the foundation and installing support pillars
 For fences made of corrugated sheets, two types of foundations are used: strip foundation, when a trench of a certain depth is dug along the perimeter of the marking (can be from 50 cm to 1.5 m) and filled with concrete, and local, when a separate hole is drilled for each post and also concreted. You can use a special drill for drilling. Installation of support pillars is carried out in the following order:
If you decide to make a local foundation for a fence from corrugated sheets, make recesses with a diameter of 25 centimeters and a depth greater than the freezing depth of the soil in your area.
Strip foundation is used in construction different types houses. There are deep strip foundations and shallow ones. The first type of foundation is used for houses with a basement or houses over one floor, the second - for small outbuildings and one-story houses. You can build on a strip foundation. Calibrated timber has good thermal insulation qualities and provides a microclimate that is comfortable for humans.
Country house frame-panel houses, houses using Canadian technology and many others can also be built on a shallow strip foundation. About dachas frame-panel houses read in, and it’s written about how to build using Canadian technology. Both types of buildings are erected quickly.
Installation of cross pipes (logs)
 When the concrete has hardened, the installation of transverse pipes begins. Their number depends on the height of the fence. The distance between the logs is maintained at one and a half meters. They are joined to vertical posts using a weld. If you have no experience in this matter, it is better to seek help from a specialist.
When all the jumpers are welded, they begin to paint the welded areas, thereby protecting the metal from corrosion. The top of the vertical supports is covered with plugs.
Installation of gates and wickets
 Making gates and wickets is the most difficult process. First, frame structures with diagonal or horizontal connections. The posts of the wicket and gate are connected to each other by a transverse joist to give the structure greater rigidity. Next, the assembled frames are attached to the posts and covered with sheets of corrugated sheets. You can immediately mount the corrugated sheet and then install the gate and wicket.
Fastening corrugated sheets to the frame
 The corrugated sheeting is secured with special self-tapping screws and rubber gaskets. For one linear meter of corrugated sheeting, from 12 to 14 fasteners are used. starts in the direction from the gate in both directions. The overlap of the sheets is one wave, the distance between the screws is 2 waves.
Cleaning the area
Installation is completed, you can start cleaning the area. The accumulated garbage must be collected and taken to where it belongs. You can remove the dust from the fence and begin to enjoy the new look of your site.
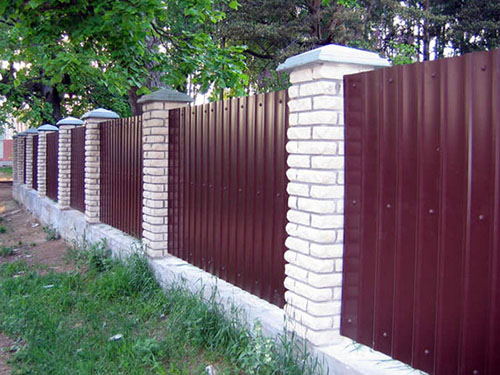
Fence made of brick and corrugated sheets
Installation of fences from corrugated sheets
Fence at the dacha made of corrugated sheets with inside
Reading time ≈ 4 minutes
Before starting construction of a new land plot care should be taken about the practical and secure fence. In addition, it is important that your future fencing is free of defects, has excellent aesthetic qualities and blends seamlessly into the surrounding landscape.
Today there is a whole mass various designs, installation technologies and materials for the construction of a protective barrier to the site. It is worth noting that each type of fence has both positive sides, as well as your weaknesses. One of the most successful, economical and easy to construct is a structure made of corrugated sheets (also called corrugated sheets or metal profiles), as in the photo.
Building a fence from corrugated sheets with your own hands will not take much effort. All that is needed for this is high-quality building materials, as well as strict adherence to technological rules construction. So, how to make such a fence?
Why should you choose metal profile fencing:


Of course, the main material of this design is corrugated sheet. This material It is made of durable galvanized steel and has a neat ribbed shape. The main advantage of such material over its analogues is low price, durability and ease of use. So, a list of materials that can be included in estimate:
I. Marking of the adjacent territory.

Before starting marking, it is important to take measurements of the perimeter of your land plot. Next, we calculate the estimated number of required supports (step 2-3 m). Only then can we begin the marking itself. We start by “breaking” the pegs in all corners of the site. We connect the pegs one by one with a well-tensioned thread. Using a tape measure, we take the final dimensions and prepare a complete fencing project.

II. Installation of supports.

The supporting posts of your fence can be metal pipes both round and rectangular. When ordering supports, you should take into account that ideally 1/3 of the pole length will be buried. For example, for a fence 2 m high, you will need a foundation pit with a depth of 1-1.5 m (depth of soil freezing), that is, we order pipes with a length of at least 3 m.
After the pits are ready, you should take care of the concrete solution (concrete grades M200 and M250 are suitable).

It is very important to install the supports strictly vertically, which means do not forget to apply a level when pouring the solution into the hole and check that everything is level!
III. Installation of transverse fence joists.

The fence should be constructed at the rate of 1 log per 1 m of fence height. That is, for a fence no more than two meters high, you need to install a couple of logs in parallel.

IV. Installation of corrugated sheets.

The final stage is attaching the corrugated sheets to the fence frame. We join the sheets with an overlap, at least 1 “wave”. For fastening we use roofing screws or rivets.
Any private plot The land needs to be fenced. Sometimes it performs a purely decorative function, but more often it is installed for the security of a country house or cottage. It also allows you to close yourself from prying eyes and adds coziness to the area. There is a large number building materials, but the optimal combination of price and quality is corrugated sheeting. Often the price for installing corrugated fences is quite high and scares off many people. The solution is to install it yourself, which is not so difficult.
There are several types of corrugated sheeting; let’s look at the main ones, which will affect the performance of the fence and its appearance.
Corrugated sheet with polymer coating . Its coating is a polyester composition, which ensures the reliability and durability of the metal. Sheets with this coating have the highest anti-corrosion characteristics. In addition, they are resistant to negative influences environment, which allows you to extend their service life, without additional care, up to fifty years.
It has a wide range of colors, which is very important for harmonious combination with the general design of buildings on the site. The polymer coating can be on one or both sides (the second option will be much more expensive). It is widely used as a roofing material and also for external cladding hangars and industrial facilities.

Galvanized corrugated sheet. Its main advantage is its low price. This is due to the fact that inexpensive raw materials are used for production. But it has low resistance to influence external factors. In addition, it is not recommended to plant plants next to it, which on sunny days can burn from overheating. Most often, galvanized corrugated sheeting is used for temporary fencing of construction sites.
In addition, it is divided according to profile height and sheet thickness into: roofing, load-bearing and fence (wall).
In order not to purchase additional material in the future, it is necessary to accurately calculate everything from the beginning. This will reduce the construction process time and financial costs. It is necessary to take into account not only the corrugated sheets themselves, but also support pillars, cross beams, fasteners and the amount of cement-sand mortar for pouring the support. In addition, any fence must be equipped with a wicket and gates.

Typically, corrugated sheeting with a wave height of 10-20 mm with a polymer coating or galvanized is used for fencing.
A square profile pipe is used for support pillars. Its cross-section directly depends on the height of the future fence.
Corrugated sheeting is a durable material; fences made from it can reach 8 meters in height. The number of logs on which the corrugated sheets will be attached may vary, but most often there are two. You will also need metal screws and rivets for joints.
Calculating the total number of supports is easy. For this total length along the perimeter we divide by the distance between the supports, and to the result we add 3 more pillars (one pillar for the gate and gate, and one for the turn).
Corrugated sheeting is calculated based on the working width of the sheets. We divide the total footage of the perimeter of the future fence by the working width, thus obtaining the required number of sheets. But for stock it is advisable to buy 1-2 more sheets.
Calculating the length of the lag is also simple. To do this, the total length of the entire perimeter is multiplied by two, and the required footage for the manufacture of gates and wickets is added to the resulting figure. And if the total number of profiled sheets is already known, then we multiply their total length by 2 and also add the required length of pipes for the manufacture of wickets and gates.
The dimensions of the corrugated fence can be made to suit your needs. individual order. But on average its width is 100-130 cm and height 180-200 cm.

Pillars. The most the best option for the support pillars there will be a metal profile pipe that has a square or rectangular section 4x6 or 6x6 cm and wall thickness from 2 mm. To give the structure rigidity and flexibility, the distance between the supports should be 2-2.5 m.

It will allow the fence to withstand heavy snow, strong winds and not break. The length of the pillars will depend on the size of the corrugated sheet, as well as on the characteristics of the soil. IN clay soil The pillars are buried 80-90 cm; if the soil is sandy or there is high groundwater, then the minimum recess for the supports is 100-120 cm.
Lags. For them, profile rectangular or square pipe, but with a smaller cross-section. 4x2 cm with a wall thickness of 2.5 mm will be enough.
Profiled sheets. For installation of a fence made of corrugated sheets, corrugated sheets with a ridge height of 2 cm and a thickness of 0.5 mm are best suited.
Fasteners. For fastening, it is advisable to choose self-tapping screws for corrugated sheeting (they have EPDM - gaskets that ensure sealing of the fastenings) or special rivets. This is due to the fact that ordinary self-tapping screws can cause metal corrosion.

Tools
The tools for building a corrugated fence with your own hands will depend on the characteristics of the soil. On the lungs sandy soils You can get by with a simple hand drill and sledgehammer, but on heavy clay and rocky soils you will need a gasoline hole drill.

But in any case, there is a list of basic tools:
Installation of pillars
All posts must be the correct size before installation. Their length is calculated from the height of the fence and the depth of the underground part of the pillar, which is approximately 30% of the height of the above-ground part of the structure.
First, marks are set in places where holes for supports will be drilled. To do this, you will need a tape measure or string, the length of which is equal to the distance between the posts.

Once everything is marked, drilling of wells using a drill begins. If the work is progressing quickly, they can be drilled all at once. But if the holes are dug manually and slowly, it is better to install several pillars in them and cement them.
The corner supports of one row are installed first and secured with wooden wedges. Between them, along the top, a cord is stretched in a strictly horizontal position. If there is a skew, then the height of the pillars can be adjusted by pouring soil into the wells or, on the contrary, digging them out. After everything is leveled, the intermediate posts are placed focusing on the stretched cord and are also fixed with wooden wedges. Next, stone, crushed stone, crushed brick or large fractions of gravel are poured into the holes to the support pillars and carefully compacted. Sand is poured on top and water is poured over it.

The cement solution is diluted in small volumes, designed for 5-6 wells. Therefore, it is not necessary to use an electric concrete mixer; you can get by with a small container. To prepare it, the following proportion is used: 1 part cement, 4 parts sand and 4 parts water and crushed stone.
For additional strength of the support posts, reinforcement 15 cm long is welded onto each of them. They should be placed on the underground part across the pillar and crosswise in relation to each other.
Installation of cross beams
The transverse joists are attached to the finished racks using electric welding. The number of rows depends on the height of the fence. If it is up to 2 meters, then two will be enough, and if it is higher, then the log needs to be made in 3 rows.

Advice: it is important to maintain the distance from the joists to the edges of the corrugated sheet, which should be strictly 20cm.
When all the joists are welded, they are thoroughly cleaned with a wire brush, after which everything is covered with paint.
Installation of corrugated sheets
Installing corrugated sheets with your own hands is a simple process. It is attached to the joists using self-tapping screws with plastic or rubber washers. No need for large quantities fastenings, it is enough to fix the sheet along the edges and in the center.
Each sheet is attached only after it has been aligned horizontally and vertically, which will prevent the formation of cracks. First, the first sheet is mounted, the second is installed on it so that it lies, overlapping, covering one wave.

Often, when at a corner you have to cut it to the required size. This is done using metal scissors without using a grinder or abrasive tools.
The final stage of installing a corrugated fence is closing the upper part of the support posts to protect them from precipitation and, as a result, from corrosion.
Advice: if scratches appear on the sheets during the work, they should be immediately painted over with spray paint. To make the fence more aesthetically pleasing, the supporting pillars can be lined with stone or brick.
In conclusion, it is worth adding that the edges of the corrugated sheet are quite sharp and can injure the skin. Therefore, before you start making a fence from corrugated board, take care to protect your hands.
Thus, the process of erecting a fence is not very complicated and even a non-professional can do it. With diligence and hard work, you can save your family budget.


Today, more and more owners of private houses are erecting fences from profiled metal sheets (profiled sheets) on their property. And this is not surprising - this durable and reliable material quickly gained popularity among the people. It is not difficult to build such a fence yourself. You can learn about all the subtleties and nuances of this work in this article.
A fence made of corrugated sheets can be installed on the site according to your drawing without recourse to professional builders and rental of special equipment. This and other factors make it very popular among private home owners.


When buying profiled sheets, you should pay attention to the price. Too little cost may indicate poor quality galvanization or insufficiently thick metal that is not suitable for erecting a fence.
First you need to check the thickness of the sheet (for building a fence, an indicator of 0.6-0.7 mm is quite enough). Then you need to make sure that the seller has certificates confirming the quality of the material.


For fences, wall corrugated sheeting is most often used. It is cheaper than a load-bearing one and is suitable for any terrain without strong wind loads. It is important to find the optimal balance between price and protection of the sheet from external influences. We must not forget that the most cheap option In any case, it loses in durability.
The material has many layers, each of which serves a separate purpose. Of course, only the right combination of them makes corrugated sheeting truly high-quality. For example, a low-grade steel coating will not have the desired effect. To settle on a specific material, you need to know what the steel is coated with.


Types of protective coatings for corrugated sheets.


Particular attention should also be paid to the thickness of the sheet. If it is less than 0.45 mm, then the fence can easily deform in the wind and tear off the holes for the screws.
It's about about the thickness of the galvanized sheet in its original form, without a protective coating.
To avoid problems with choice and not to stumble upon low-quality material, it is better to order corrugated sheets in Europe. Leading world-famous manufacturers are concentrated there.


Before starting construction, it is important to decide what design the fence will be. There is little choice here: the lower edge can be buried in the ground or located above the ground. The distance between the fence and the ground is prerequisite, if construction is carried out on a slope or on excessively wet soil.
It is also worth remembering that wind and dust will gradually erase the protective layer of corrugated sheeting and it will need to be tinted to avoid rust.
But there is another way out - to install special U-shaped profiles for guard. They will also need to be tinted every few years, but this is much easier than dealing with rust on the fence itself.


If the supports are round pillars made of brick or wood, the fence frame must be overlapped, i.e. by welding the logs and the surface of the pillars, and attaching the sheets exclusively to the logs. In the same way, you can assemble the frame on rectangular supports. Professional developers often do this.
But for greater strength, it would be useful to secure the logs in the space between the supports so that their outer parts coincide. With this assembly method, the sheets can be attached to both supports and joists. Of course, in this case you will need more self-tapping screws, but the strength of the structure will also increase many times over.
There is also a so-called modular (sectional) fence - each profiled sheet is framed around the perimeter by a frame and then welded to the supports. This option is very labor-intensive, but in the end such a fence will look more stylish and finished than a regular metal one.


Corrugated sheeting is a fairly durable material, and fences up to eight meters high can be built from it. The metal is attached to logs, of which there are often two or three. Metal screws are also needed for installation.
To calculate for yourself how many supports you will need, you need to divide the length of the fence perimeter into the spaces between the supports. To the resulting number you need to add 4 (two posts at the edges of the gate and for attaching the gate) and another 4 for each corner.
The amount of corrugated sheeting is calculated taking into account the width of the sheets. Again, the perimeter of the fence must be divided by the width of the selected profiled sheets. It is recommended to take a couple more sheets in case the calculations give an error.


To get the required log length, you need to multiply the perimeter by 2, and to the result add the required footage for installing the gate and wicket.
To make it easier to install the fence, you can immediately order sheets of the required size. Their standard width is approximately 120-130 cm, and their height is 190-200 cm. You will also need metal screws, paint (if necessary), gravel and cement.
The final cost of the fence can be affected by the installation method of the supports, the thickness of the profiled sheet, the size (number) of gates and gates, the number of posts and joists.


Step-by-step instruction Preliminary work before the start of construction involves performing several stages.
The first step is to decide where exactly the fence (gate, wicket) will be placed and mark the place for the posts. You also need to decide what the height will be in order to correctly calculate the amount of material when purchasing.

Most often, metal pipes are used as supports. The thickness of their walls should be at least 2 mm, for tall buildings - at least 3 mm. Between round and profiled pipes, it is better to choose the latter, since they are characterized by increased mechanical strength. The height of the supports directly depends on the height of the fence, and metal is often placed half a meter underground. Over time, metal supports must be treated with anti-corrosion compounds.


If you need to save money, you can choose wooden posts for supports. They are not as durable as metal ones, but will cost much less. In this case, the most suitable species would be spruce, cedar or pine. It is important to choose timber without cracks, with flat surface, otherwise repairs may be required quite soon. Before placing the pillars in the ground, they must be treated with an antiseptic and a water-repellent mixture.
An alternative to wooden and metal supports can be concrete structures. Such pillars are made of cement, crushed stone and sand and are highly durable.
Sometimes the foundation of the fence is made of brick, which looks more advantageous in appearance. But building a fence with brick supports will require a lot of effort and time.


When the issue with the choice of material has been resolved, you should proceed to the direct installation of supports. Here, the easiest and most reliable option would be a fence with concrete pillars. The standard distance between pillars will be 3 meters. The fact is that profile pipes They are 6 meters long and with spans of 3 meters it will be much easier to join the logs.


Next in in the right places Using a drill, you need to make holes that will be at least 10 cm wider in diameter than the selected supports. Gravel is poured into these holes, which must be properly compacted. The supports are then inserted and aligned.
Having filled the holes with gravel approximately to the middle, you can begin pouring cement. The pillar must be well secured with boards or braces, which can be removed only after the solution has completely hardened.

When the foundation has completely hardened, you can install the logs. Here you will need a six-meter pipe, which was mentioned earlier. The number of lags varies from 2 to 3 depending on how high the fence is. The logs are installed at a universal distance from the edge - 4-5 cm. For reliable fixation, it is better to weld them.
To prevent rust, the pillars are coated with a primer. If the soil in the area is soft, then the pillars can sag quite quickly over time. Therefore, in this case it would be logical to make a strip foundation. It is not difficult to install it with your own hands - a ditch is dug exactly along the pillars and a low tape box is built, then waterproofing is laid along the walls of the structure and the whole thing is filled with concrete.


The next stage is installing the metal profile on the logs. In order to attach them firmly, ordinary metal screws will be sufficient. The joining of metal profile sheets is done with an overlap. It is necessary to install it using construction gloves, as there is a danger of cutting yourself on the corners of the corrugated board.
The last and most labor-intensive stage will be the installation of gates and wickets. You need to build frames for them. In this case, it is necessary to prevent the gate leaves from sagging by welding a separate strip to each of them, which will connect the opposite edges of the frames. After fastening, the frames are sheathed on top with corrugated sheets.


Important features to consider during construction.


Between the posts on which the wicket or gate will be installed, you need to dig a trench up to 30 cm wide, lay a frame of reinforcement inside and pour concrete on top. This is necessary so that the pillars are connected to each other by one foundation and the influence from weather conditions was the same on both sides of the wicket (gate).
This design will prevent the sashes from skewing and they will open/close freely. For pillars that are planned to be lined with brick, this design is required.


If the site is located on a slope, this is not at all a problem for constructing a fence made of corrugated sheets, there are simply a couple of features that should be taken into account during construction. To make the structure even, you need to stretch the rope around the perimeter of the building. Based on this, the corrugated sheets are fastened in such a way as to prevent differences in height between them. It turns out that each sheet has a slight deviation from the vertical relative to the ground, but on a small slope this will be almost imperceptible.
If the fence is erected on steep slope with large differences in altitude, then a different technology is needed. In this case, the line for installation is determined using a rope, a plumb line and building level. It is necessary to measure the height of the difference between the pillars. To calculate the number of supports in this case, the height of the differences is divided by the span between the supports.


For example, if you plan a fence 30 meters long with spans between supports of 3 meters, and the difference is about 1 meter, then you need to divide 10 centimeters by the number of spans, i.e. 10. We get a result of 10 centimeters. It is by this value that each of the spans should be made lower, which will preserve the aesthetic appearance of the building. The result is a kind of ladder that gradually descends the slope.
If the slope is very steep, you can install profiled sheets of different sizes for each span. This way the result will not be the most beautiful option, but at least the differences between the sheets will not be very noticeable and the fence will look more solid.

Combined structures with stone or brick supports require special attention to the condition of the soil at the site of the proposed construction. Soils that retain moisture can become a problem for construction. This property of the earth can lead to a sharp rise in ground level when the soil freezes and, as a result, to the destruction of the entire foundation.


There are several ways to solve this problem.
As you can see, you can build a fence from corrugated board yourself in as soon as possible and be sure that it will last for many years. If concrete pillars do not look very aesthetically pleasing, there are many ways to make the fence more attractive and stylish.


Initially, corrugated sheeting was produced as a material for finishing warehouses, temporary construction sites, and parking lots. That is, buildings that do not have an attractive appearance. Today, corrugated sheets have become in great demand, so manufacturers had to think about color scheme and options for its decor.


The most common method of decoration is a combination of corrugated sheeting with brick or stone supports. Can also be finished artificial stone concrete pillars or buy corrugated sheets painted to resemble wood or stone.
The color of the fence should not stand out too sharply against the background of the design of the other buildings and the entire site. Some summer residents choose corrugated sheets of the same color as the roof. It is better to use for decorating steel elements powder paint, which will not fade or crack.
Plasma cutting technology allows you to make figured cuts on profiled sheets. Often, owners limit themselves to decorating the top edge of the fence.


Many people decorate their fences with forged elements. It can be geometric figures, patterns, ornaments and everything you can imagine. They can be welded or simply screwed to the corrugated sheet. These elements will look especially advantageous if similar ones are already present in the decoration of the balcony, staircase or gate.
In the presence of facade paints You can make your fence one of a kind. You can draw your favorite scenes, flowers, abstractions. Better yet, hire a professional artist to paint a reproduction of a classic painting. After drying, such a drawing must be varnished so that it does not crack or fade over time.


Well classic version decoration – climbing plants, remains always relevant. Often, a couple of small fasteners on the fence will help greenery grow in the right direction, leaving only the gate and gate free.


.jpg)


