Stairs.  Entry group.  Materials.  Doors.  Locks.  Design

Stairs. Entry group. Materials. Doors. Locks. Design

» Finishing the basement: instructions for disguising a pile-screw foundation

Finishing the basement: instructions for disguising a pile-screw foundation

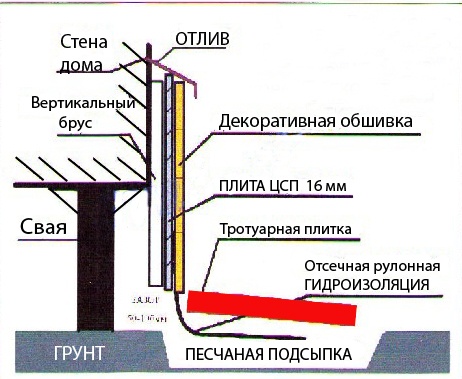
For insulation and masking of the supports, the basement of the foundation is finished on screw piles. Basement - the distance between the surface of the earth and the supporting elements of the house.

Name Characteristic
Hinged plinth Does not sink into the ground. Installed in a day, economical, provides ventilation and protection from moisture. Aesthetic: the finish imitates any material, such as stone or wood.
Shallow band plinth Based on a strip foundation. Installation is combined with the installation of the blind area. Not suitable for a site with a strong elevation difference and heaving soil. Requires time and money resources. It is not damaged by impacts, it is the basis for the basement of the house, it insulates the screw foundation. Cladding is not required.

How to make a hinged plinth with your own hands?

Soil preparation

  1. A trench 50 * 40 cm is dug along the perimeter of the screw foundation, the inner border of which goes under the walls of the house. The bottom of the trench deepens in the direction from the walls by 3 cm every 2 cm.
  2. The ditch is waterproofed. Possible materials: roofing felt, galvanized steel, PVC film.
  3. Drainage is installed - PVC perforated pipe. Lay it on a layer of rubble 10 cm.
  4. Drainage wells are brought to the surface to flush the system.
  5. The drainage is covered with rubble (10 cm).
  6. A sand cushion is formed along the perimeter with a slope from walls 10-50 cm thick.
  7. A blind area is being constructed - a waterproof strip around the perimeter of the house with a slope from the walls. Purpose - protection from rain and melt water. Width not less than 50 cm. Materials: concrete, asphalt, paving stones, tiles.

Hinged structure - frame for finishing

  1. Guides, for example, wooden beams, metal profiles, are attached to the piles with self-tapping screws or welding. Metal parts are installed in the immediate vicinity of the ground. Step between vertical guides - 90 cm, between horizontal - 45 cm. For the plinth, it is recommended to use a horizontal crate.
  2. A crate is constructed from metal corners, wooden boards or pipes. The crate covers the visible part of the screw foundation. First, the starting bar is attached at a height of 15-20 cm from the vegetation layer, then vertical slats are mounted. The step between the slats is 40-45 cm.
  3. The wooden frame is treated with a protective compound, for example, an antiseptic.

Finishing

  1. On the crate, finishing materials are fixed in layers: from warming to decorative. Insulating: asbestos-cement slabs, sheet slate, thermal panels. Before small-piece finishing, for example, natural stone, plinth panels are installed. The base is polystyrene or thermally insulating polyurethane foam.
  2. Corners are formed corresponding to the corners of the house.
  3. The seams are treated with a protective compound, for example, a sealant.
  4. Additional elements, ebbs, drips are installed - optional components.

Between the finish and the blind area, 3-5 cm is left to protect against the expansion of materials during temperature changes. It is recommended to sew up the basement 1-3 years after the completion of the construction of the house.

How to make a shallow tape plinth with your own hands?


Soil preparation

  1. The site is cleared of vegetation and debris.
  2. A trench 50 * 40 cm is dug, the inner border of which goes under the walls of the house.
  3. The bottom is treated with geotextiles.

Mounting

  1. Rebar frame is installed.
  2. The trench is filled with cement mortar.
  3. Brick or cinder concrete is placed on the tape base.
  4. Masonry is brought under the walls, vents are installed.
  5. Finishing is carried out similarly to the hinged plinth.

On weak soils, you need to make a trench 30 cm deeper to create a pillow: 20 cm - sand, 10 cm - gravel and roofing material.

How to close the pile foundation from the outside?

Name Characteristic
Plaster and paint Cheaper siding. High vapor permeability. Decorative: a variety of colors and textures, painted concrete "cobblestones" - an imitation of natural stone. Not durable.
A natural stone Durable. Elite look. Structural unit - slabs - prepared stone slabs 2 * 3 cm. Decorative: variations in shape and surface. Heavy Cladding: Adds load to the screw foundation. It is mounted for a long time, fittings and stops are required. Expensive. Do-it-yourself installation requires specialized skills.
Fake diamond Cheaper than natural analogue. Light cladding of cement-containing mixtures. It is made in the form of piece tiles or panels, mounted on fasteners. Decoration: mosaic.
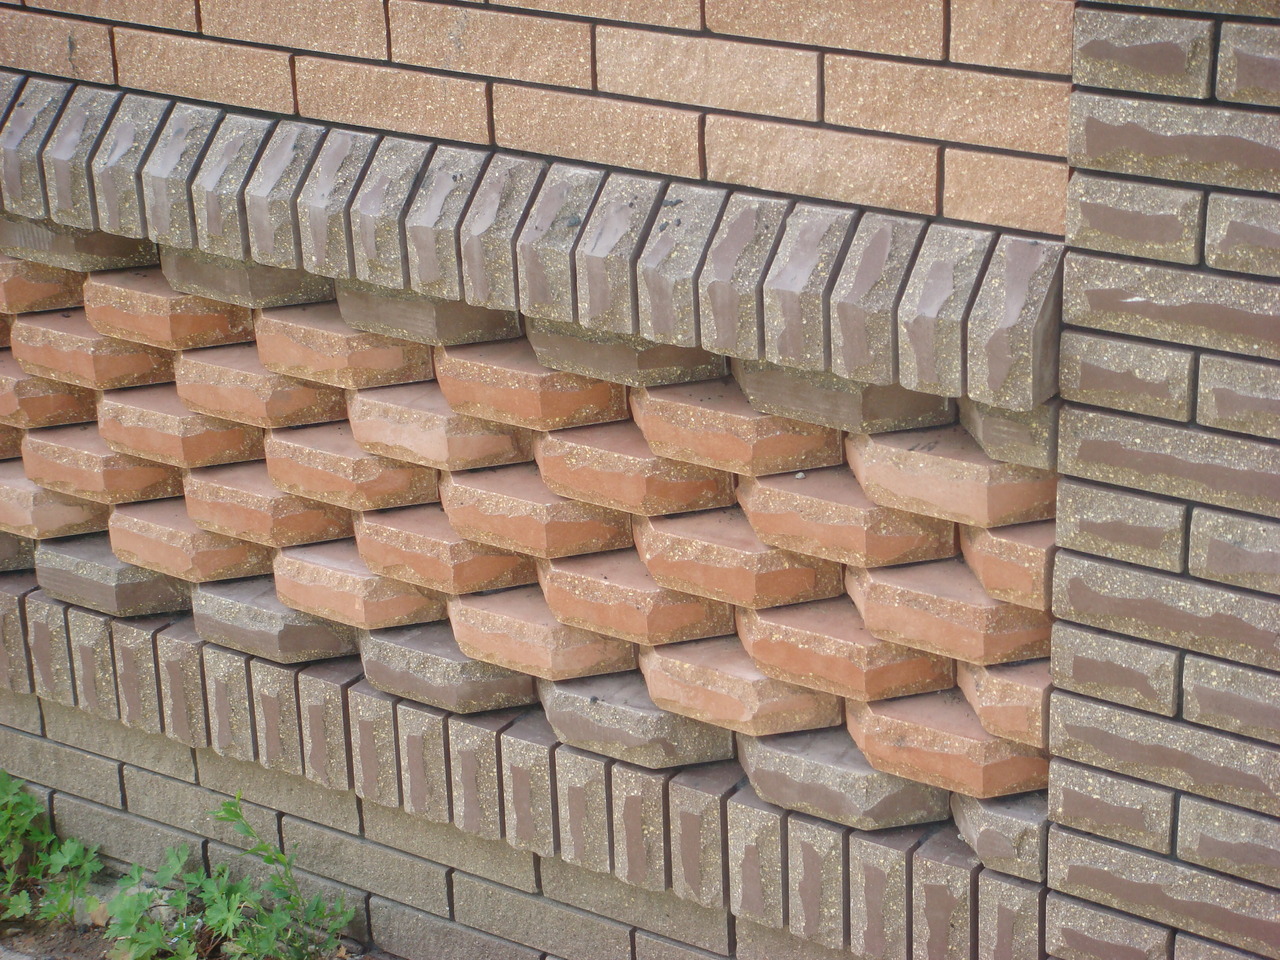
Brick Universal. Heat insulating. For installation, a strip foundation is needed. Natural brick provides a ventilated gap between the finish and the plinth, insulating material is placed in the gap. It is replaced by clinker tiles: easier to install, cheaper than siding, more variable. Decorative: work with the surface, such as uneven firing or artificial aging.
Siding - the most common cladding Universal. Unpretentious. Lightweight, durable, you can sheathe them with your own hands. Withstands temperature extremes, resistant to moisture and ultraviolet.
Plastic panels Universal, economical, withstand heavy loads, not subject to chemical and biological influences. Repeat the relief of the site. Ventilated - the plinth is protected from moisture and condensation.

Do-it-yourself siding installation

  1. On the lower lath of the crate, the starting strip of siding is attached with self-tapping screws under the control of the horizontal. Self-tapping pitch - 30 cm.
  2. Self-tapping screws in a step of 30 cm are attached to the corner bar. It is necessary to make an allowance in relation to the starting bar of 1 cm.
  3. The third panel is installed in the groove of the starting strip of the siding and slides into the corner bar. To compensate for possible expansions, the panel does not slide in as far as it will go.
  4. The bar is fixed with self-tapping screws in the provided holes.
  5. The next strip of siding is brought into the corner bar and shifted to the underlying rail. Mounting is similar.
  6. In the indicated way, the remaining panels are mounted up to the upper edge of the base. The height of the last strip is trimmed as necessary.
  7. The second corner siding strip is installed - the starting angle for the next wall.
  8. The upper fastening strip is decorated with a finishing strip. The finishing bar is a transitional element between the cladding of the facade of the house and the basement.

Each siding panel is fastened with at least 5 self-tapping screws. Between the strips, gaps of 2-3 mm are provided. The cladding is mounted without tension, as the material expands or contracts by 6-7 mm. under the influence of temperatures. Fasteners are installed at right angles to the wall.

Instead of self-tapping screws, galvanized nails 3-4 cm long with a wide hat are used. Nails are not hammered all the way: 1.5 mm remains between the cap and the siding. The gap protects the panel from thermal expansion damage.

The trick of the builders: a one-kopeck coin is inserted between the hat and the siding - an optimal backlash is formed.

A full-fledged foundation of the house is monolithic, aesthetic, smoothly turning into the soil, insulated, protected from moisture and condensation. Finishing the base of the screw foundation allows you to achieve the above characteristics.

Photo finish options

Read more:


For private housing construction, a pile foundation with a grillage is used: it evenly distributes the load, excluding deformations, cracks and subsidence. ...


The construction of a building on soft ground with complex terrain begins with the laying of a columnar foundation. To keep the structure on a stationary ...


To decide whether a pile-screw, strip or what other foundation is better to choose for a house under construction, it is important to understand which screw foundation has advantages ...