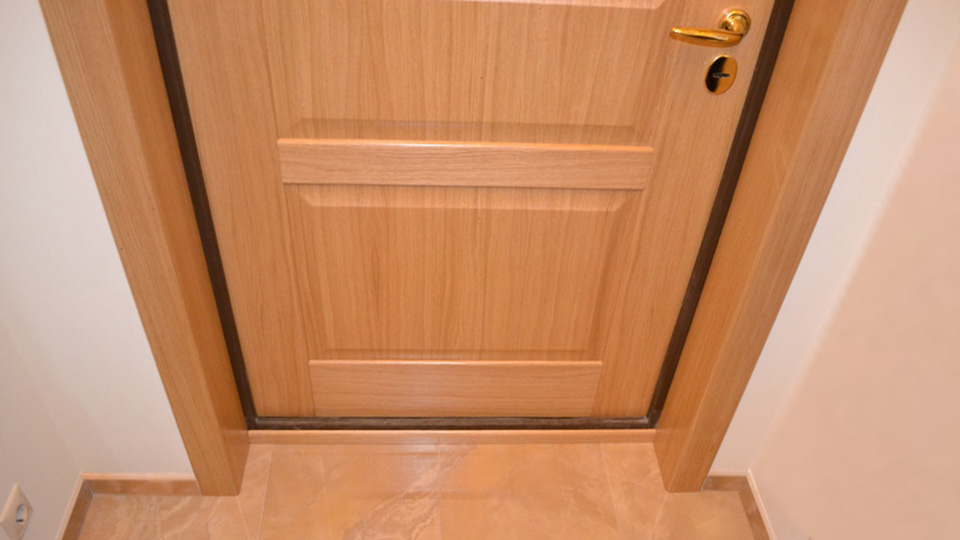
With carelessly made slopes, even the most expensive and luxurious front doors will look unattractive. Why do we need slopes for entrance doors? First of all, they are used as a beautiful frame, a means of complementing and highlighting the main element - that is, the door itself. In order for you to be able to decide what material to make slopes from, it is necessary, first of all, to pay attention to the design of the door structure itself, its style and color. After all, it is important that the slopes fit not only the design of the door, but also the overall design of the room.
We also note that the described elements perform not only aesthetic functions - they are also an insulating layer, because they close the joints between the structure and the walls.
To create slopes, you can use a variety of materials, although, as an option, you can bring the already existing slopes into a “divine look”.
If the door structure is strong and reliable, but does not look very presentable, reinforce the corners and level the slopes using plaster. Tellingly, this is often done not only from the side of the staircase, but also in the hallway itself.

Note! The plastered slopes will look pretty neat - if you wish, you can additionally paint them in the color of the room or door trim.
It is advisable to use this material if your slopes turned out to be wide due to the rather large thickness of the walls. Thanks to the use of drywall, your walls will become warmer, and all existing joints will be securely closed. In addition, the slopes, again, will look very neat.
If you want, you can subsequently paint the drywall or, alternatively, paste over with wallpaper. One of the main advantages of the material is that its installation does not require laborious work to level the surface.
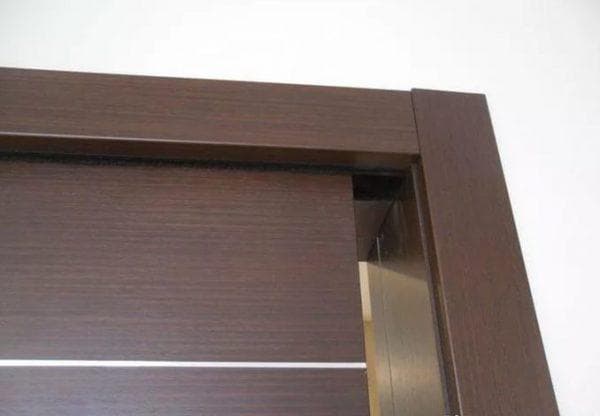
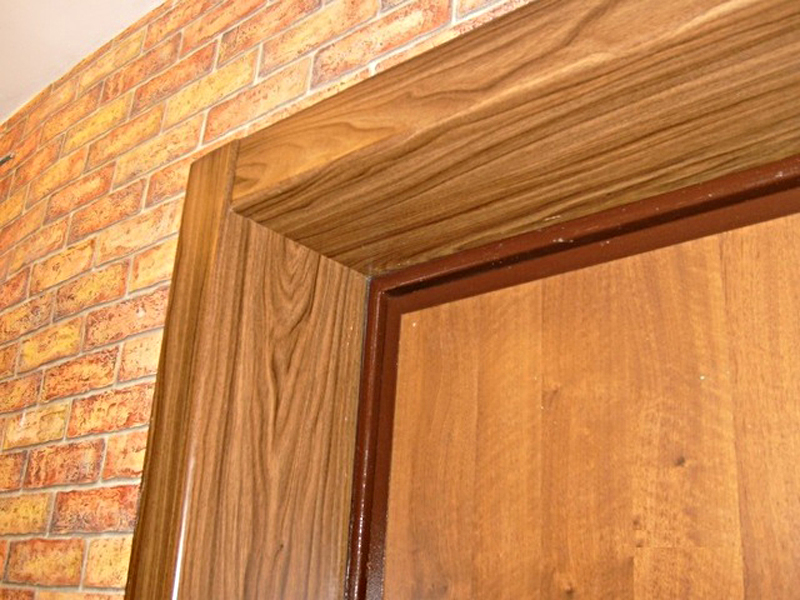
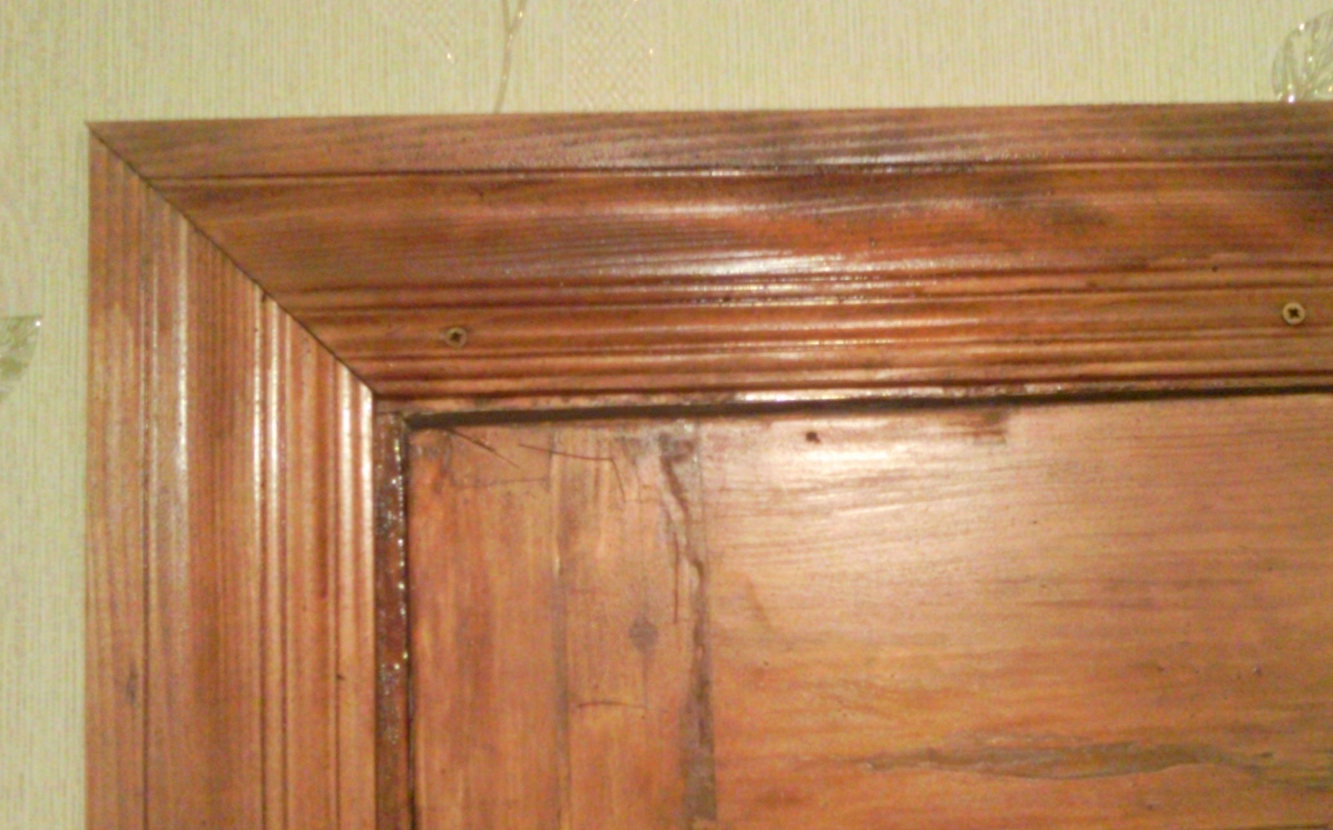
If the wood is suitable for door trim, then you can use it for slopes. It is no secret that wood has always enjoyed considerable popularity and, apparently, will never go out of fashion. The material fits perfectly into almost any interior design, and if necessary, you can easily change the tint of the material using folk / modern means.

In addition, wood can serve you for many years, while retaining all its decorative and operational properties. Although, in a pinch, you can always paint it to match the color of the hallway.
Such lining, made on the basis of chipboard, can be an excellent alternative to natural wood.

Due to the fact that this material is available in a variety of colors and can imitate the texture of various tree species, you can always choose the most suitable option for decorating the hallway. However, it is highly undesirable to use lining when finishing external slopes, since it will simply quickly become unusable there.
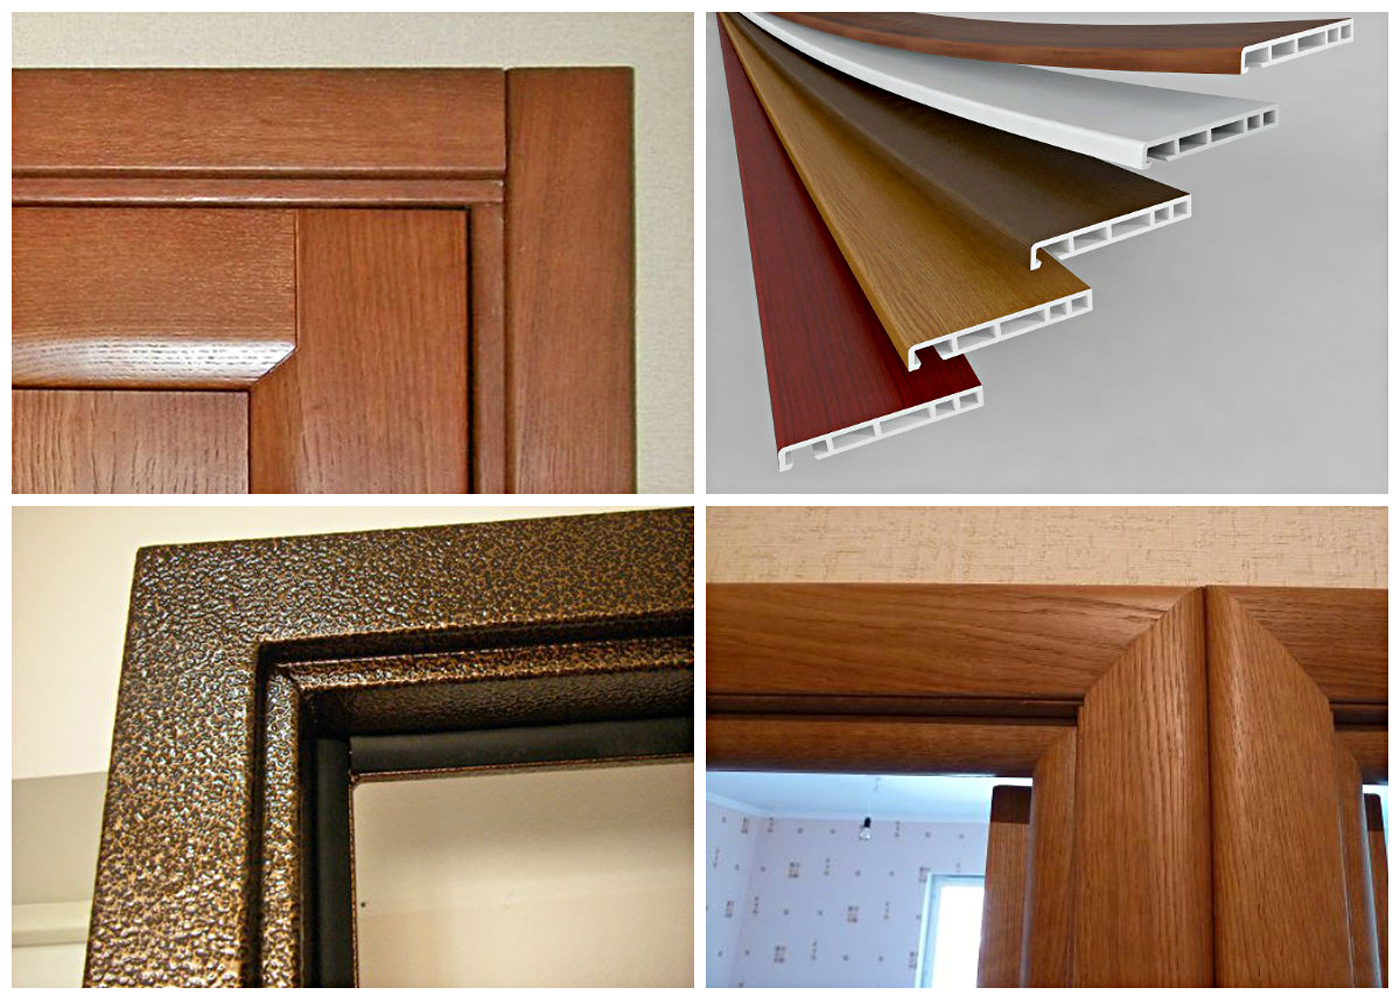
The next material through which they can get off slopes for entrance doors, are ready-made PVC panels. This material is made in a variety of colors, and the dimensions of the panels can also be different. The manufacture and sale of this kind of panels is carried out by specialized companies, where specialists work who are also engaged in their (panels) installation.

This finish of the slopes looks attractive and respectable. The service life of PVC panels is quite long, but it is still desirable to mount them from the side of the hallway, and on the reverse side - options No1 or No2 (they are described above).
Note! If you are completely confident in yourself, you can finish the slopes with finished elements with your own hands.
Although it is worth noting that there is another option for using polymeric materials for slopes - in this case we are talking about plastic lining. It also comes in a variety of colors, so you can easily choose the most suitable option for decorating the hallway.
Yes, they are also widely used in the design of slopes. But, as a rule, only for thick walls. Although in fairness, we note that this option has not been very popular in recent years due to the emergence of a huge number of more modern materials that can replace chipboard elements that are so difficult to install.

In any case, if you have a panel of suitable sizes lying around, you can very well decorate door slopes from the inside with it.
Note! There are other materials used in the design of slopes (for example, laminate, installation instructions for which will be given at the end of the article), but only the most common options were considered above.
Before proceeding directly to work, you must prepare all the necessary materials and equipment. So, if we are talking about plaster, then you should prepare:

If panel materials are used for finishing, then the list of everything you need will look a little different:
When all the required equipment and materials are ready, you can proceed to the preparatory work and the actual finishing. Let's consider in more detail each of the possible options.
First, let's get acquainted with some features of the finishing process.
In any case, the finishing work itself should begin only after the installation of the door structure and the sealing of all joints between it and the wall. We also add that the previous coating should be removed from the slopes in advance, as well as peeling areas should be repaired. After carrying out all these activities, you can proceed directly to the finish using one of the technologies presented below.
If you decide to use a plaster mixture for finishing, then proceed in accordance with the instructions.
Step one. First, prime the previously cleaned surfaces (if possible, then in two layers, but the second layer should be applied only after the first one has completely dried).

step two. After that, determine how even the slope angles are. In case of deviations from the norm, be sure to take this moment into account when installing the reinforcing corners. With the help of the latter, you can easily align corners that deviate slightly from the vertical.
Step Three. Next, using a level and a plumb line, set the perforated metal corners at the corners. Ideally, they should immediately be attached to the finishing putty (the latter can be purchased ready-made). Apply it, using a spatula, to the corners of the slopes - the mixture is necessary not only for fixing the corners, but also for leveling the slopes horizontally / vertically. Remove excess solution that has come through the perforation immediately using the same spatula. When everything is perfectly smooth, you can rest for a while - the putty should dry completely.
Step Four. In the case of uneven slopes, before installing the leveling corners, it is recommended to set the direction from the door jamb by fixing a plasterboard strip about 0.8-1 cm wide along it. To attach this material to the surface, use putty. If the putty you use is gypsum, it will not take very long to dry completely.
Step five. The perforated corner and the edge of the drywall strip are in this case the points that you must connect with putty and level with the plaster mixture.
Step Six. We continue to finish the slopes for the entrance doors. When the elements that correct the walls are dry, spread the putty (according to the manufacturer's instructions) to end up with a paste-like mixture.
![]()
step seven. Using a trowel, throw the resulting mixture onto the wall, moving up from the floor. After throwing the right amount (about 100 centimeters high), level the putty using a short rule. As a kind of beacons, a metal corner and a previously fixed plasterboard strip will serve.

Step eight. Throw the mixture on the second section, level it, and then move all the way to the top in the same way.
Step nine. With puttying the upper surface of the opening, certain difficulties may arise. So, for applying putty there, you will have to use a wide spatula, and for leveling - all the same short rule. After that, putty the wall above the opening, then cover the top of the perforated corner with the mixture.

Step ten. Wait until the puttied slopes are completely dry. The drying time depends on the composition, as well as on the thickness of the leveling layer.
Step Eleven. When the layer dries, check how good the surface is. If there are minor defects, clean or chip them. After that, bring the slopes to the limit evenness, using the finishing putty for this.
Step twelve. At the end, when the top coat is dry, cover it with a primer.
The resulting slopes can be wallpapered, painted or, alternatively, finished with decorative plaster.
This material is simpler and easier to work with than the plaster described above. However, you still have to use the finishing putty - in this case it will serve as an adhesive for GKL sheets; although instead of it, it is better to give preference to special gypsum adhesives, which are designed to work with just this material.
In the case of limited space, drywall sheets are ideal for finishing slopes. The algorithm of actions in this case should be as follows.
Step one. First of all, separately measure each of the slopes.
step two. Transfer the received numbers to the sheets of material, then, working on the markup, open the elements for subsequent fastening to the walls.

Step Three. Install drywall sheets from the bottom of the opening. First, apply several “hills” of glue on the first sheet, as in the image, then press the element firmly to the desired location and additionally fix it with pre-prepared supports.

Step Four. Similarly, finish the side slopes with drywall parts, not forgetting to check each of them for level. For fixing to the walls, you can use driven dowels, having previously made narrow through holes under them with a perforator.

Step five. Just as in the case of using plaster, close the corners with iron corners, using the same putty for fixing.
Step Six. Lubricate all joints with putty, carefully align and, when it dries, clean it thoroughly so that the finished slopes for entrance doors looked most attractive.
step seven. To obtain a perfectly even surface, apply a millimeter layer of finishing putty mixture. So you will finally mask all the defects and holes for the dowels.
Step eight. When the mixture has completely hardened, you can sand the surfaces with fine sandpaper (if required) and, finally, proceed to the decorative design. You can use for this, again, paint, decorative plaster or high-quality wallpaper.
Note! There is another way of fixing drywall - it is advisable in cases where, when leveling slopes, it is necessary to close a considerable thickness of the wall.

If you intend to use panels made of rigid materials in your work (this includes many types of lining, MDF, chipboard, etc.), then you should know that they are all attached using almost the same technology. The advantage of this method is that even the most serious irregularities can be hidden with such panels.
As for the specific algorithm of actions, in this case it will look something like this.
Step one. First, prime the slopes, mark the places where the bars or iron profiles will be attached. The step between them should be approximately 30-40 centimeters (if they are mounted across the slopes). In our example, a lining is used, mounted parallel to the box. If a transverse arrangement is required, fasten the crate along the jamb. If the surface is wide enough, you can use not 2, but 3-4 strips at once.

step two. The image shows another option - with the installation of lining parallel to the door leaf.
Step Three. You can lay heat-insulating material (polystyrene, mineral wool, etc.) between the lathing slats.
Step Four. Install the panels of the selected material on top of the finished batten.

Step five. For installation of laminated / plastic lining, use the metal fasteners shown in the image.

Step Six. To fasten large panels, use self-tapping screws, sinking the latter by 0.15-0.2 centimeters. You can use putty to seal the formed holes.
step seven. At the end, install decorative corners. They must match the color of the cladding. Glue the corners on the horizontal as well as the outer vertical corners; finally, at the joints of the finishing material and the door frame itself.
Vinyl panels are rightfully considered one of the most modern materials that can be used for finishing slopes. They are sold in almost all specialized companies involved in the production and installation of this material. In the case of a non-standard form of slopes, the panels can be made to order, having previously measured the dimensions.

Finishing can imitate various natural materials, so in any case you will choose the most suitable option for yourself, regardless of the design of the door and the hallway itself.
Note! The main advantage of such panels is that they are quickly installed, and there is little debris left after completion of work. Yes, and this kind of finish looks extremely attractive, neat and stylish.

This material is fastened with a universal adhesive that can reliably connect materials of different properties (for example, brick and lining, concrete and wood, plaster and vinyl). In a word, everything that can be used in the course of finishing and construction work. Still, as an option, slopes for entrance doors can be finished with vinyl using polyurethane foam.
The adhesive should be applied to the inner surface of each panel, and then pressed against the slopes. In this case, no holes need to be drilled in the walls or cladding, which can also be attributed to the undeniable advantages of this technology.

Laminate is widely used as flooring, it is easy to work with and comes in a variety of colors. Who does not know, laminate is an MDF panel covered with a special decorative layer. Why is this material so popular? This is because it has many important advantages.


Note! The service life of slopes can reach 10 or even 15 years, which, you see, is not so short.
Sheathing slopes with laminate can be done in one of several possible ways. Let's get acquainted in more detail with each of them.
As for the laying process itself, it - regardless of the specific method chosen - should begin with surface preparation. In our example, the laminate will be attached to the adhesive. The algorithm of necessary actions is given below.


Step one. First fill all the gaps and apply a layer of plaster. Do all this on a plaster mesh. Later, when the plaster is completely dry, prime the slopes to provide additional protection.
step two. Here begins the most important stage of work, so approach the matter with the utmost responsibility. You need to mark up and cut the laminate. Start at the top, then move on to the sides. We recommend cutting the material with an electric jigsaw, although in the absence of one, a regular hacksaw may well be suitable.
Step Three. Before starting gluing, install mounting spacers - a kind of border, thanks to which the material will not move.
Step Four. Take the first lamella, put it on the upper slope, and then open the door - the latter should not catch it. Then apply foam to the inner surface of the laminate, press it against the slope and fix it with masking tape (you can remove the latter only after complete drying). Too much foam should not be applied, because an excessive amount of it after swelling can lead to displacement of the element.
Step five. Install the sidewalls in the same way, regularly using the building level.
Step Six. Having laid out all the slopes, wait for the mounting foam to dry completely and proceed to the final stage of work. Cut off excess foam, close the openings with plaster. But this is not the end yet - slopes for entrance doors looked really attractive, seal the openings with a corner of a suitable color.

That's all, now you know about the most popular ways to finish the door slope. We hope the article was really useful for you.
Good luck in your work and, according to tradition, warm winters to you!